Category: camera equipment reviews

Category for all reviews of camera equipment like flashes, diffusers, cases, modifiers, straps bags, battery chargers.

  • Topaz video enhance ai review

    Topaz video enhance ai review

    Topaz video enhance AI review

    Introduction

    If you’ve ever worked with Photoshop or Lightroom, the name Topaz Labs most probably rings a bell. It was quiet around the Texas company for the last couple of years, but they’ve now re-centered their entire business around artificial intelligence image manipulation software.

    Topaz ‘Video enhance AI’ , the subject of this review, brings together many of their photo editing artificial intelligence products. I”m talking about image editing plug-ins like Topaz ‘Sharpen AI’, Topaz ‘Denoise AI’ and Topaz ‘JPEG to RAW AI’. This app is designed to help you repair and upscale your old or new video files.

    After years of development, the software is now at version 2.6.x, with new releases every couple of months. Besides upscaling and enhancing video, Topaz video enhance Ai also has models for slowing down/speeding up video (interpolating frames) and we’ll soo see a video stabilisation feature as well.

    Cost

    As usual, there is a free 30-day trial available on the Topaz Labs website. All output will however have a watermark.

    The full version of Topaz video Enhance AI is now $199.99 (one year of updates included), and yearly upgrades running at $99. You can however continue to use the version you bought without upgrading. So it makes sense to wait until the next big release before upgrading.

    There are always coupons floating around, google is your best friend here. Or you can use my partner coupon “wimarysphotography” if it’s still active.

    Minimum hardware requirements

    Firstly, be warned that you’ll need a powerful Mac or PC to run Topaz Video enhance AI, especially if you’re upscaling from HD to 4K. I would always recommend testing your system with the trial first.

    PC: A DirectX12 compatible GPU (NVidia or AMD). An Intel CPU from 2015 onwards or an AMD CPU from 2016 onwards are the minimum requirements for the CPU.

    Mac minimum requirements: 8GB or more RAM, 2GB of VRAM. MacOS 10.14 (Mojave) to run on CPU only. MacOS 10.15 (Catalina) or newer to run on GPU. This gives the best performance.
    Full M1 native support for all M1 machines in version 2.5 and higher.

    Interface

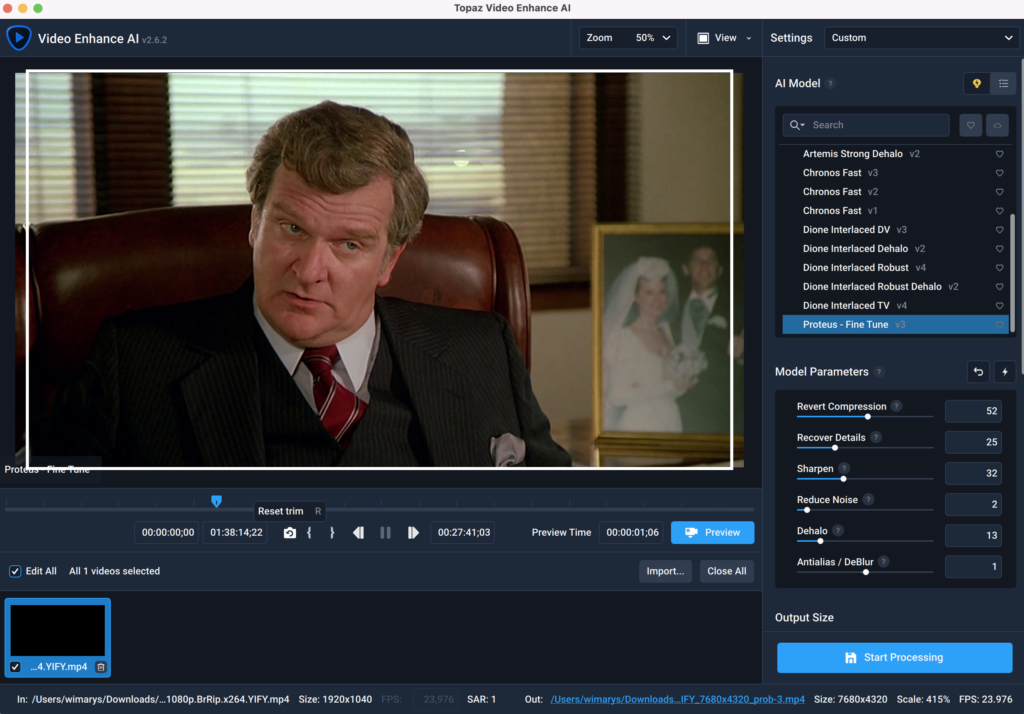
    topaz video enhance AI 2.6 interface

    Topaz Video enhance Ai interface The main window is divided into the clip selection, the processing window, the batch processing window and the video output section.
    Clip selection bar: You can use the clip selection bar to select which portion of your clip you want to render and export.This can also be done through the menu in the ‘Process’ tab.

    In the processing window, you can choose your AI model based on the quality of the video. More on this later.

    Batch processing tab In the batch processing window, you can add multiple videos for batch processing. You should know that you can decide on processing clip selection and video output settings for each video clip. Doing this for one of the clips does not automatically do the same for the next. unless you select both.
    Output Video tab In the output video tab, you can either select one of the presets ranging from an upscale percentage. I

    It’s also possible to either go with the standard naming chosen by Topaz labs (which is the original file name plus your selected processing model) or rename the file on export.

    Ai video processing models in version 2.6.x

    Proteus detail recovery

    The following Ai video processing models were available in topaz Labs Video enhance Ai version 2.6.2:
    • Artemis High Quality v12: upscale or sharpen high quality input video, this model also reduces motion flicker.
    • Artemis Low Quality v13: upscale or sharpen low quality with high noise or strong compression artefacts.
    • Artemis Medium Quality v13: upscale or sharpen medium quality with moderate noise or strong compression artefacts.
    • Artemis Strong Dehalo v2: upscale or sharpen low quality that contains haloing, high noise or strong compression artefacts.
    • Chronos Fast v3: An FPS conversion model that allows you to change the framerate, as well as doingslow motion effects on your input. Primary use is for videos with fast motion. Note that
      you cannot resize your video with this model.
    • Chronos Fast V2: An FPS conversion model that allows you to change the framerate, as well as doing
      slow motion effects on your input. Primary use is for videos with fast motion. Note that
      you cannot resize your video with this model.
    • Chronos Fast v1: First FPS conversion model that allows you to change the framerate, as well as doing
      slow motion effects on your input. Primary use is for videos with fast motion. Note that
      you cannot resize your video with this model.
    • Dione Interlaced DV v3:Deinterlace and upscale interlaced video based. Trained for interlaced digital videossuch as DV, DVCPRO, DVCAM, 720i, or 1080i sources.Note that output frame rate (FPS) will be doubled and Field Order must be set properly.
    • Dione Interlaced Dehalo V2: Deinterlace and upscale interlaced TV source that contains haloing. Trained for videoscaptured from analog TV such as 480i/576i captured from analog TV / Cameras /Camcoders, or DVDs. Note that output frame rate (FPS) will be doubled and that Field Order must be set properly.
    • Dione Interlaced Robust v4: Deinterlace and upscale interlaced video inputs that have been previously edited withthe incorrect field order. Try this model when Dione-TV/DV fails.For videos with interlaced frames such as 480i / / 576i / 720i / 1080i.Note that output frame rate (FPS) will NOT be doubled.
    • Dione Interlaced Robust Dehalo v2: Deinterlace and upscale interlaced video inputs that have been previously edited withthe incorrect field order. Deinterlace and upscale interlaced video that contains haloing.Try this model when Dione-TV/DV fails.For videos with interlaced frames such as 480i / 576i / 720i / 1080i.Note that output frame rate (FPS) will NOT be doubled.
    • Dione Interlaced TV v4: Deinterlace and upscale interlaced TV source. Trained for videos captured from analogTV such as 480i/576i captured from analog TV / Cameras / Camcoders, or DVDs.Note that output frame rate (FPS) will be doubled and that Field Order must be setproperly.
    • Proteus Fine Tune V3: Upscale video with multiple parameters for fine-tuning. Parameters includeCompression reversion, detail recovery, sharpening, noise reduction, dehaloing, andantialiasing / deblurring. Use \”Comparison View\” when trying out the model to hone inon the best results.

    Frame rate conversion

    Using the Chronos models, its also possible to do frame rate conversion now. This algorithm is used to smooth out jagged edges and make videos more realistic. It uses temporal information to create significantly higher quality results than single-frame methods. If you want to try this, go to one of the Chronos models, leave it at 100% original speed and scroll down to the Out fps setting in the video format tab.

    You can change the frame rate to:

    • 23.976 FPS
    • 25 FPS
    • 29.97 FPS
    • 50 FPS
    • 59.94 FPS
    • 60 FPS
    • 90 FPS
    • 120 FPS

    It’s also worth noting that the Chronos models can slow down a video up to 2000%

    • 100%-Original Speed (for fps conversion)
    • 150%
    • 200%
    • 300%
    • 400%
    • 800%
    • 1,000%
    • 2,000%

    Upscaling sizes

    Video enhance AI improves the quality of videos by looking at adjacent frames to improve the resolution and reduce motion artifacts.

    You can basically choose between 3 output sizes.
    100% (Denoise DeBlock): good for deb locking, demonising and sharpening videos without increasing size.
    200%: upscaling doubles output size with deblocking, denoising and sharpening.

    400%: upscaling quadruples output size deblocking, denoising and sharpening.

    You can also select the format according to industry formats.

    • SD (640×480)
    • SD (768×576)
    • HD (1280×720)
    • HD (1920×1080)
    • 4K UHD (3840×2160)
    • 8K UHD (7680×4320)

    This however only scales your video from either 200% or 400% upscale (whatever is closest). As an example it does not do a pure 225% upscale, it would upscale to 200% and then scale the output another 25%. This might not be ideal for quality output in all cases.

    Denoising and adding grain in Proteus

    Video Enhance Ai can cemove noise and grain while recovering detail in your videos. If you want full control over all parameters, you’ll want to use the Proteus model. It’s possible to edit all parameters of this model including:

    • Revert Compression
    • Recover Details
    • Sharpen
    • Reduce Noise
    • Dehalo
    • Antialias / DeBlur

    A personal favourite, Proteus also has an auto button that automatically adjusts all parameters according to your selected frame. This is a great starting point for any enhancement and upscaling project.

    In this mode, it’s also possible to add more or less noise reduction. Be careful though, because too much noise reduction can lead to waxy skin and fake looking footage in general. If you have this problem, you can try adding some more grain, that seems to resolve this issue most of the time.

    Output Video formats

    For now, output video formats are limited to MP4 (H.264 codec) or .MOV Process 422 HQ. You can also export your movie as singleJPG 8-bit Compressed,PNG 8-bit, TIF 8-bit Uncompressed or TIFF 16-bit UncompressedLossless files. This would leave you with a folder of single files that you can recompile later to a video format of your liking.

    Custom presets

    Topaz has made some presets for you to get started quickly. You can also make your own.

    The list now includes:

    • Progressive Footage to 4K
    • Clean up Old Progressive Footage
    • Interlaced Footage to 4K
    • Clean up Old Interlaced Footage
    • 400% Slow-Mo, 60FPS

    How to process your video in Topaz Video enhance Ai?

    How to remaster an old video in high definition?

    • Open your video: After starting Topaz ‘Video enhance AI’, click the center of the preview frame to select an open your video. You can open one video at a time, or you can open multiple videos.
    • Make video adjustments and preview your selection: Select your model depending on the original quality of your video. Then make adjustments to your video output. You can adjust the size, decide to upscale up to 400% and change the quality.
    • Export your video: In the export window you can select the output format and start the render of your video export. this may take some time depending on the length of the video.

    Conclusion

    Topaz labs video enhance AI is a pretty impressive software that has already greatly improved since the launch in 2020, with regular updates to warrant keeping your subscription up to date. It has the ability to take out old footage of pretty much of any quality and restore it back to a level far above original. It’s even more powerful at upscaling good hd to 4k.Last year, Topaz have added the ability to increase frame rate as well as slow down video with impressive results.

    Much also depends on the input quality. A good quality HD source for instance, will look fantastic in 4K, but if the input is inferior, Video Enhance Ai won’t be able to recover or add much detail. You’ll also need to familiarise yourself with all the different models and features this software has in order to get the most out of it. You can’t really select a model and hope for the best.

    Topaz Video Enhance AI is a very powerful video enhancement tool for both Windows and macOS. It is the best video ai software on the market. But you should realise that enlarging video files is an extensive process that requires a powerful machine and takes a lot of time. Upsizing video from HD to 4K may take longer than resizing from SD to HD. It’s speed with the new macOS M1 Pro and Max processors is really fast and probably your safest bet speed wise at the moment.

    Questions

    What does Video Enhance AI do?

    Video Enhance AI is an advanced image enhancement technology used to make video files look sharper and upscale video up to 4K. You can also apply noise reduction, recover details and revert compression artefacts.

    How Can We Improve Video Quality using Topaz?

    You can use Topaz to upscale your old videos to high definition 1080p and 8K Ultra HD resolutions.

    How Long Does It Take to Upscale a video in Topaz Video Enhance Ai?

    iMac 6-core i5, 32 GB RAM, Radeon Pro 570X 4 GB GPU:5 hours to upscale 10-second video at 1080p (60 fps) video to 4K.

    NVidia 1050: 3 hours to upscale a 10 minute 480p video to 1080p.

    NVIDIA GTX1080: 5 hours from from HD to 4k wA lot of people use this software to enhance their old videos. There are many features available, but you can try them out yourself. This software can help you to recover your lost memories.You can also check the official demos. The AI upscales video looks great too!

    Is Topaz Labs Video Enhance AI Worth the Money?

    It’s worth every penny! You get a very high-quality video enhancement software. It’s easy to use and works well.

    My machine has more than one Nvidia GPU can I use all of them?

    You can use the experimental all-graphics card setting. This setting is intended for users who have multiple similar graphics cards installed. For example, if you’ve got two NVIDIA RTX 2080s, this setting is for those users. If you have a single NVIDIA RTX 2080 and an integrated Intel GPU then you should choose your dedicated graphics card. If you have a separate GPU and an integrated Intel CPU, it might not work for you or run slower.To enable both graphic cards you would want to choose Preferences from the Video Enhance menu and change the AI processor to all GPUs. VEAI only uses 8GB of VRAM in one application, and can’t use more than this at this point. You can run VEAI again on another window machine and that will allow it to use more.
  • Anthropics PortraitPro 2019 review

    Anthropics PortraitPro 2019 review

    Introduction

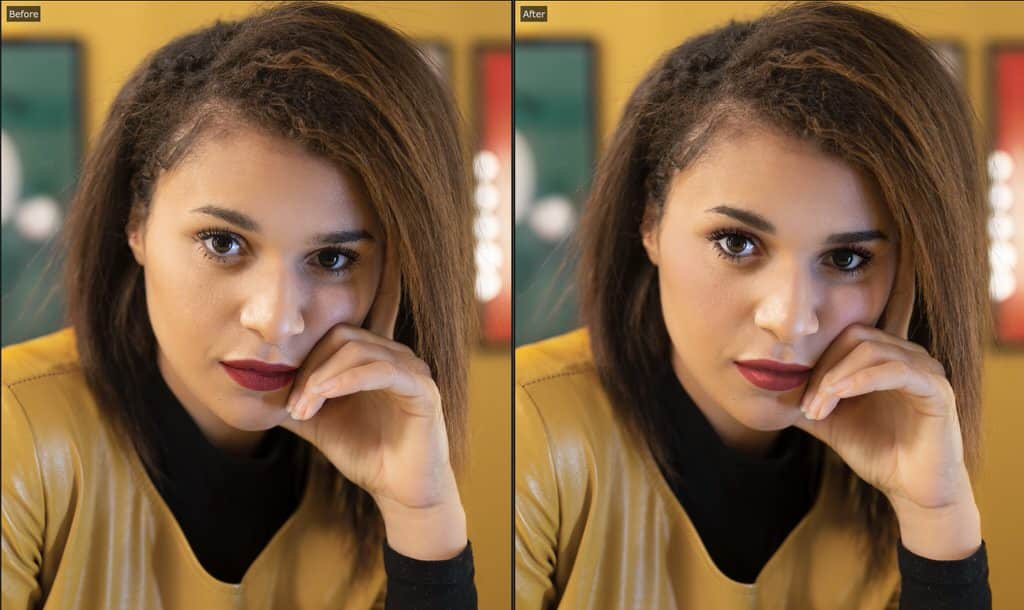
    Anthropics PortraitPro 2019 hardly needs any introduction. It’s the go-to software for batch- and beauty enhancement for many portrait-, lifestyle and wedding photographers out there. And while there still might be some differences between a full manual beauty enhancement routine in photoshop and PortraitPro, the differences are getting smaller and smaller with each iteration of this interesting plug-in. Especially if you know what you’re doing and have a good knowledge of all the modules inside PortraitPro 2019.
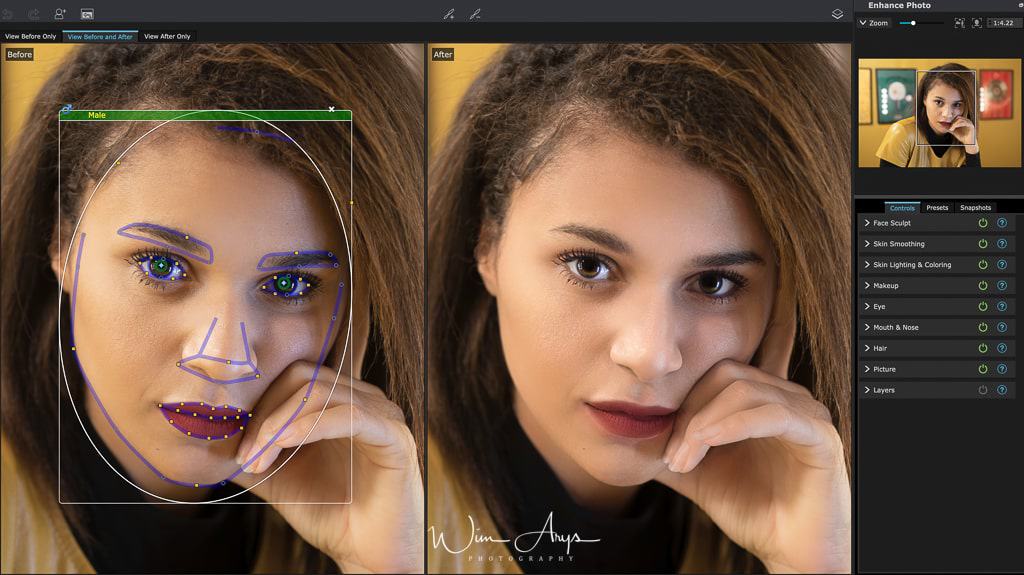
    PortraitPro 2019 interface

    There are currently two versions of Anthropics PortraitPro 2019 available. The Studio and Studio Max versions only differ in the fact that the latter also has a batch mode which allows you to process multiple images (with your own or one of their presets. Both also work as a plug-in from Photoshop which is my preferred way of using it. Portrait Pro Max costs 89,90, Studio costs 299,90.

    Now once you’ve selected an image and load it into PortraitPro 2019, the software will immediately start calculating where your subject’s nose, eyes, mouth, eyebrows, hair, and jaw outlines are. This automated process called ‘markup’ gets better with each version, and it’s now up to a point where you don’t need to amend anything to a well-lit portrait.

    Presets

    Presets let you quickly set the values of several or all sliders.

    Presets are divided into sections, which match the sections available in the main slider controls.  The presets in each section only affect the sliders in the corresponding section in the main slider controls.

    In addition, there is a section for Global presets.  Presets in this section affect all the sliders in all the sections.
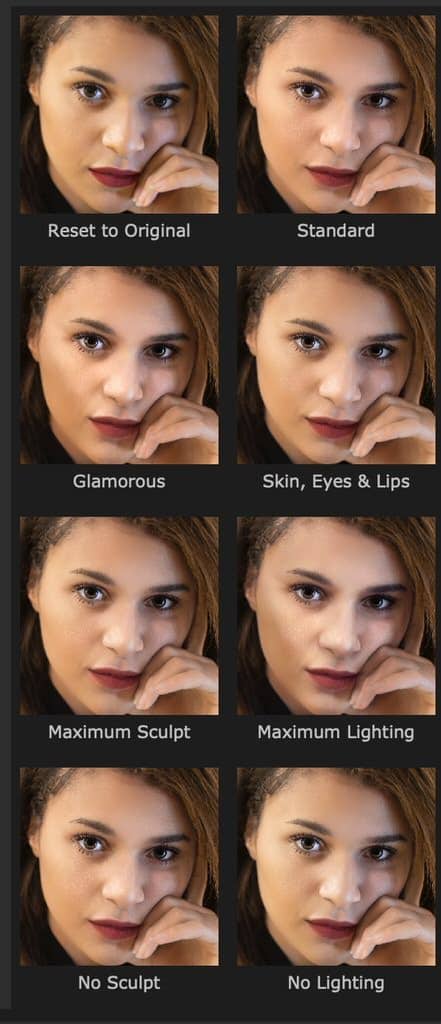
    Each preset has a name, and also shows an image showing the result of applying that preset to the current face.

    When PortraitPro is installed, it comes with a number of presets ready for you to use.

    One of the global presets is used to set the initial slider values when a face is enhanced. The preset used can be different depending on whether the face is female, male or child.

    SnapShots

    Snapshots are very similar to global presets, except that they are only stored for the current image.  They provide a way to store several sets of settings for the current image, that you can then quickly switch between.

    To save a snapshot, switch to the Snapshots tab and then press the Save button.  Alternatively, you can press the keyboard shortcut F3.  When you save a snapshot, you can optionally give it a name.  This will be shown under the snapshot image when you view the snapshots.
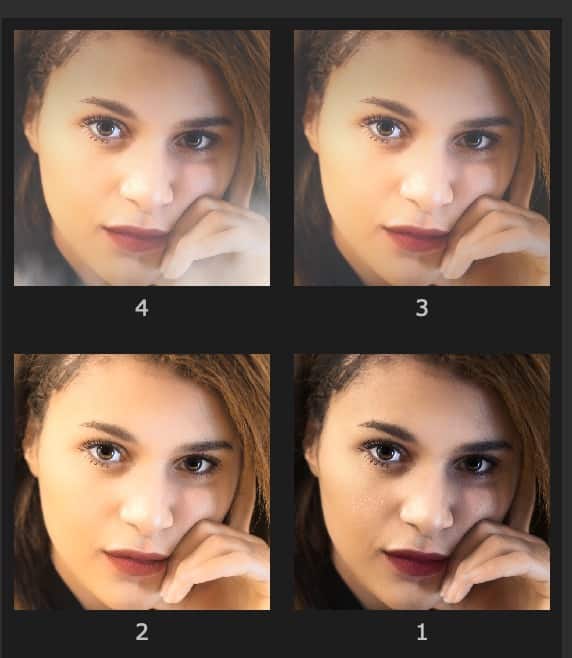
    If you save a PortraitPro session (using the Save Session command in the File menu), then the snapshots will be saved with that session and restored when you reload the session.  Otherwise, snapshots are lost when you close the session.

    To convert a snapshot to a preset, simply apply the snapshot to the current face, then save the current settings as a preset.

    Let’s have a look at these modules, as well as a good workflow in order to get the best results.

    Interface Module overview
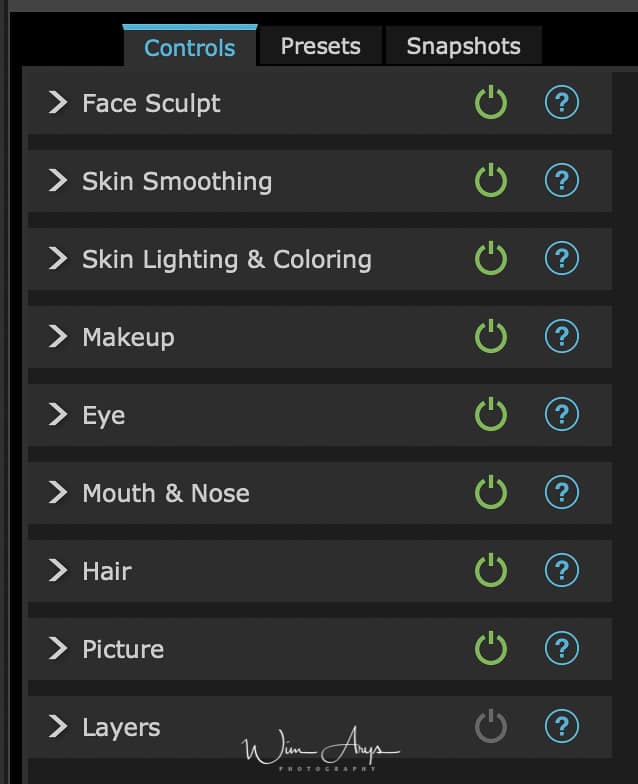
    PortraitPro 2019 interface

    PortraitPro 2019 Face Sculpt Module

    PortraitPro gives you the ability to subtly reshape and enhance facial features, simply by moving sliders. Some people regard this as going too far when enhancing a portrait. For those people, the shape sliders can simply be left at 0 and PortraitPro will not change the shape.
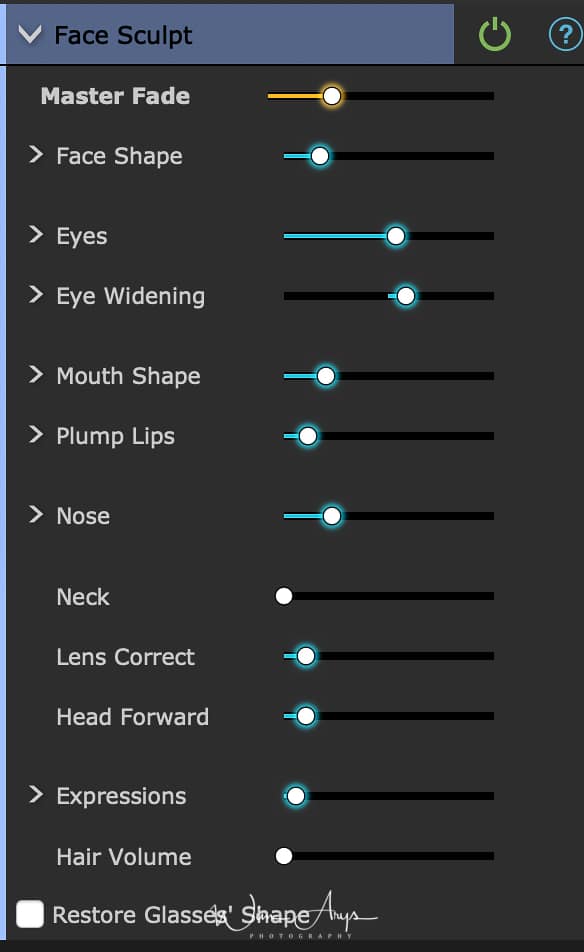
    PortraitPro 2019 Face sculpt module

    Master fade

    Master fade is the master controller for the face sculpt tab. This fader will dynamically affect all the functionalities in this menu.

    Face Shape

    Changing the face shape is also an effect that mostly depends on your selected face. This enhancement will automatically change to the shape of the face and pull it more towards what is generally considered a more eye-pleasing, more perfect ratio between forehead, chin, and cheekbones.

    Studies of these ratios have been made since the times of Ancient Greek and Roman sculptures. Keep in mind that changes like this might make for a more eye-pleasing image, but clients are quick to notice that it has been ‘photoshopped’. So use sparingly.

    Eyes

    A human being is rarely born with both eyes at the same height and space toward the nose. Numerous experiments have however established that we feel more attracted to symmetrical faces. This slider will do exactly that, it will pull both eyes in line towards more symmetry. Both left and right eyes can be adjusted separately if you feel that this effect changes the dynamic of the face position too much. This can also be done with the eyebrow shape.

    Eyes Widening

    Widening the eyes makes for a more expressive and less tiring look. Both eyes can also be manipulated separately. A nice feature for beauty shoots if used sparingly.

    Mouth Shape

    It’s also possible to change the shape of the mouth, i.e. make the mouth wider.
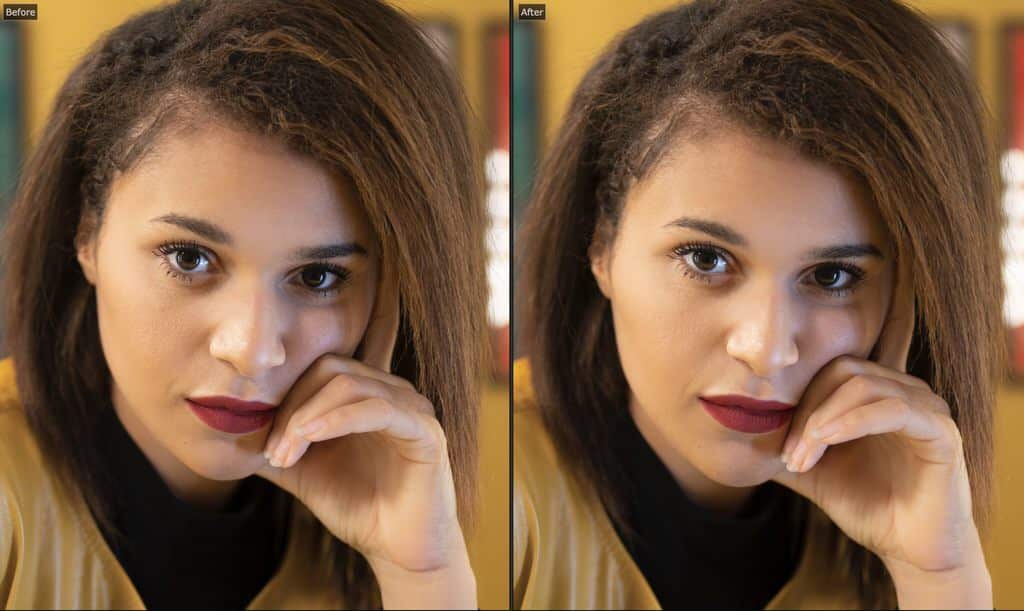
    Plump Lips

    Plump lips are of course all the rage right now. You can fatten both upper and lower lips together or separately.

    Nose

    You can make the nose more narrow if you want. This is often useful if you’re working on an image shot from a more awkward angle and you want to save it from the bin. It’s possible to shorten the nose separately, as well as the Philtrum (the vertical indentation in the middle area of the upper lip). You can also slip the nose and the nose tip/

    Neck

    You can elongate the neck if you feel it looks squeezed in what is, of course, a 2D rendering of a 3D person.

    Lens Correct

    It’s generally accepted that an 85mm prime lens will render a face more or less how we perceive it in reality. Wide-angle lenses can often distort a face, making it appear more elongated. Especially the forehead and nose become out of proportion. The Lens correction feature can remedy this for you.

    Head Forward

    Head forward attempts to create the optical illusion that the head is tilted slightly to the front. This is considered more eye-pleasing in many cultures.

    Expressions

    Turn that frown upside down. it’s been a feature of the photoshop face liquify pannel for a while now, and of course, PortraitPro 2019 needed to follow suit. PortraitPro is in most ways better and more advanced by the way. It’s possible to change the facial expression to a  Smile, a Frown, Surprise, Interest, and Thoughtful. Not all work well with every face but it’s amazing to see how realistic most are.

    Hair Volume

    If you feel that your model can do with a bit more volume in the hair, Athentech has this covered too.

    PortraitPro 2019 Skin Smoothing Module

    The skin-smoothing controls let you selectively remove or reduce wrinkles, spots, shine, shadows and other skin defects while retaining a natural skin texture.

    PortraitPro automatically determines the skin area, but you will get better results if you check and fix the skin area.
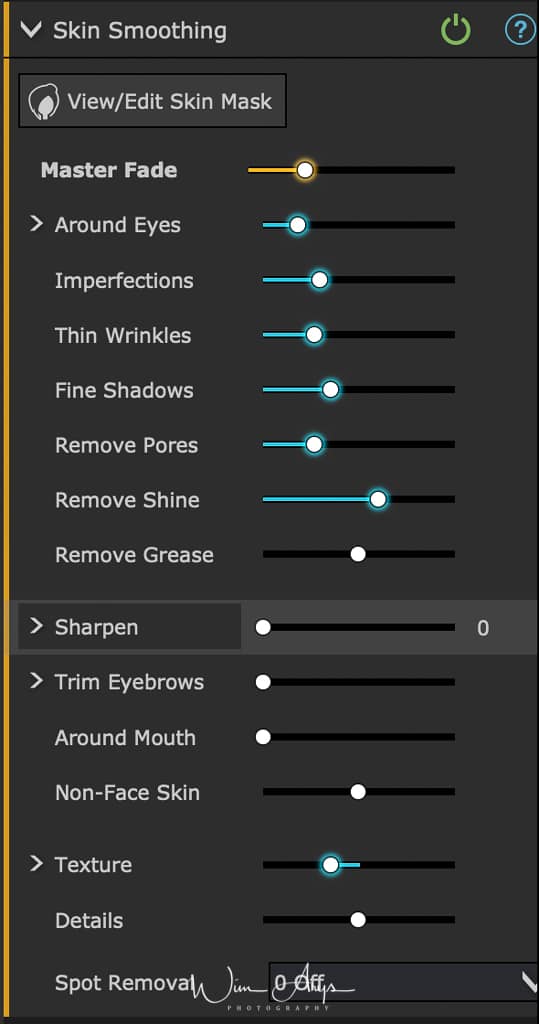
    PortraitPro 2019 Skin Smoothing Module

    Master Fade

    This slider is connected to the other sliders in this section that perform general enhancements to the skin.  You will see the other sliders move as this one is moved.

    Around Eyes

    Reduces bags under the eyes, and reduces “crows feet”, the wrinkles that appear next to the outer corners of the eyes.  Pressing the Around Eyes button opens the following sub-sliders that let you control these enhancements independently:

    • Lighten Eye Bags: Reduces the appearance of bags under the eyes by lightening the skin color in the area where eye bags appear. Click the triangle next to Lighten Eye Bags to access sliders that let you control the left & right eyes independently.
    • Smooth Eye Bags: Reduces the appearance of bags under the eyes by lightening the skin color in the area where eye bags appear. Click the triangle next to Smooth Eye Bags to access sliders that let you control the left & right eyes independently.
    • Smooth Crows Feet: Smooths the areas to the left of the left eye and to the right of the right eye where crows feet appear. Click the triangle next to Smooth Crows Feet to access sliders that let you control the left & right eyes independently.
    Imperfections

    Subtly removes redness and reduces small skin blotchiness within the skin area.

    Thin Wrinkles

    De-emphasizes wrinkles by making them thinner and lighter within the skin area.

    Fine Shadows

    Fades away dark specks and fine wrinkles within the skin area.

    Remove Pores

    Removes pores within the skin area giving a smooth, airbrushed effect.

    Remove Shine

    Corrects small areas of shine within the skin area.

    Remove Grease

    Corrects larger areas of shine within the skin area.
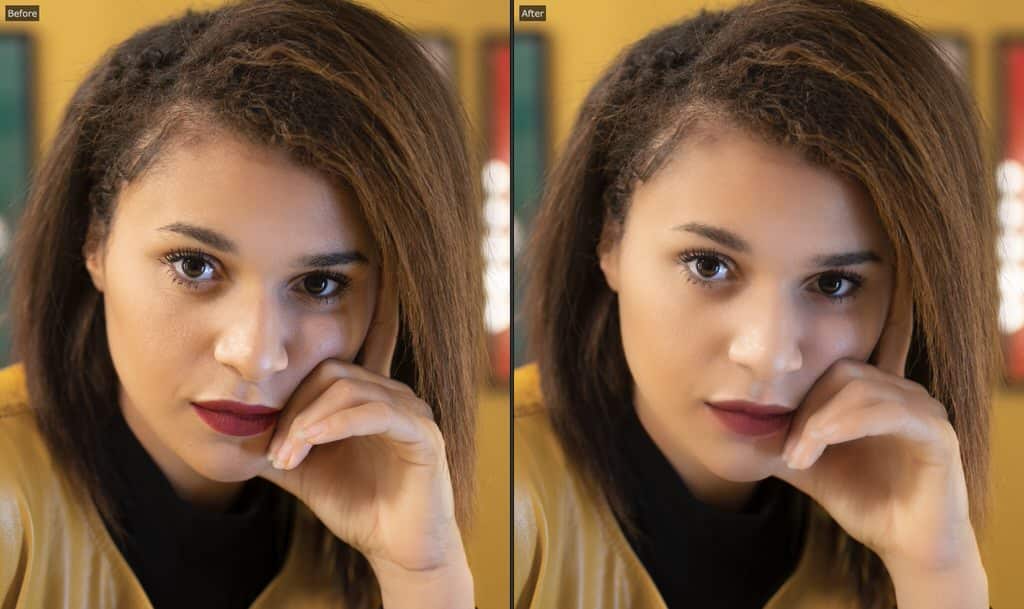
    Sharpen

    Sharpens the skin area.  Press the Sharpen button to open the Scale sub-slider, which affects the scale at which the sharpening is applied.

    Trim Eyebrows

    Removes stray hairs from around the eyebrows.

    Around Mouth

    Quickly clears up faults such as wrinkles from around the mouth.

    Non-Face Skin

    Smooths skin that is not on the face.

    Texture

    Maintains a natural look by applying realistic skin texture in areas where skin texture is being corrected. This texture goes into touch-up brush strokes and areas where the sliders have had an effect. You will need to zoom in the picture to see the effect of changes to the skin texture. Clicking on the triangle next to Texture opens the following sub-sliders:

    • Brightness: Finer control over skin texture brightness.
    • Saturation: Finer control over skin texture saturation.  The greater the saturation, the more intense the color.
    • Size: Makes the skin texture pattern larger or smaller.
    Details

    The Details slider allows you to bring back or further reduce details such as moles, wrinkles and strong spots.   It affects all the other skin smoothing sliders and the touch-up brush.

    It has no effect if the other skin smoothing sliders are at zero, and has the most effect when the other skin smoothing sliders are high.

    If the touch-up brush doesn’t completely remove a blemish, moving the detail slider to the left should reduce the blemish further, by giving more of an air-brushed look.

    PortraitPro 2019 Skin Lighting & Coloring Module

    PortraitPro lets you change the lighting on the subject’s face via simple controls.  These controls can provide a very effective way to enhance the appearance of the face.

    Note that some of these controls are quite sensitive to the positions of the outlines around the face.  If you are not getting a good result, try adjusting the outlines shown over the before view so that they line up with the edges of the face.

    Note: the sliders and other controls in this section only affect those parts of the picture that are in the skin area.  Press the View/Edit Skin Area button to change the skin area.
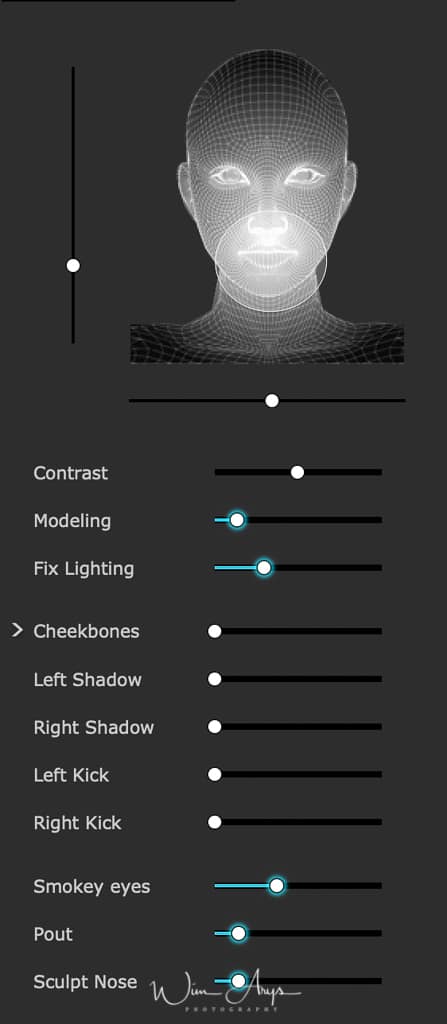
    PortraitPro 2019 Skin Lighting @ Coloring module

    Contrast

    Changes the lighting contrast.

    Modeling

    Relights the image to make the features of the face appear more sculpted or defined.

    Fix Lighting

    Applies lighting similar to “beauty lighting” that makes skin and features appear smoother.

    Cheekbones

    Gives more definition to the cheekbones.  Pressing the Cheekbones button opens two sub-sliders that let you change the left and right cheeks independently.

    Left Shadow

    Adds shadow to the left side of the face.

    Right Shadow

    Adds shadow to the right side of the face

    Left Kick

    Adds a kick light to the left side of the face.
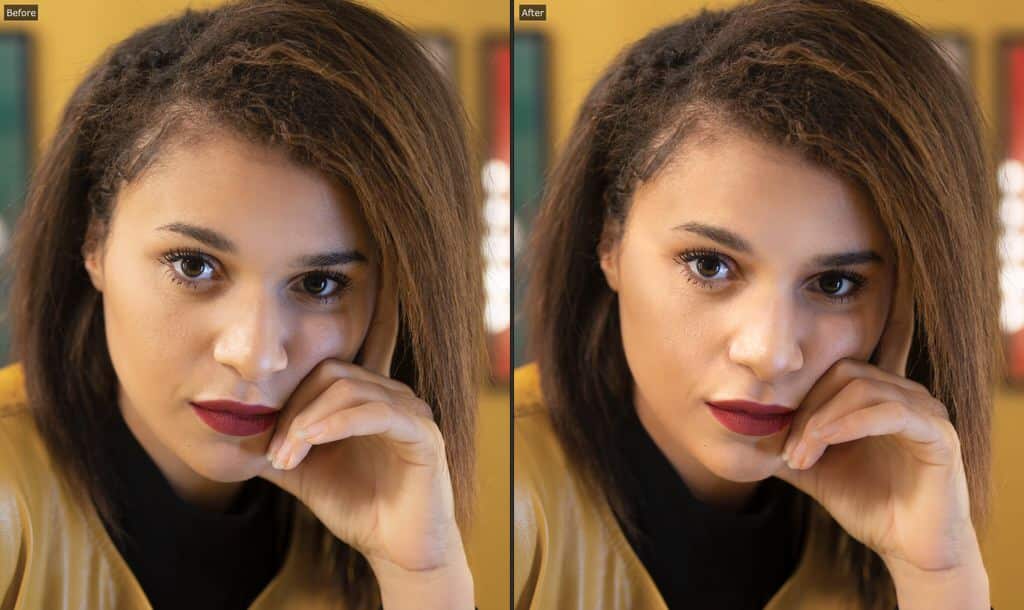
    Right Kick

    Adds a kick light to the right side of the face.

    Smokey eyes

    Darkens the area above the eyes to simulate smokey eyeshadow or a stronger brow.

    Pout

    Adds shadow below the lips to make them appear fuller.

    Sculpt Nose

    Adds definition to the nose.

    Skin Color

    This slider can do different things depending on the setting of the drop-down menu on the left of the slider.

    • Color Correct:  A very general color correct that will fix badly colored skin.
    • Other options: Will change the skin color to match a particular style of coloring.

    PortraitPro 2019 Makeup Module

    Makeup controls allow you to add realistic looking makeup after your picture has been taken.  This can be done to make your subject look better, or just to explore different looks.

    To start adding a makeup Element, just slide up the master slider (next to the element name) to increase the opacity of that element.  All makeup elements come with sensible defaults that can be altered as described here.

    • Hair covering the face: Because makeup shouldn’t appear over the top of hair, if there is hair covering any area where makeup is applied, adjust the Hair Area (found in the Hair controls) to paint away makeup in areas where there is hair.
    • Objects covering the face: Sometimes glasses, accessories or hands may be covering an area where makeup is being applied. To prevent this, use the Restore Brush set to Restore To Original image to paint over the area.
    • Profile faces: please note that makeup is not supported for faces that are viewed in profile, so the makeup section will not appear for those faces.
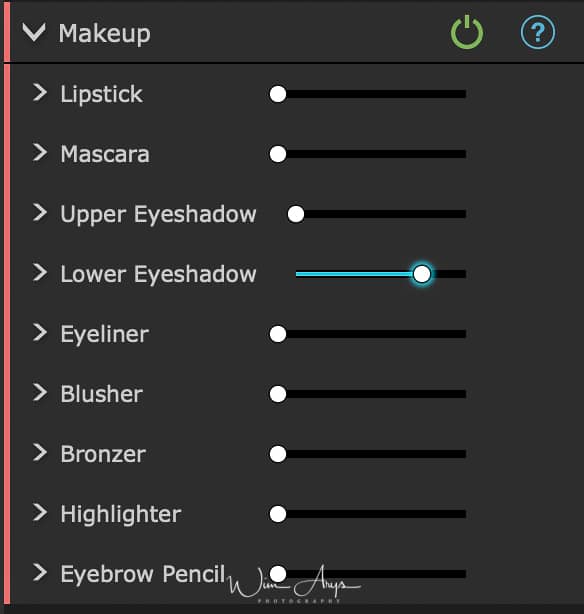
    PortraitPro 2019 Makeup Module

    Lipstick

    Lipstick isn’t just for giving the appearance of lipstick, it can also be used to cover faults on the lips (using the coverage slider).

    Master slider

    The master slider controls the opacity of the entire lipstick.  All the controls under it are affected by the opacity.  Because you won’t see any difference to the lipstick when the opacity is at 0, it will automatically jump to 75% when adjusting any of the other controls.

    Texture

    Use this to control the material property of the lipstick. The best way to understand this is just to scroll through the different options to see what they do.

    Color

    The color of the lipstick is controlled using the brightness slider and the hue and saturation picker underneath.   Drag the “plus”  around to alter the hue and saturation.

    Shine

    This is used to tweak the amount of shine added to the lipstick.  

    Coverage

    This affects how much of the original shine from the lips is visible.   When applying to already shiny lips, a low coverage can result in overly shiny lips.   A higher coverage can cover faults in lips better, but can end up looking artificial as the original lighting is discarded.

    Mascara

    Mascara can be used to draw attention to the eyes.

    Master slider

    The master slider controls the opacity of the mascara.  All the controls under it are affected by the opacity.  Because you won’t see any difference to the mascara when the opacity is at 0, it will automatically jump to 75% when adjusting any of the other controls.

    Application

    Use this to choose what style the mascara appears in.

    Softness

    Because sometimes eyes are slightly out of focus, Portrait Pro measures the focus of the original pictures eyes and tries to match the mascara softness to it.   This slider can be used to manually tweak the default focus detection.

    Nudge lashes

    Portrait Pro uses the eye markup in the “before” panel to place the mascara.   The markup should be placed where the waterline meets the eyeball.  Lashes come out of the outside of the waterline, so there is a gap between the markup and the roots of the mascara.  However if the head is tilted, the waterline can be larger or smaller.  This slider lets you adjust the position of the mascara to compensate in these situations.

    Texture

    Adds texture to the mascara.

    Eyeshadow

    Eyeshadow can be used to draw attention to the eyes.

    Master slider

    The master slider for the eyeshadow element controls the opacity of the entire eyeshadow.  All the controls under it are affected by the opacity.  Because you won’t see any difference to the eyeshadow when the opacity is at 0, it will automatically jump to 75% when adjusting any of the other controls.

    Texture

    Use this to control the material property of the eyeshadow. The best way to understand this is just to scroll through the different options to see what they do.

    Color

    The color of the eyeshadow is controlled using the brightness slider and the hue and saturation picker underneath.   Drag the “plus”  around to alter the hue and saturation.

    Shine

    This is used to tweak the amount of shine added to the eyeshadow.  

    Inner/Outer opacity

    This is used to change the opacity of the inside or outside parts of the makeup.

    Eyeliner

    Eyeliner can be used to draw attention to the eyes.

    Opacity

    Controls the opacity of the eyeliner.

    Application

    Controls the shape of the eyeliner.

    Texture

    Adds a texture to the eyeliner.

    Blusher

    Blusher is used to give cheeks a rosy glow.

    Master slider

    The master slider controls the opacity of the blusher.  All the controls under it are affected by the opacity.  Because you won’t see any difference to the blusher when the opacity is at 0, it will automatically jump to 75% when adjusting any of the other controls.

    Face shape

    You can adjust the blusher to flatter different face shapes.

    Color

    The color of the blusher is controlled using the brightness slider and the hue and saturation picker underneath.   Drag the “plus”  around to alter the hue and saturation.

    Bronzer

    Bronzer is way to sculpt the face while giving a tanned look.

    Master slider

    The master slider controls the opacity of the bronzer.  All the controls under it are affected by the opacity.  Because you won’t see any difference to the bronzer when the opacity is at 0, it will automatically jump to 75% when adjusting any of the other controls.

    Color

    The color of the bronzer is controlled using the brightness slider and the hue and saturation picker underneath.   Drag the “plus”  around to alter the hue and saturation.

    Highlighter

    Highlighter is used to sculpt the face while making it glow.

    Master slider

    The master slider controls the opacity of the highlighter.  All the controls under it are affected by the opacity.  Because you won’t see any difference to the highlighter when the opacity is at 0, it will automatically jump to 75% when adjusting any of the other controls.

    Color

    The color of the highlighter is controlled using the brightness slider and the hue and saturation picker underneath.   Drag the “plus”  around to alter the hue and saturation.

    Eyebrow pencil

    When using the eyebrow pencil controls, make sure the eyebrow outlines are correctly positioned over the eyebrows.  If they are not correctly positioned, you can move them in the “before” view.

    Master slider

    The master slider controls the opacity of the eyebrow pencil.  All the controls under it are affected by the opacity.  Because you won’t see any difference to the eyebrow pencil when the opacity is at 0, it will automatically jump to 75% when adjusting any of the other controls.

    Color

    The color of the eyebrow pencil is controlled using the brightness slider and the hue and saturation picker underneath.   Drag the “plus”  around to alter the hue and saturation.

    Left and right

    Use this to individually adjust the left and right opacity.

    PortraitPro 2019 Eye Module

    PortraitPro can automatically brighten, whiten and sharpen the eyes. The Eye controls allow you to adjust exactly how much effect you get. You can also change the color of the eyes.

    • Partially obscured eyes: The eye sliders look bad when applied over hair that covers eyes. If there is hair covering the eyes, use the Hair Area brush (found in the Hair controls) to paint away the effect of eye sliders by marking pixels as hair.
    • If another object (such as a hand or glasses) is covering the eye, you can use the Restore Brush to prevent edits being made to that item. Simply select Restore To Original Image and paint over the object.
    • Totally obscured eyes: If one of the eyes is completely obscured, you can turn off all changes to that eye using the Eye On/Off buttons at the top of the Eye menu. If both eyes are obscured, simply turn off the eye menu entirely using the power button next to its header.
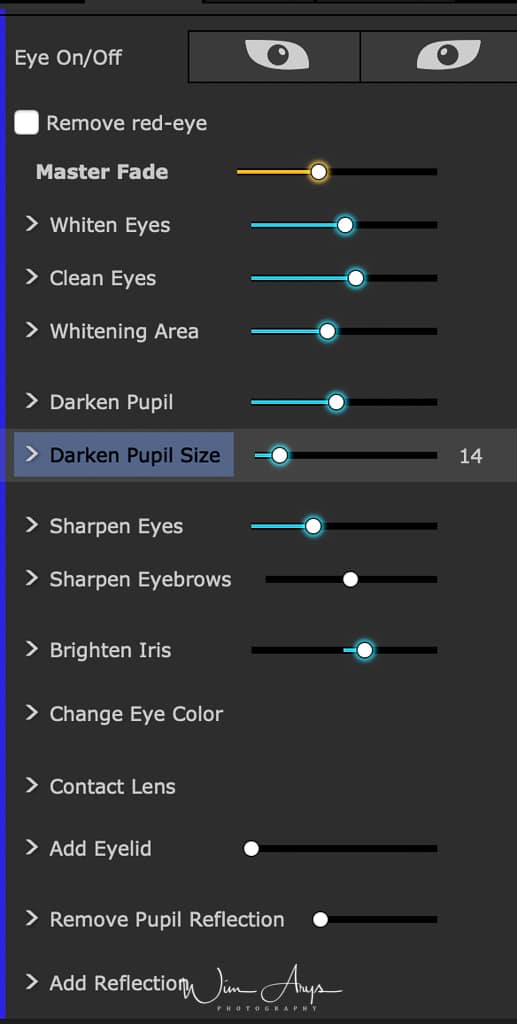
    PortraitPro 2019 Eye Module

    Master Fade

    This slider is connected to some of the other sliders in this section that perform general enhancements to the eyes.  You will see the other sliders move as this one is moved.

    Whiten Eyes

    Whitens and brightens the white part of the eyes. The area affected is controlled by the Whitening Area slider.

    Whitening takes any color out of the whites of the eyes leaving them a shade of gray when the slider is at the top.

    Pressing the Whiten Eyes button opens two sub-sliders that let you whiten the left and right eyes independently.

    Clean Eyes

    Cleans up veins and other discolorations in the whites of the eyes. The area affected is controlled by the Whitening Area slider.

    Pressing the Clean Eyes button opens four sub-sliders that let you control the left and right eyes independently.  The sub-sliders Left Eye and Right Eye let you control the overall effect for each eye, from 0 (no effect) to 100 (maximum effect).  The sub-sliders Left Curve and Right Curve can be used to either increase the apparent curvature of the eye by moving the slider to the right, or make the eye appear flatter by moving the slider to the left.  The curve sliders work by adjusting the cleaning effect added, so they will have no effect if the corresponding left/right eye slider is 0.

    Whitening Area

    Changes the area of the eye that will be whitened or cleaned by the Whiten Eyes or Clean Eyes sliders.

    Pressing the Whitening Area button opens two sub-sliders that let you change the area for the left and right eyes independently.

    Darken Pupil

    Darkens the pupil (the black part in the middle of the eye) in the eyes.

    Pressing the Darken Pupil button opens two sub-sliders that let you darken the left and right pupils independently.

    Darken Pupil Size

    Use to change the size of the pupil when darkening.

    Pressing the Darken Pupil Size button opens two sub-sliders that let you change the left and right pupils independently.
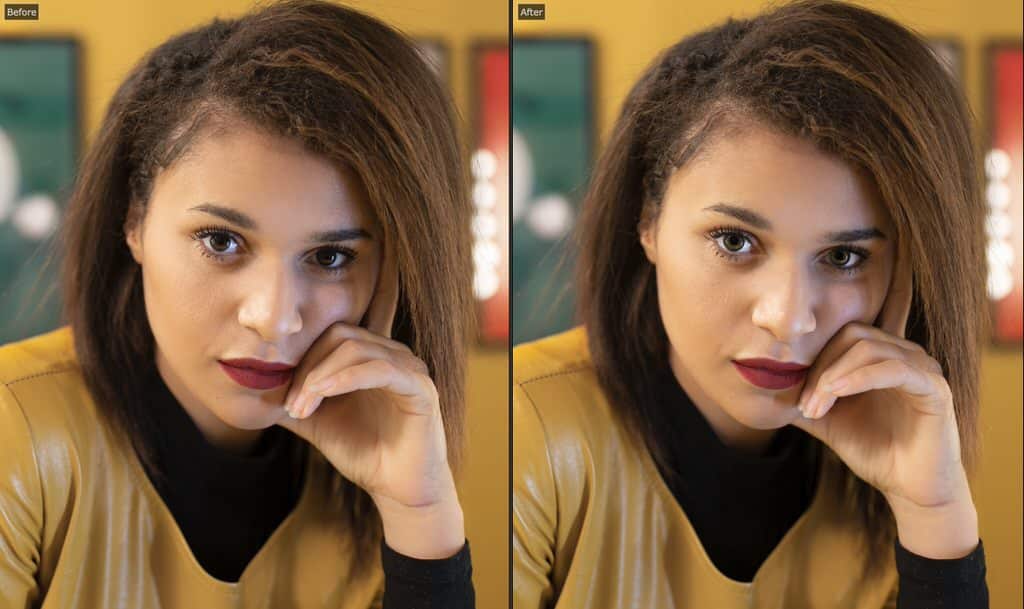
    Sharpen Eyes

    Sharpens the subject’s eyes.

    Pressing the Sharpen Eyes button opens the following sub-sliders that let you control the amount of sharpening applied to different parts of the eyes.

    Upper L Lash

    Sharpens the upper left eye lashes.

    Lower L Lash

    Sharpens the lower left eye lashes.

    Left Eye

    Sharpens the left eye.

    Left Lash Area

    Changes the size of the area that the left eye sharpening influences.

    Upper R Lash

    Sharpens the upper right eyelashes.

    Lower R Lash

    Sharpens the lower right eyelashes.

    Right Eye

    Sharpens the right eye.

    Right Lash Area

    Changes the size of the area that the right eye sharpening influences.

    Sharpen Eyebrows

    Sharpens the subject’s eyebrows.

    Pressing the Sharpen Eyebrows button opens two sub-sliders that let you sharpen the left and right eyebrows independently.

    Brighten Iris

    Brightens or darkens the iris (the colored part of the eye).

    Pressing the Brighten Iris button opens two sub-sliders that let you brighten or darken the left and right irises independently.

    Change Eye Color

    Press the Change Eye Color button to open the sub-sliders that let you change the color if the irises.

    Amount of Change

    If this slider is 0, the color of the eyes will be unchanged (the Color and Intensity sliders will be ignored).

    Set this to 100 to set the eye color selected by the Color and Intensity sliders. Lower values will blend between the selected color and the original eye color.

    If this slider is at 0, it is automatically set to 100 whenever the Color or Intensity sliders are moved.

    Press the Amount of Change button to open two sub-sliders that let you set the amount of change for the left and right eyes independently.

    Color

    Sets the color of the eyes (provided the Amount of Change slider is not 0).

    Press the Color button to open two sub-sliders that let you set the color for the left and right eyes independently.

    Intensity

    Sets the intensity of the eye color.

    Press the Intensity button to open two sub-sliders that let you set the intensity for the left and right eyes independently.

    Contact Lens

    You can choose from a list of contact lens options to be applied to the eye.  There is an opacity slider to fade it in and out and a scale slider to change the size.

    Add Eyelid

    Accentuates the line above the eye where the eyelid starts.

    Remove Pupil Reflection

    This slider blackens the pupil area to remove reflections. This can be used with the Add Reflection drop down list to add new eye reflections.

    Pressing the Remove Pupil Reflection button opens two sub-sliders that let you remove catch-light reflections from the left and right pupils independently.

    Add Reflection

    You can choose from a selection of reflection images (catch-lights) to be added to the eyes.

    PortraitPro 2019 Mouth & Nose Module

    PortraitPro automatically whitens the teeth and enhances the color of the lips. The Mouth & Nose controls allow you to adjust these effects to get exactly the look you want.
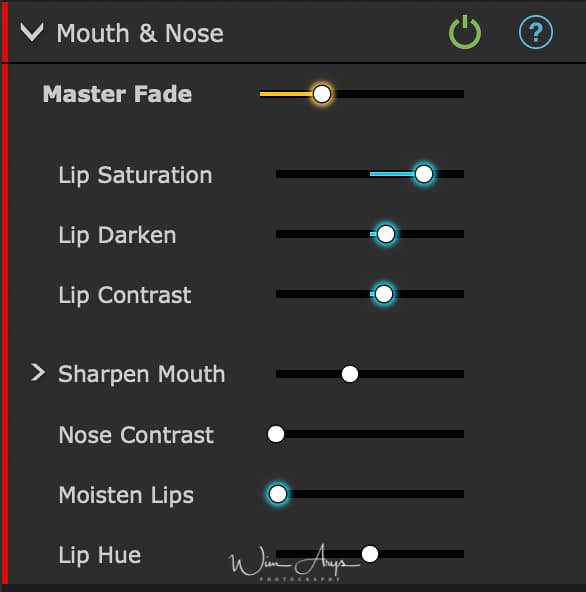
    PortraitPro 2019 Mounth & Nose module

    Master Fade

    This slider is connected to some of the other sliders in this section that perform general enhancements to the mouth and nose areas.  You will see the other sliders move as this one is move

    Whiten Teeth

    Removes any color from the teeth. The area affected is controlled by the Whiten Area slider. This control is not shown if the mouth is closed.

    Clean Teeth

    Cleans the teeth. The area affected is controlled by the Whiten Area slider. This control is not shown if the mouth is closed.

    Whiten Area

    Changes the teeth area affected by the Whiten & Clean Teeth sliders. This control is not shown if the mouth is closed.
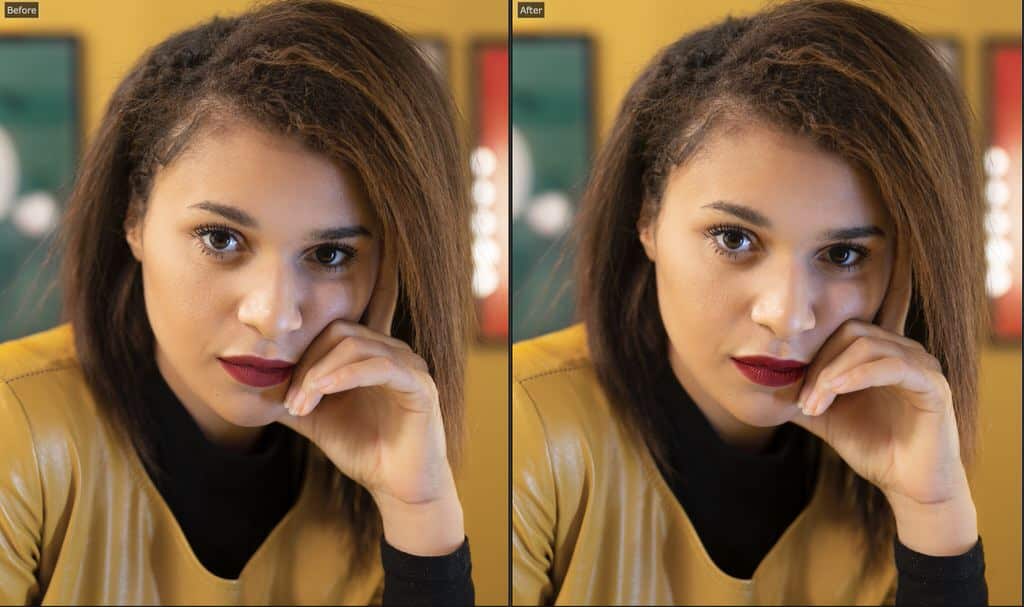
    Mouth and nose

    Lip Saturation

    Makes the lips more colorful.

    Lip Darken

    Move this slider to the right to darken the lips, or to the left to make them lighter.

    Lip Contrast

    Increases the contrast within the lip area, giving the lips more impact.

    Sharpen Mouth

    Sharpens the outline and details of the mouth.  Press the Sharpen Mouth button to open the following sub-sliders that let you control the amount of sharpening applied to the different parts of the mouth independently.

    Top Lip

    Sharpens the top lip only.

    Bottom Lip

    Sharpens the bottom lip only.

    Sharpen teeth

    Sharpens the teeth.

    Nose Contrast

    Increases the contrast within the nose to draw attention to it.

    Moisten Lips

    Adds some shine to the lips.

    Lip Hue

    Changes the color of the lips.

    PortraitPro 2019 Hair Module

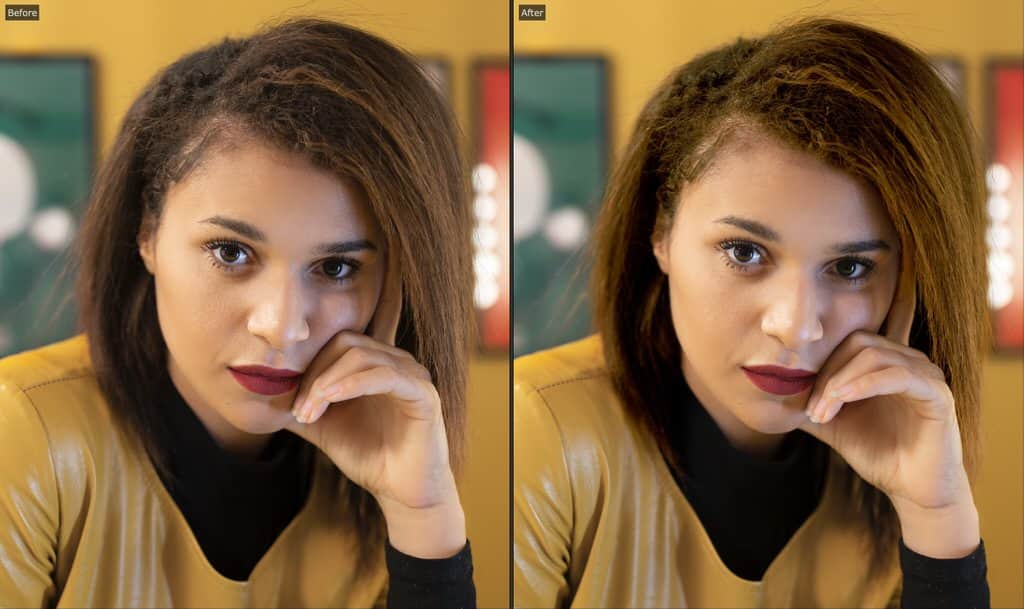
    PortraitPro lets you enhance the hair of the subject by moving sliders. Please note that before doing this, it is important to have the hair area set reasonably accurately.
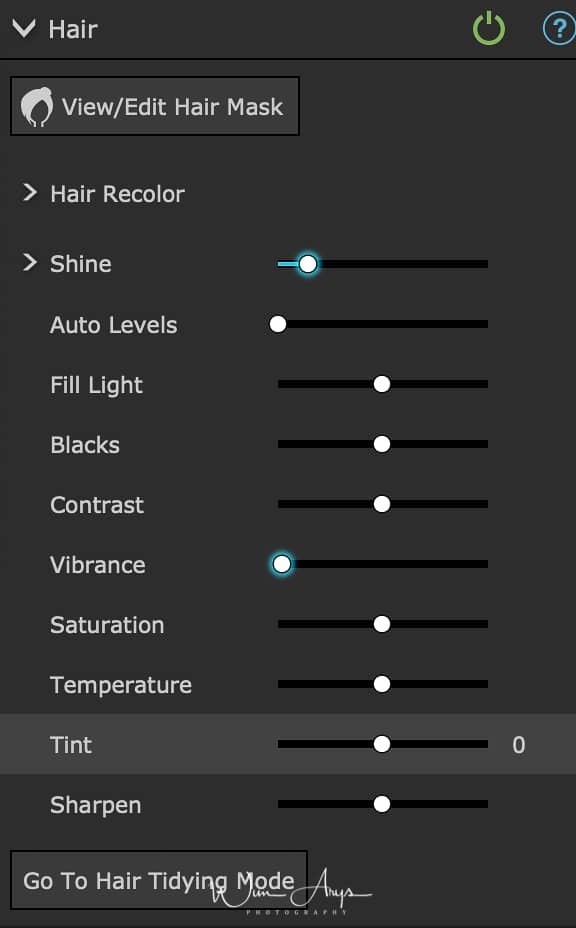
    PortraitPro 2019 Hair Module

    Hair Color

    Controls how much hair recoloring to apply.

    The color is set by selecting one of the hair swatches.

    This slider will be automatically set to 75 if it is at 0 when a hair color is selected in the Hair Recolor drop-down list.

    Shine

    Makes the hair more shiny.  Pressing the Shine button opens two sub-sliders, Shine Amount and Shine Softness.

    Shine Amount lets you set how much shine to add.

    Shine Softness controls the softness of the shine added.  This has no effect if Shine Amount is set to 0.

    Auto levels

    Automatically improves the contrast and colors in the hair area.

    Fill Light

    Adds a fill light to the hair area, which will brighten shadow areas.

    Blacks

    Darkens or lightens the black areas within the hair.
    Contrast

    Adjusts the contrast of the hair area.

    Vibrance

    Increasing the vibrance will make the color of the hair more intense.

    Saturation

    Adjusts the saturation of the colors in the hair area.

    Temperature

    Adjusts the temperature (red-blue) of the colors in the hair area.

    Tint

    Adjust the tint (green-purple) of the colors in the hair area.

    Sharpen

    Increase or decrease contrast in dark areas if needed.

    PortraitPro 2019 Picture Module

    These controls affect the whole image and allow you to adjust the overall look of the picture, controlling things like the contrast and color temperature.
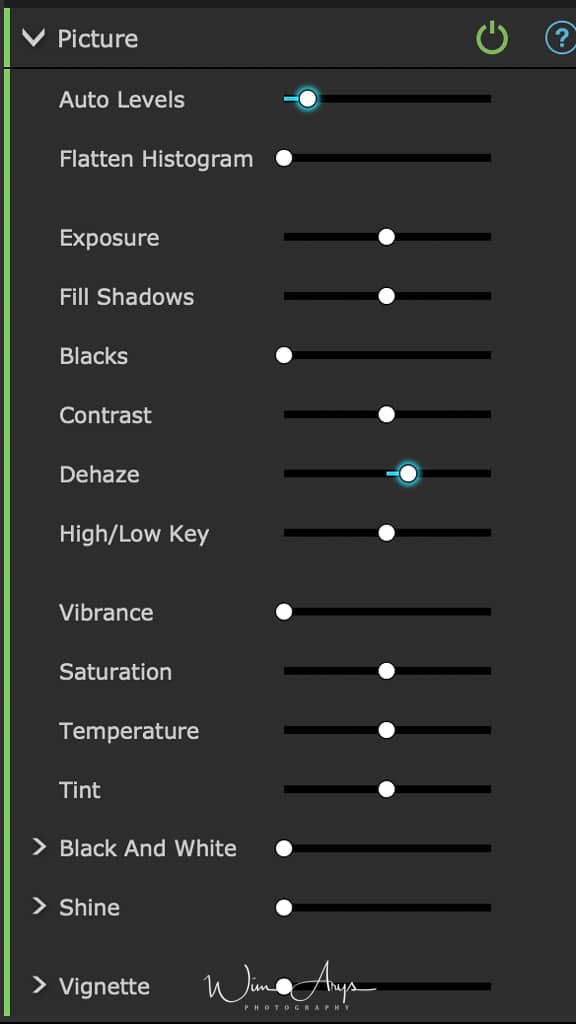
    PortraitPro 2019 Picture Module

    Auto Levels

    Automatically improves the contrast and colors of the whole image.  Note: this slider may have little effect on some images.

    Flatten Histogram

    Adjusts the colors in the image to flatten the histogram.

    Exposure

    Adjusts the overall exposure (brightness) of the whole image.

    Fill Shadows

    Simulates adding a fill light, which brightens the darker areas of the image.

    Blacks

    Darkens or brightens the very dark areas of the image.
    Contrast

    Increases or decreases the contrast of the image.

    Dehaze

    Increases or decreases the contrast in dark areas if needed.

    High/Low Key

    Makes the image more high key (more brighter tones) or low key (more darker tones).

    Vibrance

    Adjusts the overall vibrancy of the colors in the whole image.  Increasing vibrancy will make muted colors more intense, but has less effect on colors that are already saturated.  This helps preserve skin tones.

    Saturation Temperature

    Adjusts the saturation of the colors in the whole image.  Increasing the saturation will make the colors in the picture more intense.  Decreasing the saturation will make the colors less intense (grayer).

    Temperature

    Use this slider to adjust the color of the whole image to remove any temperature (red-blue) color cast.

    Tint

    Use this slider to adjust the color of the whole image to remove any tint (green-purple) color cast.
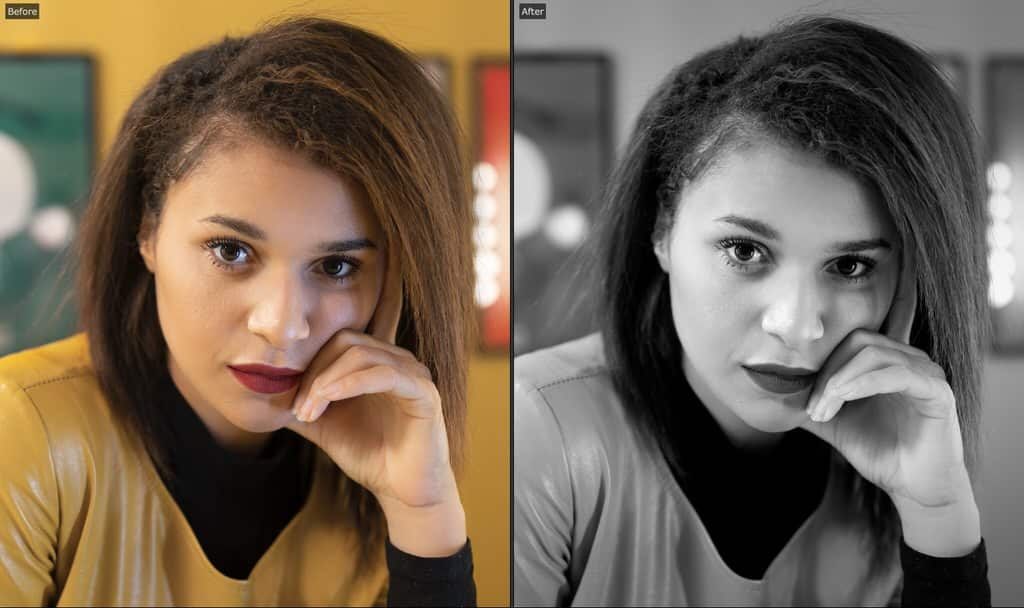
    Black and White

    By default, this slider converts the image into black and white.

    If you press on the Black And White button, it opens three color wells that let you set the color for the dark tones, the color for the mid tones, and the color for the bright tones.  These default to black, mid gray and white, but by changing these you can get a variety of effects.

    Shine

    Makes the image more “shiny”.  Pressing the Shine button opens two sub-sliders, Shine Amount and Shine Softness.

    Shine Amount lets you set how much shine to add.

    Shine Softness controls the softness of the shine added.  This has no effect if Shine Amount is set to 0.

    Vignette

    The vignette controls let you add a classic vignette effect over the image.

    Vignette

    The main vignette slider controls the opacity of the vignette effect.  If this is at 0, no vignette is applied.  At 100, the vignette effect will be opaque at the edges.

    Radius

    Controls the radius of the oval used to create the vignette effect.

    Color

    Sets the color for the vignette.

    Hardness

    Sets the size of the soft part of the vignette.

    Horizontal Offset

    Moves the center of the vignette left and right.

    Vertical Offset

    Moves the center of the vignette up and down.

    PortraitPro 2019 Layers Module

    PortraitPro lets you add extra image layers over your image.

    PortraitPro also lets you make changes to the background, including replacing the background completely or adding additional elements between the background and foreground parts of the image.

    The background mask identifies which parts of the image are background and which are foreground.  PortraitPro will automatically create a background mask.  Tools are provided so that you can modify the background mask as required.

    Before pressing the Create Background Mask button, you should make sure all the faces in the image have been found, and the face outlines correctly shown around them.  Press the Other Faces button in the toolbar if any faces have not been located properly.  This is necessary since PortraitPro needs to know the location of the faces to make the initial background mask.

    Don’t spend much time adjusting the background mask initially.  Once the mask is roughly correct, press the Next button to open the other section, Change Background.

    When the Background controls are shown, you can switch between the Background Mask controls and the Background Image controls by clicking on the header for that section.

    After you have changed the background image, go back to the Background Mask section and use the tools there to refine the mask.

    Note that the accuracy needed for the background mask depends greatly on the change made to the background.  If the new background is very similar to the original background, then you usually don’t need to be very accurate with the background mask.  However, if the new background is very different from the original, then a highly accurate mask will probably be needed.
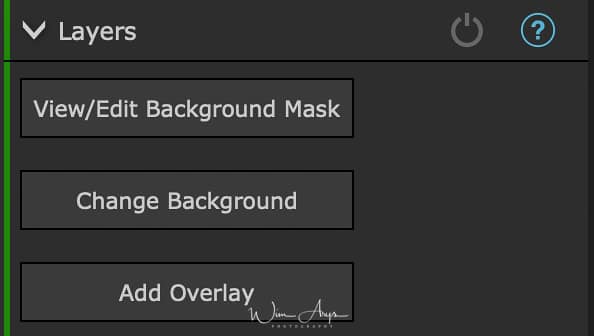
    PortraitPro 2019 Layers Module

    Create Background Mask

    When you press this button, PortraitPro will automatically create a mask and then switch to the Background controls, with the View/Edit Background Mask controls section open. This button is only shown if the background mask has not yet been created.

    View/Edit Background Mask

    Switches to the Background controls, with the View/Edit Background Mask controls section open.

    This button is only shown if the background mask has been created, or if the original image loaded had an alpha channel.
    Change Background

    Switches to the Background controls, with the Change Background controls section open.

    This button is only shown if the background mask has been created, or if the original image loaded had an alpha channel.

    Add Overlay

    Switches to the Overlay controls. This button is only shown if no overlays have already been added.

    View/Edit Overlays

    Switches to the Overlay controls. This button is only shown if one or more overlays have already been added.

    Conclusion

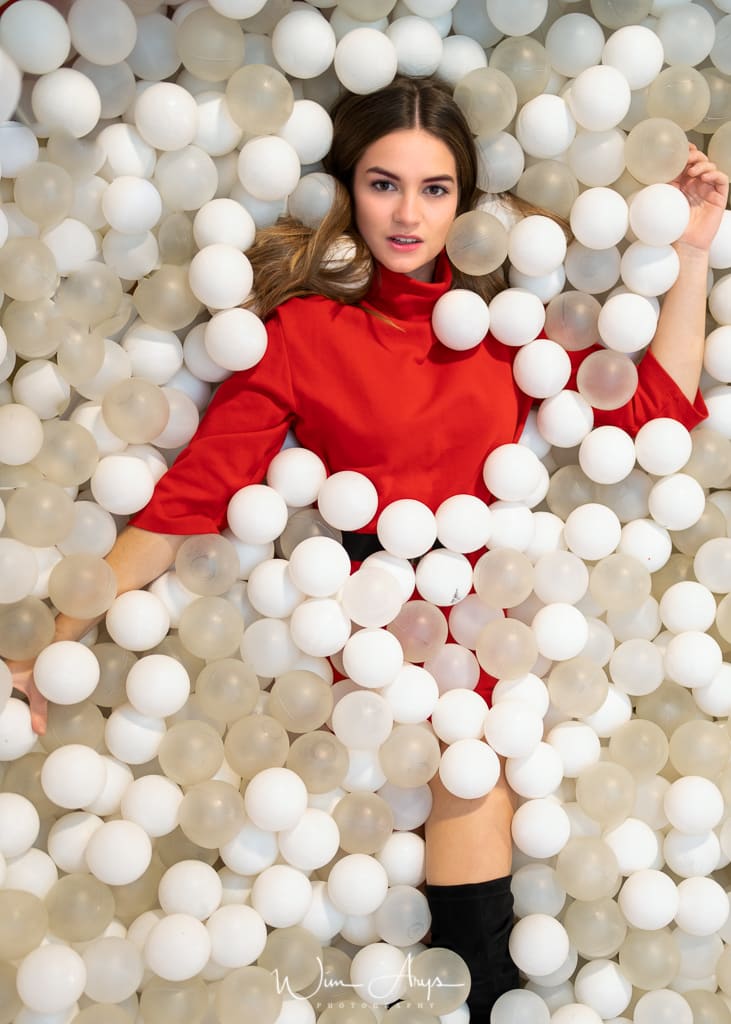
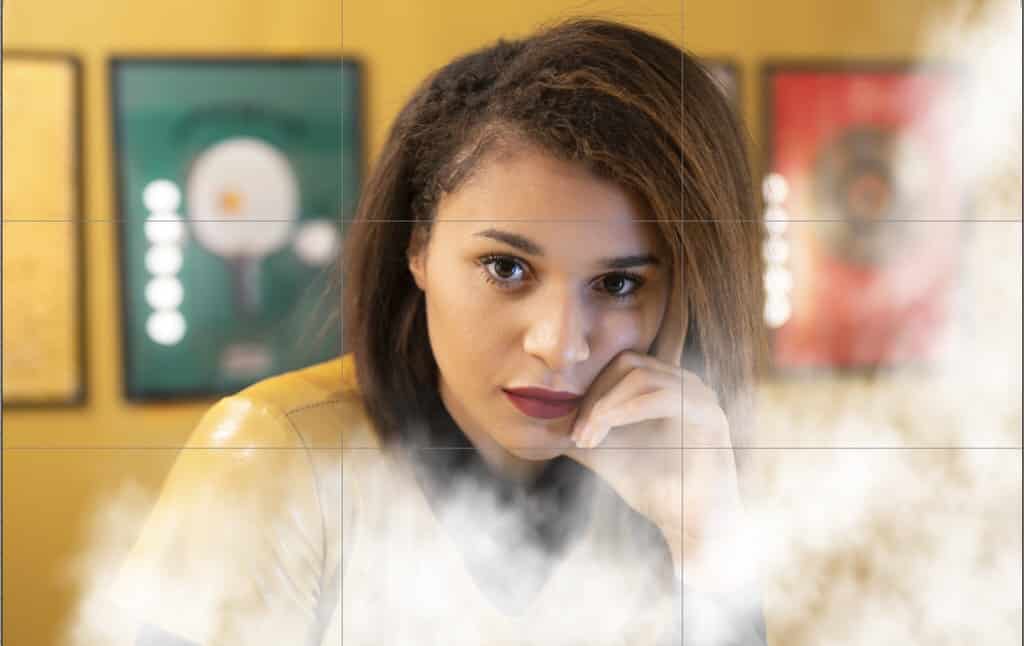
    Athnetech PortraitPro 2019 hardly needs any introduction. I’ve been using the software for years and each version gets better and better. There are still some problems, however, like at times it has difficulty automatically recognizing jawlines with hands in front of the face (like the example above) and sometimes natural light portraits where features are less apparent.

    The procedure of actually editing and changing these automatically generated markers (the markup process as they call it) has gotten faster in the last few versions of Portraitpro. It used to take a lot of computing power and hence was very slow, now it’s a lot better and easier to do.

    The ‘preset’ processing was also dialed down from the exaggerated beautification in version 17 and 18, although this might also have something to do with the more refined processing in PortraitPro 2019.
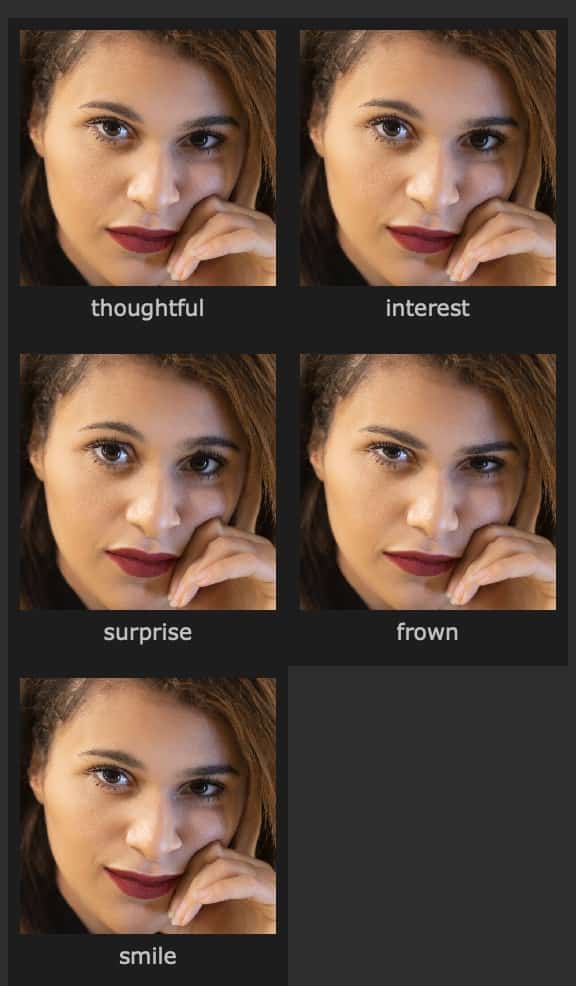
    There are also some new features like the expressions menu where you can add a smile, a frown, and even express surprise or interest on your subject’s face. This works convincingly well.

    Besides this, the layers panel has also received a full overhaul, enabling you to add overlays and backgrounds from an included library. Masking of the face is also fully customizable thanks to new tools that allow you to edit the mask precisely.
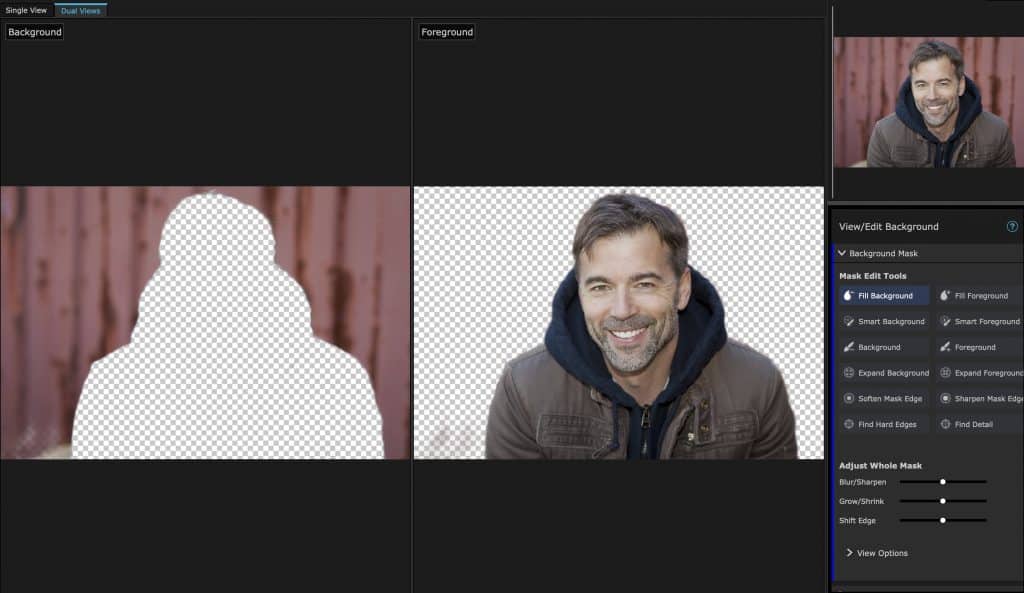
    PortraitPro change background

    PortraitPro 2019 is definitely a worthy upgrade for any serious portrait photographer or retoucher. Almost all aspects of this beautification software have been enhanced and streamlined. Even a few new features have been added that can allow wedding photographers to use Portrait Pro as standalone software for a complete image editing flow from start to finish.

    Portrait Pro coupon code

    The kind people at Portrait Pro 19 have kindly provided me with a coupon code for 15% discount. Just go to the Anthropics website and fill in “WIM15” in the coupon field. This is on top of any other promotions that might be running!
  • Life+Guard camera skin review

    Life+Guard camera skin review

    Life+Guard camera skin introduction

    Life+Guard is a Taiwanese company that makes ‘skins’ or armor wraps that stick onto your camera and lenses. Their AlphaGVRD range started out for Sony Alpha cameras, but now also includes other camera brands like Canon, Nikon, and Fujifilm. The skins are made from premium 3M materials and are precisely cut according to the dimensions of your specific camera model or lens.

    Why would you want a Life+Guard camera skin?

    Now, why would you want to have a skin like this many people ask? Well firstly, cosmetically it’s a way of personalizing your camera according to your taste. There are many different designs and colors available, and it’s possible to mix and match some of them. So the possible combinations are almost endless, allowing you to create a unique look for your gear.

    Secondly, it’s an efficient way of protecting your camera against dust and scratches. Like protecting your screen with a screen protector, a LifeGuard skin will do essentially the same for your camera and lens body.

    Life+Guard camera skin installation

    My package arrived within one week in a basic grey plastic envelope. Inside was a cardboard box for protection. It was bent somewhat due to the transport but luckily no damage inside.

    life+guard cardboard packaging

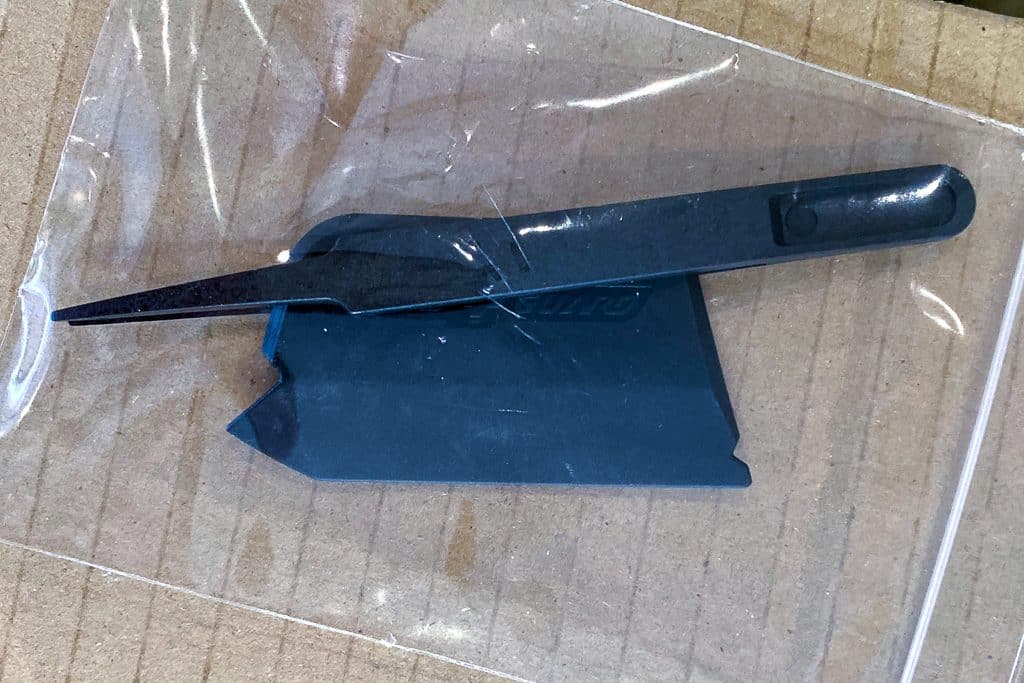
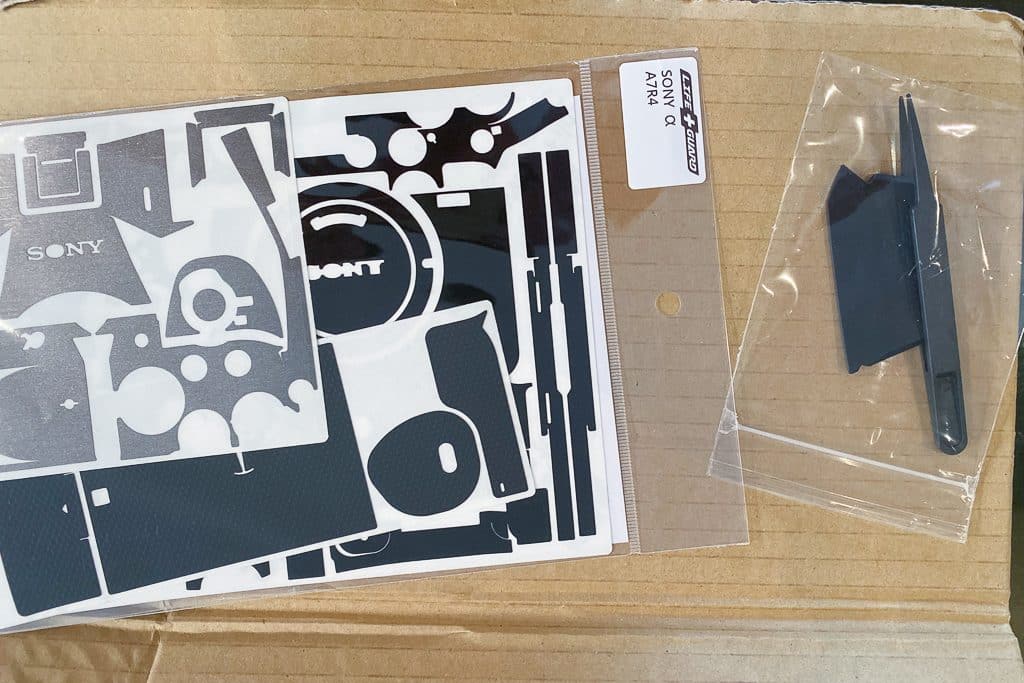
    Inside the box, you’ll find the set of skins as well as plastic tweezers and an applicator. These can, of course, be used to apply the skins to your camera.

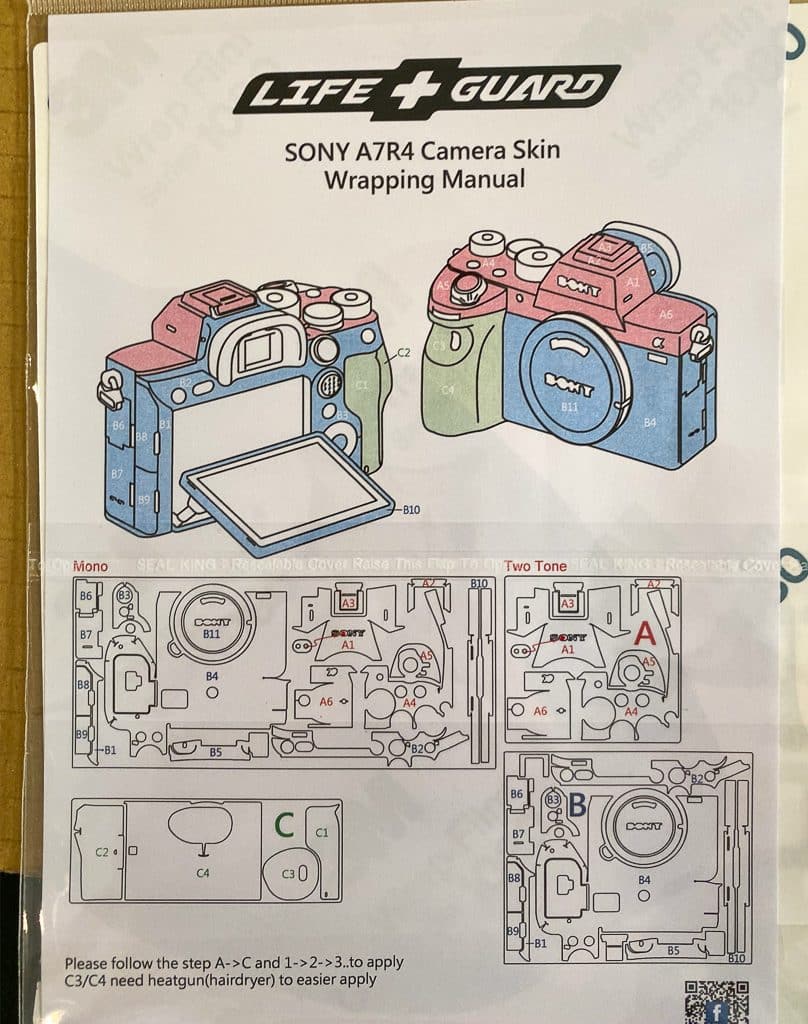
    As you can see, the ‘skin’ is actually a set of precisely cut vinyl stickers that need to be applied piece by piece in order to get full coverage of your camera.

    If you’re baffled by the many different parts, don’n worry. You’ll also find a manual that explains step by step where start.

    Life+Guard instructions

    In my case, I had to start with sticker A1, the front part of the viewfinder. It’s a simple matter of following the entire sets of A’s, B’s and C,s until the enite camera is covered.

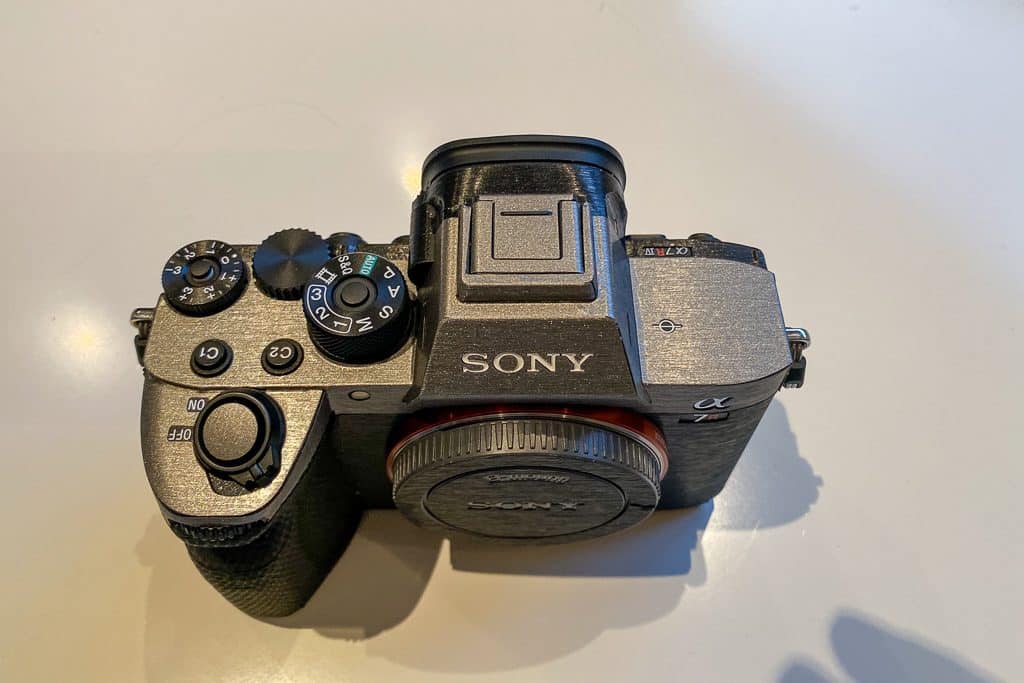
    Sony A7rm4 Life+Guard camera skin EVF

    Now at this point I should mention that you’ll need some time to apply the full skin. Mine took around 90 minutes fro start to finish. At times it’s not always easy to get the stickers in all the nooks and crannies that this camera has. I imagine it’s like that with any camera really. The method I found most effective was to use the Life+Guard supplied plastic tweezers to lift the 3M stickers off the paper, apply them on the camera surface and then use the other tool to flatten the sticker onto the surface.

    Now I have to be honest. I’m the type of person whio gets dust spots under almost any screen protector I’ve applied. Nomather how much cleaning I do with a cloth, solvents or whatever, I always manage  to get one or two spots under the proector. My wife on the other hand, usually just slaps them on without much regard, and usually gets it right on the first try. In this case, I found it reltively easy to get a good result, with only a few corners and  overlaps that I was not totally happy with. I woud think that your second application would go better than your first.

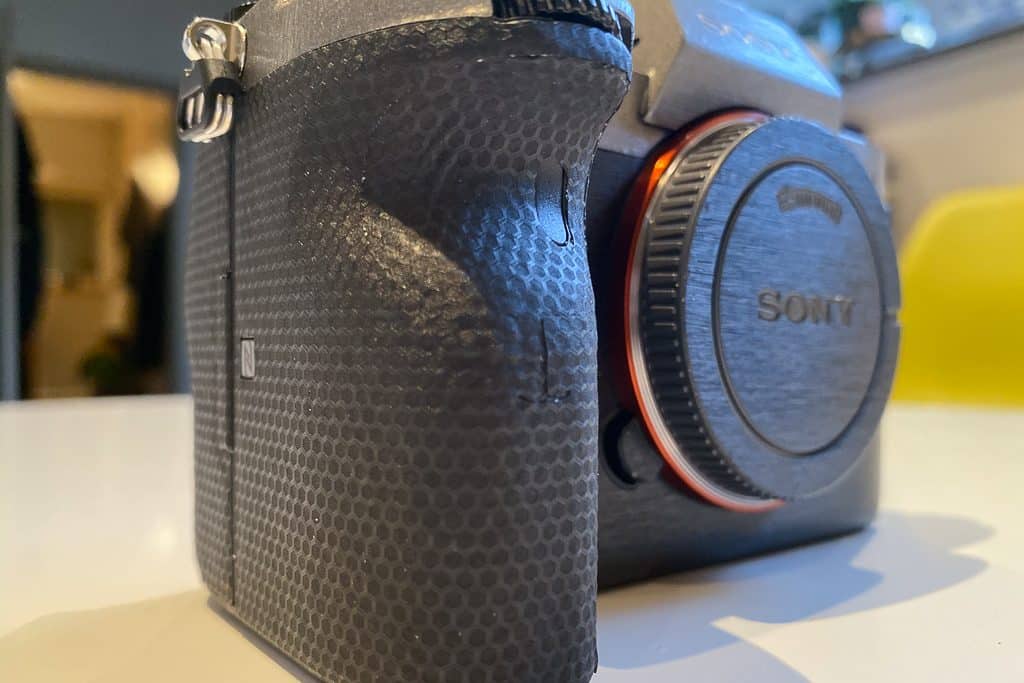
    There is also a cover included for the grip. You’ll net a hairdryer in order to make a solid adhesion here. This of course because the grip has a bir more texture. I also use the hairdryier on the entire bodu to ensure all corners and ends sticked well.

    Conclusion

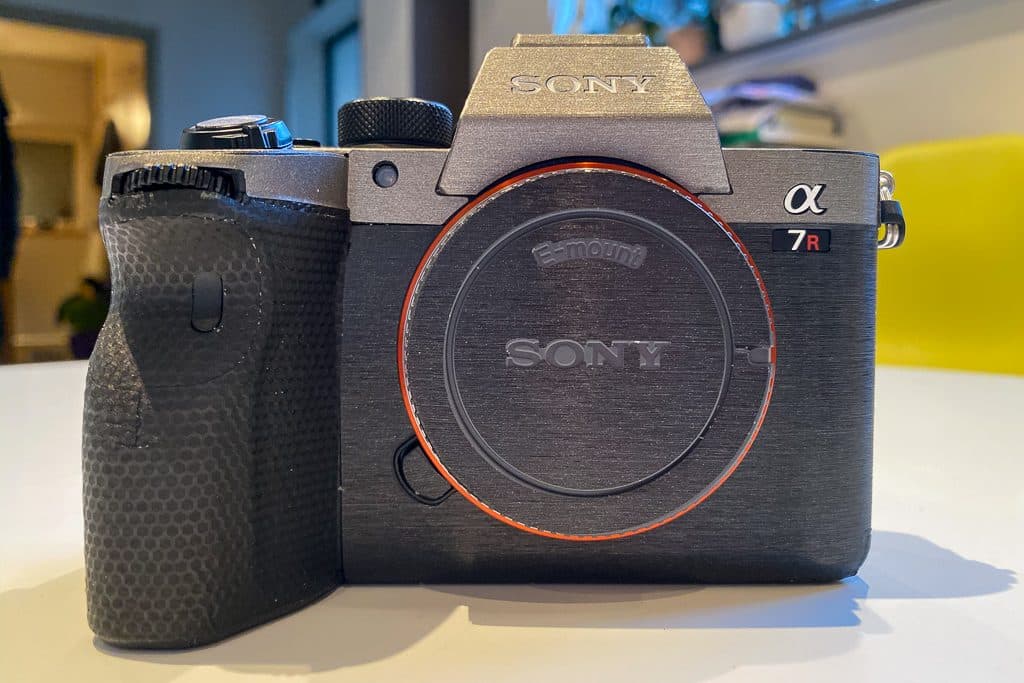
    In my case, t chose to buy the Life+Guard skin called Retro (BRTI/BEBK)for my Sony A7rm4.  My old A9 actually got some damage in the first month of ownership. Nothing major, but a few scratches on the bottom plate.  I had been looking for a practical solution to protect my new camera body and this looked both stylish and practical. I’ve used half cases in the past, but at times you need to remove them, like for use on a tripod. And as luck would have it, that’s of course when the body gets scratched.

    even the grip gets a Life+Guard cover

    A skin like this Life+Guard stays on permanetly and gives at least a solid superficial protection thanks to the rugged 3M coating. Application isn’t too difficult and Overall I’m happy with the final result.

    If you’re looking for a way to proect your mirrorless camera or want to tweak the appearance more to your liking, have a look at the options on the Life+Guard website.

  • Rawsie review

    Rawsie review

    Introduction

    Rawsie, formerly called Dotphoton RAW, is a deep-tech startup focussing on RAW image compression. Rawsie is a macOS app for professional photographers that allows them to compress raw images by up to 80%. After the size reduction, your files still have the full raw quality and resolution preserved.

    Rawsie in use

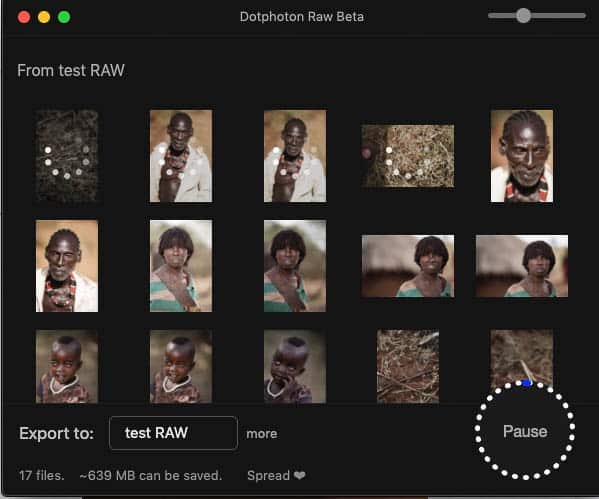
    Rawsie is deceptively easy to use, in contrast to the code behind it. You basically drag your RAW images or folder on the application, choose where to export the compressed images and press start. You’ll also get an indication of how much space can be saved.
    In my case 49 Mb Sony A9 RAW files could easily be compressed down to a .dng around 9Mb. Yes, as art of the compression process, Rawsie asks you install the free Adobe DNG converter app, and all your RAW files will get the .dng extension.
    Dotphoton RAW interface

    DNG file output

    Many professional photographers already convert their RAW files to .dng when importing into Lightroom. This because it future proofs their images, as a .dng (digital negative) will most likely always be supported by any image editor And it’s of course possible that to reason that your current camera won’t be supported by each and every piece of software twenty years from now.

    Rawsie: compression without artefacts

    Lossless means that there is no loss in quality at all, while lossy means that there is a slight loss in quality but rarely detectable. I can tell you that in camera,  switching between lossless and lossy compression in does make a difference, especially with ‘low’ 24MP cameras. The lossless (or not) compressed images do have better dynamic range and less visible artefacts.

    Now how does Rawsie’s Lossless algorithm fare? I could see no loss in dynamic range, color range or any other artefacts even though the files on average where reduced by a  factor 5. I would think that the data, the ones and zeros are somehow reduced, but not the developed image. I’ve incorporated Rawsie now in my workflow and will update this post if I see anything different.

    Are there any negative sides to Rawsie?

    I was firstly pleasantly surprised that Rawsie can also handle DNG files. Well not really surprised as the output uses the DNG standard, but it’s good to know that I can also compress these files.

    It’s however not possible to compress .TIFF files, so you’d need to start your workflow by compressing your RAW files before touching or editing them. And of course I you have a large library of 10 TB files like me, you’d need to compress them and then rebuild your entire library in Lightroom in order to maker it work properly.

    Thirdly, not all cameras on the market are supported, which means you’re out of luck if your camera (like my Hasselblad X1D) is not on the list. I believe Rawsie is actually working on expanding this list in the future.

    Dotphoton RAW review

    Supported cameras

    Most big brand cameras from Sony, Canon And Nikon are supported, as well as a few from Fujifilm, Dji and Leica.

    Sony:

    • A6300
    • A6500
    • A7 II
    • A7 III
    • A7S II
    • A7R II
    • A7R III
    • A7R IV soon!!!
    • A9
    • A99 II
    • RX1R II

    Nikon:

    • D5
    • D810
    • D850
    • D750
    • D800
    • D800E
    • D700
    • Z7

    Canon:

    • 1D X Mark II
    • 5D Mark IV
    • 5D Mark III
    • 5D Mark II
    • 5DS R
    • 5DS
    • 7D Mark II
    • EOS R (new!)

    Fujifilm Medium format:

    • GFX 50S
    • GFX 50R

    Dji:

    • Mavic Pro 2

    Leica

    • M9
    You can also upvote your own camera brand on their site in order to have it added to the list more quickly.

    Feature updates for Rawsie release

    The rebranding to Rawsie from Dotphoton Raw also brings some new features not yet discussed here. This update brings the option to move your all your files to an external folder. hese files will also retain the original folder structure into said folder.

    Full-size previews more visible

    The preview window is moved to the import screen for your convenience.

    Lightroom catalogue optimisation

    It was already possible to optimise your entire Lightroom catalog by simply importing the .lrcat. Rawsie will go through your entire catalog and see which images can be optimised. These will be moved to a new folder called DPR-optimized (and converted to DNG) and the compressed files will be linked to the correct images inside adobe Lightroom. The originals will not be overwritten so if you’re doing this to save space, you will need to manually delete original files as a safety precaution.

    Windows 10 version

    Rawsie has a Windows Edition in development with a release date in December 2020 and there will be a crowdfunding campaign with a significant discount..You can preorder here.  rawsie.co/pre-order

    Conclusion

    Yes, now it’s possible to compress your RAW photo library without any loss in quality, dynamic range, color accuracy or resolution. Thanks to Rawsie you can reduce your image library by up to five times in an easy way. There are some caveats for the moment though, like the fact that only a limited number of cameras are supported and that TIFF files can’t be compressed. But if you’re one of the photographers on that list and you have the courage to press ‘start’ on that interface, you won’t be disappointed and nor will your hard disk or backup budget.
  • Arsenal intelligent camera assistant honest review

    Arsenal intelligent camera assistant honest review

    Introduction

    Arsenal, the Smart Camera Assistant, was launched a while ago on Kickstarter. Arsenal sets all the settings for you (shutter, aperture, ISO, focus points) based on Artificial Intelligence. This means that it compares your specific composition and scenario with a database of thousands of other photos that have been created in similar situations.

    Arsenal different modes

    There are four modes that you can choose from:

    1. Smart: Arsenal sets all the values for you.
    2. Manual: For example, you can determine ISO or all settings..
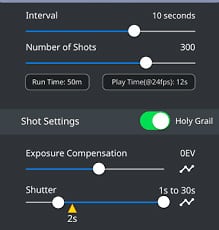
    3. Time-lapse: through interval and a number of shots you can conveniently determine the duration.
    4. Video: To make Movies.

    Arsenal smart camera assistant Sony

    Arsenal intelligent camera assistant in real life shooting

    I’ve had time to fully with the Arsenal intelligent camera assistant in the last few weeks. I unfortunately have to say that I am not enthusiastic. Best way to see the Arsenal intelligent camera assistant is as a glorified ‘Auto’ Mode, but with flawed software.

    There are some major flaws:

    • Handheld shooting is impossible! handheld shooting is very difficult because shutter speed is kept structurally slow, and the aperture is always high (it will go to at least f/5.6 for example, even when you use a fast prime lens).
    • Limited RAW Options: it’s possible to use the multi-stacking technique where you have multiple focus points from front to background.  Unfortunately,  Arsenal doesn’t store this stacked image on your card in the camera, it stores these in the smartphone app as JPG…. This is also the case when making the time-lapse.
    • Difficult to make your composition: According to Arsenal, this tool should help you to focus solely on the composition, and not have to worry about all the camera settings. My experience so far is that this has actually become more difficult. Yes, you can turn Live View on in the Arsenal app similar to Live View in your camera, but this is very buggy and jittery because they transfer the signal to your phone via a WiFi. To make it worse, Live View on the camera can not be activated, you can’t even look through the viewfinder.
    • No camera control: Arsenal literally takes the camera out of your hands because you can’t control any settings anymore. You can’t access the menu system either, or browse images, etc.You need to physically disconnect Arsenalto to make this work again.
    • Firmness: The Arsenal is not seated properly in the Hotshoe. There is no lock like what you have with a flash. Just a tiny bit of shaking and the Arsenal box will slide off.

    Arsenal Smart app

    Conclusion

    We’ve been waiting a long time for the company behind the Arsenal intelligent camera assistant to actually deliver on their Kickstarter promise. Although the physical device is now being shipped, the promise and allure of artificial intelligence camera assistant definitely has not. Perhaps things will change with newer versions of the Arsenal Intelligent camera assistant, or maybe some of these things can be fixed with a firmware update, but for now I would seriously recommend spending your money elsewhere. For long exposures, for instance, I get significantly better results when I use a filter than if I let Arsenal do its job.

  • Skylum Airmagic review

    Skylum Airmagic review

    Introduction

    In line with Photolemur (latest review here), Skylum Airmagic is a ‘one-click’ automated photo enhancer, this time for your drone and aerial images. Airmagic uses an artificial intelligence (AI) engine that has been fed thousands of drone images and knows more or less what corrections need to be done in order to make stunning images from aerial photography. Machine learning is now a prominent factor in a lot of software, and although it can’t make your photos truly unique, it will make your drone images stand out more with minimal effort.

    Skylum Airmagic DJI Hasselblad

    Airmagic interface

    The Airmagic interface is easy enough to work with, you simply can drag and drop files or use the ‘open more’ command on top. All current drone manufacturers are supported (like Powervision, Kespry, Ehang, Parrot, Yuneec and of course DJi), including RAW files with the appropriate lens/sensor corrections.  It’s of course also possible to enhance jpeg files if you prefer this format, at the expense of a bit of image quality as always.

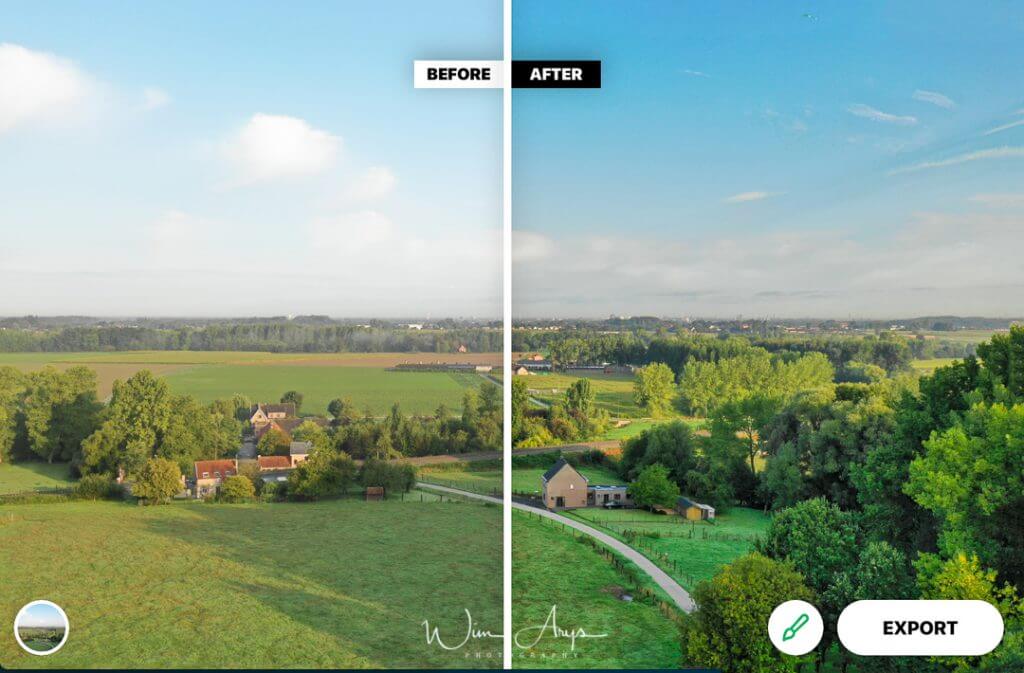
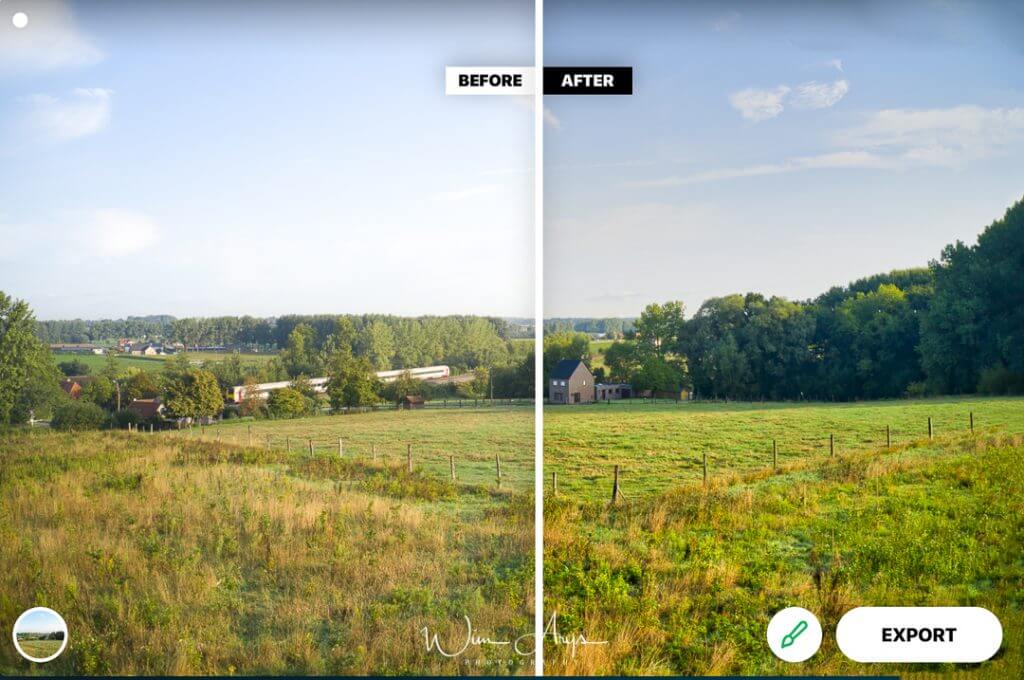
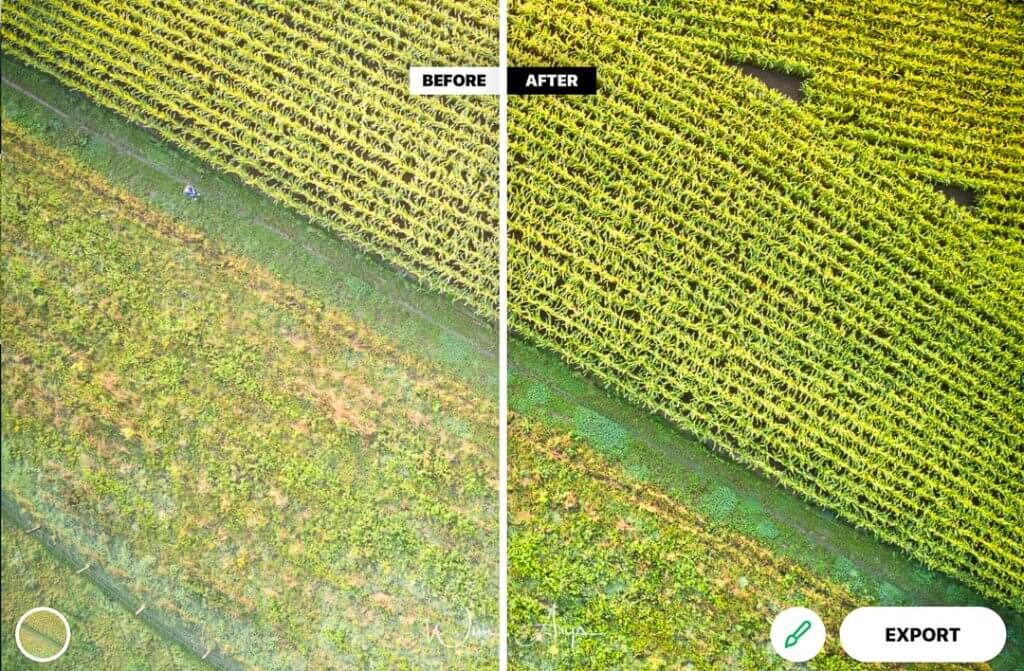
    Skylum Airmagic before/after

    You’ll see an export button on the lower right part of the screen. You can easily export to disk, email and even Smugmug. Export is also accessible through the main top menu, and files will of course be saved as Jpeg. Next to the export button; you’ll see a paintbrush. Clicking it will open a slider that allows you to dial in the the percentage of enhancement versus the original image. In my experience (with the DJI Mavic 2 Hasselblad) is that dialling the enhancements down to around 50-70% yielded the best results.

    Skylum Airmagic amount slider

    On the bottom left of the screen, you’ll find an icon that opens up the presets which are basically LUT based looks, but more on that later.

    How Skylum Airmagic works

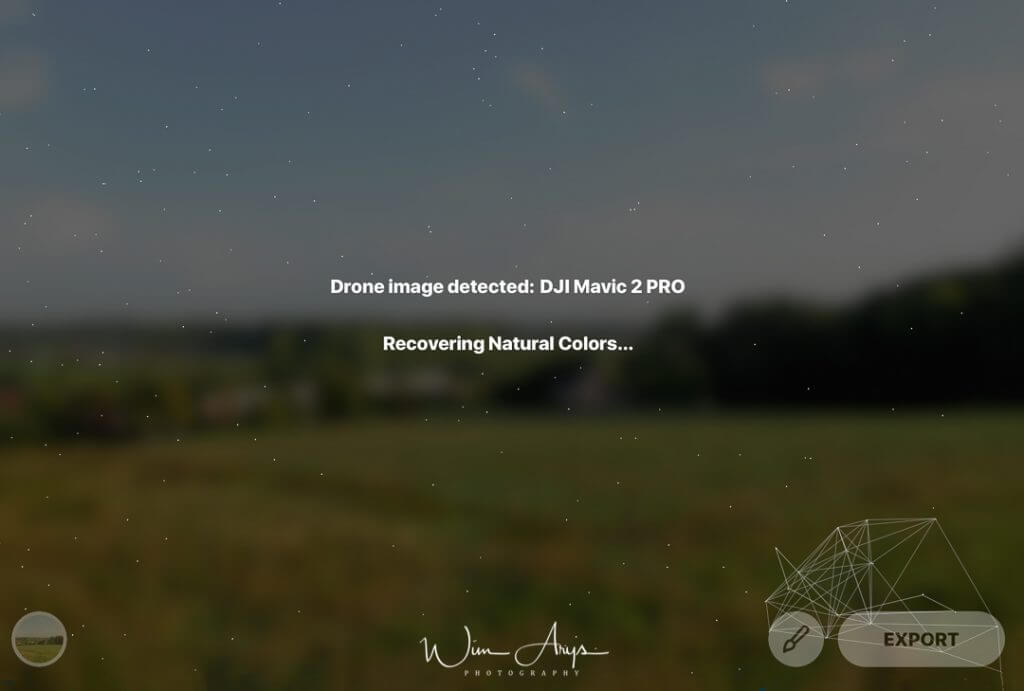
    After you’ve dropped an image on the interface, Airmagic will go to work and analyse your particular photo. Besides judging exposure, contrast, color balance, saturation and perceived sharpness, it will determine where the sky is, if there is foliage in the picture and any other distinctive features. Now this is the point where the artificial intelligence will kick in and make some decisions for you. Perhaps the analysis of thousands of images has revealed that generally people like grass to appear more greener and skies more saturated than your sensor renders them. Or perhaps noise reduction needs to be applied after automatic sharpening.

    Skylum Airmagic review

    Airmagic can also detect and eliminate atmospheric haze which can hide important details and is very common in drone photos.  And automatically adjust levels across midtones, highlights, and shadows to achieve deeper, richer colors for awe-inspiring results.

    Airmagic styles

    Besides these automated photo fixes and enhancements, Airmagic also currently offers 5 styles. You can see these styles as different looks for your images, like a LUT for colour corrections in movies.

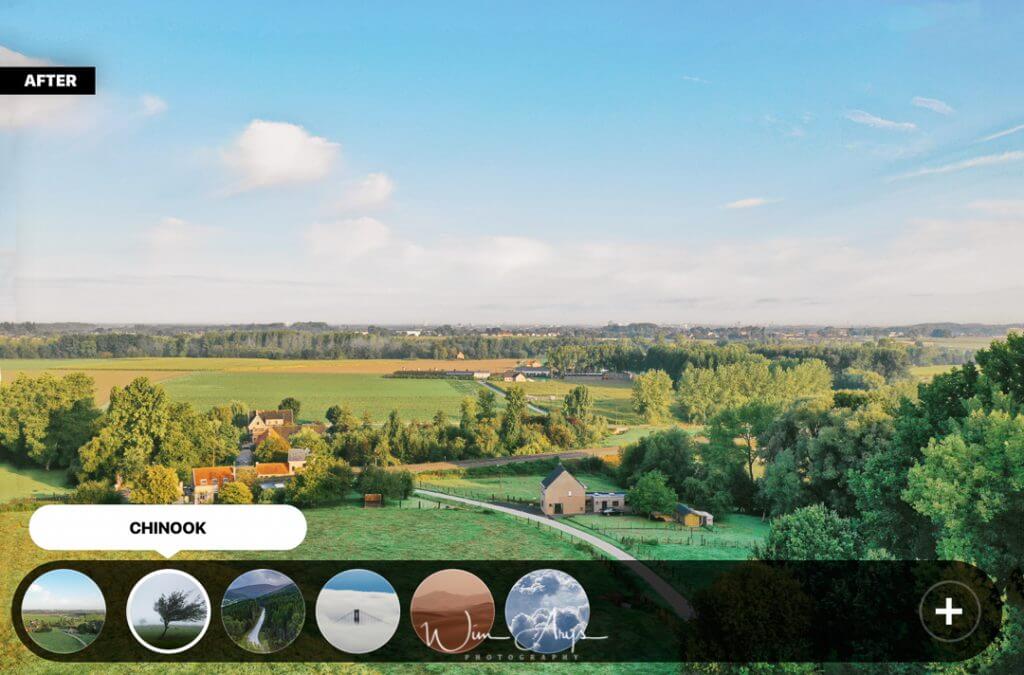
    Chinook Style

    Skylum Airmagic chinook preset

    Chinook is one of my current favourite styles that adds some saturation and contrasts to your image without getting that over processed look you often see in drone images. remember to tone down the enhancements with the paintbrush slider on the bottom right to around 60%.

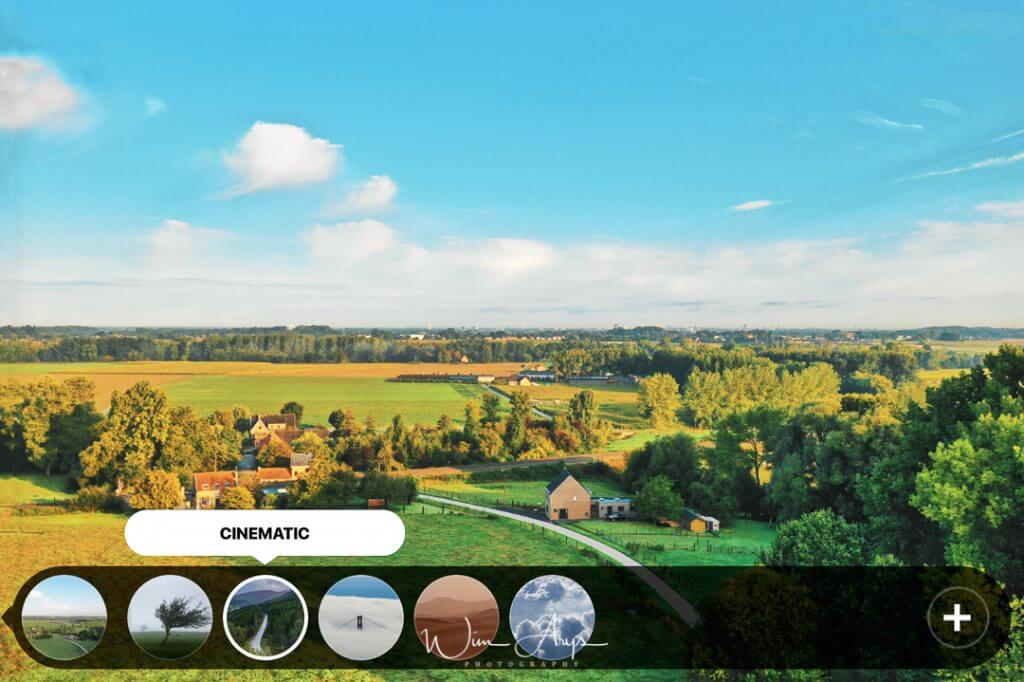
    Cinematic Style

    Skylum Airmagic cinematic preset

    Cinematic transforms your image to a more teal and orange look, which is still popular in film grading. A pity that the colours can become a bit oversaturated with this look.

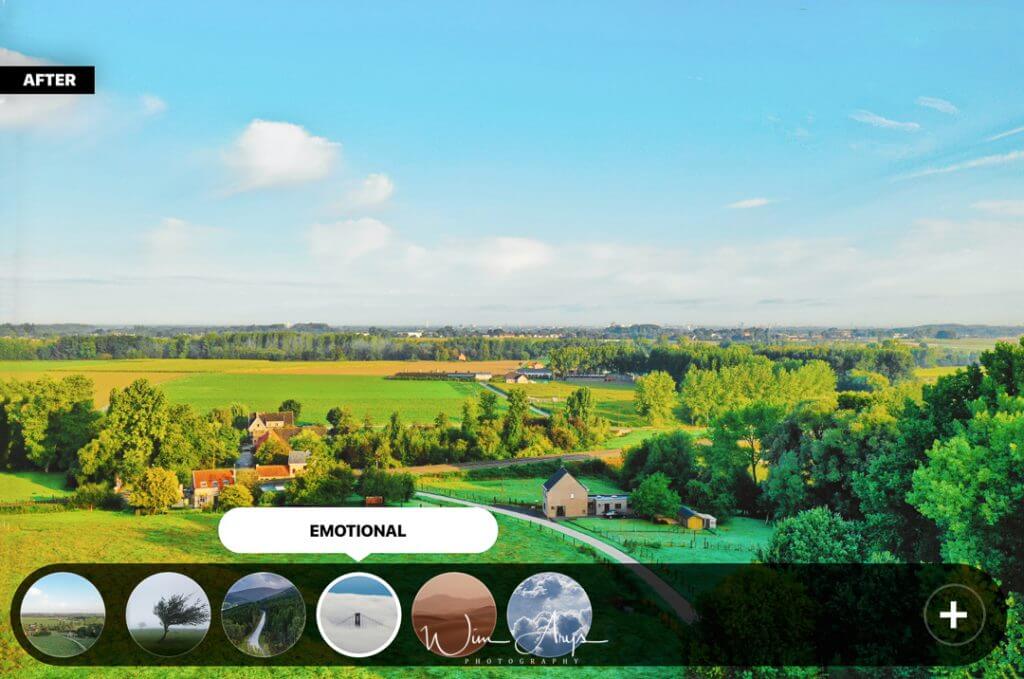
    Emotional Style

    Skylum Airmagic Emotional preset

    Perhaps better suited for seascapes or winter landcapes, the Emotional presets adds a lot of saturation and a slight green colour shift to your aerial photos. Not my personal favourite, but perhaps I just haven’t found the ideal photo match for it.

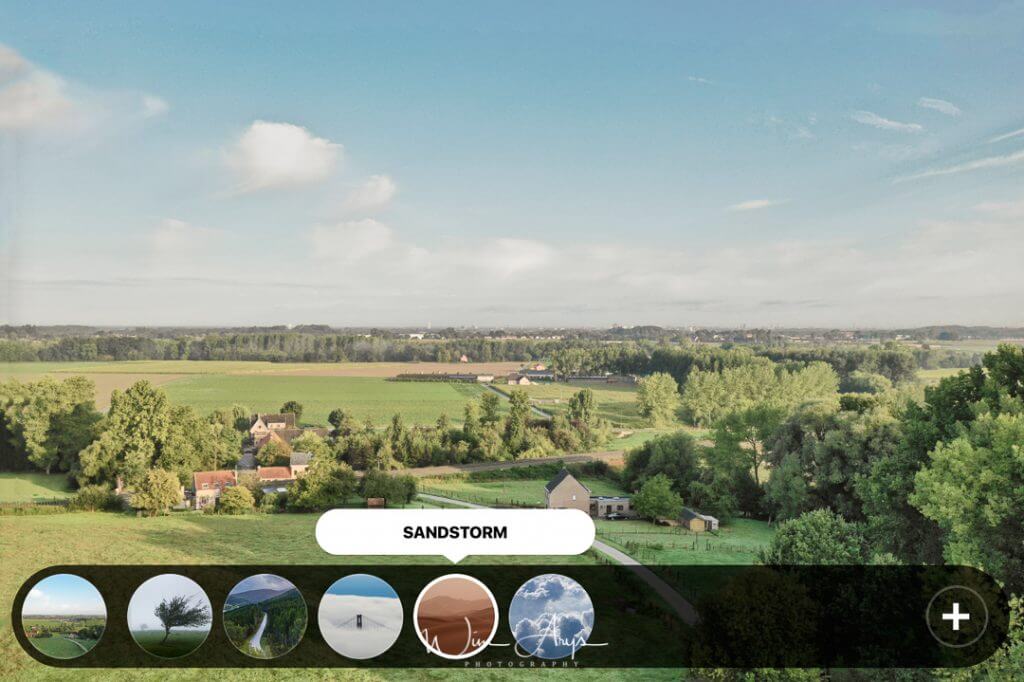
    Sandstorm Style

    Skylum Airmagic Sandstorm preset

    Sandstorms stays pretty close to the original image, perhaps even desaturating a bit while adding some more yellows to the greens and a bit of teal in the sky.

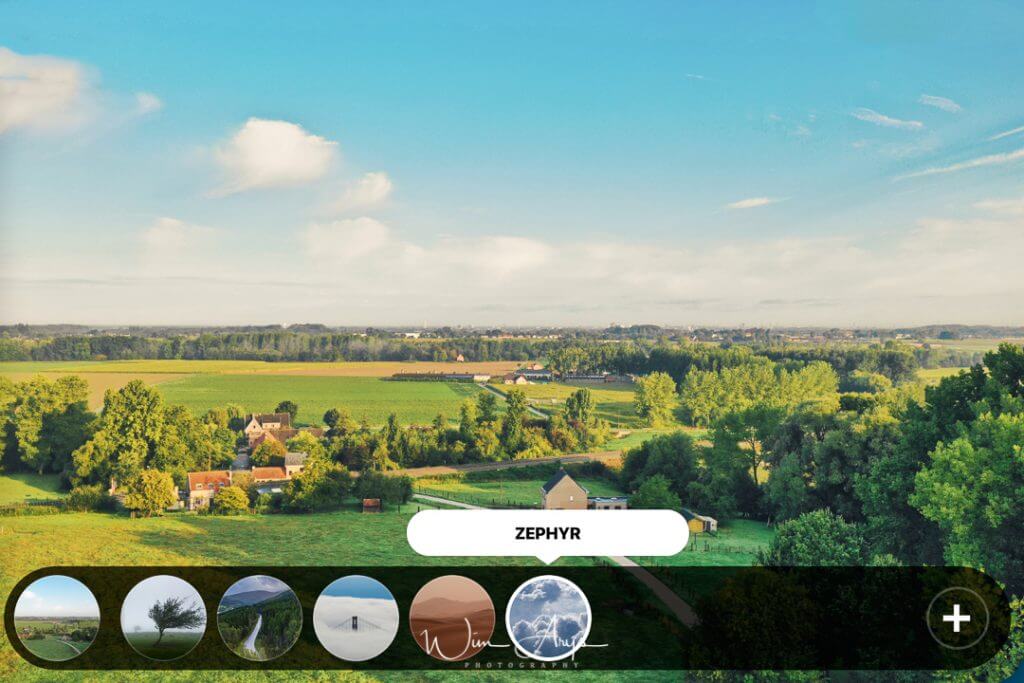
    Zephyr Style

    Skylum Airmagic zephyr preset

    If you want to make your images glow like a precious gem, Zephyr will probably be your look of choice. It’s great for adding depth to the often flat drone photos as well as making the sky appear warmer.

    Computer requirements

    Airmagic works both as a standalone application as well as a plugin in  Lightroom, Photoshop and even Apple photos. Since this is not a large or processor intensive app, a Mac from 2010 or newer with a minimum of 4GB of Ram and 4GB disk space will work well. If you’re a windows user, you’ll need Open GL 3.3 or later and a Intel® Core i3 or AMD Athlon® 64 processor with a 2 GHz or faster processor.

    Conclusion

    Skylum Airmagic is an interesting proposition for drone and aerial photographers. Thanks to the artificial intelligence engine with a database of thousands of drone images, this small and inexpensive app will make short work of batch processing your photos captured with any of the drone manufactures out there. Thanks to the RAW support, it’s not only possible to automatically enhance Jpeg, but also save them as TIFF for additional tweaks in Adobe Lightroom or Photoshop.

    Skylum Airmagic review

    The Airmagic interface is simple enough for even a beginner as you can simply drag and drom your photos on the app. This image will then be analysed and automatically enhanced with added sharpness, clarity, depth and dehazing. It’s possible to tone down these enhancements (I do) with a simple slider as well as add a colour grade with the LUT based styles/ in the left hand corner.

    If you’re looking for a one stop application to automatically and intelligently enhance your images, I would suggest taking a look at Skylum Airmagic. It(s the only application of it’s kind out there, and it does not cost an arm and a leg.

    Purchase, coupon code and availability

    Airmagic is now available for purchase from the Skylum website here. A basic licence costs 39 euro, the creative edition (including Premium styles) costs 41 Euro and the Business edition (with 5 licences) costs 89 Euro. You can use the coupon code “Wimarysphotography” for a 20% discount.


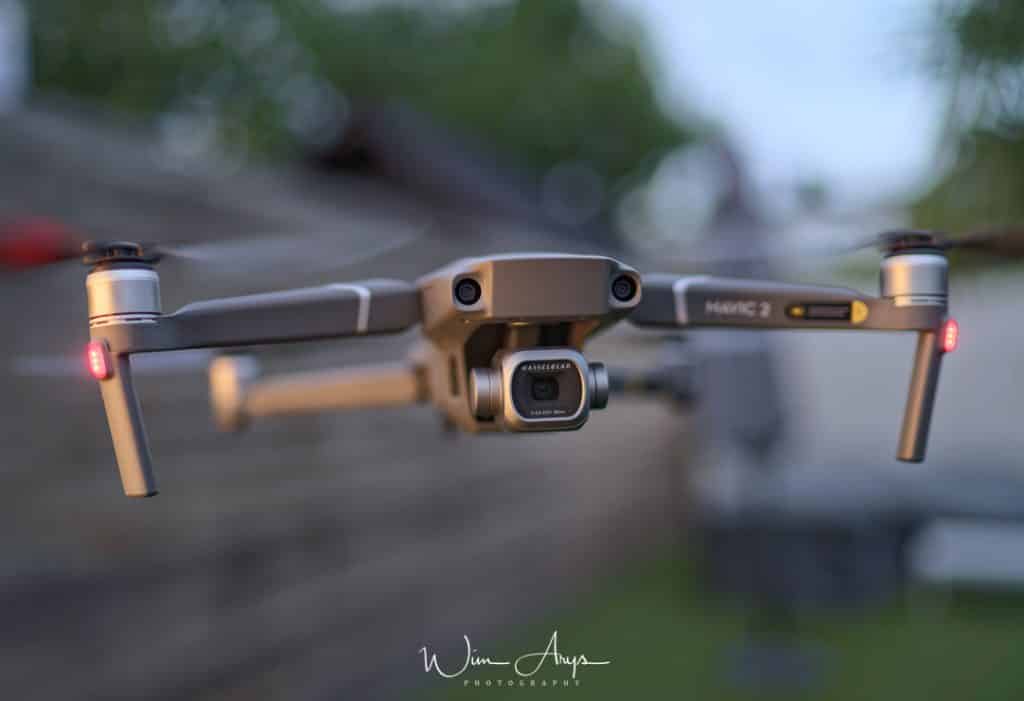
  • Why not to buy the DJI Mavic 2 Pro Hasselblad for photography

    Why not to buy the DJI Mavic 2 Pro Hasselblad for photography

    Introduction

    I’m sure that many photographers are keen to move into the field of aerial drone photography. If you’re one of those people, the DJI Mavic 2 Pro might have caught your eye recently. This new drone from market leader DJI features a Hasselblad designed L1D-20c camera with 28mm lens and a 20 megapixel 1 inch Sony sensor, the same as featured in the original Sony RX100. Interesting facts and features on paper, but let’s see if this holds up in real life shooting.

    DJI Mavic 2 Hasselblad for photography review

    A bit of Hasselblad and DJI history

    Hasselblad does not have the best track record over the last decade. Although no one can call their pedigree into question (they where the first camera on the moon after all), they’ve made a couple of big mistakes in the last years. The first was their venture into the full frame sensor market, which consisted of basically rebranding Sony’s Alpha range of cameras and lenses, and selling them at a considerable markup. These cameras ended up being considerably discounted and at onetime you could get some even at a lower price than The Sony equivalent. Their second gamble that did not pay off was the development of the first medium format mirrorless camera called the Hasselblad X1D. By the time that camera got to market, Hasselblad was virtually bankrupt. An external investor was urgently needed and DJI stepped in and essentially saved Hasselblad from bankruptcy. The first result of this merger is the development of the Dji Mavic 2 Pro with a Hasselblad designed L1D-20c camera.

    DJI Mavic 2 Pro Hasselblad 28mm lens

    Exactly which parts of the L1D-20c camera design was done by Hasselblad is not exactly known. The one inch 20MP sensor however is made by Sony (the biggest sensor producer in the world) so Hasselblad probably has at least some input into the choice of lens focal length. I’m sure designing a camera drone is challenging and there are many factors to take into account.

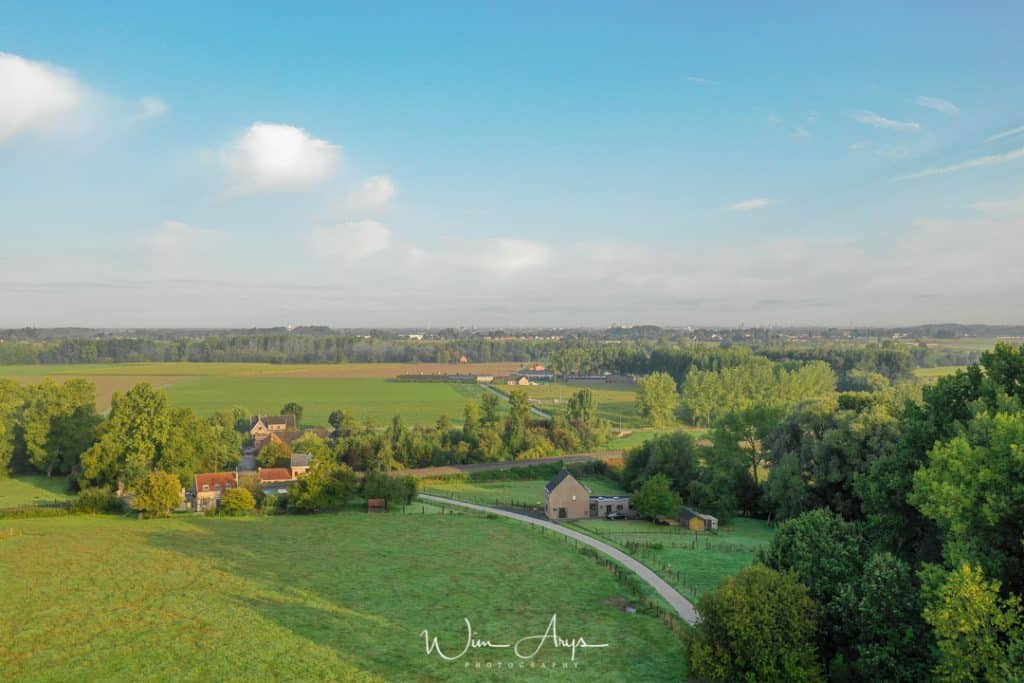
    DJI Mavic 2 Hasselblad landscape

    Perhaps 28mm was a good choice because there was no chance of the blades getting into the frame, or maybe it was deemed a good match for the sensor dimensions. For me however it was an extremely bad choice. 28mm is just not wide enough for that satisfying landscape photo look and too wide to get a traditional 35mm field of view. Images just look awkward and you always feel like stitching images together.

    DJI Mavic 2 Pro Hasselblad sharpness

    DJI Mavic 2 Hasselblad for photography review
    full image

    With an aperture range ranging from f/2.8 to f/11, an image crop of 100% at f/8 does reveal a relatively crips and sharp center image.

    DJI Mavic 2 Hasselblad for photography review
    center sharpness

    A closer (100% crop) look at the left upper corner however reveals a very soft corner performance, even at f/8. If this was a handheld camera with prime lens, you would not be pleased at all.

    DJI Mavic 2 Hasselblad for photography
    corner sharpness

    DJI Mavic 2 Pro Hasselblad lens flare

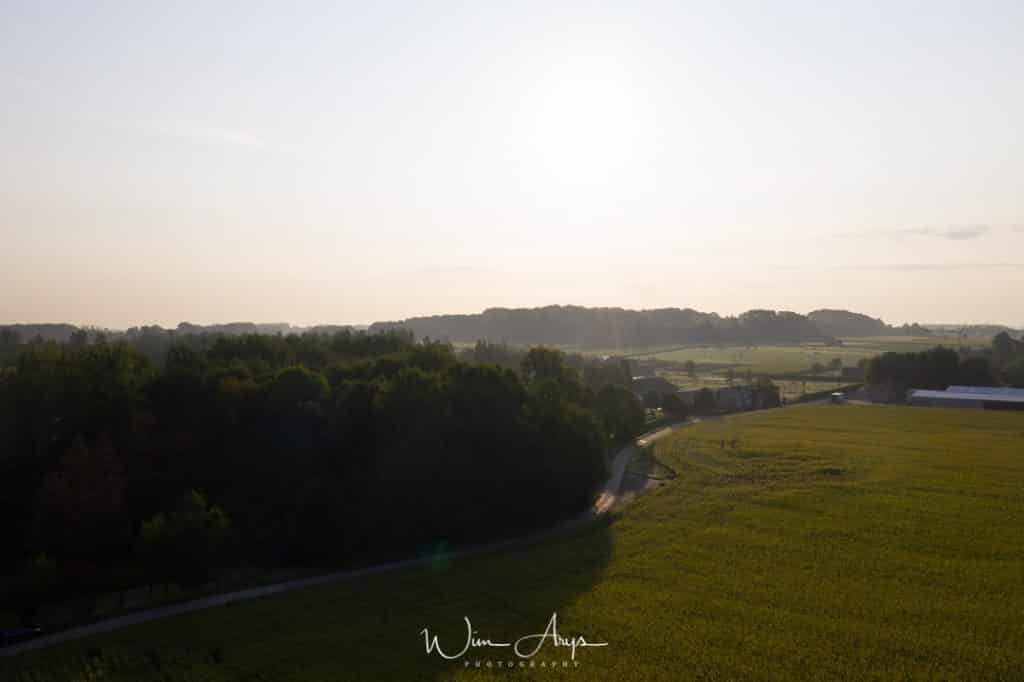
    Sunsets and sunrises are the times when you’ll be most likely to launch your drone for what you’d hope would be spectacular shots. Lens flare is one of the factors that could ruin these shots, as you’ll likely have the sun in the shot.

    DJI Mavic 2 Hasselblad for photography

    Disappointingly, the 28mm Hasselblad (?) designed isn’t very resistant to flare. And even worse is that the flare does not look eye-pleasing. It’s a bit too much to ask for nice sunstars in this compact form factor, but flare resistance seems to have been totally overlooked.

    DJI Mavic 2 Pro Hasselblad dynamic range

    A one inch sensor is about 5 times larger than the largest sensor found in a smartphone. A larger sensor generally means an increase in dynamic range and less noise at higher ISO levels. In case you’re not familiar with this concept, the less light you have, the higher your ISO number will be. Your sensor output is basically boosted from the base ISO of 100. The side effect of this boost is added noise in your image.

    Now sensor technology has improved over the last decade, with new designs like a BSI (backside illuminated) and stacked sensors to improve noise and DR even in these smaller sensors. Unfortunately, DJI made the decision not to use these new designs, but instead went for a first or second generation Sony 1 inch sensor. This is equivalent to what you get in The Sony RX100 or RX100 Mark 2.

    DJI Mavic 2 Hasselblad for photography
    original DNG
    DJI Mavic 2 Hasselblad for photography
    highlights turned down and shadows boosted to a maximum

    These cost cutting decisions have resulted in a less than ideal image quality with visible noise even at base ISO and a very mediocre dynamic range.

    DJI Mavic 2 Pro Hasselblad color science

    As part of the Hasselblad collaboration in the design of the DJI Mavic 2, the L1D-20c camera uses Hasselblad’s Pro Natural Colour Solution (HNCS). I wonder if anyone has ever heard of this before, I certainly have not. It’s true that Hasselblad is know for their quite neutral and realistic color rendition, so perhaps they’ve made up a name for it now.  In regards to “neutral color” however, I’m sure you’ll be disappointed too. Auto white balance in general does not seem too far off, but even at lower ISO’s, the colors do need a lot of work in post processing to look neutral and realistic. A pity.

    DJI Mavic 2 Hasselblad for photography

    Conclusion

    Are you looking for a fun and cool drone to plain around with in the weekends? Or are you looking for a professional photography tool to launch yourself into the world of drone photography? If you’re in the first category, I’m sure you’ll have lots of fun with the DJI Mavic Pro 2. If you are looking for a drone for professional photography, you’ll be very disappointed. Why?

    • A 28mm lens is not wide enough for landscape photography.
    • the 28mm lens is prone to flare, not ideal for a device often used at sunrise or sunset.
    • Although the center frame looks sharp throughout the aperture range, the corners never really catch up.
    • The 1 inch Sony sensor is a cheaper, older design with high noise levels and mediocre dynamic range.
    • the 28mm lens is prone to flare, not ideal for a device often used at sunrise or sunset.
    • Colors need a lot of work in post processing despite the Hasselblad HNSC colour science.


  • Anthropics PortraitPro Body 3 review and tutorial

    Anthropics PortraitPro Body 3 review and tutorial

    Introduction

    For those of you not familiar with the company Anthropics, they are the ones behind the very successful Portrait Pro plug-in for Adobe Photoshop. PortraitPro Body is one of their latest plug-ins, made to basically make your male or female subjects look slimmer or more muscular. Many of the face/skin retouching features of the face retouching plug-in Portrait Pro 17 are also available in this plug-in, making it a one stop retouching solution. Amazingly, most of these processes are fully or at leat semi automated and actually look very realistic. We’ll have a look at all the features/functions in this run-through.

    PortraitPro Body 3 interface

    PortraitPro Body 3

    I’ve been using Portrait Pro since the very first version, and PortraitPro Body 3 has improved massively since then in terms of speed and usability. In version 2 for instance, it was still necessary to manually draw the skeleton and figure outline.Now however, this is all automated.

    PortraitPro Body 3

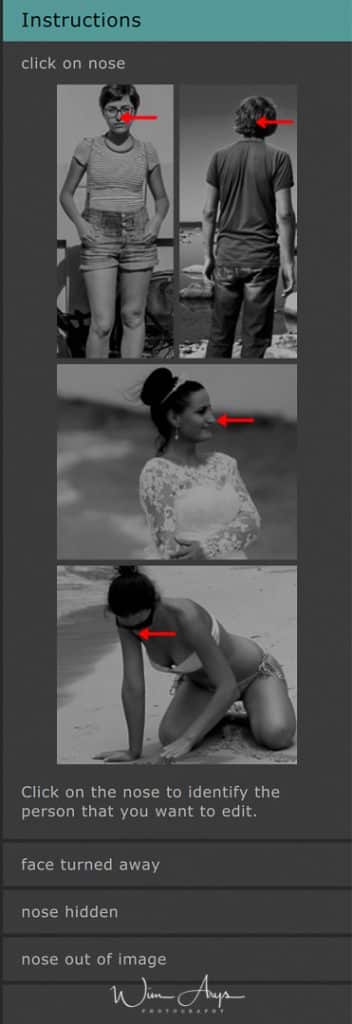
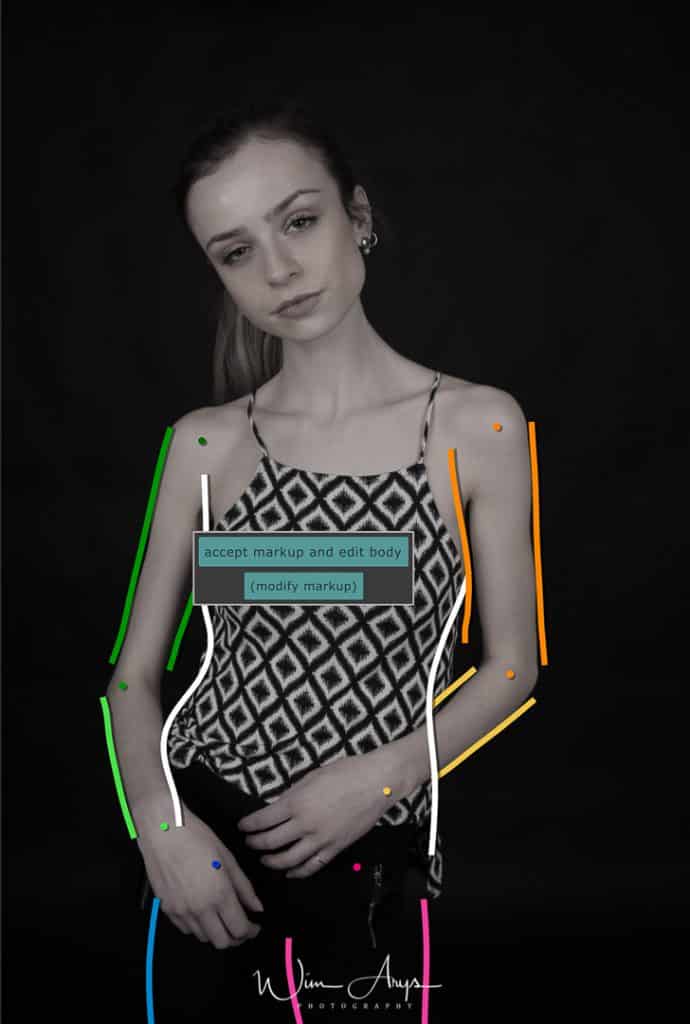
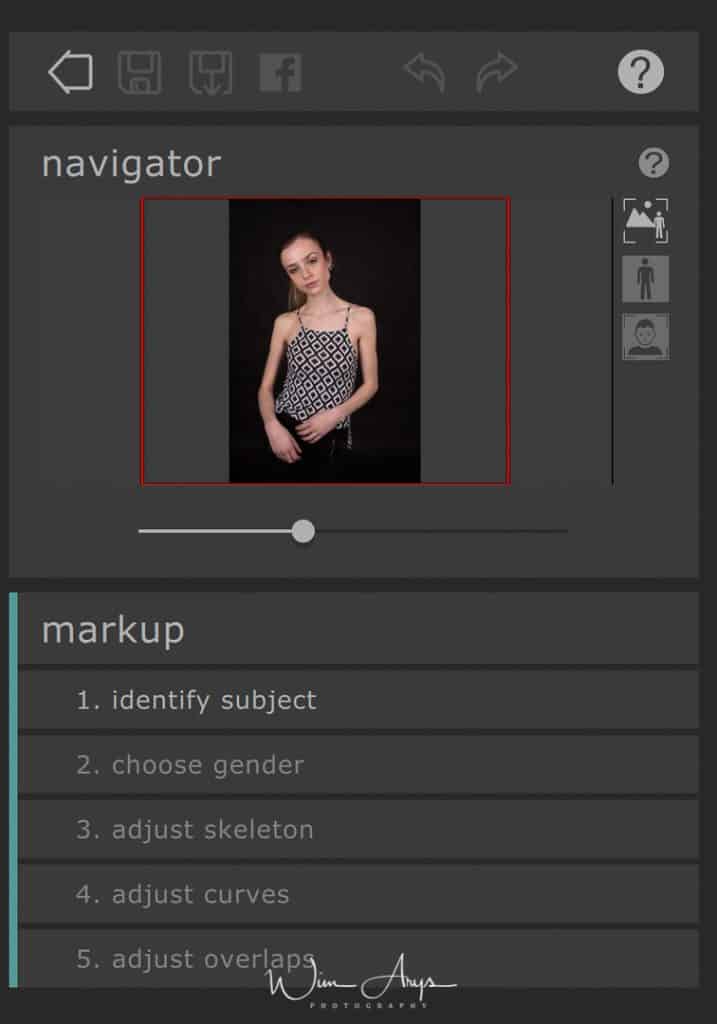
    You only need to click on the nose, select gender, and the software will automatically find the face, body and the curves. It’s of course possible to edit these curves, and at times it’s still necessary especially with difficult poses, but it’s definitely a major improvement and time saver over previous versions.

    PortraitPro Body 3

    You’ll notice the navigator on the right of the interface that will tick all the boxes of your markup progress. Once you’ve accepted or edited the body, you’ll automatically go to the shape sliders menu.

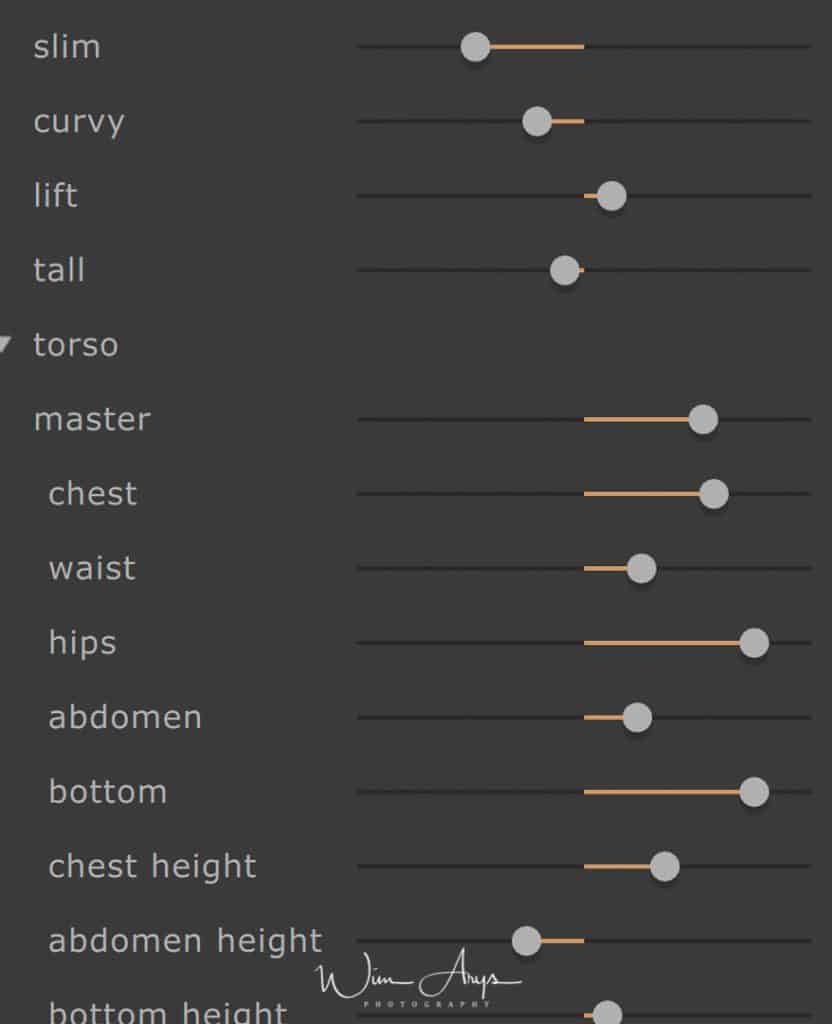
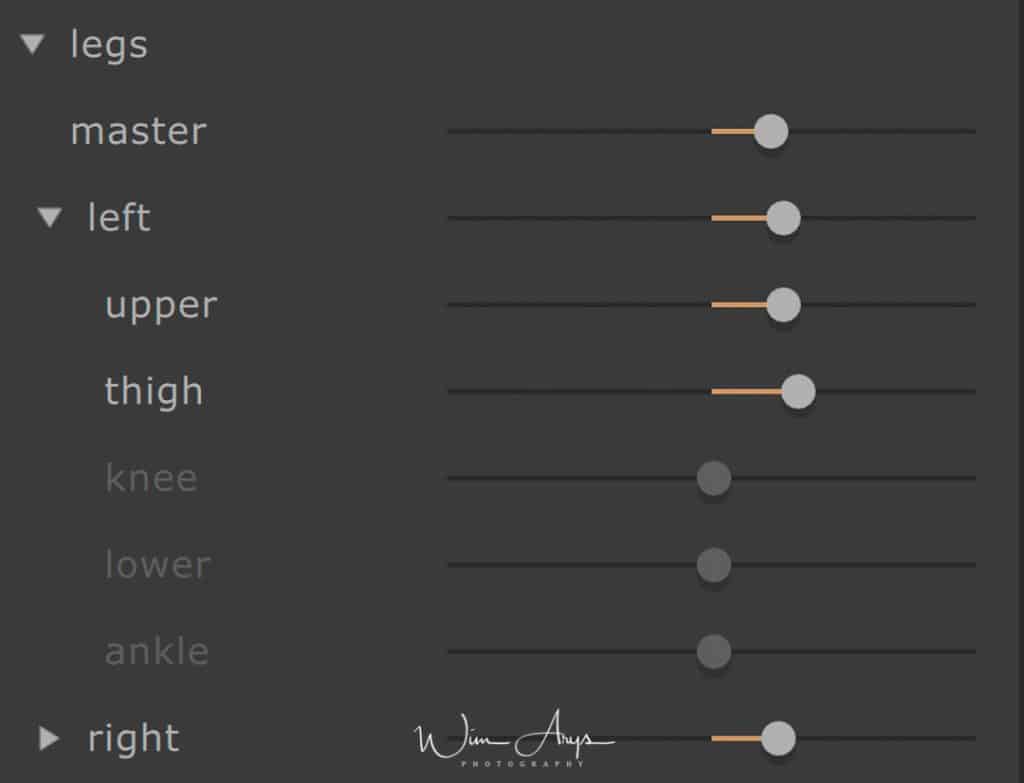
    Shape sliders Menu

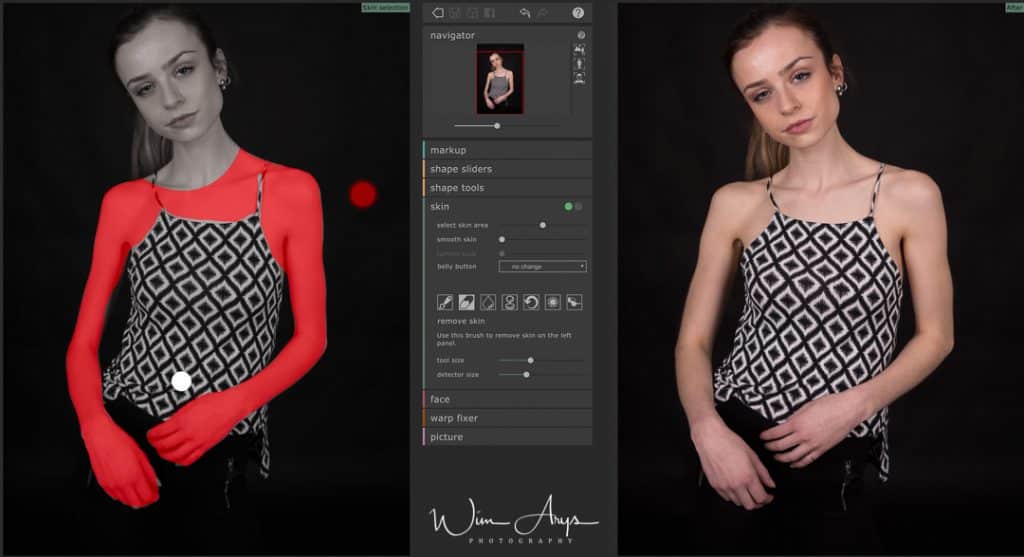
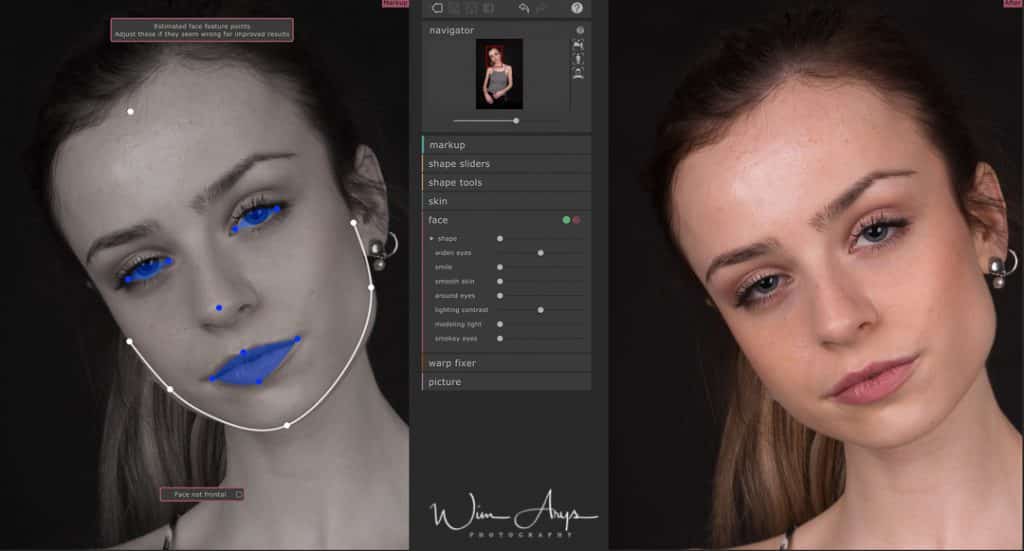
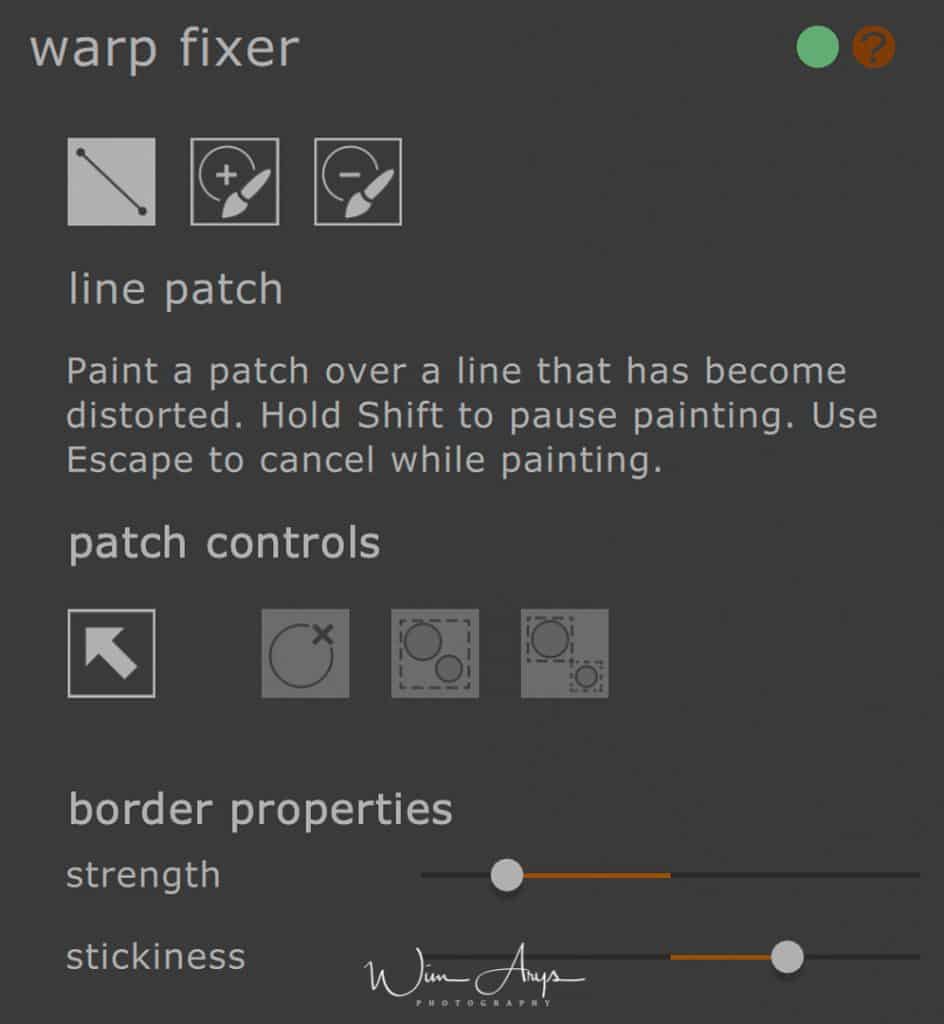
    PortraitPro Body 3

    You’ll find a main window where basic adjustments like slimming, curve, lift and make taller can be easily done via the use of sliders.  There is also the possibility to go for a deeper edit of each body zone from torso through arms, legs and full skeleton.

    PortraitPro Body 3

    Each body zone has their own sliders, so there are a lot of possibilities in terms of tweaking the size and shape of arms, legs belly etc. In my example, I’m actually making this model a little more curvy instead of slimming her. So yes this is of course a possibility too.

    Shape tools menu

    Once you’re pleased with the overall look of your model’s body, you’ll go to the shape tools menu.

    PortraitPro Body 3

    This menu adds another layer of flexibility to Perfectpro Body 3. It’s meant to add final touches to your previous edits, as well as handle specific issues that the particular body might have. Things that can’t be solved with the more general shape sliders menu. Functions include:

    • Edit Body: when this is selected, you can drag the outlines (or curves as they are called) to reshape the body. Pressing the Shift Button while dragging only makes local changes.
    • Edit Body Local: same as using the shift button while using “edit body”
    • Drag: Click and drag to warp a specific region. You can change the size and strength of your pencil. If you’re familiar with photoshop, you’ll quickly get the hang of this function.  And in case you’re wondering, yes PortraitPro Body 3 is in some ways similar to the Photoshop Liquify function. it’s easiest to see Photoshop Liquify as the little brother of this suite.
    • Expand: click and hold using the pencil to expand the region. Press shift and click to contract. Pencil size and strength are selectable
    • Contract: click and hold using the pencil to contract your selection. Press shift and click to contract. Again pencil size and strength are selectable.
    • Repair: click and hold to repair tears between two regions; This tool needs some work, I’ve had limited success using it.
    • Fix Bulges and Pinches: Move over any small bulges or pinches and click and hold to warp the red line towards the blue line. This tool needs some practice but it’s very useful to correct these problems.

    Skin Menu

    As I mentioned earlier, Portraitpro Body 3 can be seen as a one-stop beauty retouching application. Besidesadjusting your model’s figure, you can also smooth skin and even do things like changing the size of the belly button.

    PortraitPro Body 3

    The body skin will be automatically selected for you. You can off course add or remove the skin area. There are also brushes to smooth out skin, remove blemishes and brighten/darken (dodge/burn) skin areas. There is a general smooth skin slider too that works great and is I mentioned before you can do a virtual tummy tuck here as well as change the size (and type!) of belly button.

    Face Menu

    PortraitPro Body 3

    The next step is the face menu, where the software will automatically detect the skin, eyes, lips and outline. The range of options here is not as advanced as what you’d get in Portrait Pro 17, but the basic set of tools is here. It’s possible to change the shape of the face, widen the eyes, add a smile, smooth the skin, remove dark circles around the eyes, add a bit of contrast, add a modelling light and even some of the make-up functionality is here with the smokey eyes slider. I often think it’s easy to overdo the beautification process in PortraitPro 17, so I’m actually quite happy with what is on offer here in terms of face retouching tools.

    Warp Fixer Menu

    PortraitPro Body 3 Warp Fixer Menu

    You won’t need the warp fixer menu as much for studio shots, but once you start editing outdoors shots, with straight lines in your frame, you’ll notice that these will get bent by this stage. This of course is a byproduct of the edits to your model’s curves, and these can be corrected here. You can paint a patch over a line that has become distorted using this tool and the application will restore this to a straight line again. You can use a brush to reduce or expand these patches for an optimal result.

    Picture  Menu

    Once you’ve run through all these steps, you’ll end up in the picture menu. You don’t really need to use PortraitPro Body as a plug-in from photoshop as all the ‘basic’ functionality of say Adobe Lightroom or Camera Raw is also available here. Directly importing RAW is no problem, and you can make basic changes to exposure, white balance, contrast, vibrance and saturation right here. It’s even possible to convert your image to black and white or sepia. It’s basic, but it’s here if you feel it would improve your retouching workflow.

    Conclusion

    Portraitpro Body 3  has some interesting enhancements and improvements over previous versions. If you’re the type of photographer or retoucher that is looking for an easy and convenient way to slim or reshape people in your photos, Portraitpro Body is the application for you. This interesting piece of software from Anthropics allows you to make adjustments to a person’s body shape and face features, not unlike the Liquify feature in Photoshop. The main difference is that Portraitpro Body is more advanced and that you have more control over how the reshaping is done. There are also tools available to correct mistakes in geometric objects that might occur as a side effect of this reshaping of body contours as well as advanced portrait retouching tools. Not that Portraitpro 17 is now obsolete, but for basic beauty retouching you’ll have all the tools you need.

    PortraitPro Body 3 before
    before PortraitPro Body 3

    If you’re a version 1 or 2 owner, there is indeed a good reason to upgrade and that is the fact that the skeleton and contour settings of your individual model is now completely automated. This will save you a lot of time if you have a batch of images to process. Many other features also feel more polished and enhanced.

    PortraitPro Body 3 after
    after PortraitPro Body 3

    Are there any negatives? Sure, I you are using PortraitPro body 3 as a plugin you’ll still need to import and export your images to and from the application. Some tools like the edit curve feature seem a little bit buggy, even on my 2017 iMac. But I’m sure that will be fixed in a future update.

    I’m not a reviewer who is positive about every piece of software, but if you’re looking for an excellent tool to reshape the contours of your model photography, Portraitpro Body definitely deserves your attention.

    Portrait Pro Body discount code

    The kind people at Portrait Pro 19 have kindly provided me with a coupon code for 15% discount. Just go to the Anthropics website and fill in “WIM15” in the coupon field. This is on top of any other promotions that might be running!


  • Photolemur 3 review: highly recommended

    Photolemur 3 review: highly recommended

    Introduction

    Photolemur is an automatic photo enhancer that uses Artificial Intelligence to enhance your pictures, be it RAW files or jpegs. You can use it directly by drag and dropping images onto the interface directly or from applications such as Windows Photos, or both Mac and Windows versions of Adobe Photoshop and Lightroom.

    Previous versions and Skylum

    Photolemur has been around for a few years, and earlier versions weren’t really worth the expense as you can read here in my original Photolemur  1 and 2 review. 

    But since Skylum (or Macphun as it used to be called) bought this technology, a few important things have changed. No longer can we say that images look over processed. In fact the enhancements look very natural with a good degree of added sharpness, contrast and vibrancy. And a few new features that I will talk about later.

    RAW support

    Besides JPEG, TIFF and DNG files, RAW files are now also supported. If you are a castle free jpeg only shooter, I would highly recommend to start shooting in RAW camera format and quickly running everything through Photolemur 3 for a more polished and generally more eye-pleasing image.

    Photolemur 3.0 in use

    It’s a simple matter of drag and dropping  photos, or choose images using the ‘Import’ button in order to gain access to the advanced Photolemur third generation technology. After the logarithmic calculations have been made, you can view the difference between the quality of the original image and Photolemur’s edit. This by using the ‘before/after’ slider. To save the photo, simply click on the ‘Export’ button and choose any of the export options.

    New features

    What I especially like in this new and tweaked version of Photolemur are the Facial retouch and Eye enlarger functionalities. Let’s look at these functions and see what they do with real life images.

    Photolemur 3 review

    Facial Retouch

    The new Facial Retouch tool can be used to improve the look of skin and teeth and remove eye circles and wrinkles. You should look at this as a photoshop lite version which makes enhancements similar to what a plugin like Perfectly Clear does. It’s a method that retouches faces without getting a fake “photoshopped” or iPhone processed look.

    Photolemur 3 review
    before Photolemur auto processing
    Photolemur 3 review
    After Photolemur auto processing

    The results are similar to pictures taken of your subject on a good day, with enough sleep and feeling happy.

    Eye Enlarger

    Photolemur 3.0 also has a brand new Eye Enlarger tool. It can recognize and enlarge eyes for a more awake and I had my coffee look. Again, it’s not exaggerated at all but a slight enhancement that makes all the difference to the final picture. Your subject will be happy and so will you.

    Photolemur 3 review
    Before Photolemur 3.0 processing
    Photolemur 3 review
    After Photolemur 3.0 processing. Notice the subtle RAW lens profile correction.

    Photolemur Styles

    There are now 6 uniques styles available in Photolemur 3, which can be applied to your photos to make any image look perfect. Think of them as presets for a different look or feel, without the hassle of image processing software like Lightroom or Photoshop.

    We’ll have a look at the available presets. We’l start off with the original image, a horseman from the Nomad games held in Kyrgyztan last September 2018. Fantastic experience with lots of photo opportunities by the way.

    photolemur preset styles
    original image
    Evolve preset

    The Photolemur 3 “Evolve” preset adds more warm tones and increases both local and global contrast. It’s reminiscent of Kodak film from the early seventies.

    Photolemur 3 Evolve preset
    “Evolve” preset
    Apollo preset

    The “Apollo” preset takes us back to the mid sixties with a shift in both reds and greens. Great for blogging or instagram.

    Photolemur 3 Apollo preset
    “Apollo” preset
    Fall preset

    Another retro style preset, “Fall” increases saturation I the red channel for a warmer, vintage final image.

    Photolemur 3 Fall preset
    “Fall” preset
    Noble preset

    The “Noble” preset does not have such a big impact than many of the other presets, instead it decreases some saturation and flattens the tune curve like what would happen in analogue film.

    Photolemur 3 Noble preset
    “Noble” preset
    Spirited preset

    The “Spirited” preset is a more modern take on Fuji analogue film. Works well on some images though not on this particular one that already has lots of earth tones.

    Photolemur 3 Spirited preset
    “Spirited” preset
    Noble preset

    The “Mono” preset is currently the only black and white preset available. I think it’s a good idea to leaver the interface as simple as possible as Photolemur 3 should be RAW images on autopilot without too much hassle. The “Mono” preset is a nice B&W conversion though, with lots of contrast for a classic black and white look.

    Photolemur 3 Mono preset
    “Mono” preset

    New Export and batch processing functionality

    It’s now possible to export directly to SmugMug and seamlessly apply Settings to all images; for me, the big advantage is that you can make a preset and apply Boost, Styles, and Facial Retouch to a batch of images. Easy for your landscape shots or that series from the wedding.

    Photolemur 3 review

    Use Photolemur as a Windows Photos extension

    1. Checkmark Photolemur in System Preferences > Extensions.

    2. Open a photo in Photos and go to the editing screen by clicking the edit button.

    3. Click on “Extensions” and choose Photolemur.

    4. Photolemur will launch in extension mode. After the magic is done you can set the intensity of the adjustments using our opacity slider.

    5. When you’re satisfied with the result click on “Save Changes”. The edited photo will automatically return to Photos.

    Photolemur as a Lightroom and Photoshop plugin

    Yes. To use Photolemur as a Lightroom plugin! Simply  click on Photolemur – Install plugins during installation and you’ll see the plug-ins appear when you restart.
    Purchase and availability

    With a single license, you can activate Photolemur on one computer now with a 35% discount (only $22.99) for a short time here: Photolemur 3 Single licence.

    The single licence is now 30% off for a limited time for only $22.99, the family licence for up to 5 computers is $39 with discount here: Photolemur 3 family license (5 devices).

    And I can offer you a 30% off coupon code with this coupon:  WimArys30%off

  • mydigitaland.com camera store review: buy local

    mydigitaland.com camera store review: buy local

    mydigitaland.com camera store review: buy local

    Introduction

    As an independent mirrorless camera reviewer, I’m always looking for the best prices for high quality camera equipment. Google directed me to a site called mydigitaland.com as the cheapest price available for my camera of choice, an Sony A99 II. A quick google search resulted in a bunch of mixed reviews on this seller, but since the price was so low, I decided to give it a long term (1 year review). What follows is my personal experience.

    mydigitaland.com scam

    Ordering and delivery

    The ordering process at mydigitaland.com went very smooth. I opted for a PayPal checkout, thinking that in case of trouble I could count on their insurance. Delivery timesat digitaland are quite long, between 1 and two weeks, but at these prices who can complain. I later found out that these goods have to be imported to the United Kingdom from Hong Kong first. Hong Kong used to be a commonwealth protectorate and apparently the treaties in place still allow some native born locals to conduct business inside the UK without having to pay for import taxes and such. Since the UK is still a part of the EU (for now), shipping these items to any EU country is not illegal. Although perhaps not morally right, legally they are not breaking any laws.

    Arrival and condition of goods

    As I already mentioned, delivery can take up to two weeks because of the process involved, but the camera arrived safely and it new condition. The box appeared unopened and the camera unused. The Sony A99 Mark 2 was not the European model per sé, but except the PAL/NTSC standards and sometimes the operating language, there is no difference between models anymore. It was possible to change the standard English menu system to my native ‘Nederlands’ by the way, but I prefer to leave everything in English, in case I need to look something up online or even read my own guides as a refreshment course.

    Tamron SP 45mm f/1.8 Sony review
    the camera purchased at mydigitaland.com

    Warranty

    This is where it gets tricky. Stores like mydigitaland.com offer a limited one year warranty, and as I would discover even getting support for a year is at times problematic. Even though my camera arrived in a new like condition, after around ten months it started to develop an issue where every time I try format an SD card, I get the warnings “Image Database not ready”. Check this video:

    So I contacted Digitaland. They suggested that I would take my camera to a local repair center to get this fixed. They would in turn reimburse me for the cost of the repair. My local repair center actually refused to repair the camera because it is what they call a grey import and Sony does not support this type of purchase. I contacted mydigitaland.com again and all they asked me to send the camera to their Hong Kong warehouse at my cost, with the warning that they would decide if this was something covered by their warranty or not. I think I am smart enough not to go this route and instead write this piece to warn my readers not to purchase anything at mydigitaland.com

    Conclusion

    Even though you might be seduced by the prices of online stores like mydigitaland.com, you should remember that European or US laws do not apply when purchasing cameras, lenses or any other electronics from these stores. You are stuck with their own proclaimed warranty, and I believe it would be hard to even enforce that. You should also remember that these are what they call grey import items and are being imported through various schemes from Hong Kong without paying the normal taxes. Although these companies are not doing anything illegal, your local camera distributor and the international brand will not support you in any way.

    mydigitaland review mydigitaland.com scam

    I even had a case where I had a problem after 10 months and my local camera repair store would not even repair these grey import items! I was left only with the choice of sending my expensive Sony A99 II to Hong Kong, where mydigitaland.com would decide for themselves whether or not this would be repaired under warranty. Potential customers: be warned and think twice before buying here!!!