Category: camera equipment reviews

Category for all reviews of camera equipment like flashes, diffusers, cases, modifiers, straps bags, battery chargers.

  • Neewer NW860II hotshoe flash review

    Neewer NW860II hotshoe flash review

    Neewer NW860II hot shoe flash review

    Introduction

    Neewer is a Chinese camera accessory supplier based in Hong Kong. Most of their catalogue are rebranded OEM products, sourced from other Chinese camera equipment producers. Since virtually every electronic device is now produced in China, there is nothing wrong with that, as long as you get value for money and a decent support desk should anything go wrong.
    Neewer NW860II focus assist beam

    I’ll be looking at the Neewer NW860II (or mark 2) for Sony MIS (Multi Interface Shoe) in this post. You’ll find this exact flash under different brand names like Godox and Flashpoint in various parts of the world.
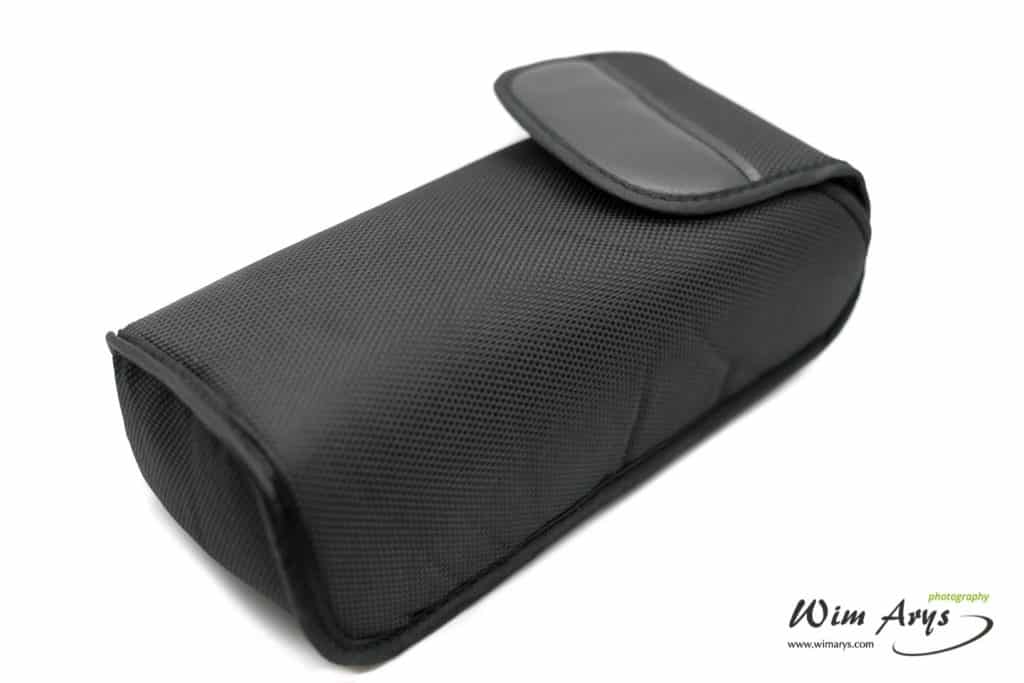
    Neewer NW860II carrying pouch
    The box comes with a high quality carrying pouch

    There is much to like here on paper. This is a powerful flash with a high guide number (GN) of 60, offers High-speed sync up to 1/8000th of a second, TTL (through the lens metering), a powerful built-in 2.4G ultra-long-distance wireless remote system for transmitting and receiving and to top it all off comes with a 2000mAh rechargeable Li-ion Battery that provides 650 Full Power Flashes with a Recycle time that is less than 1.5s.
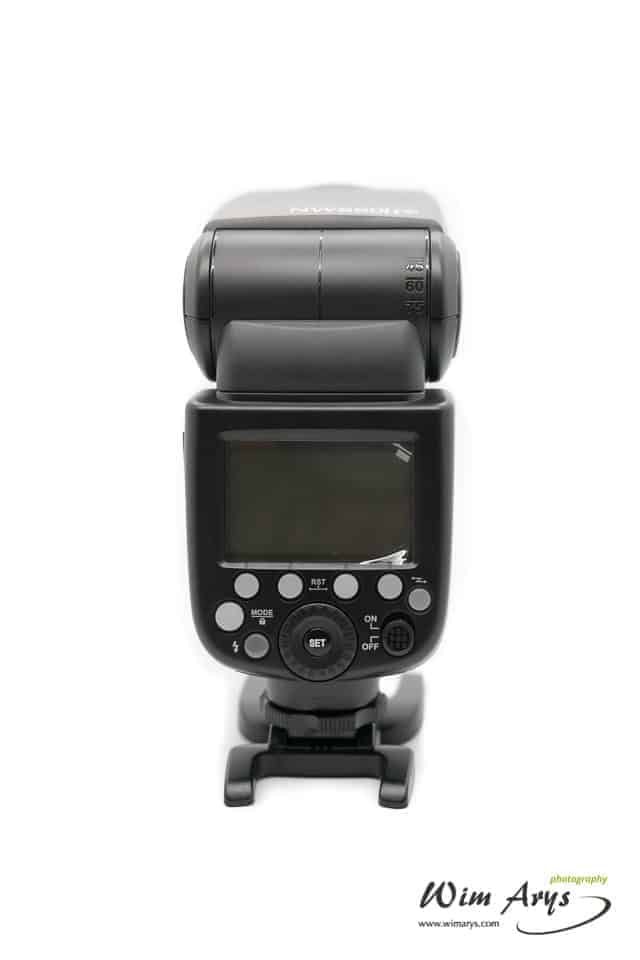
    Neewer NW860II product shot back

    Build

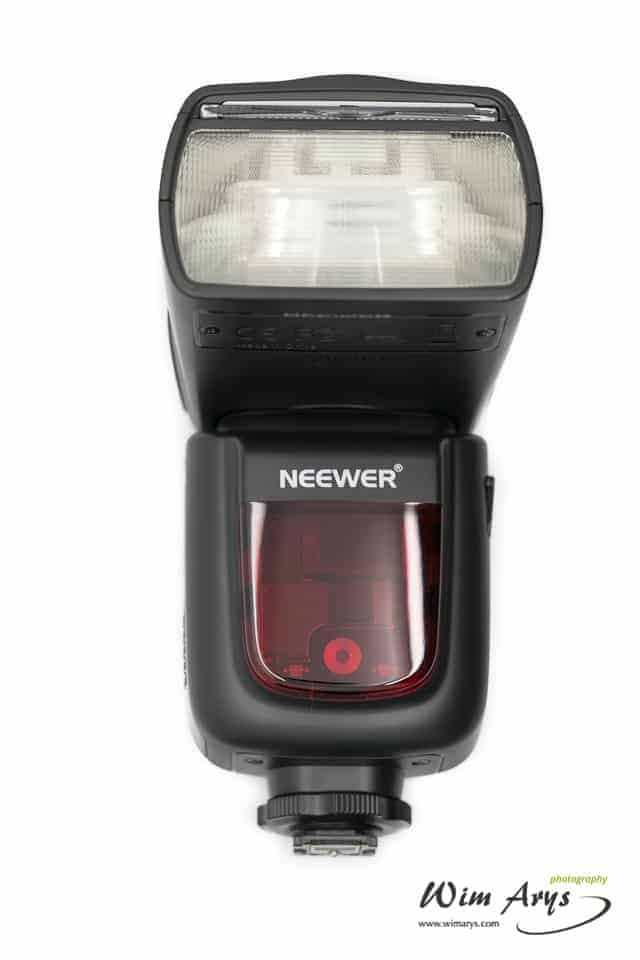
    TheNeewer NW860II is roughly the same size and weight as top Sony speed lights like the HVL-F60M. This isn’t a light flash, but there is no difference in weight when compared to ‘brand’ flashes costing four times as much. The build quality also looks equal to those top brands. Not a big surprise really as they are probably made in the same factories, or at least with the same quality control mechanisms. The buttons, switch, and wheel also feel quite feel durable.
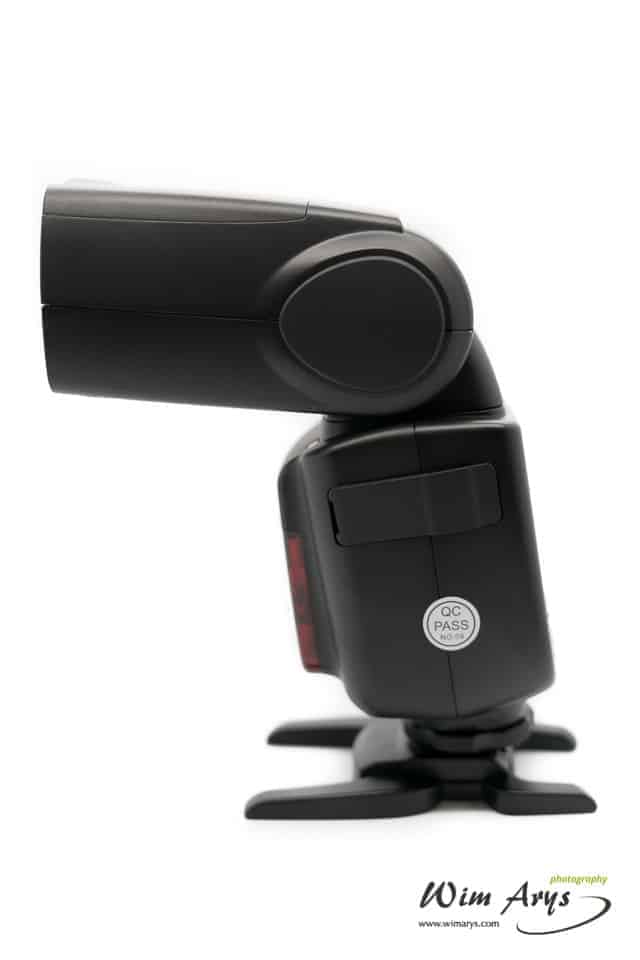
    Neewer NW860II product shot left side

    The foot is made of plastic and locks securely in the Sony MIS. I would complain about the plastic hot shoe, but I’ve had a Nissin, and Sony flash shoe break on me too It’s always better to break a flash foot (they are cheaper on often self-replaceable) than break the camera’s metal hot shoe itself.

    Battery

    I am used to flashes with AA batteries and these last for around 200-250 flashes. Recycle times do get longer too when they drain, so there is much to be said for a flash that comes with a powerful 2000mAh rechargeable Li-ion Battery. The manual states that you can get around 650 flashes with one fully charged battery and this is also what you can expect when using it in real life. Replacement batteries are also available at a reasonable price if you think 650 pops wouldn’t suffice for you. These are by the way the same as the Godox or Flashpoint replacement batteries.
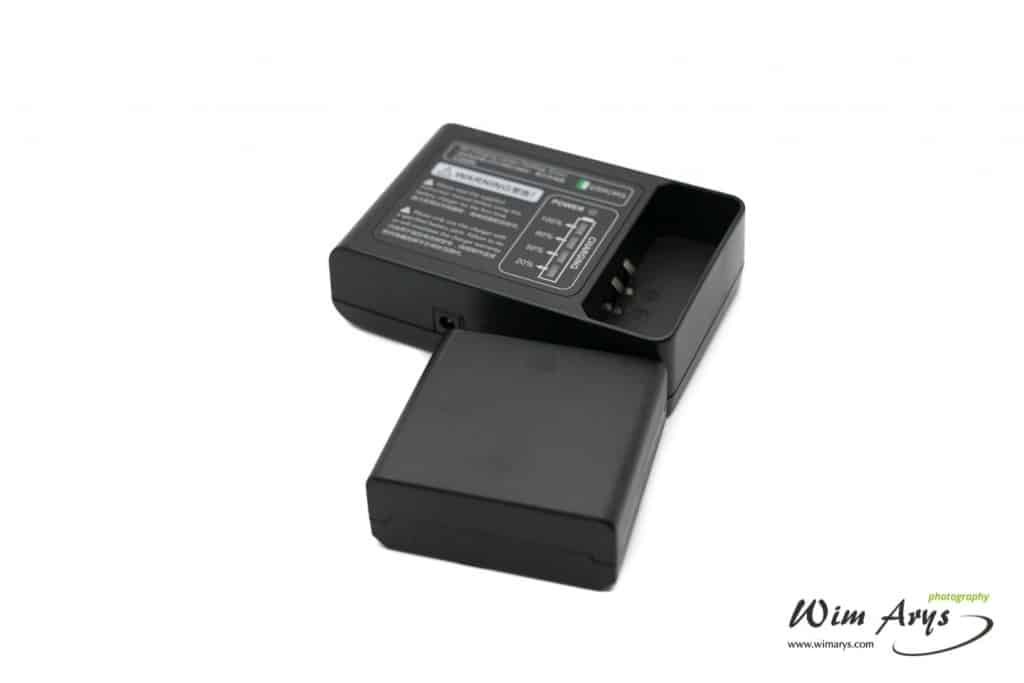
    Neewer NW860II battery

    One thing you won’t find on the Neewer NW860II is a port for external battery packs, but with a spare battery in your pocket, it’s not that difficult to switch them over during a full day of shooting.

    The lithium-ion battery gives you a very fast recycle speed of 1.5 seconds at maximum power, with AA’s you’d be getting recycle speeds of around two seconds, and that is when they are at full power. Excellent performance!

    Neewer NW860II image sample TTL HSS back illumination

    Power output

    Having compared the NW860II output to the Sony HVLF-60M at the same camera and flash settings, I can tell you that there is no difference in power output. It looks as though this cheap flash for Sony Mis performs just as well as a flash that cost three times as much.

    Usability

    This Neewer is a fully functional HSS and TTL flash. This allows for much creative freedom.

    Neewer NW860II image sample TTL HSS capadocia

    TTL or ‘through the lens metering’ means that the camera will decide what flash output is needed, taking into account your aperture and shutter speed. This works very well, just as good as you’d get with a Sony branded flash, so again no difference here.  This is an ideal system for wedding or event photography, where you don’t have the time to set everything manually, and want to get a decent exposure quickly. The metering process does involve a pre-flash to meter the effect that the flash has on the scene you are shooting. So don’t panic if you notice this, it’s not a synchronisation issue, it’s just the way TTL works.

    Neewer NW860II image sample TTL HSS off camera tips

    HSS or high-speed sync’ is another very useful feature. This allows the flash to sync to very high shutter speeds up to 1/8000 second. Say you’re shooting portraits on a bright afternoon and you want to stay at a large aperture with the use of flash, this is possible with HSS. If your flash is strong enough, you’ll even be able to overpower the sun using this system. I have decoupled exposure and flash compensation on my Sony A7rm2, meaning I can slightly underexpose to let the flash shine in certain situations. This means you can shoot an outdoors portrait like you would in a studio environment, eliminating all background distractions with a high contrast image as a result.

    Neewer NW860II image sample TTL HSS close-up

    The powerful built-in 2.4G ultra-long-distance wireless remote system allows you to either use the Neewer NW860II as a controller for other off-camera flashes or for it to be controlled by a wireless transmitter like the Godox X-1 or FT-16S. Yes, these particular OEM flashes are all interchangeable (at least the ones I have tested) and can be wirelessly controlled by each other. The only thing you need to make sure is that they all comply with the 2.4Ghz system, most of the time clearly marked in the literature. Who knew life could be so easy? Even better, the 2.4Ghz wireless system is very reliable even up to 100 meters, and I haven’t had any hiccups yet.
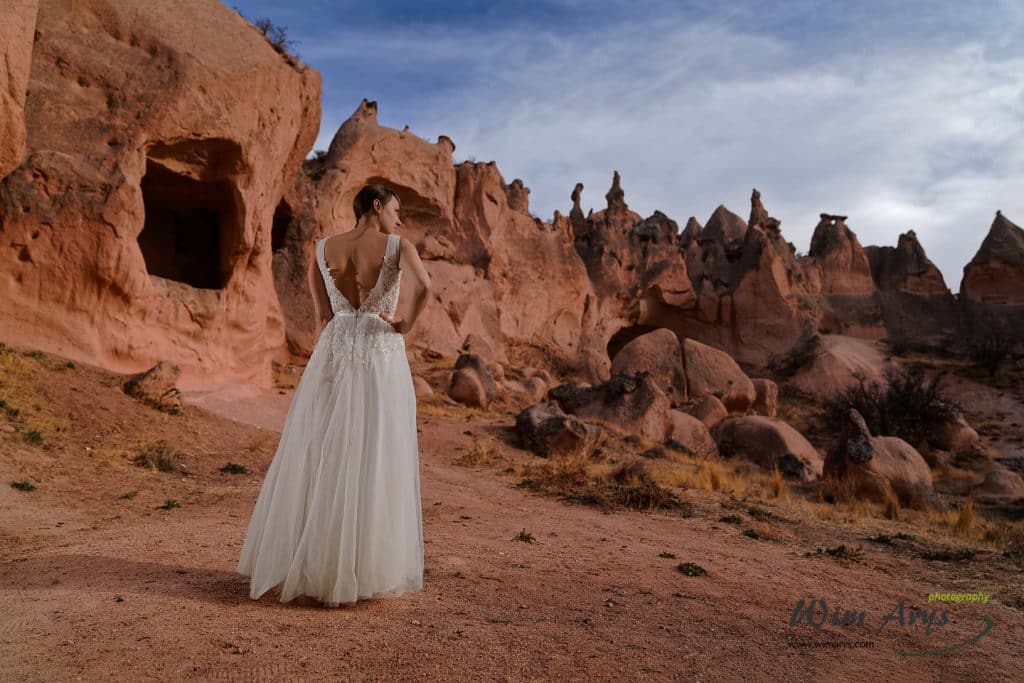
    Neewer NW860II image sample TTL HSS mars landscape

    Available Flash modes are TTL,M,Multi,FEC,Master,Slave, S1,S2. For TTL, you set it to the appropriate mode and fire away. With that neat little decoupling of flash and exposure compensation, I see no need ever to use manual. If you want to use it as a Master controller, the screen will turn from green to red when you scroll through the modes.

    Compatibility

    I’m testing the Sony MIS version here, but there is also a Canon and Nikon version available. Rumour has it that there might be a Fujifilm version coming in 2017 too. Even better, all these versions can be used together (though of course not on the respective shoe) for off-camera flash triggering with full control over all functionality including HSS and TTL metering.
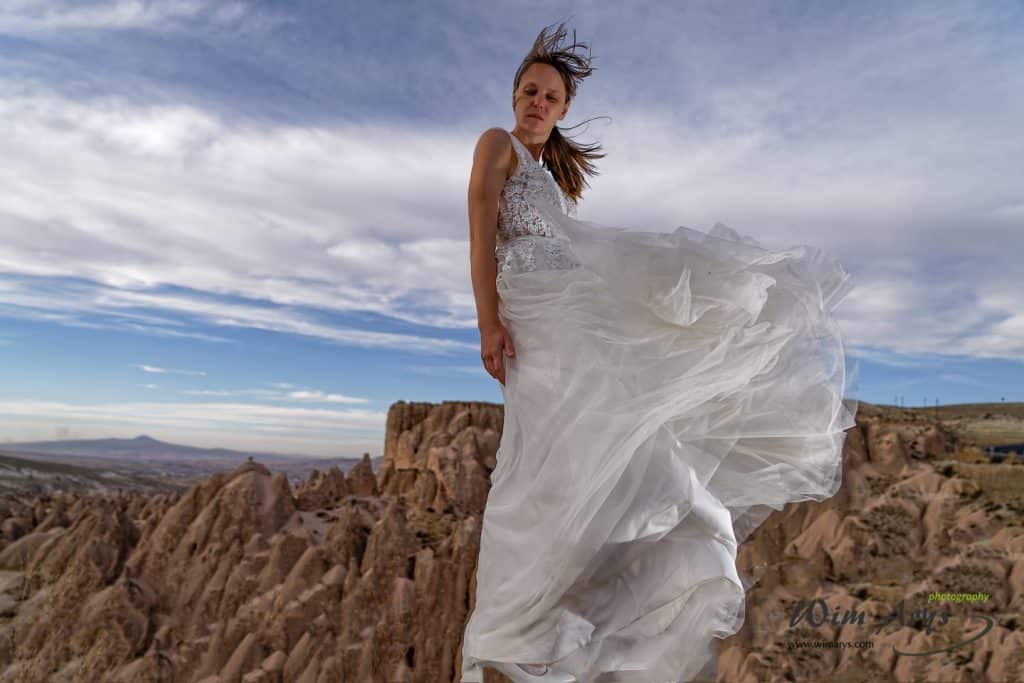
    Neewer NW860II image sample TTL HSS off camera

    Summary

    There is much to like in the Neewer NW860II. Let’s start with the high capacity rechargeable battery with a short 1.5 second recycle time for no less than around 600 flashes. Extra battery packs can be bought quite cheaply for around 40 Euro-30 dollars. The backlit interface is also quite clear and concise, although it could take a few times to wrap your head around what is where exactly. The build is quite decent and up to par with brand flashes costing a multitude of what this one costs. The only thing I am not crazy about here is the quality of the flash foot itself. But as I stated earlier, it’s better to break your cheaper flash foot than the shoe on your camera.
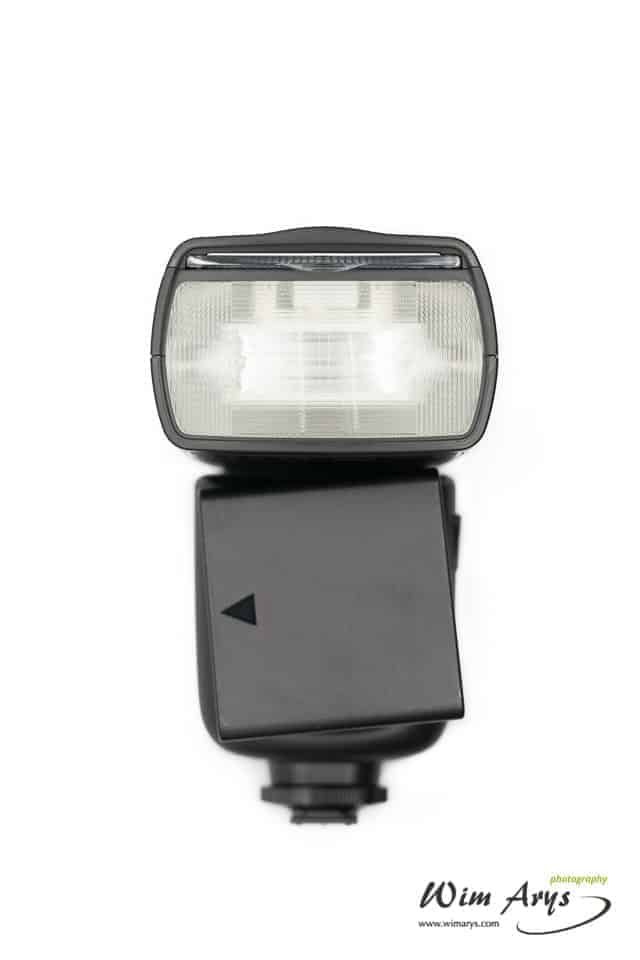
     

    Neewer NW860II flash and batteryAll functionality you could ask for in a modern flash is here. TTL metering for Sony cameras, high-speed sync up to 1/8000 sec and a powerful 2.4 GHz wireless system that allow the NW860II be used as either a transmitter to control off camera flashes or a receiver.  The best part is that it is compatible with these flashes under the other OEM brand names like Flashpoint or Godox.



  • Miller & Shneider eyecup for Sony A7x review

    Miller & Shneider eyecup for Sony A7x review

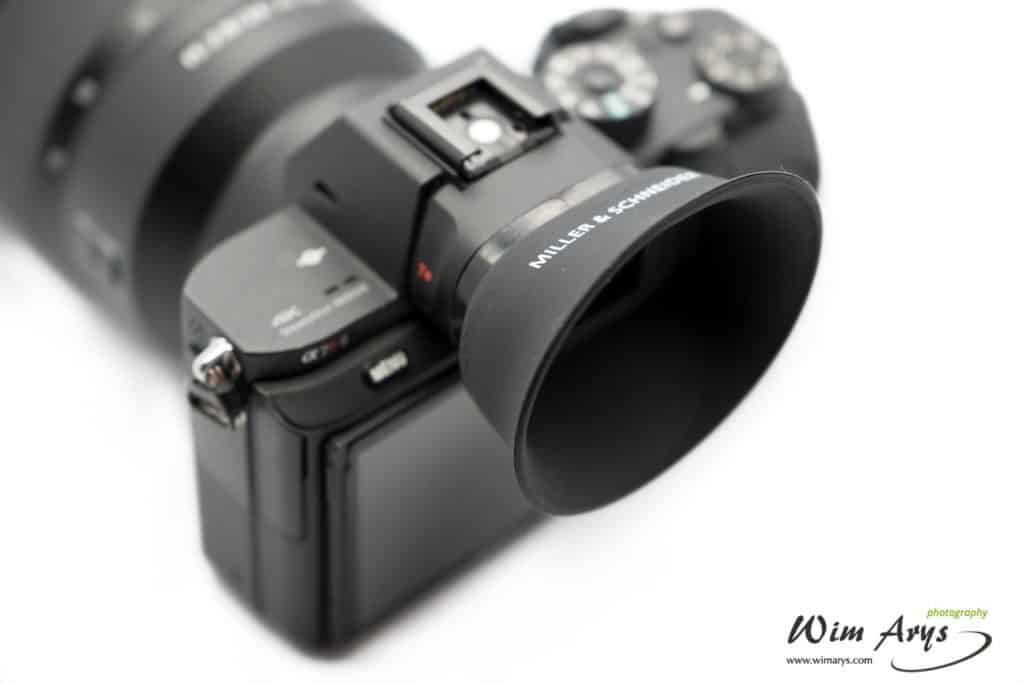
    Miller & Schneider large eyecup for Sony A7x review

    Introduction

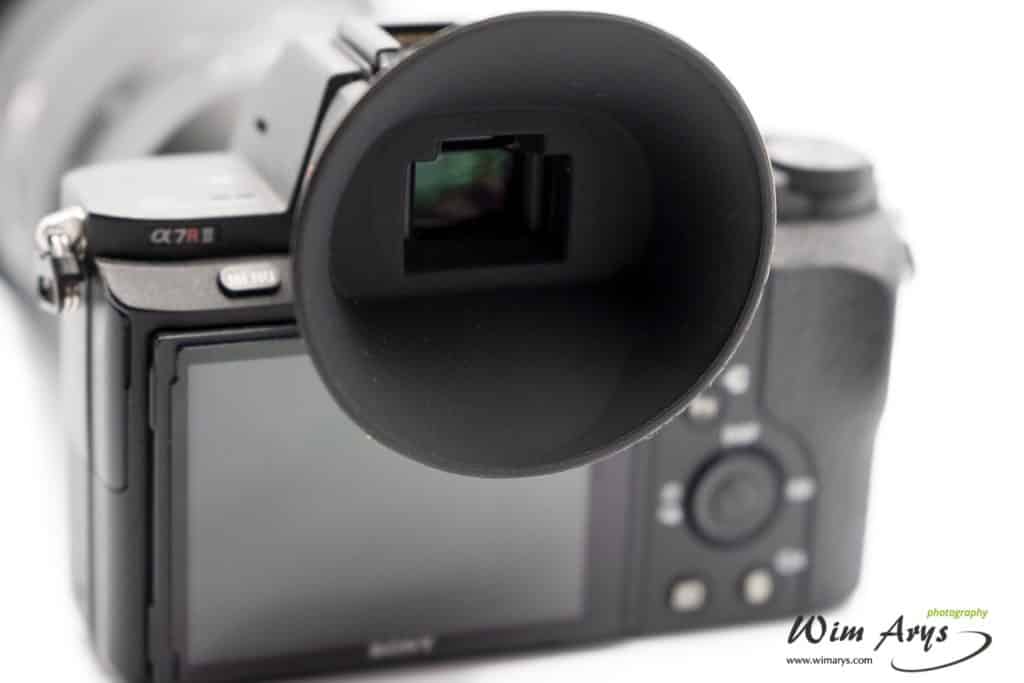
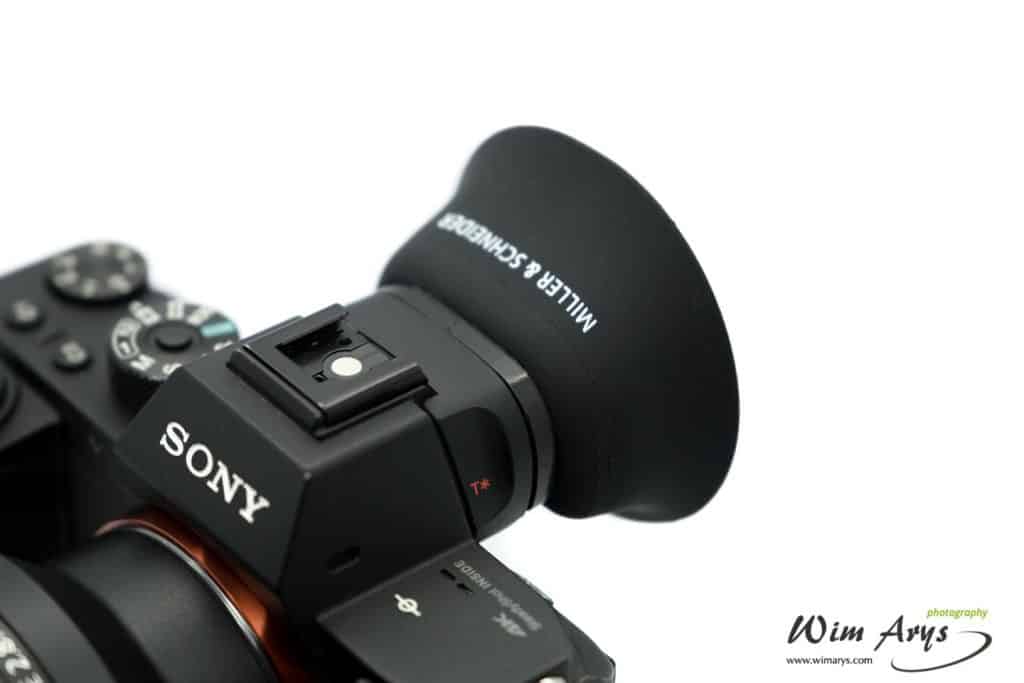
    Miller & Schneider make replacement eyecups for Panasonic, Canon and Sony Cameras. This company started out as a crowdfunded startup by a team of Hollywood filmmakers who wanted to make a better eyecup for videographers. They now have global distribution, but it looks like very few eyecups are still available. If you’re lucky enough to find one still, I would suggest that you pick it up asap.

    Miller & Shneider eyecup for Sony review

    Installation

    The Miller & Schneider eyecups are designed to attach to your camera like the original Sony version simply. This eyecup clicks securely in place on the camera and looks quite sturdy. You will have to take into account that it is larger than the original one, and this might cause some problems when storing your camera in a backpack or case for travel. I would suggest leaving the original eyecup on your ILCE7-RM2 and taking the Miller & Schneider with you in case you need it. There is nothing worse than arriving somewhere only to find that your favourite eyecup was torn apart during transport.

    Miller & Schneider Eyecup for Sony mirrorless A7 series in use

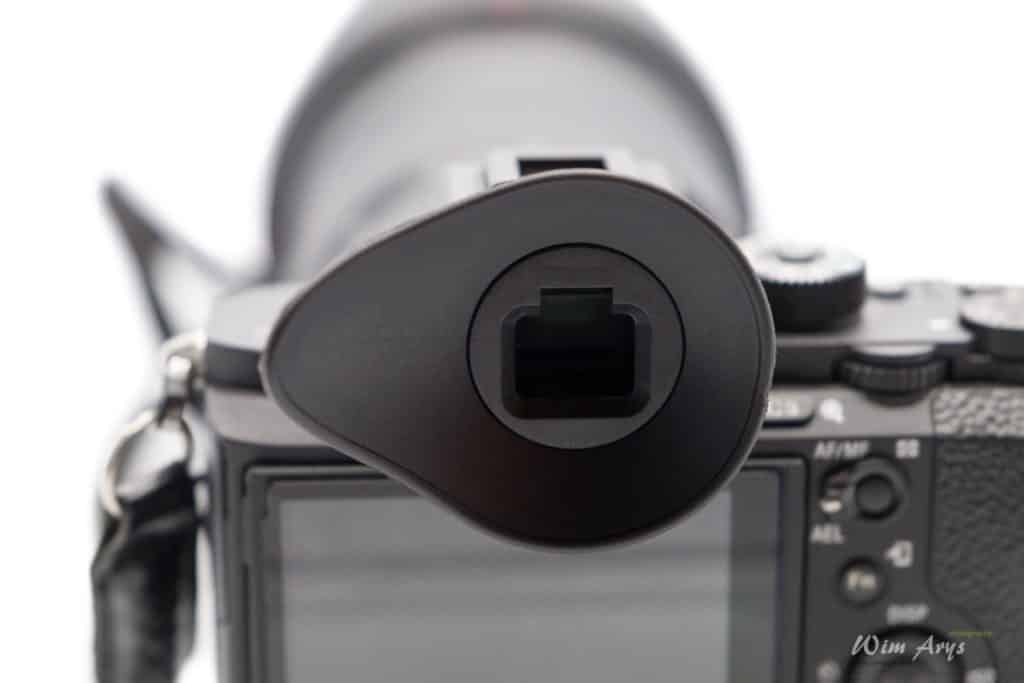
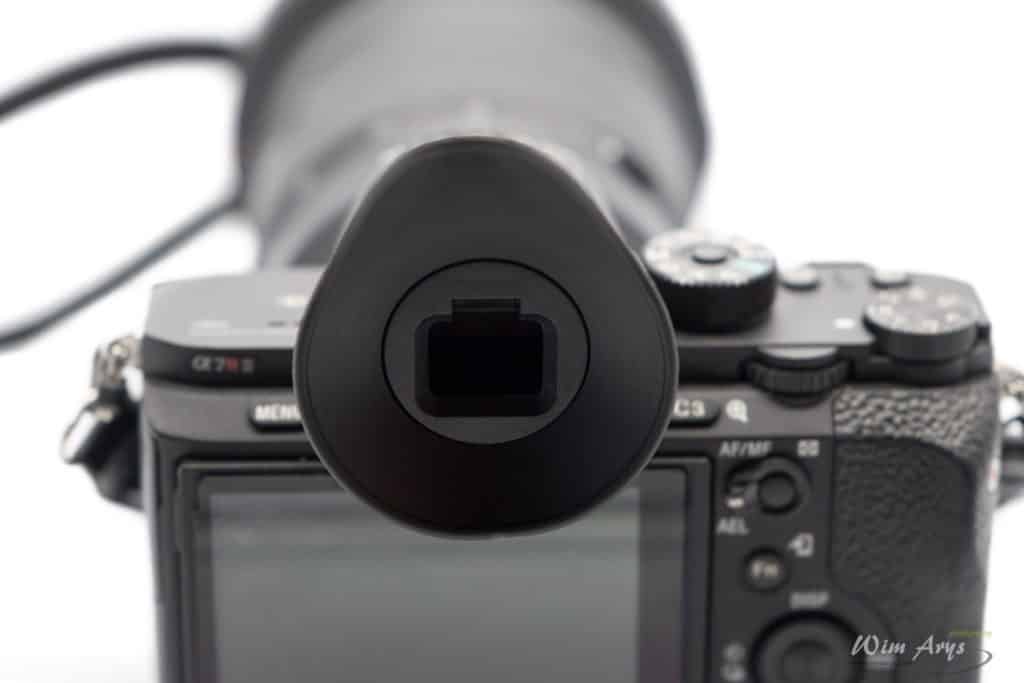
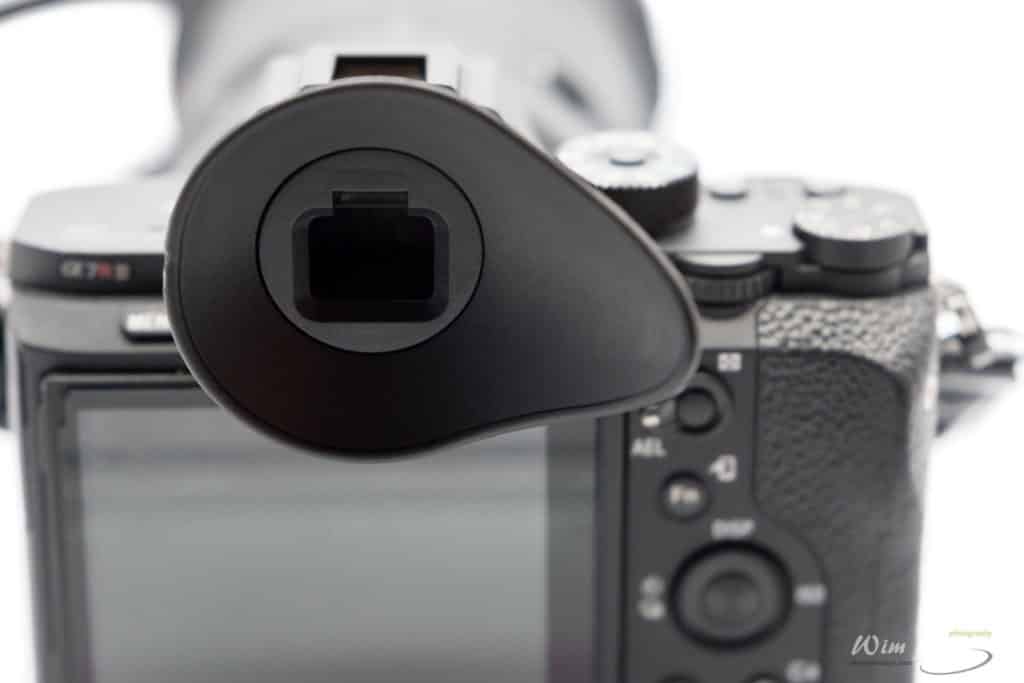
    The main advantage of these eyecups is that they provide a greater degree of contact when using the EVF. More stray light is blocked, and hence you’ll get a clearer and brighter view of the EVF. This is useful for many reasons like allowing for easier composition in bright daylight with less eye fatigue.  Their large eyecup certainly looks like a vast improvement on the rather weedy stock Sony eyecup. It simply adds a significant cushion to the EVF rather than adding any new optical elements.

    Miller & Shneider eyecup for Sony review

    The A-Cup improves handheld shooting most of all, so the combination of our secure, comfortable eyecup and Sony’s 5-axis IBIS stabilisation is a problem, I think video shooters, in particular, are going to feel great about only picking this camera up and shooting handheld without supplementary rigging.

    Conclusion

    The Miller & Schneider A-Cup for the Sony A7 series is designed to look and feel like an extension of the camera. It can be used with either eye, providing a comfortable, flexible cushion to push against and a solid third point of contact. It wraps around the eye to block out light, and it doesn’t disrupt the camera’s shape or balance. The A-Cup doesn’t add a diopter or lens; it merely changes the form of the EVF’s cushion.

    This is one of the best third party eyecups I’ve used, and besides some reservations when it comes to portability and travel, I would highly recommend it.


  • JJC ES-A7 eyecup for Sony A7 series review

    JJC ES-A7 eyecup for Sony A7 series review

    JJC ES-A7 eyecup for Sony A7 series review

    Introduction

    Although the eyecup of the Sony A7 series cameras has significantly improved in the A7rm2 and A7Sm2, some photographers and videographers still prefer a larger cup. A larger cup has several benefits like sealing out stray light for improved viewfinder optics, a more comfortable fit for eyeglass users or a more ergonomic oval shape that fits the dominant eye better. This does come at the cost of a larger form factor that might be harder to store in a bag.

    JJC ES-A7 eyecup for Sony A7 series review

    JJC, a Chinese manufacturer of peripherals for cameras from chargers and batteries to screen protectors and remotes, now have a replacement eyecup for the Sony FDA-EP16.

    JJC ES-A7 eyecup specs and installation

    JJC ES-A7 eyecup for Sony A7 series review

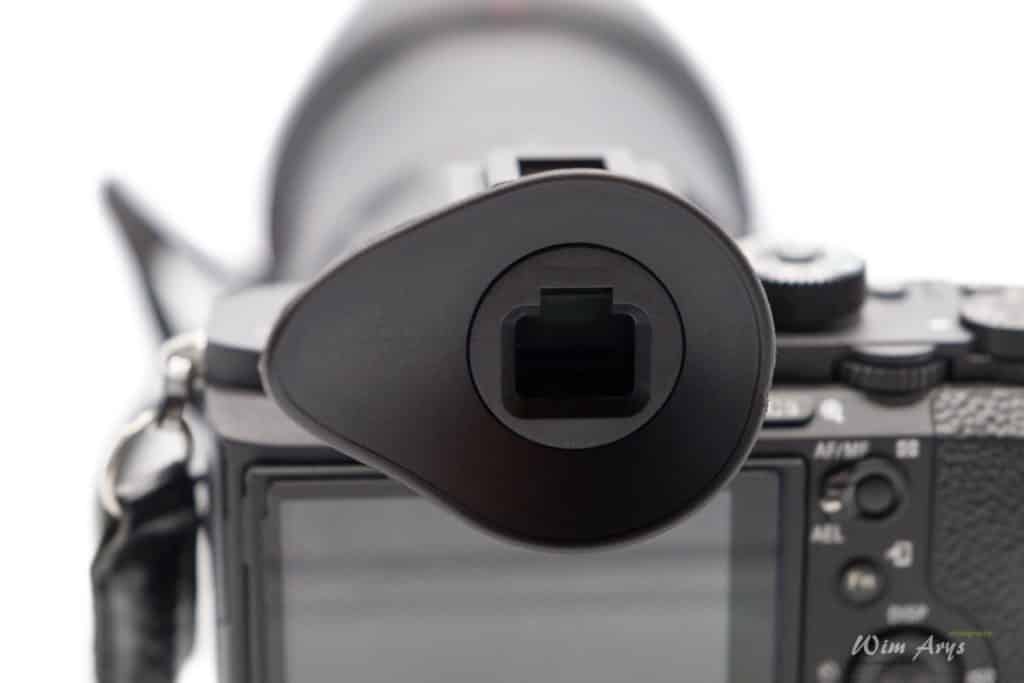
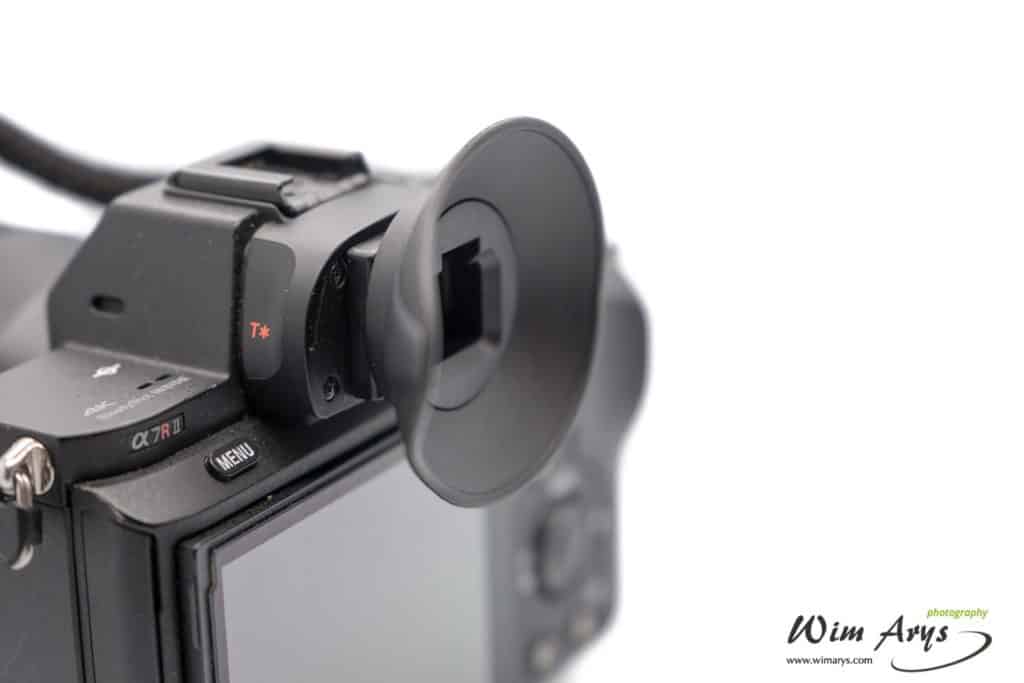
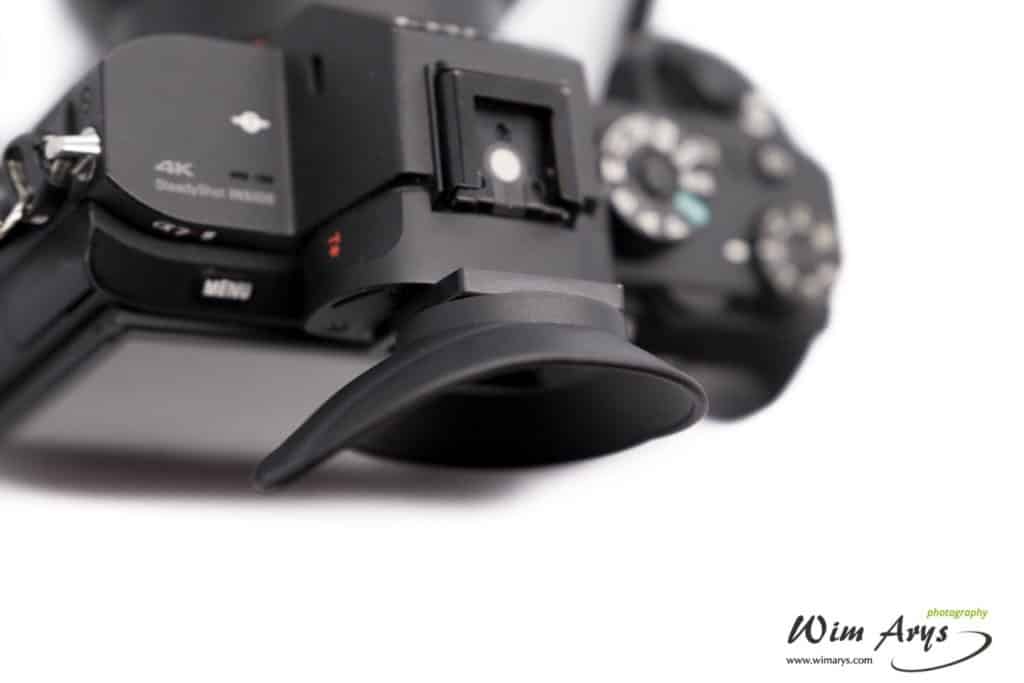
    The JJC ES-A7 eyecup is larger than the Sony equivalent and is made from what seems like a more rugged plastic. It comes in a simple plastic packaging and includes a booklet outlining the installation process.  The eyecup indeed looks like it should be more ergonomic, being at least twice as large as the original with an elongated lip that is meant to fit the eye better. Once installed, you can rotate the front part of the cup for portrait mode or depending on your dominant eye, turning it 180° to the left or right.

    JJC ES-A7 eyecup for Sony A7 series review

    The installation procedure itself is quite straightforward. First, you’ll need to remove your original eyepiece by squeezing both sides together and lifting up. You’ll notice that you’re able to lift the old eyepiece out of the bracket quite easily. Then it’s just a case of sliding the replacement JJX ES-A7 eyecup into place.

    JJC ES-A7 eyecup for Sony A7 series reviewJJC ES-A7 eyecup in use

    The JJC ES-A7 eyecup might look like a nice enhancement for your A7 series on paper, but in real life, it’s not nearly as comfortable as the original Sony FDA-EP16. Sony has made a lot of improvements in the A7 series overall, and when using the JJC equivalent, it felt more like going back to the old A7 eyecup.

    JJC ES-A7 eyecup for Sony A7 series review

    The TPU rubber used is quite hard and hence doesn’t fit snugly around the eye. I can also image it could be quite uncomfortable pressing this hard plastic on your eye socket for longer durations, and because it doesn’t fit snugly, you get a lot of stray light entering the viewfinder optics.

    Purchase and availability

    If you’d like to try the JJC ES-A7 yourself, it’s available on Amazon worldwide.

  • Dot.Foto Sony NP-FW50 Fast Dual USB Battery Charger review

    Dot.Foto Sony NP-FW50 Fast Dual USB Battery Charger review

    Dot.Foto Sony NP-FW50 Fast Dual USB Battery Charger review

    Introduction

    Any Sony mirrorless camera owner will know the pain of continuously having to charge batteries for your A7 or A6000 series cameras. Small sized bodies use smaller batteries than a larger DSLR, but these batteries have a lower capacity than their bigger counterparts. So we’ve all gotten used to carrying around a few spare NP-FW50’s so we can make it through a full day of shooting. No biggie. For me, the biggest headache is having to recharge several batteries overnight when you’re abroad over have a new job the next day.

    I’ve been looking for a cheap yet portable solution for this, and since Sony mirrorless has become more popular over the last few years, third party suppliers have started filling these gaps in Sony ILCE camera peripherals.

    Dot.Foto Sony NP-FW50 Fast Dual USB Battery Charger review

    We’ll have a look at one of these, the Dot Foto Sony NP-FW50 Fast Dual USB Battery Charger, typically sold for around ten bucks.

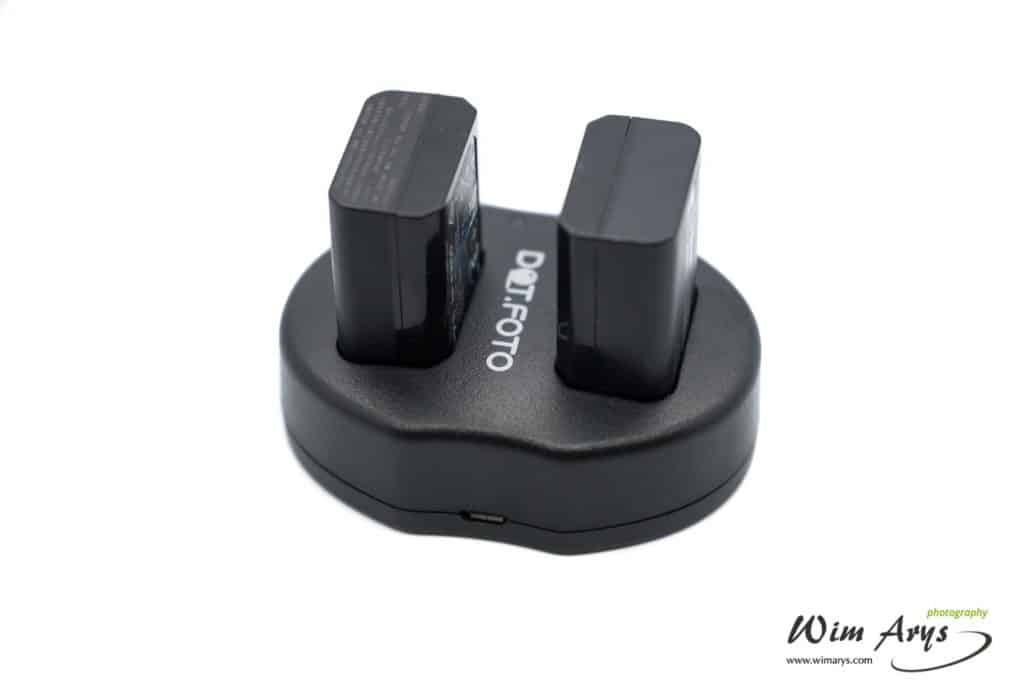
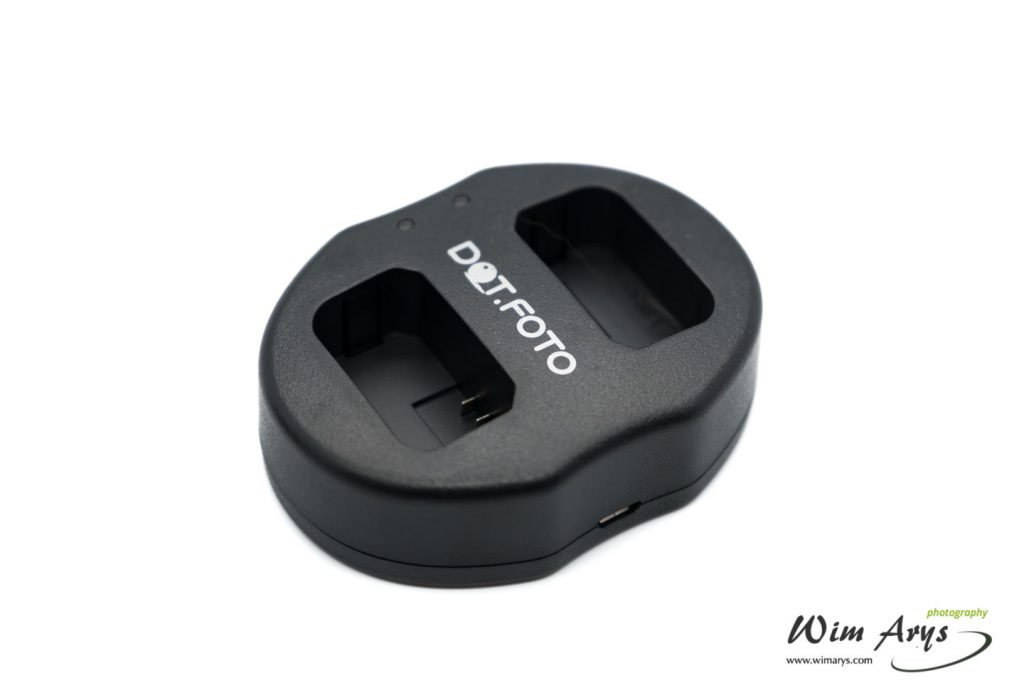
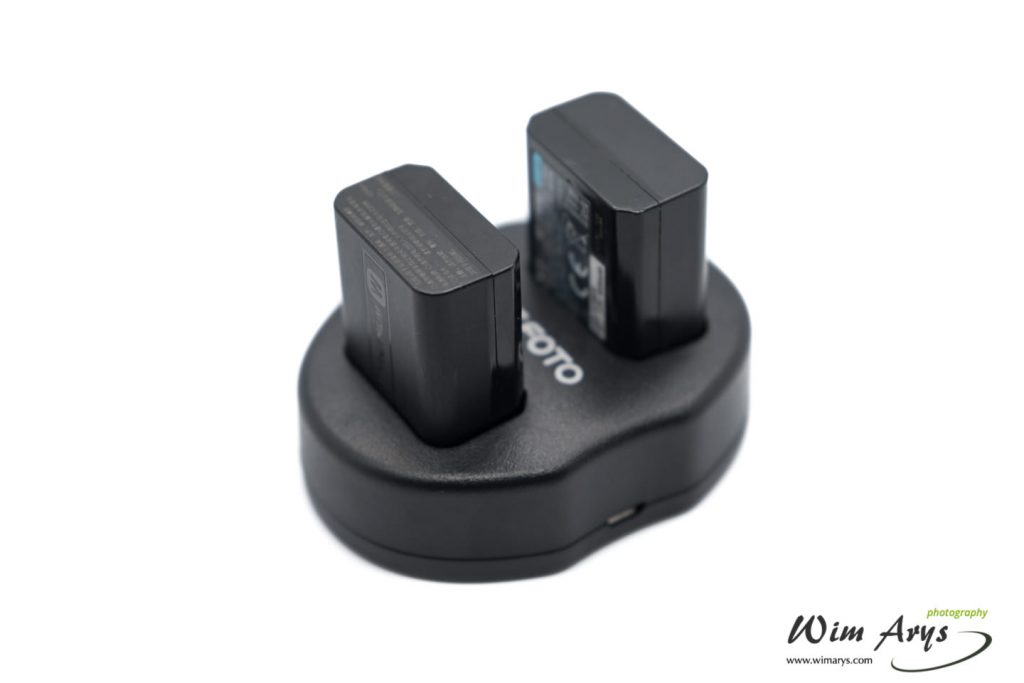
    Dot Foto Sony NP-FW50 Fast Dual USB Battery Charger

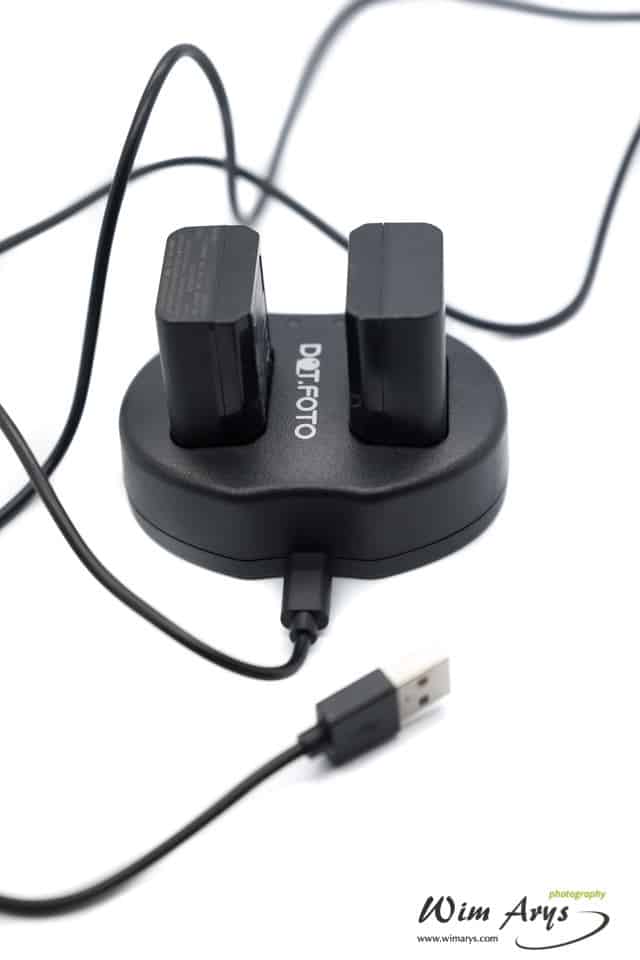
    The Dot Foto Sony NP-FW50 Fast Dual USB Battery Charger comes with just a USB cable. It can charge two batteries at the same time and uses two red or green LEDs to indicate either charging or fully charged. Input is specified at DC5V/2A max and this small device can either charge one battery at 800mA or two at 600mA. It measures 20x55x75mm and weighs only 66 grams.

    dscf8951

    As mentioned earlier, this charger does not come with an AC adapter so you’ll need to plug it into your Laptop, a car charger or use a power bank. Charging time will depend much on the power output of your USB device, but I’ve been using the AC adapter of my XPERIA Z phone and can get two batteries charged from empty in under two hours.
    The power cells behave normally in the camera and do indeed indicate a full charge.

    Conclusion

    The Dot Foto Sony NP-FW50 Fast Dual USB Battery Charger is a must-have for anyone who uses Sony ILCE cameras with more than one battery. It’s a very compact charger, and with the USB cable that is included, it’s easy just to plug it into your device (with a USB port) of choice overnight.  At around 10 dollars, it won’t break the bank, and it can be a lifesaver at times.

    Dot.Foto Sony NP-FW50 Fast Dual USB Battery Charger review

  • Topaz Glow 2 preview

    Topaz Glow 2 preview

    Topaz Glow 2 preview

    Introduction

    Next Tuesday (8/16/16) Topaz Labs will release Topaz Glow 2, an updated version of electric lighting and glow effect software, complete with new features. As always, this update is free to anyone who already owns Glow. And for those who don’t own it, Glow 2 will be on sale (30% off!) from August 16th – September 2nd.
    Topaz Glow 2

    Glow 2 new features

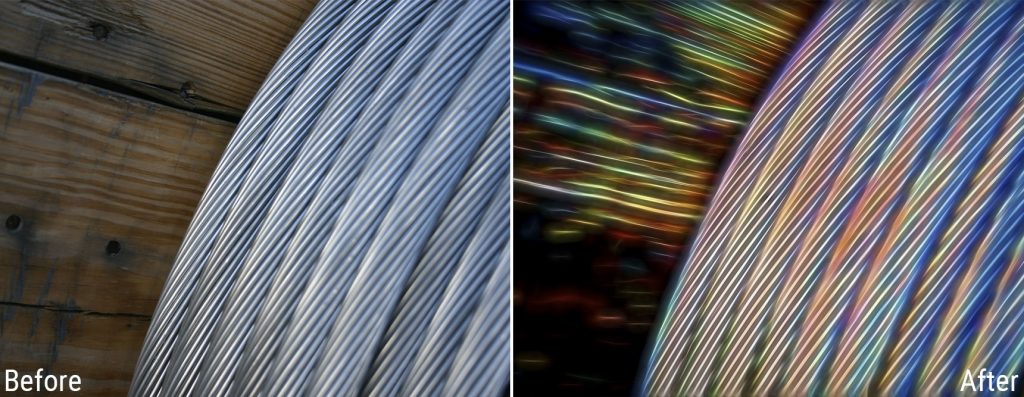
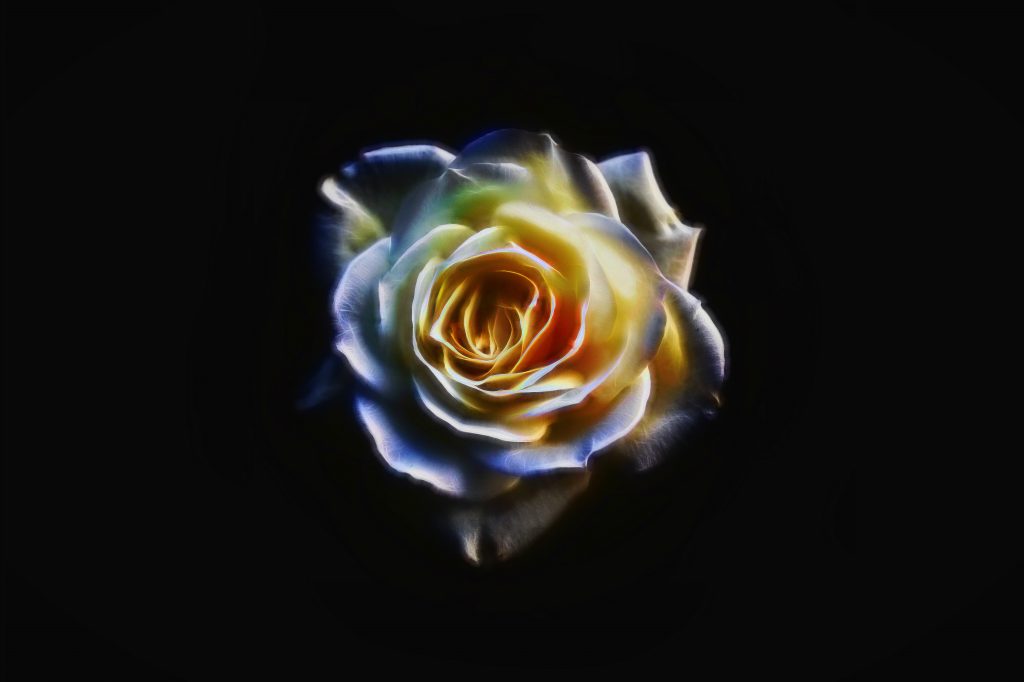
    Topaz Glow introduces a new kind of tool into your workflow designed to electrify your imagination by illuminating the contours of your images to reveal the hidden life in each moment you capture. Glow 2 gives you the power to create stunning neon effects, or subtle ethereal glow. No matter the look you love, amplify your images faster than ever with Glow 2.

    Frog

     New features:

    •  Over 30 New Presets – That brings the total to over 100 included effects to amplify your images or give you a boost creating a personal look you love.
    •  New Masking Module -You no longer need a host editor like Photoshop to create masks on your images! Now, you can open Glow 2 and mask areas of your image directly from the application using luminosity, color selection, a spot mask, or a traditional brush mask, and yes it’s color aware.
    •  Unlimited Undo/Redo – That’s right! As long as you don’t close the program you can now undo or redo to your hearts content (as far as your system memory will allow.)
    •  Topaz Community Integration – Topaz Glow 2 is the 3rd of our products to include the Topaz Community, an easy way for users to search save and share custom made presets with other Glow 2 users around the world. Surf an ocean of hand-crafted presets, then download and apply with a click. Or share
      your custom presets for other users to try.
    • Automatic Preset Backup – as long as you’re signed into your account when you save a preset, that preset will be privately uploaded to the community then synced on any other machine you sign into.
    • Topaz Glow 2

    Topaz Glow 2 new system requirements

    There have been some compatibility changes to the program as well. Glow 2 requires Windows 7+, Mac OSX 10.9+, and a GPU with OpenGL 3.3 or higher.
    (this replaces the older requirement for OpenGL 2.1)

    Topaz Glow 2

    Topaz Glow 2 coupon code

    This product is not updated anymore but you can still download it on the Topaz website here (click to go).


  • Anthropics LandscapePro review

    Anthropics LandscapePro review

    Anthropics LandscapePro review

    Introduction

    UK based software developer Anthropics Technology has a new plug-in for Photoshop and Lightroom called LandscapePro. Aimed at Landscape photographers, it brings some interesting features like landscape relighting, sky replacement, 3D depth estimation, a depth of field simulator, distance controls, intelligent selection tools, and photo-adaptive controls. Furthermore, you don’t need any prior knowledge or technical skills to create unique and dramatic images quickly.
    Anthropics LandscapePro review Anthropics LandscapePro review

    These are pretty big claims, but when I tell you that this software was developed by the makers of the award-winning retouching software PortraitPro and PortraitPro Studio, you might think twice and give the demo a try.

    Key Features

    • Quickly enhance landscape photos. LandscapePro contains a host of unique tools to enable anyone to create beautiful scenic photographs.
    • Intelligent selection tools.
    • Unique editing controls that adapt to the photo.
    • Easy-to-use slider interface.
    • No technical skills required.
    • LandscapePro Studio handles RAW files and can be run as Photoshop, Lightroom, and Elements plug-in.

    How LandscapePro works

    You’ll firstly need to find the LandscapePro plug-in in the plug-in window. Apparently, there is an issue with the latest version of Lightroom CC, but I did manage to find it in Photoshop.

    landscape-15

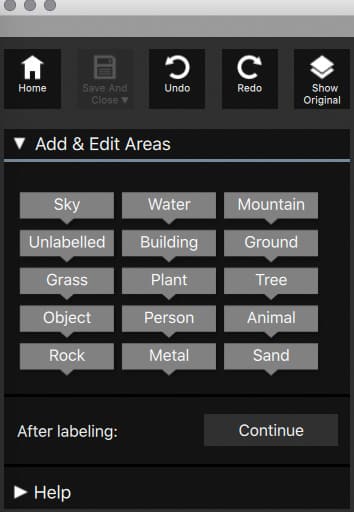
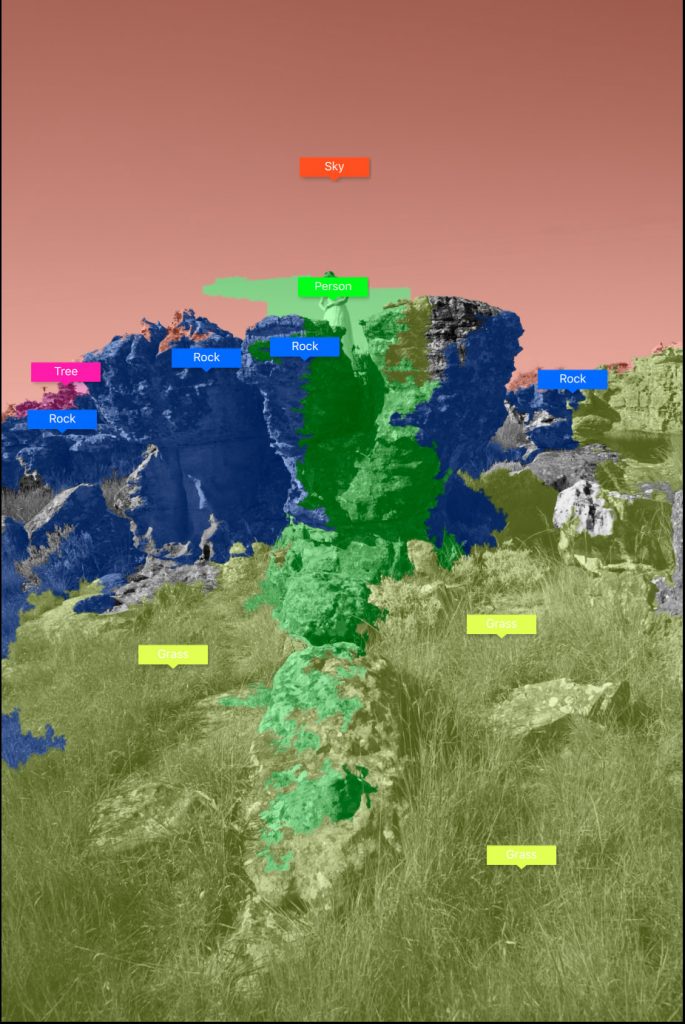
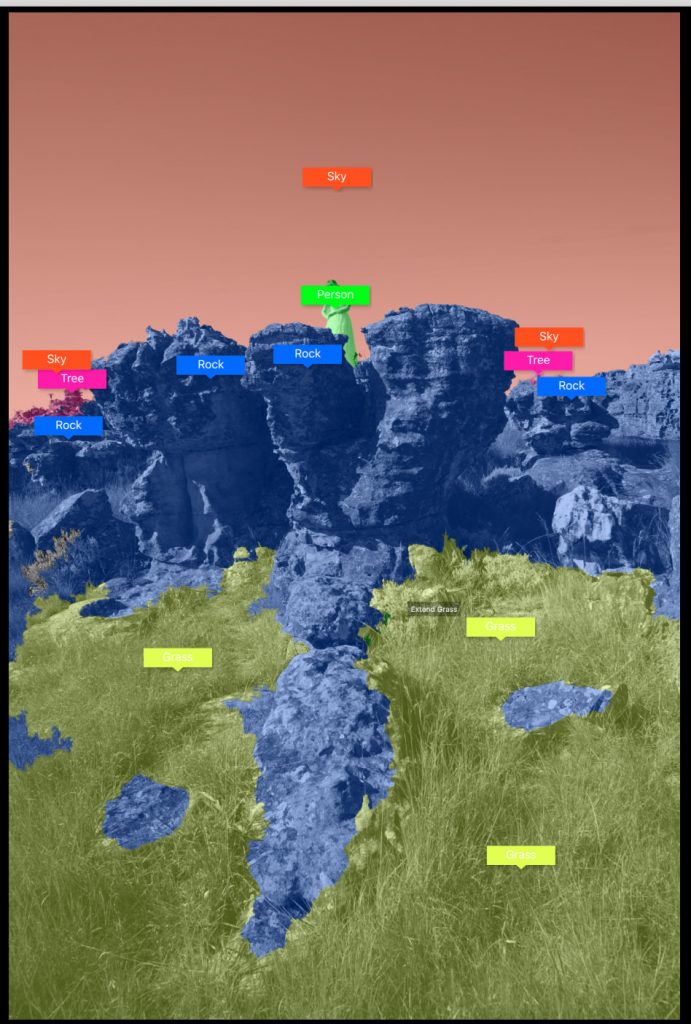
    Once LandscapePro has launched, you’ll see your image and an ‘Add and Edit Areas’ window on the right side. The idea is the drag the labels on your picture so that the software more or less knows what is what before automatically making the masking selections. Adding these ‘tags’ is important because you’ll later be able to edit each of the areas differently once the masking is done.

    Anthropics LandscapePro review Anthropics LandscapePro review

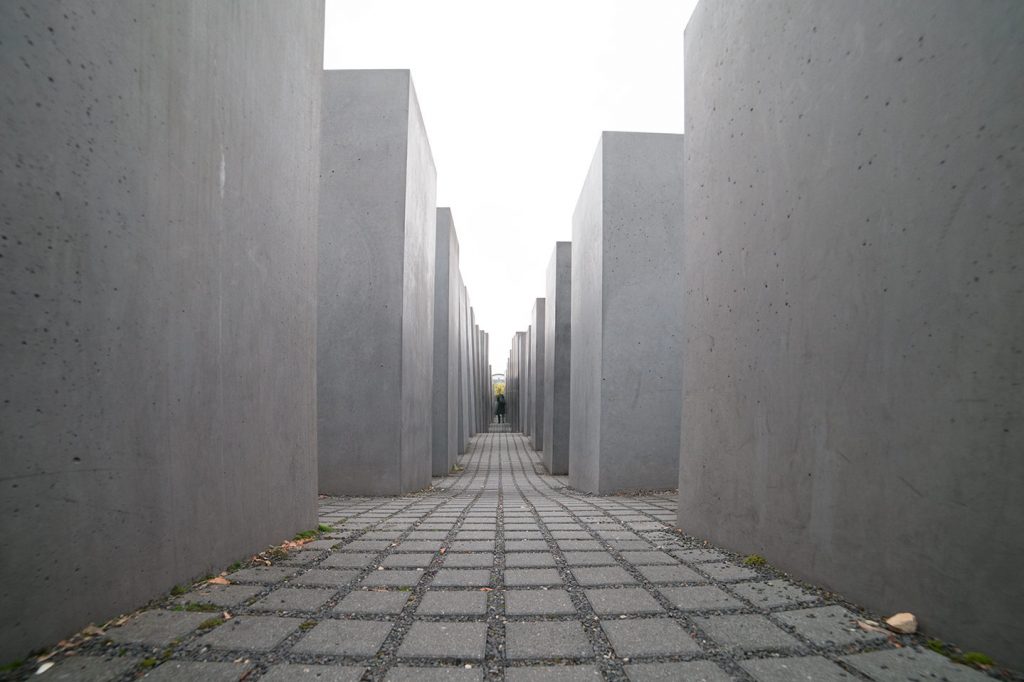
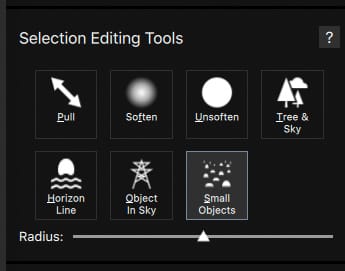
    You’ll end up with something like this image above. Landscape Pro’s auto masking isn’t the best masking software currently on the market, but it’s not the worst either.  Once the auto mask is made, you can simply add areas to each different mask by dragging the arrow over your image. It takes some getting used to, but you’ll get the hang of it after a while. You have several tools to refine the auto selections, and the ‘tree and sky’ command is one of the best ways I’ve found to separate branches and leaves quickly from the sky. Also, the ‘object in Sky’ is perfect for masking birds and such.Anthropics LandscapePro review

    You have several tools to refine the auto selections, and the ‘tree and sky’ command is one of the best ways I’ve found to separate branches and leaves quickly from the air. Also, the ‘object in Sky’ is ideal for masking birds and such. Check out this next image, where I managed to keep the birds in the sky while replacing the rest.

    Anthropics LandscapePro review Anthropics LandscapePro review

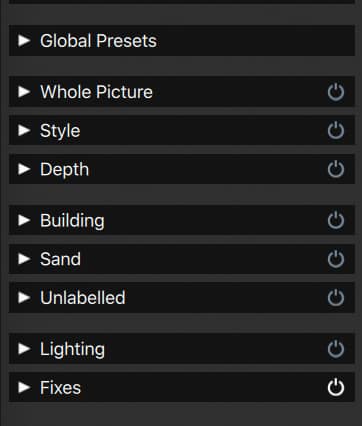
    As I mentioned before, each of your named masking selections will have a separate section where you can change the appearance (colour, saturation, white balance,…) of that particular mask. Anthropics LandscapePro review

    This means that it is quite important to get your masks right from the beginning, as it will have a major effect on the final image. It is always possible to go back to the ‘Add and Edit areas’ section to refine your selections further if you notice that you’ve made a mistake.

    Anthropics LandscapePro review Anthropics LandscapePro review

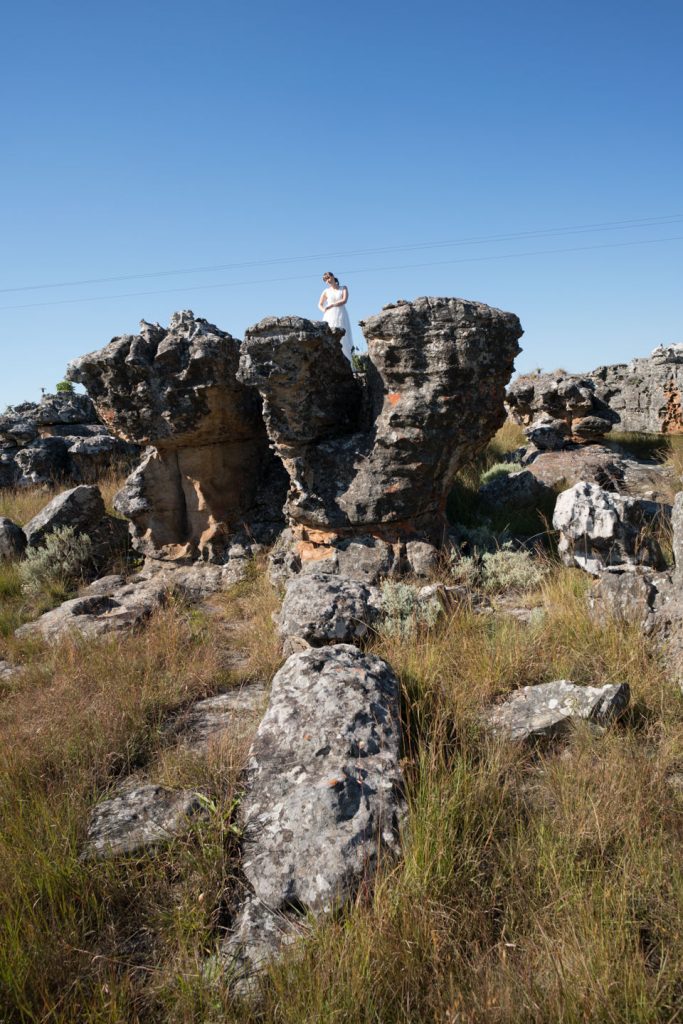
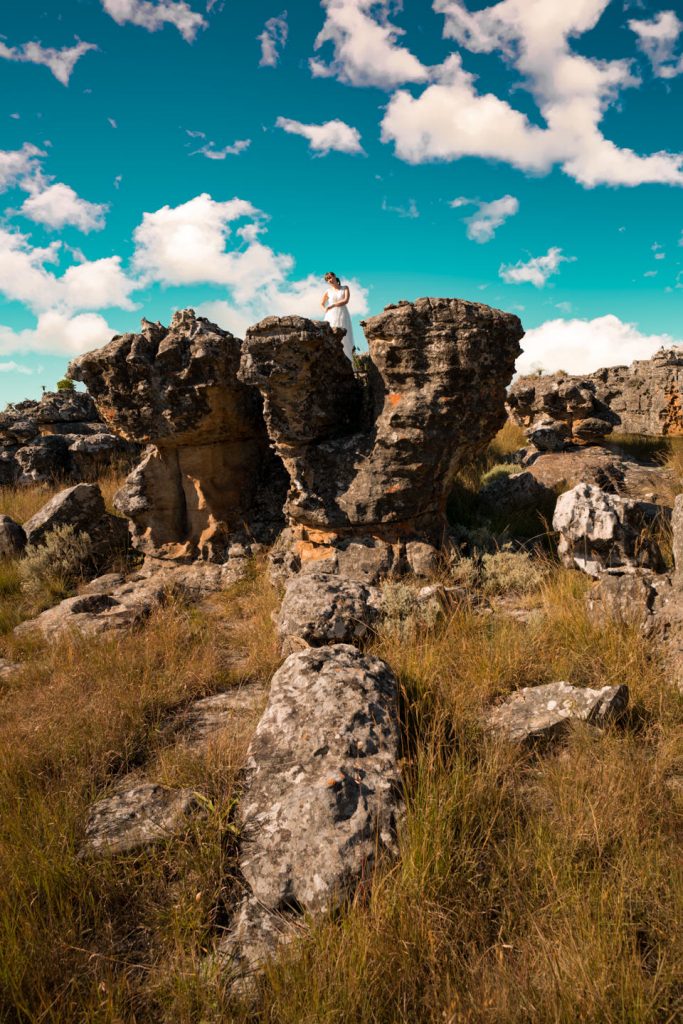
    Sky replacement is always the most striking change in images, and LandscapePro has some beautiful skies available, ranging from simple cirrostratus clouds to stars and the moon. All the sky presets also have a slider where you can set the amount of colour, depth and exposure change the rest of your image will get in relation to the new sky.

    Anthropics LandscapePro review Anthropics LandscapePro review

    Obviously, most of the more heavily processed images will fall into the category of ‘creative images’ and won’t always be photorealistic. But finding the best match for your sky in relation to the foreground can help you get a realistic image if that is what you’re after.

    Anthropics LandscapePro review Anthropics LandscapePro review

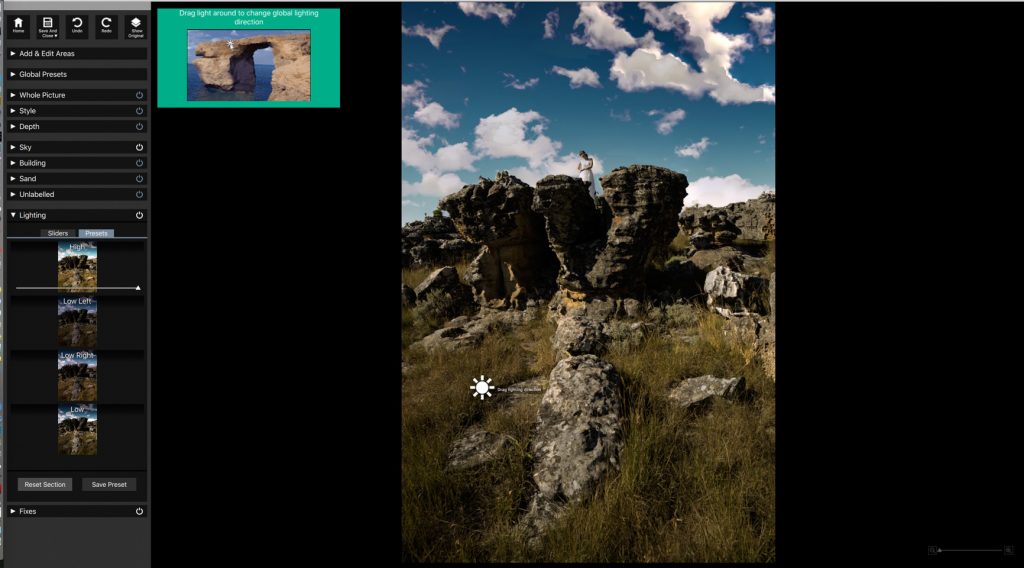
    Another functionality I want to touch on is the Lighting Tab. It’s possible to change the direction of light in your images so you can light up a facade of a building or a mountain to get a more realistic or dramatic final result.

    Anthropics LandscapePro review

    This is done by adding a sun icon to a part of your image and then dragging sun rays to illuminate desired parts. This kind of technology is obviously relatively new, but it will be interesting to see where this goes in future updates of LandscapePro. I used this technique in most of the images here to get an as realistic as possible result.

    Conclusion


    LandscapePro is a fascinating Photoshop and Lightroom plug-in for landscape photographers. Anthropics have already proven in the past that they know how to make industry standard image manipulation software with PortraitPro, and LandscapePro also brings a few innovations I’ve never seen before. Automatic masking, sky replacement with color matching of the foreground, adding depth and lighting effects, it can all be done with never before seen ease.

    Anthropics LandscapePro review landscape-23

    It is quite important that you find a good ‘match’ for the specific image that you’re editing. After all, changing a landscape shot in bright sunlight to a sunset will be difficult to pull off convincingly.At times, you do feel that the software is still young, as functionalities like auto masking and colour grading could do with some improvement. It takes some experimenting to get the best out of this software, and results are often more on the creative side than on the photo realistic. Not that this is always a problem, it just depends on your perspective as a photographer.

    Anthropics LandscapePro review Anthropics LandscapePro review

    All in all, I was quite impressed with this new offering from Anthropics. It’s a lot of fun to use, and if you combine the right image with appropriate settings, I’m sure you’d be very pleased too.

    Trial, Availability, and Pricing

    LandscapePro is available to purchase for a special launch price at the moment:

    • LandscapePro $39.95 £29.95 €39.95
    • LandscapePro Studio $59.95 £49.95 €69.95
    • Edition upgrade (Standard to Studio) $19.95 £19.95 €29.95

    If you want to delve more into the capabilities of the world’s first intelligent landscape editor, you can find all tutorial videos here: https://www.landscapepro.pics/tutorials/

    System Requirements

    PC running Windows 10, Windows 8, Windows 7, Vista, or XP
    Mac from OSX 10.7 or later

  • RNI ALL FILMS 4.0 brings custom camera profiles

    RNI ALL FILMS 4.0 brings custom camera profiles

    RNI ALL FILMS 4.0 brings custom camera profiles

    Introduction

    Since my RNI v3.0 review from last year (find the full review here), Really Nice Images have been working on a complete overhaul of their film presets.

    RNI ALL FILMS 4.0

    RNI All Films 4.0 is  the latest version of RNI’s flagship film-simulating package for Lightroom and Adobe Camera Raw. This new release is aimed at giving serious photographers a powerful and versatile tool for bringing the artistic flair and sophistication of film into their digital workflow.

    What’s New in RNI All Films 4.0

    RNI ALL FILMS 4.0
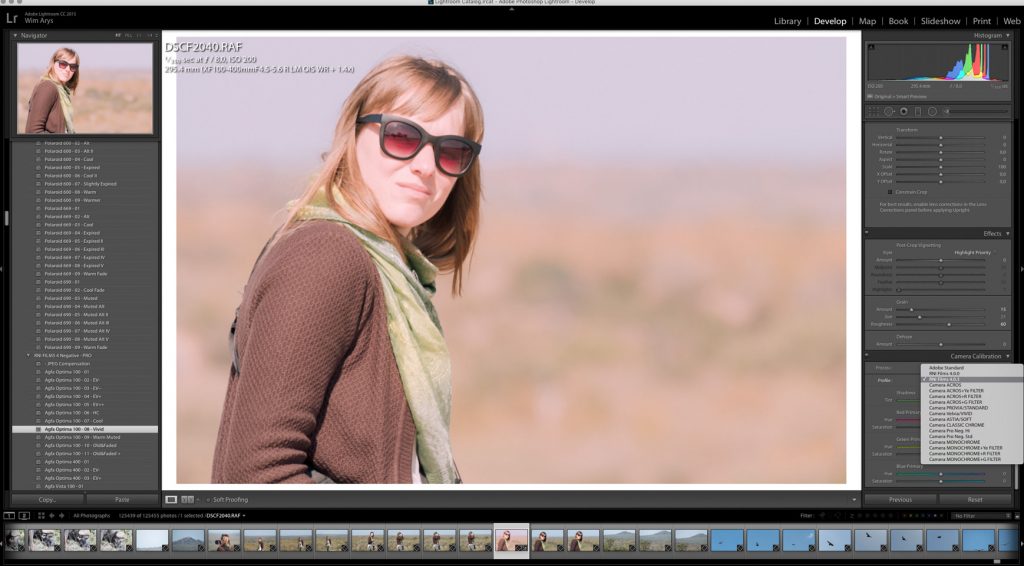
    You’ll find the RNI all films in the Lightroom Develop section on your left under presets.

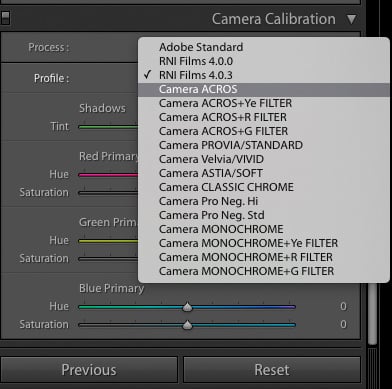
    RNI are now offering customized camera profiles for a wide range of supported cameras to expand the available tonal range of your photos and provide more convincing film simulation than ever.  Besides a makor overhaul of existing presets, many new emulsions, including Fuji Natura 1600 and Kodak Tri-X 400 are now included in the PRO bundle. Also, film grain settings have been refined across the package and you’ll find a new RNI Toolkit 4 added to the package for quick control over analog softness, film grain, fading and other parameters of film simulation.

    RNI versus VSCO

    RNI ALL FILMS 4.0

    Now that version 4 of RNI All films also offers customized camera profiles, I believe that RNI is now a real competetor for VSCO. The full RNI bundle includes all their  film emulations for a mere $121 whilst getting all these emulations from VSCO would cost you around four times as much. Having said that, both companies do offer different flavors and much comes down to personnal preference and your workflow.

    Conclusion

    RNI ALL FILMS 4.0
    The RNI custom camera profiles can be found on the bottom right hand section in the Lightroom Develop tab.

    Generally, the processing in RNI All Films 4 feels more delicate and sophisticated than earlier versions and the addition of customized camera profiles allows you to get even more realistic film emulations. I hear RNI is also working on porting the look of their presets to a library of real-film LUTs tailored to the needs of professionals and I’m sure many videographers are looking forward to that. Mac users now have added a handy .pkg installer where you just launch it and it will install all the required product components for you automatically.

    Purchase and availability

    RNI ALL FILMS 4.0

    RNI All Films is now available for $121 and yes this incudes every single film emulation they have. Head on over to the RNI website to learn more.


  • Athentech Perfectly Clear, Perfect Eyes and Perfect Skin review

    Athentech Perfectly Clear, Perfect Eyes and Perfect Skin review

    Athentech Perfect Eyes and Perfect Skin review

    Introduction

    Athentech Imaging makes retouching software for Adobe Lightroom and Photoshop. Over the past 12 years, their Perfectly Clear plug-in has become one of the most advanced and easiest to use skin- and eye retouching software suites on the market. I’ve been using Perfectly Clear since 2014 and have found it one of the most realistic portrait retouch plug-ins currently available. Besides updating their algorithms and user interface in the last year, Athentech has also released separate plug-ins for eye and skin retouching. These two modules are also available in the new Perfectly Clear bundle and are called Perfect Skin and Perfect Eyes. You can now get them for a discount of $99 until July 15th, scroll down to the bottom of this page for a link to take you to their website.

    Update: If you want the latest promo codes and check what is new in version 3,5 read my review here. 

    Athentech Perfect Skin

    Perfect Skin overview

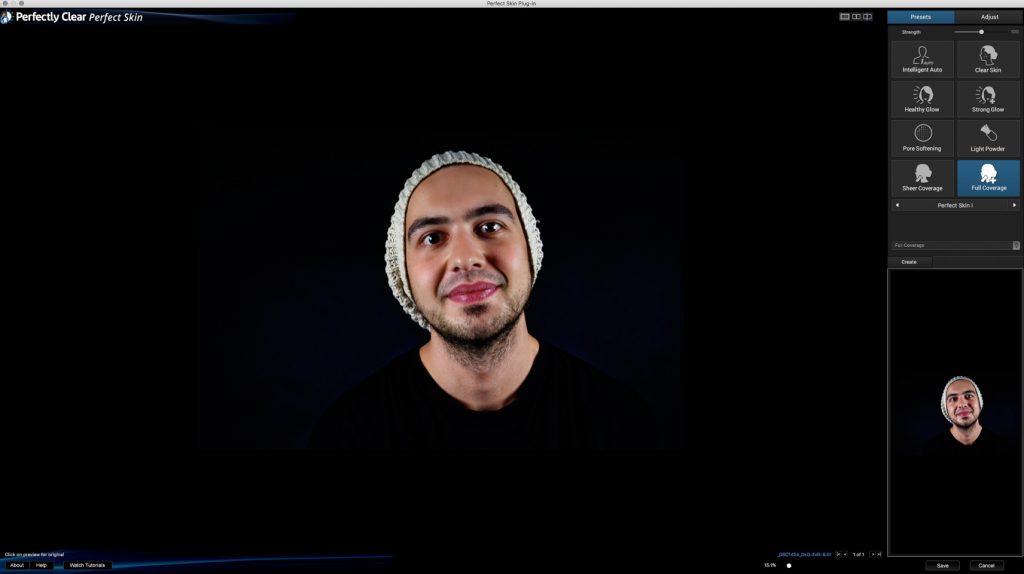
    Athentech Perfect skin plug-in window

    From either Lightroom or Photoshop, you can access Perfect Skin from the plug-in tab. I would advise you to start from a RAW file and not to use JPEG images, as the results with the former will be superior. Once a TIFF copy of your original file has been made, Perfect Skin will open in a new window.

    On the left side of your screen, you’ll see a preview of your image with the Perfect Skin corrections applied. On the right hand, you’ll find a Preset and Adjust tab.

    Perfect Skin Presets


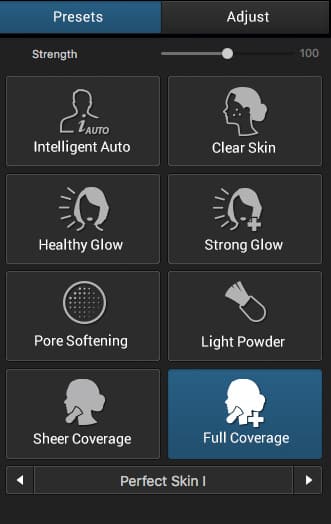
    The Perfect Skin Presets tab
    The Perfect Skin Presets tab

    Perfect Skin has a total of 16 presets. They are a great starting point for your portrait retouching needs and will often get you where you want to go without much tweaking.

    If you would like to know what the presets do and how they differ from each other, you can check the following examples.

    Intelligent Auto
    Athentech Perfect Skin examples
    Intelligent Auto Preset

    Adds a gentle enhancement to all types of faces. Perfect mix for most skin types and group portraits.

    Clear Skin
    Athentech Perfect Skin examples
    Clear Skin Preset

    Reduces the appearance of acne and blemishes while still leaving skin pores visible. Use te strength slider in the Adjust panel to make the effect more or less conspicuous.

    Healthy Glow
    Athentech Perfect Skin examples
    Healthy Glow Preset

    Adds a healthy glow that creates a fresh and younger look to your portraits. Also, impacts the lighting of your image

    Strong Glow
    Athentech Perfect Skin examples
    Strong Glow Preset

    Reduces blemishes and shine while adding depth, detail, and color. Great preset for refining portraits, while also tweaking the lighting of your images.

    Pore Softening
    Athentech Perfect Skin examples
    Pore Softening Preset

    Reduces the intensity of pores to produce ultra-smooth skin. Be sure to use the strength slider or individual controls to refine the effect.

    Light Powder
    Athentech Perfect Skin examples
    Light Powder Preset

    Gently reduces blemishes and shine for all skin types.

    Sheer Coverage
    Athentech Perfect Skin examples
    Sheer Coverage Preset

    The Sheer coverage preset adds moderate coverage to blemishes and shine while smoothing the skin

    Full Coverage
    Athentech Perfect Skin examples
    Full Coverage Preset

    Stronger settings when sheer coverage is not enough.

    Male school portrait
    Athentech Perfect Skin examples
    Male School Portrait Preset

    Adds details brightens teeth and reduces blemishes and shine. Ideal for portraits shot under reduced lighting or in a studio setting.

    Female School portrait
    Athentech Perfect Skin examples
    Female School Portrait Preset

    Adds details brightens teeth and reduces blemishes and shine. Ideal for portraits shot under reduced lighting or in a studio setting.

    Teenagers
    Athentech Perfect Skin examples
    Teenagers Preset

    Reduces blemishes, shine and also gently softens the light by diffusion. Ideal for younger skin shot under natural light.

    High Fashion
    Athentech Perfect Skin examples
    High Fashion Preset

    Showcases enhancements preferred by fashion photographers. Face slimming, blemish and shine reduction. Gentle light diffusion and adds depth to images.

    The Works
    Athentech Perfect Skin examples
    The Works Preset

    Uses the beauty corrections with higher values to make significant adjustments to skin and features. Use the adjustment and strength sliders to refine the amount of retouching.

    Supermodel
    Athentech Perfect Skin examples
    Supermodel Skin Preset

    Adjusts skin so it looks smooth and flawless.

    Middle age
    Athentech Perfect Skin examples
    Middle Age Preset

    Removes blemishes and shine, brightens the smile and adds color and depth. Ideal for hiding the signs of aging.

    Rugged Skin
    Athentech Perfect Skin examples
    Rugged Skin Preset

    Brings essential details to male faces by applying moderate improvements. This preset also sharpens detailed information in the eyebrows and beards to make hair look thicker and rugged.

    Perfect Skin Adjust Tab

    Athentech Perfect skin plug-in window
    The Perfect Skin Adjustments tab

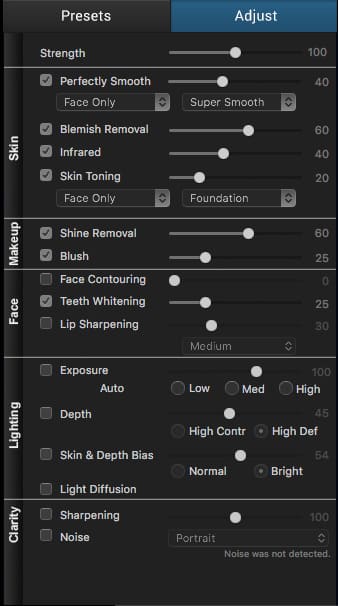
    The second Tab on the right hand of the screen allows you to access all the individual enhancements and tweak them to your liking. I mainly choose an appropriate preset and start from there, but you can of course also start from scratch here and even make your own presets.

    Strength Slider

    The Strenght slider allows you to adjust the overall amount of retouching applied to your image. The slider goes from zero to 100, and it’s always a good idea to lower this slider slightly to get a natural looking final image.

    Skin retouching controls
    Perfectly Smooth

    This preset Smooths skin without losing important features or detail. You can either select to apply this smoothing to only the face or skin on the full body. You have three degrees of smoothing ranging from Subtle to Super Smooth. I mostly leave this on the Default value, but skin and blemishes do differ from person to person, so it is at times useful to switch values to get the most natural result.

    Blemish removal

    Blemish removal automatically finds facial blemishes and removes them without losing any important detail. The slider goes from zero (no effect) to 100 (full stain removal).

    Infrared

    Removes excess red from faces due to your camera sensor picking up infrared head from your subject and adding it to the red channel.

    Skin Toning

    Skin Toning adds a warming or cooling filter to skin tones for a warmer or smoother look. You can choose between warm, cold, pale, white or give your subject a tan or foundation.

    Makeup controls
    Shine Removal

    Finds and removes glare from faces due to studio lighting or camera flashes.

    Blush

    Blush adds extra colour to the cheekbones.

    Face Controls
    Face contouring

    Face contouring automatically detects faces in your image and slightly slims them.

    Teeth Whitening

    Automatically finds teeth and whitens them from zero to maximum effect.

    Lip Sharpening

    Detects and adds sharpness to the lip area. Fine, medium and coarse options available.

    Lighting Controls
    Exposure

    Automatically corrects the exposure of your entire image. Low, medium and high corrections available

    Depth

    Increasing the shadows of a picture helps reveal the textures and shapes in a scene. This helps provide visual clues of the 3D world in a 2D scene. This algorithm optimizes contrast in each pixel, choosing the right amount of shadow to provide those 3D clues without any loss of detail in the shadows for an eye-pleasing image with lots of punch. You can steer the algorithm toward a more contrasty image or high definition by selecting one of the two options.

    Skin and Depth Bias

    Gives a photo more depth and whiter skin tones. Use normal or bright depending on the brightness of your image.

    Light Diffusion

    This preset creates a softer, slightly warmer overall appearance in portraits.

    Clarity Controls
    Sharpening

    If you’d like to add some sharpening to your final image, Athentech provides their proprietary artefact-free sharpening algorithm.

    Noise

    If you found that your image has become too noisy, you can reduce color and luminance noise. Select one of the appropriate presets like Portrait, Night Scene or Camera Phone. The plug-in will also tell you if any noise is detected.

    Athentech Perfect Eyes

    Perfect Eyes Overview

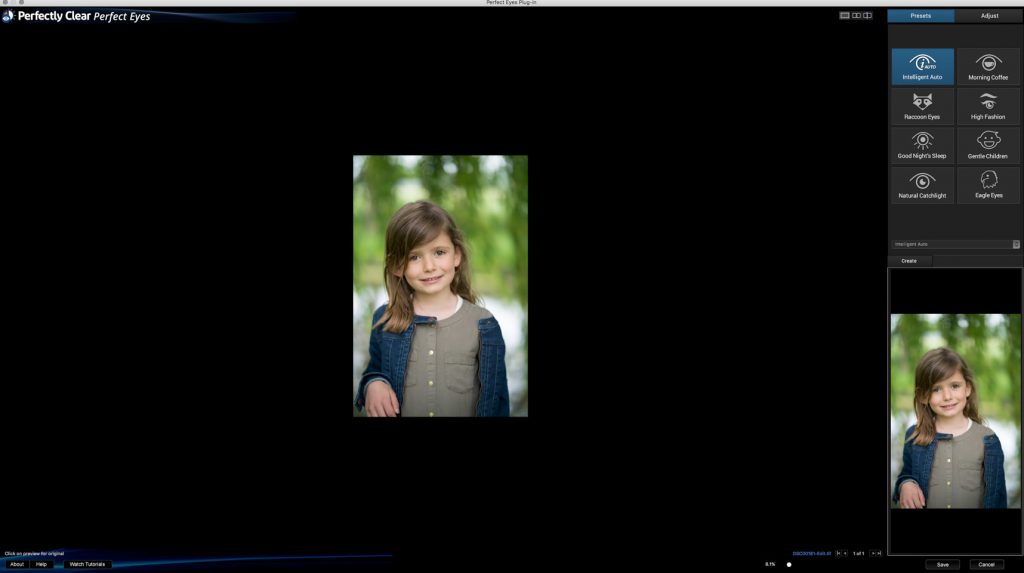
    Athentech Perfect Eyes plug-in window
    The Perfect Eyes plug-in window

    Athentech Perfect Eyes plug-in focusses mainly on eye enhancement. Eye sharpening, reducing red-eye, removing dark circles and eye enlargement are all available.

    You have eight presets to choose from as a starting point. You can check what each preset does by looking over the examples below. If you want to edit this further, or start from scratch, go to the second panel on the right called adjustments.

    Perfect Eyes Presets

    Intelligent Auto
    Athentech Perfect Eyes examples
    Intelligent Auto Preset

    Intelligent Auto analyzes the image and achieves an overall balanced adjustment to the eyes. This preset is ideal for making a natural looking enhancement.

    Morning Coffee
    Athentech Perfect Eyes examples
    Morning Coffee Preset

    Enhances the eyes and creates a small enlargement to add a sense of alertness. Also sharpens the Eyes and removes dark circles below.

    Raccoon Eyes
    Athentech Perfect Eyes examples
    Raccoon Eyes Preset

    Removes dark circles under the eyes, adds general enhancements with slight sharpening.

    High Fashion
    Athentech Perfect Eyes examples
    High Fashion Preset

    Strongly enhances the eyes and gives a gentle nudge in exposure. Ideal for fashion like images that require a dramatic lift in the eyes.

    Good Night’s Sleep
    Athentech Perfect Eyes examples
    Good Night’s sleep Preset

    Removes dark circles and slightly sharpens the eyes, a gentle approach to enhancing.

    Gentle Children
    Athentech Perfect Eyes examples
    Gentle Children Preset

    Removes dark circles and slightly sharpens the eyes while slightly enlarging them to counter any squinting during the shot.

    Natural Catchlight
    Athentech Perfect Eyes examples
    Natural Catchlight Preset

    Applies a soft natural light by diffusion. This preset also applies general standard enhancements and adds a catchlight. Explore controls to adjust to your specific image.

    Eagle Eyes
    Athentech Perfect Eyes examples
    Eagle Eye Preset

    Removes dark circles and applies strong sharpening. Great for older and male eyes.

    Perfect Eyes Adjust Tab

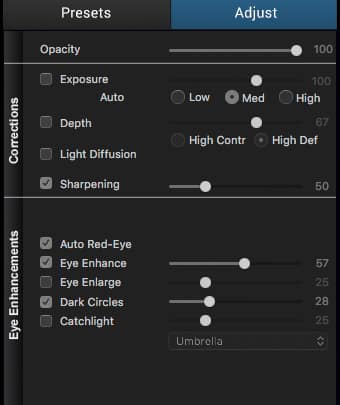
    Perfect Eyes Adjust Tab
    Perfect Eyes Adjust Tab

    You’ll find all the possible adjustments in the Perfect Eyes Adjust Tab. It’s always easiest to start from a preset for an overall look and make a few changes later to get an as realistic as possible final image.

    Corrections
    Exposure

    Automatically corrects the exposure of your entire image. Low, medium and high corrections available

    Depth

    Increasing the shadows of a picture helps reveal the textures and shapes in a scene. This helps provide visual clues of the 3D world in a 2D scene. This algorithm optimizes contrast in each pixel, choosing the right amount of shadow to provide those 3D clues without any loss of detail in the shadows for an eye-pleasing image with lots of punch. You can steer the algorithm toward a more contrasty image or high definition by selecting one of the two options.

    Light Diffusion

    This slider creates a softer, slightly warmer overall appearance in portraits.

    Sharpening

    If you’d like to add some sharpening to your final image, Athentech provides their proprietary artefact-free sharpening algorithm.

    Eye Enhancements
    Auto Red-Eye

    Automatically remove red-eye problem if the software can detect them. Works on different faces in group shots too.

    Eye Enhance

    Automatically detects and enhances eyes to bring out more detail and color.

    Eye Enlarge

    Makes eyes larger to counter the effects of squinting in bright light.

    Dark Circles

    Detects and removes dark circles and shadows from under the eyes.

    Catchlight

    Adds a catchlight or reflected image of a light source in pupils.

    Conclusion

    Although there are a few other, more invasive ways of retouching portraits in Photoshop and through other plug-ins like Portrait Pro, Perfectly Clear is one of the easiest and fastest ways of achieving a great result. Both Perfect Skin and Perfect Eyes are combined in the full Perfectly clear plug-in, but I do find it useful to have them separately available in case you don’t need one or the other.

    What I like most about the Athentech technology for retouching portraits is the fact that their presets are all very useable and that their automatic detection of eyes and faces is by far the best out there. It’s also easy to still make people look realistic in portraits, something that can not be said of all portrait-enhancing software.

    Purchase and Availability

    Head over to Athentech’s website (click to go) to enjoy a discount on all Perfectly clear bundles:

    • Perfectly Clear Complete for only $99 (a savings of $50)
    • Portrait Photographer’s Bundle: Perfect Skin + Perfect Eyes for only $79 (a savings of $30)

    These discounts are valid until the end of July!

  • DXO Optics Pro 11 review: interesting new features

    DXO Optics Pro 11 review: interesting new features

    DXO Optics Pro 11 review: exciting new features

    Introduction

    DXO is a French company that makes software tools for both consumers and professionals to enhance digital images automatically.  DXO Optics Pro is the name of their RAW file developer, and this software comes in two editions: Essential and Elite. The Elite version has some added functionality like Prime Noise reduction, a dehazing function called Clearview, an anti moiré tool and color rendering profiles to match different cameras used in a shoot. Both versions include their acclaimed and large lens correction database for optical corrections and the usual variety of tools you’d find in an RAW editor. 

    Screen Shot 2016-06-03 at 07.39.58

    New Features in DXO Optics Pro 11

    The latest version of DXO Optics Pro handles files up to four times faster than previous versions. Their acclaimed PRIME noise reduction has also received an update with improved bokeh protection and better detail retention, particularly in shadows.

    Screen Shot 2016-06-03 at 07.39.52

    Another favorite tool of mine is DXO’s Smart Lighting tool that now includes face detection and spot weighted metering for a better preservation of overall contrast.

    Are the improvements worth the upgrade from previous versions?

    I’ve been a long time DXO Optics Pro user, and I can tell you that if your camera and lens are supported, there is no better RAW developer than this. DXO’s Prime noise reduction was already one of the best on the market and with faster processing times and a more intelligent algorithm, it’s even better now.

    Screen Shot 2016-06-03 at 07.39.15

    The Smart Lighting module was already very handy to pull perceived exposure of a batch of images to the same level, but in the past, you quickly ended up with a washed-out look when used at higher values. With the inclusion of spot metering together with face detection, this feature works incredibly well now on portraits.

    Pricing & Availability

    The ESSENTIAL and ELITE editions of DxO OpticsPro 11 for Mac and Windows are available in the DxO online store for a discounted price until June 30th, 2016. 

    DxO OpticsPro 11 ESSENTIAL will set you back  83 Euro (instead of 108) and DxO OpticsPro 11 ELITE Edition 125 Euro ( instead of 166).

    If you’ve purchased a license on or after April 1, 2016, you are entitled to a free upgrade to version 11. The regular upgrade price is 53 EurO.

  • Fujifilm X70 leather case BLC-X70 review

    Fujifilm X70 leather case BLC-X70 review

    Fujifilm X70 leather case BLC-X70 review

    Introduction

    Fujifilm X70 leather case BLC-X70 review

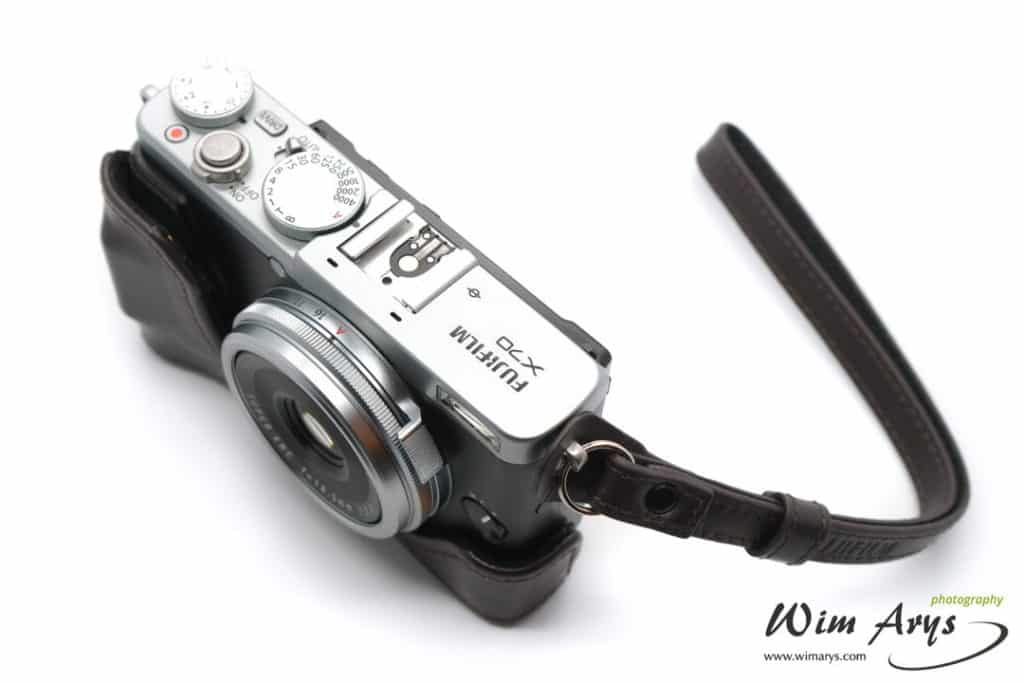
    Alongside the release of the Fujifilm X-PRO 2, the Japanese camera manufacturer also released a very compact APS-C camera with a fixed 18.5 mm lens called the X70. It’s always a good idea to purchase a screen protector and carrying case to protect your investment, and Fuji has a beautiful little leather half case called the BLC-X70 available.

    Description

    Fujifilm X70 leather case BLC-X70 review

    The BLC-X70 Leather Case is a genuine leather fitted case that protects the camera from scratches and bumps and also adds some heft to the grip. This makes it easier to hold and better balance this very small camera while shooting. It is made from leather for a luxurious feel, offers access to the battery compartment while attached and comes with a matching hand strap. You’ll also find a protective cloth in the box to store and transport the X70 with extra peace of mind. All other controls, dials and flip-up screen are also accessible in this beautifully made case.

    Installation

    Fujifilm X70 leather case BLC-X70 review

    Installing the BLC-X70 is an easy affair as it screws into the tripod thread on the bottom plate. As usual with Fuji half cases, you will need a coin to properly fasten it. but once installed you’ll never really need to remove it since the battery (and SD card) compartment is reachable thanks to a flap.

    Conclusion

    Besides the obvious functionality of protecting your X70, the BLC-X70 also adds some grip to this very small camera. The case also comes with a fetching little hand strap that I actually find easier to use with this lightweight APS-C camera than using a neck strap. It’s great that both battery and SD slot are accessible without having to remove the case.

    Fujifilm X70 leather case BLC-X70 review

    The BLC-X70 is a very well designed leather half case for the Fujifilm X70 that offers an extra level of protection. It retains all the functionality of dials, buttons and flip screen and also adds just a bit more grip to this great little camera. Highly recommended product.