Category: camera equipment reviews

Category for all reviews of camera equipment like flashes, diffusers, cases, modifiers, straps bags, battery chargers.

  • Haida 150 Series Filter Holder for Tamron 15-30mm f/2.8

    Haida 150 Series Filter Holder for Tamron 15-30mm f/2.8

    Haida 150 Series Filter Holder for Tamron 15-30mm f/2.8

    Introduction

    Lenses like the Tamron SP 15-30mm f/2.8 have a bulbous front element that make in impossible to use any screw-in filter or filter holder. If you want to use an ND filter with a lens like this, you need to find an filter holder system specially designed for that lens. Lenses like the Tamron SP 15-30mm f/2.8 have a bulbous front element that make in impossible to use any screw-in filter or filter holder. If you want to use an ND filter with a lens like this, you need to find an filter holder system specially designed for that lens.
    Haida 150 Series Filter Holder for Tamron 15-30mm f/2.8
    Haida has such a system called the 150 Series Filter Holder and compared to similar offerings from other manufacturers; it’s at least half as expensive. But does this lower price mean a lower quality item? Let’s find out in this review.
    Haida 150 Series Filter Holder for Tamron 15-30mm f/2.8

    Haida 150 Series Filter Holder

    Haida has a 150 Series Filter Holder System that they produce for the most popular bulbous front element wide angle lenses:

    • Olympus M. ZUIKO DIGITAL ED 7-14mm 2.8 PRO
    • Nikon 14-24 2.8G ED
    • Tamron 15-30 2.8 Di VC USD
    • Canon 14 2.8L II
    • Canon 17 TS-E
    • Sigma 12-24 4.5-5.6 DG HSM II
    • Samyang 14 2.8 IF ED UMC
    • Tokina 16-28 2.8 PRO AT-X
    • Olympus M. ZUIKO Digital ED 7-14mm 2.8 PRO Lens

    Haida 150 Series Filter Holder for Tamron 15-30mm f/2.8
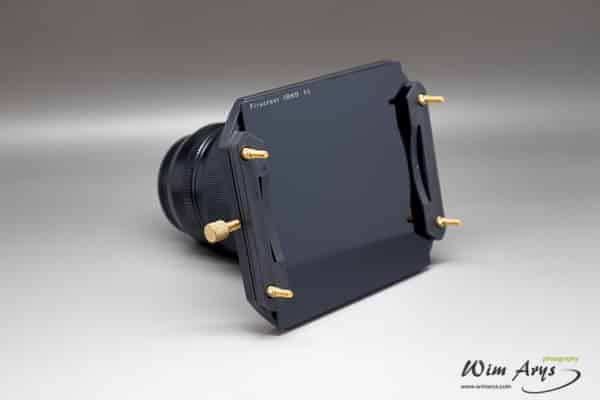
    The Haida 150 Series Filter Holder kit includes the filter holder itself, a front ring, locking ring, gaskets and a copper fix screw. The holder, front ring and locking ring are made of high-quality industrial grade aluminium. The 15 cm filter holder is 360° rotatable and locks with the copper fix screw.

    This system allows you to use up to two stacked ND filters without any vignetting.

    150mm filters available from Haida

    Although you can use any 150mm filter (like Lee Filters) in the Haida 150 series filter holder system, Haida has a range of high-quality Optical Class filters too.
    Haida 150 Series Filter Holder for Tamron 15-30mm f/2.8

    • ND0.3,2x Optical Glass Neutral Density Filter
    • ND0.6,4x Optical Glass Neutral Density Filter
    • ND0.9,8x Optical Glass Neutral Density Filter
    • ND1.8,64x Optical Glass Neutral Density Filter
    • ND3.0,1000x Optical Glass Neutral Density Filter
    • ND3.6,12 Stops Optical Glass Neutral Density Filter
    • 150 Series C-POL
    • 150 Series PROII MC Soft Graduated ND0.3
    • 150 Series PROII MC Soft Graduated ND0.6
    • 150 Series PROII MC Soft Graduated ND0.9
    • 150 Series PROII MC Soft Graduated ND1.2
    • 150 Series PROII MC Hard Graduated ND0.3
    • 150 Series PROII MC Hard Graduated ND0.6
    • 150 Series PROII MC Hard Graduated ND1.2 I
    • 150 Series PROII MC Hard Graduated ND0.3
    • 150 Series PROII MC Hard Graduated ND0.6 
    • 150 Series PROII MC Hard Graduated ND0.9
    • 150 Series PROII MC Hard Graduated ND1.2
    • 150 Series PROII MC Hard Graduated ND0.3
    • 150 Series PROII MC Hard Graduated ND0.6
    • 150 Series PROII MC Hard Graduated ND0.9
    • 150 Series PROII MC Hard Graduated ND1.2
    • 150 Series PROII MC Reverse Graduated ND0.6
    • 150 Series PROII MC Reverse Graduated ND1.2

    Haida 150 Series Filter Holder in use

    The assembly of the 150mm series filter holder for the Tamron SP 15-30mm f/2.8 is quite easy.
    Haida 150 Series Filter Holder for Tamron 15-30mm f/2.8

    The locking ring slides over the lens barrel from the mount upwards. The locking ring slides over the lens barrel from the mount upwards.

    Haida 150 Series Filter Holder for Tamron 15-30mm f/2.8
    The second step is screwing on the front ring that is held into place on the fixed lens hood by four triangle pins. The second step is screwing on the front ring that is held into place on the fixed lens hood by four triangle pins.
    Haida 150 Series Filter Holder for Tamron 15-30mm f/2.8

    When these elements are firmly in place, you can simply mount the filter holder onto the front ring.
    Haida 150 Series Filter Holder for Tamron 15-30mm f/2.8

    The filter holder can be locked for either portrait or landscape orientation by using the copper pin provided.
    Once assembled, the construction looks very sturdy. Clear markings on the front ring and locking ring show you how to disassemble the unit. You’ll be happy to know that assembly and disassembly of the filter holder can easily be done without damaging the lens itself.
    An advantage of a system like this is that since the lens hood is the fixed type, you can still benefit from the shading provided to eliminate lens flare. If, on the other hand, you’d be using a filter thread system on another lens, you’d lose this benefit.

    150mm filters in use

    Haida 150 Series Filter Holder for Tamron 15-30mm f/2.8

    I had the chance to try two 150mm filters from Haida: the PROII MC Soft Graduated ND0.9 Insert Filter and the ND3.0, 1000x Optical Glass Neutral Density Filter. Both performed very well with almost no color cast. In certain situations like low light shooting at dusk and dawn, it will warm up your image towards the warm side, but this is easily corrected in post processing. The filters are made out of high-quality coated optical glass, and I had no issues with flare either.

    Haida 150 Series Filter Holder for Tamron 15-30mm f/2.8
    These 150 mm filters come very well packaged and each have a padded soft sleeve and seem to be quite durable. I’ve had no signs of wear and tear thanks to the felt used in the flocked inner ring and padding on the filter holder inserts. But filters this large should always be handled with care, so a setup like this is perhaps not the best solution for travel photography.

    Conclusion

    The Haida 150 Series Filter Holder is an excellent option for a 150mm filter holder for the Tamron 15-30 lens. It is much less expensive than the competition and features an excellent build quality. All parts fit very well and are made from high-quality aluminum. I like the fact that there is only one screw to look after, and even if lost the unit will continue to function, as this pin is simply used to lock the rotation down. The set came with two thin foam light-blocking gaskets already installed and there are three additional sets in case you need them down the road. I don’t think there is a better alternative in this price range or even double the cost.

    Haida 150 Series Filter Holder for Tamron 15-30mm f/2.8
    The PROII MC Soft Graduated ND0.9 Insert Filter and the ND3.0, 1000x Optical Glass Neutral Density Filter produced zero vignetting, even when used together. Compared to more expensive 6-stop and 10-stop multicoated filters, these Haidas impart practically no colour cast and are also sharper. Optical glass always seems to perform better than resin filters (like Formatt Hitech). Haida filters are a fraction of the cost of Lee and appear to be at least as good in terms of quality.

    Purchase and availability

    You can find more information on where to purchase Haida filters and filter holders on their website: www.haidaphoto.com.
     

  • PortraitPro 15 quick review

    PortraitPro 15 quick review

    PortraitPro 15 quick review

    Introduction

    There is a new version, you can find my review of PortraitPro 19 here. Anthropics Technology Ltd just announced the launch of PortraitPro v15. This is a major release of the professional portrait retouching software, used by many portrait and wedding photographers.

    PortraitPro 15’s technology, grounded in cutting-edge scientific image-processing research, allows for expanded creativity and retouching efficiency while preserving natural-looking results and ease of use.

    New Features

    PortraitPro 15 incorporates many new features requested by photographers. These include realistic makeup controls, wide angle (selfie) lens distortion correction, enhanced Child Mode, advanced skin coloring, and tone correction, improved feature detection, and support for ultra-high resolution displays.

    PortraitPro 15 review

    Makeup Controls

    From subtle, everyday looks to high-fashion editorial styles, PortraitPro 15 offers a full set of makeup controls, the most requested new feature. Based on research into how real cosmetics works, PortraitPro 15 delivers the most natural results in the industry via simple slider controls.

    Wide Angle (Selfie) Lens Distortion Correction

    The new Lens Correction slider fixes distortion caused by a wide-angle lens (known as selfie distortion on smartphones), creating more natural-looking, flattering portraits from pictures taken with wide-angle lenses or smartphones.

    Enhanced Child Mode

    PortraitPro 15 can also enhance child photos better. Children need very different treatment from adults in terms of photographic enhancement, and new modes have been added to the software to treat children more sensitively.

    More advanced Skin Coloring Controls

    Brand new skin coloring controls allow you to correct intelligently for any lighting situation and give skin a healthy, natural glow.

    Improved feature detection

    The feature detector has been made more accurate in version 15 to enhance the quality of results and speed throughout.

    Support for ultra high-resolution displays

    PortraitPro v15 now supports Apple Retina and Hi-Res PC displays.

    Conclusion

    PortraitPro 15 offers some worthwhile additions and enhancements to convince you to upgrade to the latest version. Face- and feature recognition works faster and more accurate than previous versions.

    The addition of make-up and skin coloring controls can improve your portraits significantly if you don’t have the means or opportunity to be in full control of make-up and lighting during your shoot. I’m thinking especially of wedding photographers when often the bride has to be shot in less than ideal circumstances.

    Enhancing childrens’ faces has always been a difficult task, but the added features in PortraitPo 15 do make the job easier.

    Finally, the added support for Retina and Hi-Res PC displays was a much-needed upgrade in functionality.

    If you’ve never used PortraitPro, I would advise you to try the demo on their website. I’m sure you’ll be impressed.


  • DEO-Tech adapter guide for the sony A7 series

    DEO-Tech adapter guide for the sony A7 series

    DEO-Tech adapter guide for the Sony A7 series

    Introduction

    Deo-Tech, also sometimes called Tech-Art, is a Chinese adapter brand from MX Camera. Adapters available for the Sony A7 series are the Golden Eagle (Contax G to NEX), Falcon (Canon EF to NEX) and Saker Falcon Lite (Canon EF to NEX). All these adapters retain electronic communication between camera and lens and a Bluetooth module for firmware updates via your smartphone. Since these adapters are not supported by either Canon or Sony, the mapping of both lens and camera has to be re-engineered.

    All DEO-Tech adapters for the Sony A7, A7r, A7, A7s, A7II, A7rii, and A7sII

    DEO-Tech Golden Eagle Contax G Lens to Sony NEX Camera Lens Mount Adapter Mark III or Techart TA-GA1B

    The Deo-Tech Golden Eagle is also known as the Techart TA-GA1B. The Golden Eagle adapts Contax G Lenses to the Sony E or FE mount. It is compatible with both APS-C cameras (like the A6000) and the Full-Frame A7 series.  This adapter retains Electronic Communication between your camera and lens with Auto Exposure and Autofocus supported. It has a Built-in Bluetooth 4.0 module that allows you to install firmware updates. The Mark III has been optimized for stability to reduce the dreaded “black screen” in earlier versions and is reportedly now 50% faster. The Golden Eagle has a copper bay bayonet mount on both sides of the adapter, a smooth manual focus wheel and a solid build with a smooth finish.

    Supported Cameras:
    • A7r
    • A7
    • A6000
    • A5000
    Support Lenses:
    • Hologon T* 16mm f/8 (no AF)
    • Distagon T* 21mm f/2.8
    • Distagon T* 28mm f/2.8
    • Planar T* 35mm f/2
    • Planar T* 45mm f/2
    • Sonnar T* 90mm f/2.8

    Not Supported: Vario-Sonnar T* 35-70mm f/3.5-5.6

    Purchase and Availability

    The Techart TA-GA1B is available for purchase at around $299 on eBay here Techart TA-GA1B.

    DEO-Tech Falcon Canon EF Mount Lens to Sony NEX Camera Lens Mount Adapter Mark III or Techart EOS-INEX III

    The Deo-Tech Falcon is also known as the Techart EOS-INEX II. The Falcon adapts Canon EF/EF-S Lenses To Sony E- and FE cameras. It’s compatible with both APS-C cameras like the A5000 and the Full Frame A7 range. This adapter Retains Electronic communication between camera and lens and features automatic aperture control, EXIF data, image stabilization and autofocus, including USM autofocus. There is no Vignetting with Full Frame Cameras, and it features a built-in Bluetooth 4.0 Firmware Module. You’ll find an Arca-Type Removable Tripod Foot in the box if you need to adapter larger Canon lenses with a tripod. Some vignetting may occur when using Canon EF-S since these lenses are designed for an x1.6 sensor, but Sony has a 1.5x crop sensor.  Autofocus may be slow or non-compatible with some third party EF-mount lenses. On Sony NEX-5 or later model cameras, the aperture can be adjusted during video capture. Your EXIF data will only show “Sony DT 50mm f/1.8 ” as the lens model.

    Supported cameras:
    • NEX 3
    • C3
    • NEX 5, 5N, 5R, 6, 7
    • Sony ILCE-A7, A7r, A7s
    • VG-10, VG-20, VG-30, VG-900,FS-100
    Supported lenses:
    • Canon 24mm f/1.4 L USM (Ver. II)
    • Canon 16-35mm f/2.8 L USM (Ver. I)
    • Canon 24mm f/2.8 USM
    • Canon 16-35mm f/2.8 L USM (ver. II)
    • Canon 28mm f/2.8
    • Canon 17-40mm f/4 L USM
    • Canon 35mm f/1.4 L USM
      Canon 20-35mm f/2.8 L
    • Canon 35mm f/2 (tested, but not reliable AF)
    • Canon 24-70mm f/2.8 L USM (Ver.I)
    • Canon 40mm f/2.8 STM
    • Canon 24-105mm f/4 L USM I.S.
    • Canon 50mm f/1.2 L USM
    • Canon 28-70mm f/3.5-4.5
    • Canon 50mm f/1.4 USM
    • Canon 28-80mm f/2.8-4 L
    • Canon 50mm f/1.8 II
    • Canon 28-90mm f/4.-5.6 (Ver. II)
    • Canon 85mm f/1.2 L USM (Ver.I)
    • Canon 80-200mm f/2.8 L
    • Canon 85mm f/1.2 L USM (Ver.II)
    • Canon 70-200mm f/4 L USM (you need switch off the camera while change MF to AF)
    • Canon 85mm f/1.8 USM
    • Canon 70-200mm f/4 L USM I.S. (you need switch off the camera while change MF to AF)
    • Canon 100mm f/2
    • Canon 70-200mm f/2.8 L USM
    • Canon 100mm f/2.8 L Marco USM I.S. (you need switch off the camera while change MF to AF)
    • Canon 70-200mm f/2.8 L USM I.S. (Ver. I)
    • Canon 135mm f/2 L USM
    • Canon 70-200mm f/2.8 L USM I.S. (Ver.II)
    • Canon 70-300mm f4.5-5.6 L USM I.S.
    • Canon 100-400mm f/4.5-5.6 L USM I.S.
    • Canon EF-S series
    • Canon 17-55mm f/2.8 USM I.S.
    • Canon 18-55mm f/3.5-5.6 USM I.S.
    • Canon 18-135mm f/3.5-5.6 I.S.
    • Canon 55-200mm f/4.5-5.6 USM I.S.
    • Sigma SP 17-35mm f/2.8-4 Di LD Asph
    • Sigma 50mm f/1.4 EX DG HSM (you can change the aperture, but lens AF does not work correctly)
    • Sigma SP 17-50mm f/2.8 XR Di II VC
    • Sigma 24-70mm f/2.8 EX DG HSM (you can change the aperture, but lens AF does not function correctly)
    • Sigma SP 28-75mm f/2.8 XR Di LD
    • Sigma SP 200-500mm f/5-6.3 Di LD IF
    • Sigma SP 70-300mm f4-5.6 Di VC USD
    • Zeiss ZE Distagon T* 21mm f/2.8 (you can change the aperture but can’t display the correct largest opening)
    • Zeiss ZE Planar T* 85mm f/1.4
    Purchase and Availability

    The DEO-Techart Falcon is available for purchase at around $299 on eBay here Techart EOS-INEX III.

    DEO-Tech Saker Falcon Lite

    The DEO-Tech Saker Falcon or Saker Falcon Lite is their latest adapter for Canon EF/EF-S Lenses to Sony E- and FE cameras. This adapter makes Canon EF/EF-S lenses as fast on a Sony A7 as on the A7rII. It supports DMF, AF-C and AF-A and has all the features and functionality as the original Falcon. 

    It’s about as fast as the Metabones Mark IV on the A7rII. 

    Supported Cameras
    • NEX 3
    • C3
    • NEX 5, 5N, 5R, 6, 7
    • Sony ILCE-A7, A7ii, A7r, A7s, A7rII
    • VG-10, VG-20, VG-30, VG-900,FS-100
    Supported lenses (testing is ongoing for others)
    • Canon 70-200/2.8 ii
    • Canon 24-70/2.8
    • Canon 24-70/4
    • Canon 50/1.2
    • Canon 85/1.2
    • Canon 24/1.4
    • Canon 16-35 ii
    Purchase and Availability

    The new Saker Falcon will be available soon.

    Firmware updates via BlueTooth

    It’s possible to update the DEO-Techart Golden Eagle, Falcon and Saker Falcon Lite via Bluetooth. Te Easiest way to do this is via an app for Android and iOS called ‘TECHART Update’.

    You can find this app on Google Play or on iTunes.


  • NiSi v3 filter holder system and filter review

    NiSi v3 filter holder system and filter review

    Introduction

    Anyone serious about long exposure photography with wide-angle lenses will eventually end up looking at a Square Filter Holder System. These systems use oversized pieces of rectangular optical glass that are placed in front of your lens to reduce the amount of light hitting the sensor. This in turn allows the photographer to use longer shutter speeds to achieve a range of effects like silky smooth water, thick mist and cloud streaks. Another application is tempering bright skies with a graduated filter for general landscape photography.

    nisi v3 filter holder system

    Finding a decently priced Square Filter Holder system and high-quality filters isn’t easy, though. This photography field has been traditionally dominated by Lee Filters, with companies like Formatt Hitech and Cokin following in their footsteps. If you’re on a tighter budget, you’ll also find an abundance of cheaper filter systems from mainly Chinese manufacturers on eBay and Amazon.

    There is always the question of quality, though, as some filter systems add what is called colour cast, decrease sharpness and reduce contrast. These problems aren’t exclusive to the cheaper Filter systems as you can read in my Formatt Hitech review earlier this year.

    In Europe and the US, NiSi is a relative newcomer in the square filter system market. And at least on paper, they do seem to offer high-quality products and very competitive prices, so I decided to give them a try.

    About Nisi

    NiSi is a Chinese company that specialises in photographic filters. Their manufacturing and research facilities cover an area of 500 square metres with professional CNC machining equipment and advanced optical instruments. This company has a team of optical design experts with over 20 years of experience. They don’t just produce for their in-house brand but also have many international clients for whom they design and manufacture optical photography equipment.

    nisi v3 filter holder system review

    The glass used in the filters come from AGC in Japan and Schott in Germany. Their frames are made from high-quality aviation grade aluminium with a thickness of only 5.2mm, the thinnest in the world so far. Many of their products incorporate double side, anti-reflection, water/stain/scratch resistant coatings to assure optimal transmittance and ultra-low reflectivity. NiSi currently produces three filter series (UV, CPL and ND) all by the strict ROHS European standards.

    NiSi v3 filter holder system

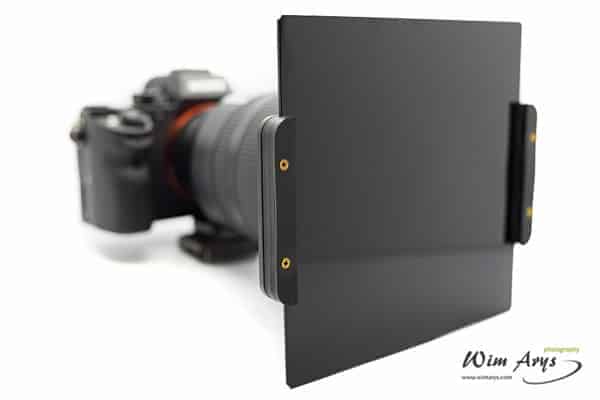
    NiSi Digital has recently launched a new patented design 100mm square filter holder system. This filter holder has a few interesting innovations like an ad hoc adapter ring that incorporates an 82mm CPL filter. This polarising filter is extremely thin, enabling it to work inside the filter system without any vignetting or artefacts. It’s possible to rotate this CPL with a special gear behind the filter holder.

    nisi v3 filter holder system

    Incorporating a CPL in your landscape or long exposure system has several advantages besides adding contrast and clarity to your images. It also reduces reflections from the lens (or markings on the front) and can act as a kind of graduated filter (eliminating blown out skies) in the right conditions. The use of a CPL reduces the light entering the lens by one to two stops.

    nisi v3 filter holder system

    The holder itself can accommodate up to three 100mm square filters of your choice and fits all makes of lenses with 67mm, 72mm, 77mm and 82mm filter sizes. The set has three step-up rings to accommodate the smaller thread sizes, all included in the box. The special 82mm adapter ring holds the ultra slim CPL filter I mentioned earlier. The wide angle adaptor rings and filter holder all have an integrated foam collar to eliminate stray light entering the lens.

    Nisi AR ND1000 (3.0) 1o0x1o0mm 10 stop filter

    nisi v3 filter holder system

    NiSi were kind enough to supply me with an ND1000 (3.0) filter for this review.  This square filter is made of high quality Japanese optical glass from AGC (equal to Schott HK-9L) and offers ten stops of exposure correction to weaken the light entering the lens effectively without any colour cast. The NiSi ND1000 has an anti-reflective multi-coating on both sides and is waterproof and stain-resistant. Both sides have their precision grinding and polishing technique applied with the markings etched by laser on the surface. Just like Lee filters they have an EVA protective seal to calibrate better the filter in your filter holder and prevent flare and come in a high-quality fabric pouch.

    NiSi v3 filter holder system in use

    Nisi want to become one of the big players in the photography market, and their products all seem to be made to a very high standard. All parts in the filter holder system are CNC machined and have a lovely matte finish. Every element of this system looks beautifully crafted and elegant, you do notice that a lot of work has been put into the design and fabrication of this product. NiSi Digital has eight professional photographers on retainer who give feedback on all their designs, and they were also instrumental in this very smart filter holder.

    nisi v3 filter holder system

    The assembly of the filter system is quite straightforward: the filter ring adapter (either 67mm, 72mm, 77mm) screws on your lens filter thread that in turn screws onto the 82mm adapter ring. The 82mm adapter ring can accommodate the thin polarising filter, and the 100mm holder system called HS-V3 just clips onto this ring by the use of a metal pin. This system makes it easy to assemble and disassemble the filter holder itself, but the HS-V3 does turn freely around the 82mm ring. Not a real problem, but if you’re coming from another filter holder system, it is something that might need some time to get used to.

    nisi v3 filter holder system

    The 100mm filter holder has a flocked inner ring to ensure a tight fit once you’ve inserted a filter. At first, the seal might feel very tight, but this is necessary to ensure that no stray light can enter the lens.

    nisi v3 filter holder system
    The most important part of any filter system is, of course, the actual filters themselves. These large square pieces of glass slide into the front part of the holder right in front of the lens. The NISI system has three slots that allow you to stack up to three filters of your choice.

    nisi v3 filter holder system

    I’ve become suspicious of big claims about the quality, scratch resistance and ‘no colour cast’ of ND filters. But NiSi filters work as described, I could see no colour cast (when used with a grey card), it’s very effective at eliminating unwanted reflections and in the few months that I’ve been using them, they seem very durable.

    nisi v3 filter holder system

    Conclusion

    The Nisi v3 filter holder system is an excellent choice for any long exposure or landscape photographer who is looking for a high performing filter holder system. Whatever wide-angle lens you use, you’ll be happy to know that you’ll find all the most commonly used filter thread adapters inside the box. All parts are exceptionally well made and assembly is straightforward. The inclusion of high quality slim polarising filter and the unique rotating mechanism prove that a lot of thought has gone into the design of the NiSi v3 and that this company is listening to their user base.

    nisi v3 filter holder system

    The Nisi AR ND1000 (3.0) 1o0x1o0mm filter rivals any 10 stop filter from any of better-known brands, with no decrease in sharpness or contrast detectable. Colour cast from this filter is also virtually none existent, except in very dim conditions without the use of a grey card to adjust white balance. In any case, this was easily rectified in Lightroom (something that is not always the case with ND filters from other manufacturers). 

    nisi v3 filter holder system

    Using the v3 filter holder together with their Nisi AR ND1000 filters did not cause any vignetting on my Full Frame Canon 16-35mm f/4 wide-angle lens, even though this lens requires the use of one of the step-up adapters. This will be my filter system of choice from now on.

    Purchase and availability

    NiSi has an extensive distribution network around the world, have a look at their website to find your local distributor here. If you’d like to see more images made with Nisi equipment, the NiSi Singapore Facebook page shows updates and examples frequently. In Belgium, NiSi is distributed by VDH Photo Supplies.


  • JJC multi function timer remote shutter review

    JJC multi function timer remote shutter review

    JJC Multi-function timer remote shutter review

    Introduction

    JJC or Shenzhen JinJiaCheng Photography Equipment is a Chinese manufacturer of digital camera accessories with an integrated research department. They are most known for our their wireless remote controls, camera batteries and camera chargers.

    JJC Multi-function timer remote shutter

    Even though most mirror-less cameras have WiFi capabilities and can be controlled remotely via an app, I still prefer a dedicated remote trigger for long exposures and crucial landscape work. The reason is simple: phones have a short battery life and tend to shut down right at the moment when you need them to trigger your camera. A remote shutter like the JJC, on the other hand, uses 2 AAA batteries and will last for about two months of continuous shooting. It’s also easy to program the shutter time once you’ve calculated it, and even program in multiple consecutive exposures with a delay time.

    JJC multi function timer remote shutter

    Different camera manufacturers use different protocols for remotely operating this functionality, and often use a different USB connection. JJC makes their Multi-function timer remote shutter units for any brand of camera you can think of, so I’m sure yours is available too. I’ve tried three of these units: for Sigma, Sony, and Fuji cameras.

    JJC multi function timer remote shutter

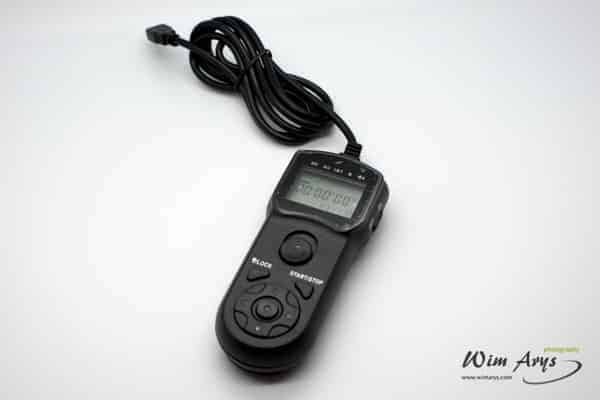
    The basic functionally is the same across the board: the JJC timer remote controller provides a trigger function and can also activate the bulb function. The remote has a two stage release button: half-press to focus and a full press will trigger the shutter.
    JJC multi function timer remote shutter
    For long exposures, you can press the release button fully and slide it into the locked position. These units can also be programmed to function as an intervalometer. This functionality allows you to set a self-timer, interval timer, long exposure timer, and the number of consecutive exposures.
    The timer can be adjusted anywhere from 1 second to 99 hours 59 minutes and 59 seconds. The maximum number of exposures is 399. Pressing the Lock button for 2 seconds will lock the panel to prevent you from accidentally stopping a running timer. These remote triggers also have a backlit LCD screen that allows you see the LCD even in total darkness.

    Conclusion

    The JJC timer remote controller is an essential piece of kit for any landscape or long exposure photographer. They are cheaper and often offer more elaborate timing and programming capabilities than brand timers. One thing you need to keep in mind that your camera will need a bulb function (shutter time over 30 seconds) to take full advantage of this remote shutters’ capabilities. These JJC units are pretty reliable, the only thing you have to be careful of is the USB connection to the camera.The USB connection is not of the highest quality and can quickly detach from the plastic casing if left unsupported.

    Purchase and availability

    You can find these JJC units for all major camera brand at your local store or on Amazon here [easyazon_link identifier=”B008XW7T8I” locale=”US” tag=”wimarysdigitc-20″ cart=”n”]JJC TM-M LCD Timer Remote Control for Nikon D600 D7100 D7000 D5200 D5100 D5000 D3200 (Black)[/easyazon_link]

  • Komodo Gear Lokee adaptable grip cage on Kickstarter

    Komodo Gear Lokee adaptable grip cage on Kickstarter

    Komodo Gear Lokee adaptable grip cage on Kickstarter

    Introduction

    Komodo-Gear has launched a new product called Lokee. It’s a modular, adaptable grip cage for video. A grip cage improves the ergonomics of a small camera while remaining lightweight. It allows you to easily and quickly film with different angles and also protects your device.  

    Lokee was designed to provide a high-quality construction for camera steady shot control while still staying small and light. It also provides an additional platform for different accessories with added functionality and brings you a more professional filming experience, even with a smartphone.

    Komodo Gear Lokee adaptable grip cage

    Lokee works with many different devices. Mirrorless Cameras, DSLR Camera, BMPCC, Digital Camera and even Smartphones can use this cage to enhance video quality.

    Lokee was primarily designed for small and lightweight cameras. However, many medium-sized DSLRs can also take advantage of what this camera cage offers. The maximum distance from the screw to right side edge and back side edge is 9cm and 3cm respectively.

    Komodo Gear Lokee adaptable grip cage

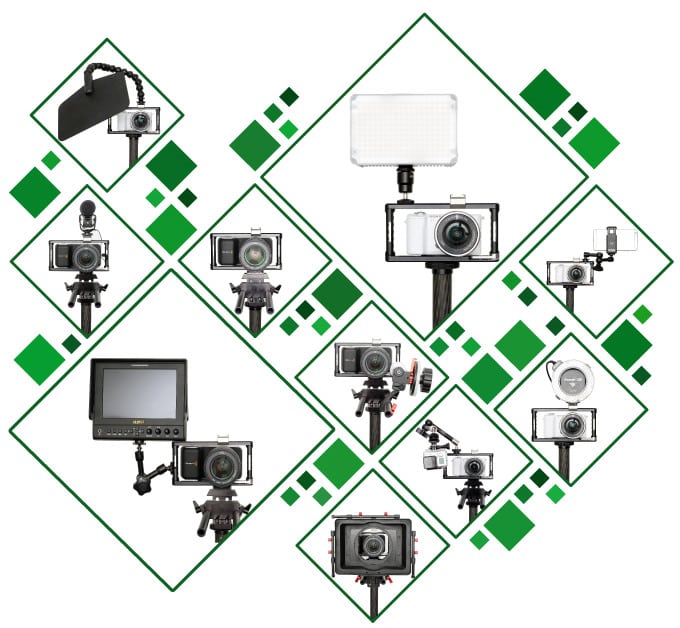
    Lokee is designed for multi-functional usage. There are eight main modes of use, but it can also be customized further. If you are looking for simple, comfortable and fully equipped gear in small size, with handles, cheese plate or tripod mount, then look no further. They are all available, and custom made for Lokee.  It doesn’t matter if you are just using a regular camera to shoot, you like to film with a monitor, or you have another special way to taking video, you can always find a way to play with Lokee that works with your style.

    Komodo Gear Lokee adaptable grip cage

    Different Modes

    Lokee comes in 8 different modes, each with their own accessories and intended for different types of cameras and shooting modes.

    Basic Mode

    Komodo Gear Lokee adaptable grip cage

    Basic mode uses the base unit only. It’s intended for small mirror-less cameras and consumer DSLR’s. Using the Lokee in the basic mode will stabilise your camera and help you get a better grip for longer shooting.

    GoPro Mode

    Komodo Gear Lokee adaptable grip cage

    GoPro mode extends the base unit with a particular accessory to mount you GoPro camera.

    Mobile Mode

    3in1-01

    Mobile mode has a special adapter for mobile devices.

    Double Handle

    Komodo Gear Lokee adaptable grip cage

    Double handle mode allows you to shoot with a range of angles while still stabilizing your DSLR or mirrorless camera.

    Butterfly mode

    Komodo Gear Lokee adaptable grip cage

    Butterfly mode adds two firm grips to the cage. This is intended for more serious use, and heaving two grips will greatly improve stabilisation of your camera. Accessories like a continuous LED light or a microphone can be easily attached to the cage via an accessory.

    Monitor Mode

    Komodo Gear Lokee adaptable grip cage

    Monitor mode allows you to comfortably add a monitor to your set-up via a back cheese plate accessory. It supports monitors up to 7-inch.

    Tripod Mode

    Komodo Gear Lokee adaptable grip cage

    Tripod Mode is perfect for fitting your camera to a tripod or fluid head. It uses standard 15mm rods, supports matte box, follow focus and other pro accessories. It’s designed for BMPCC and also fits most DC and mirrorless cameras.

    Cage mode

    Komodo Gear Lokee adaptable grip cage

    Cage mode fully protects your camera and allows for a better grip. A range of accessories can be attached to the cage.

    Purchase and Availability

    Lokee is raising funds for production on Kickstarter now. Click here to go to the Lokee Kickstarter page.

  • Manfrotto X-PRO 3-Way Head MHXPRO-3WG review

    Manfrotto X-PRO 3-Way Head MHXPRO-3WG review

    Manfrotto X-PRO 3-Way geared Head MHXPRO-3W review

    Introduction

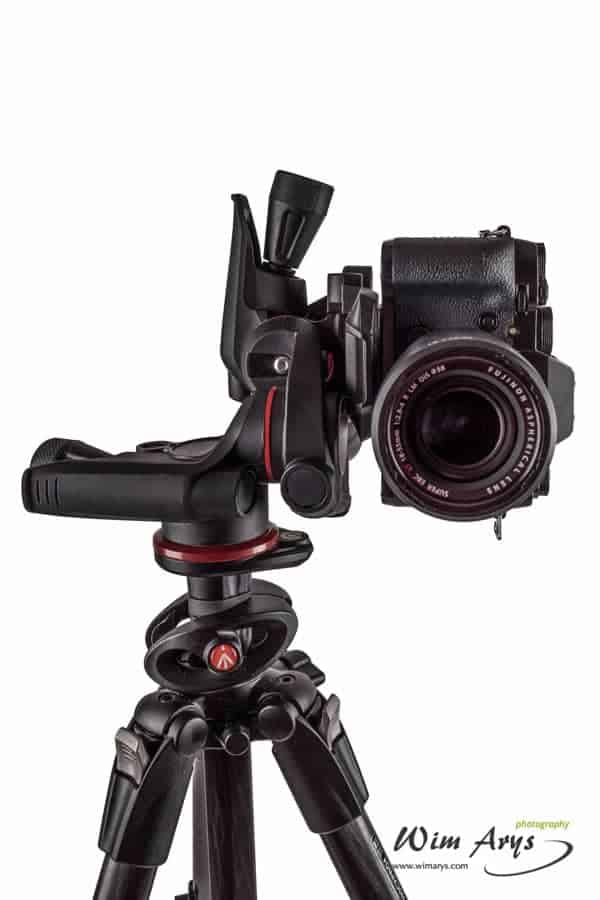
    The Manfrotto X-Pro 3-way geared head is a precise 3-way photographic head. The ‘Adapto’ body is made from a strong technopolymer, this to make the head the lightest that Manfrotto has.

    Manfrotto X-PRO 3-Way Head MHXPRO-3W

    This head has micrometric knobs to allow photographers to frame images precisely on all three axes. For larger framing adjustments, the locking system can be disengaged by pushing the knob against the levers.

    Manfrotto X-PRO 3-Way Head MHXPRO-3W

    MHXPRO-3W in use

    This is Manfrotto’s most compact, precise and reliable 3-way photographic head. You can make extremely accurate framing adjustments thanks to the micrometric knobs.

    Manfrotto X-PRO 3-Way Head MHXPRO-3W

    The three leveling bubbles on the head make precise framing and composition very easy. This reduces post-production work and is especially useful if you don’t want to lose any pixel information by straighting horizons or re-framing in Lightroom.

    Manfrotto X-PRO 3-Way Head MHXPRO-3W

    The build is very sturdy, this tripod head has travelled with me around the world and still performs correctly. Even though it’s relatively light, I transport it in my check-in luggage as it’s too big to fit in my carry-on photography backpack.

    Manfrotto X-PRO 3-Way Head MHXPRO-3W

    I use this tripod head together with the Manfrotto 190CXPRO4 and this combination has proved very successful balancing my mirror-less cameras and eliminating any movement during long exposures.

    Manfrotto X-PRO 3-Way Head MHXPRO-3W

    It’s true that the Manfrotto MHXPRO-3WG is quite expensive, but I’ve found that there are few shortcuts when it comes to a reliable tripod and tripod head.

    This 3-way head comes very recommended, I have not regretted my purchase and has improved my landscape/seascape photography considerably. Manfrotto also gives an extra warranty for a total of 8 years; you do need to purchase your Manfrotto equipment in the country where you live if you want to take advantage of this extended warranty.

    Purchase and Availability


    [easyazon_image align=”none” height=”126″ identifier=”B00NI4A6LI” locale=”US” src=”https://wimarys.com/wp-content/uploads/2015/07/41MX5C7m8GL.SL160.jpg” tag=”wimarysdigitc-20″ width=”160″]

  • Manfrotto 190 carbon fibre 4-section tripod 190CXPRO4 review

    Manfrotto 190 carbon fibre 4-section tripod 190CXPRO4 review

    Manfrotto 190 carbon fibre 4-section tripod review (190CXPRO4)

    Introduction

    Manfrotto is one of the world’s leading brands in manufacturing high-quality camera and lighting supports. They were originally an Italian company, but UK broadcast and media giant Vitec Group Plc acquired them in the late 1980’s. They kept the name Manfrotto though, and their tripods and other equipment are still produced and designed in Italy. Today, the Manfrotto name is renowned for high quality (yet quite expensive) cutting edge photography tripods, ball heads and other photography-related suspension equipment.

    Manfrotto 190 carbon fibre 4-section tripod

    The Manfrotto 190 carbon fibre 4-section tripod is one of their top-of-the-line four-section tripods. The leg tubes are made of carbon fibre for an optimal balance between sturdiness and weight. A mere 3.6 lb (1.6 kg) makes this tripod an excellent option for travel photography with a folded length of 20.6″ (52.5 cm). Manfrotto managed to cut down the length by 16 cm compared to earlier 190 models thanks to this four section design. Not bad for a tripod that extends to a maximum length of 63″ (160 cm) with a load capacity of 15.4 lb (6kg).

    Manfrotto 190 carbon fibre 4-section tripod 190CXPRO4

    One of the more unusual characteristics of the 190CXPRO4 is its 90° centre column mechanism. This mechanism lets you extend the column vertically as normal, or horizontally for a wide range of framing and shooting possibilities from portrait mode to otherwise uncomfortable angles for macro photography. Switching between the vertical and horizontal column orientation requires a press on the mechanism on the bottom of the centre column, and can even be done with a camera attached.
    Manfrotto 190 carbon fibre 4-section tripod 190CXPRO4

    The legs have what Manfrotto calls ‘Quick Power Lock levers’ that block and unblock each leg section. They allow for a more comfortable and stronger single-handed grip of the leg locks, enabling you to release each section of the leg with z digne movement. This QPL lever design also has the benefit of a more powerful locking of each section. This means that the tripod is more stable and rigid than with traditional lever designs.

    Manfrotto 190 carbon fibre 4-section tripod 190CXPRO4

    It’s also possible to angle the legs in four steps via a click system. This allows you to angle it down to an extremely low angle, 8 cm above the ground; quite useful for macro photography.

    Manfrotto 190 carbon fibre 4-section tripod 190CXPRO4

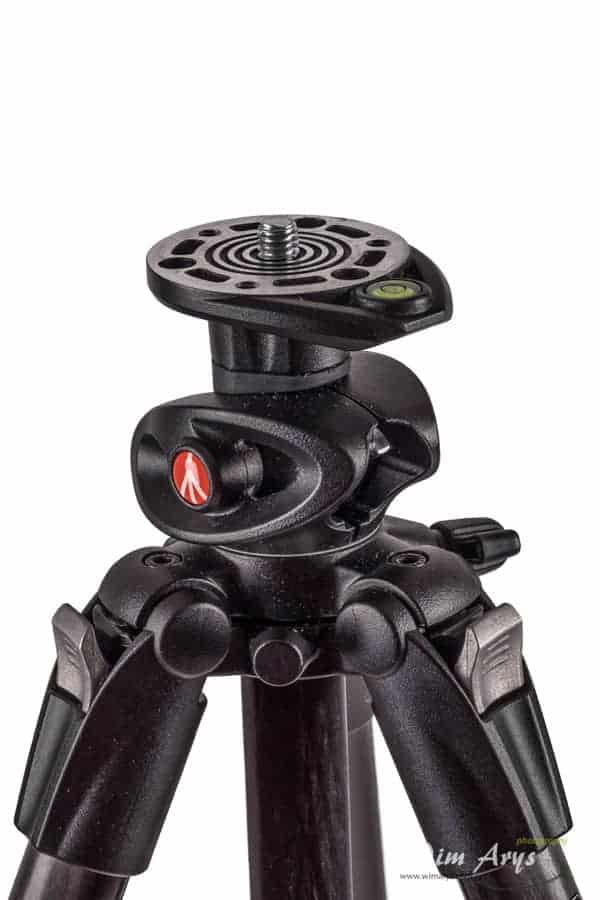
    You’ll also find a bubble level on the top of the centre column. This bubble level rotates freely around the centre column, so you can position it wherever it’s easiest for you to see it without being obscured by the mounted head and your camera. Getting your tripod level makes all the other following steps in getting your image level easier. It can take a bit of work, but it’s worth it.

    Manfrotto 190 carbon fibre 4-section tripod 190CXPRO4

    Finally, the top connector of the 190CXPRO4 has Manfrotto’s  Easy Link connector for connecting hour ball head and many other accessories like reflectors, an LED light or flash. Handy if you’re and making several tripods into a practical mobile studio.

    My experience

    I’ve travelled all around the world with the Manfrotto 190 carbon fibre 4-section tripod. It’s just a tad too large to strap it to your carry-on, but it fits well in my medium sized check-in luggage. Thanks to the lightweight carbon fibre construction, it only adds 1,6 kg to the total weight. This relatively low weight also helps in the field when you’re hiking and carrying it around all day.

    All these innovations like the Quick Power Levers might look good on paper, but they are only useful if they help you in your work. I do a lot of long exposures at times (like sunrise and sunset) where a quick setup is essential, and I can tell you that the 190CXPRO4 is very easy to set-up. It’s also relatively easy to set it level thanks to the rotating bubble level, making all subsequent steps in framing your image easier too.


    Manfrotto X-PRO 3-Way Head MHXPRO-3W

    This tripod has been in sand and salt water, on slippery rocks and desert conditions. It still looks none the worse for wear. No signs of corrosion except for one small screw on the centre column. I do give it an occasional shower when I get back home to remove salt and dirt. I’ve seen no deterioration in performance in the last year, so I’m euphoric with my purchase.

    Manfrotto 190 carbon fibre 4-section tripod 190CXPRO4
    the only fault I could find, a corrosive screw on the centre column

    One feature I rarely use is the tilting centre column. I’ve bought a 3-way ball head that allows me to change the angle of my camera in every direction, so I don’t have a need for it. It might be very useful though if you want to use this tripod for your off camera flash, a reflector, etc.

    Manfrotto 190 carbon fibre 4-section tripod 190CXPRO4

    This is an expensive product, retailing around $300. I’ve had many ‘cheap’ tripods before this one, and I do think it is worth the extra investment. It’s also very sturdy and keeps my lightweight mirrorless camera well balanced. It’s easy to transport and set-up, and it seems to be durable, giving me years of service.

    One thing you might want to be aware of is that Manfrotto offers an extra warranty on all their products up to 8 years. They’ll only extend the legal warranty though if you purchased the product in the country that you’re registering it.


  • Formatt Hitech Firecrest ND filters review

    Formatt Hitech Firecrest ND filters review

    Formatt Hitech Firecrest ND filters review

    Introduction

    Formatt Hitech Firecrest ND filters

    Formatt Hitech Firecrest ND filters are a new type of ND filter. Unlike Lee filters that use dyed resin, Firecrest filters use a carbon metallic coating that according to their literature create hyper neutral NDs across all spectrums (including UV, visible and infrared). The filters are made from 2mm thick Schott Superwhite glass, with the multicoating bonded in the centre for a better scratch resistance.

    A word about long exposure photography

    High-Quality Long exposure photography needs a significant investment in both time and money from you. Besides a decent camera that supports bulb mode, you need a sturdy and weatherproof tripod, a high-quality ball head, preferably a programmable remote.

    Formatt Hitech Firecrest ND filters

    Your camera

    There is a long and tiresome debate about the advantages of a full-frame sensor vs. an APS-C camera. Whatever you use depends on your personal preference, suffice to say that to have good quality images for a decent size print, you’ll at least need an APS-C camera. I’ve used both types for long exposure photography and found that at base ISO, results are similar in terms of noise and overall image quality. Noise will build up during long exposures, due to the sensor being on for such a long time, the heat generated adds noise. And you’ll most probably want to do some post processing like sharpening and colour correction, wich will aggravate the apparent noise in your capture.

    Sony A7II vs A7 vs A7r
    Sony A7r, ideal for long exposures

    Bulb mode is a program mode on your camera that allows you to dial in exposure times beyond the standard maximum exposure speed. This is set to a maximum of thirty seconds, this exposure time that can already generate some nice milky/cloudy waves if there is enough movement. If you want to go beyond that, you’ll need to invest in a programmable remote. JJC make these for most camera models.

    Lenses

    Long exposures can be made with any lens of course, but you’ll get the most spectacular results with wide angle primes or zooms. Fast aperture lenses are not necessary with this type of photography, as you’ll want to set the aperture to the sharpest possible corner-to-corner. This is usually around an opening of f/8-f/11. Using larger apertures will most certainly affect corner sharpness in a negative way, smaller apertures mean you’ll have to deal with a loss of sharpness throughout your image. This loss of sharpness is due to a phenomenon called diffraction. By closing the iris, light at all points of the visual spectrum entering the lens gets scattered or diffracted, causing this loss of sharpness.

    Formatt Hitech Firecrest ND filters
    Fujinon XF10-24mm wide angle zoom

    Most tutorials will advise you to avoid using lenses beyond f/11, but there are exceptions to this rule. One exception is if you want to get a nice ‘sun star’, where you’d need to close the iris even more. And, of course, it all depends on what exposure times you want to get with the ND filters you have available. I’ve had good results at f/22, with some sharpening in Iridient Developer or Topaz plug-ins, so don’t worry about that too much.

    Tripod and Head

    I would recommend getting a weather proof tripod. Sand, salt and water are tough on any equipment, and anything that corrodes will suffer over time. Make sure it is sturdy, has a level gauge and balances well with your camera.I use a carbon Manfrotto tripod with a 3-way adjustable head.

    Even more important is a good tripod head. I use a 3-way head, this allows me to make quick and precise adjustments. As with all photography, you don’t want to miss that crucial moment where conditions are ideal.

    Long Exposure Calculator

    The best approach is first to calculate the exposure time at base ISO and your preferred aperture automatically in-camera without any ND filters in front of your lens. Once you have this exposure time, you’ll need to calculate the exposure with your ND filter. Each ‘stop’ number refers to a doubling of shutter speed, ISO  or a full stop in aperture (f/1, f/1.4, f/2, f/2.8, f/4, f/5.6, f/8, f/11, f/16, /22). It this case, your main goal is to increase the shutter speed at f/8 and base ISO.

    Formatt Hitech Firecrest ND filters review

    A ten stop ND filter will get you at around 30 seconds to a minute exposures in bright daylight. In the early morning, and during golden hour and blue hour will allow you to take longer exposures. You can always stack several ND filters or get a 16 stop ND 4.8, this will get you 4-6 minute exposures, even in broad daylight.

    You’ll find plenty of ‘cheat sheets’ online that will help you with this, but this is the 21st century, and using a smartphone app. There are many available for free; I’ve tried ‘Exposure Tool’ by Instituto Universitario de Microelectronica Aplicada and LE Timer (Long Exposure Photography timer) by C. Sergios.

    They usually work like this:

    1. Choose the filter you want to use (usually in the left-hand column)
    2. Select the exposure time without ND filter (right column)
    3. Choose the difference between dark and light areas, for instance, the difference between the sky and land. (Exposure Tool has this interesting added feature)

    There are a few other interesting apps available for Long Exposure and landscape photographers. TPE (The Photographer’s Ephemeris) is a map based sun and moon calculator that lets you see how the light will fall on the land, day or night, for any location on earth. Golden hour gives you comprehensive data on the sun for any day of the year and helps photographers around the world plan their shoots for the best possible light.

    Filters and filter holder included in this review

    Firecrest ND filters

    Formatt Hitech Firecrest ND filters

    I tested the Formatt Hitech Firecrest ND 3 (10 stops), Firecrest ND 4.8 (16 stops), Firecrest ND 1.2 (4 Stops) and their Firecrest ND Grad Soft Edge 0.9 (3 Stops).  All these filters in the 100mm version with Formatt Hitech aluminium filter holder and adapter ring. All these filters come well packaged in wrapping paper with a sleeve for safe storage provided.

    Firecrest ND Grad Soft Edge 0.9 (3 Stops)

    Formatt Hitech Firecrest ND filters

    A Grad Soft Edge filter is ideal for taming bright skies in landscape photography. It gradually darkens a portion of the frame so you can compensate for a wider dynamic range in your scene. The graduated filter gradually lightens from the top to the centre of your frame. It’s oversized, so you can reposition it in the holder to compensate for where your horizon lies.

    Firecrest ND 1.2 (4 Stops)

    Formatt Hitech Firecrest ND filters review

    Solid filters like this allow you to slow down the shutter speed. A four stop ND is a good choice for street photography, or scenes with people and movement. It allows for a more dynamic looking image, with a sense of movement.

    Firecrest ND 3 (10 stops)

    Formatt Hitech Firecrest ND filters review

    Ten stop ND filters, this is where the fun starts. This will allow you to create a softening effect in any scene where water is involved. Think waterfalls and seascapes with turbulent waters. The effect is already clearly visible with around 30-second exposures, a typical shutter speed you’d get during daylight hours with an ND 3 filter.

    Firecrest ND 4.8 (16 stops)

    Formatt Hitech Firecrest ND filters review

    Formatt Hitech is currently the only company that produces 16 stop ND filters. This ND 4.8 will allow for around 4-minute exposures even on sunny days. If you need longer exposures than this, you will have to stack two or three filters. The iPhone and Android apps I mentioned earlier can help you with the exposure calculations here too.

    Formatt Hitech aluminium filter holder and adapter ring

    Formatt Hitech Firecrest ND filters

    The filter holder is made out of machined aluminium, in incorporates three plastic slots in the front of the housing for stacking your filters. This filter holder screws onto the adapter ring. These rings are available in many sizes but are also quite expensive. If you intend to use the filter holder on several of your lenses with different diameters, I would suggest going for the largest lens filter size you have. This will most probably be your widest angle lens, and adapt your other lenses with a step-down rings lens adapter filter set. If you don’t have any vignetting with your widest angle lens, chances are that it is safe to use on your other lenses with a step-down ring.

    Formatt Hitech Firecrest ND filters

    Firecrest Build and durability

    Scratch resistant does not mean scratch-proof. These are delicate pieces of glass, and should be handled so. It’s almost inevitable that you will get some scratches on the Firecrest ND filters. This is made worse by the design of their filter holder. Other companies use felt stickers on the filter holder to avoid this, but these felt stickers wear down, possibly leading to light leaks over time. I do however prefer that approach, as it’s easier and cheaper to replace those than the ND filters.

    Formatt Hitech Firecrest ND filters

    Firecrest Image Quality

    All ND filters will affect your image in some way. The ideal approach is to use a grey card when shooting. This will make it easier to get the right white balance in Lightroom or any other RAW converter using the eyedropper tool. There is an RAW converter called Iridient Developer that allows you to fine-tune white balance in highlights, mid-tones and shadows seperately, and I have found this to be very efficient at removing colour cast.

    Formatt Hitech Firecrest ND filters review

    Although Formatt Hitech’s literature about the Firecrest ND filters would have you believe that there is no colour cast when using these filters, there is. It’s towards the blue-purple spectrum and renders your image quite cold. As I mentioned, all ND 3 filters add colour cast to some degree, and it’s still possible to make beautiful long exposures with these Firecrest ND filters.


    Conclusion

    Formatt Hitech Firecrest ND filters review

    Formatt Hitech Firecrest ND filters are high-quality filters for long exposure photography. Their unique carbon metallic coating process allows for a 16 stop ND filter, the world’s first.

    These filters do however add a bothersome blue/purple colour cast to your images that is at times difficult to completely remove.

    They are also still very susceptible to scratches and breaking, partly due to the Formatt Hitech filter holder that does not use any felt protection. In my experience, it’s almost impossible not to get any scratches on them in daily use. Luckily this does not affect image quality most of the time, with the exception of scenes where direct sunlight hits the ND filter. At this rate (I do a lot of long exposures), I’ll need to replace them very six months a,d I believe companies like Haida and NiSi offer better value alternatives.


  • Athentech Perfectly Clear 2 for Lightroom and Photoshop review

    Athentech Perfectly Clear 2 for Lightroom and Photoshop review

    Athentech Perfectly Clear 2 for Lightroom and Photoshop review

    Introduction

    perfectly clear

    Perfectly Clear is a photo adjust and portrait retouching plug-in for both Adobe Lightroom and Photoshop. You can more-or-less divide the functionality of this plug-in into two sections: overall image enhancement and portrait beautification.The underlying technology for image enhancement tries to emulate the non-linear response of the human eye in order to achieve realistic and more balanced images from digital cameras. Their Beautification processes automatically find faces in your imagery and applies part-specific processes depending on age and gender.

    Update: If you want the latest promo codes and check what is new in version 3, read my review here. 

    Athentech Perfectly Clear 2 Presets Overview

    perfectly clear

    When launching this plug-in from either Lightroom or Photoshop, you’ll find a basic interface with eight basic presets. These presets are starting points, and you can further tweak/add modules from other presets in the Adjust panel.

    Exposure Correction

    The human eye dynamically adjusts for exposure, whereas your camera can only use a single aperture. It’s not possible for a single aperture to open and close at a single opening and properly expose everything in a photo. As a compromise, your camera calculates an overall exposure between the brightest light and darkest tones available. Perfectly Clears’ dynamic adjustment algorithm makes adjustments pixel by pixel to mimic how your eyes scan a scene to get everything in your image exposed correctly.

    perfectly clear
    underexposed landscape

    You can tweak the image according to your liking by adjusting the slider. Moving it to the right will increase the exposure in the darker areas much more than in the brighter areas. If overall you’d like a more brilliant image you can change the Auto Exposure to ‘High’, or Low if you’re into more Low Key Photography.

    perfectly clear
    landscape with exposure and vibrancy correction

    Vibrancy Correction

    Some cameras will render washed out and faded images. This is due to the in-camera illuminance enhancement you’ll often seen in JPEG files. This process adds white to a photo in order to make it more bright. This is very different in the way our eyes see as our eyes are always moving around and changing iris size during the viewing process. Traditional software brightness adjustments will look for the darkest pixel in the foto and change these RGB values to zero, making for an unrealistic colour reproduction.

    Perfectly Clear Models the eyes’ logarithmic response to light on a pixel-by-pixel basis. Hence making for a realistic reproduction of your captured scenes.

    Tint Correction

    perfectly clear
    scene with a blue tint

    No matter what camera you prefer, you’ll always get some images with an abnormal tint. Using a grey reference chart improves white balance dramatically but is not always that practical. Auto White balance looks at the brightest object in your image and assumes this should be white, but this is often not the case in reality. Another reason is that the camera is exposed to multiple light sources simultaneously. As there is no multi white balance available, the camera has to pick one of these light sources as white.

    perfectly clear
    scene with perfectly clear tint adjustment

    Tint Corrections’ algorithm does not rely on this brightest point equal white technique. It automatically detects any tinting issues and corrects these. It is possible to tweak the amount of auto correction.

    Beautify Correction

    perfectly clear
    unedited studio portrait

    Beautify uses sophisticated algorithms and advanced face detection to identify age, gender and key facial features including skin tone and texture. PC will smartly apply ten beautify corrections automatically with often astonishing results. Four of the presets, Vivid, Details Beautify and Beautify Plus have automatic face detection built-in. If your image does not have any faces in it, no beautify setting will be applied.

    perfectly clear
    portrait with beautify preset

    Beautify offers a one click mild beautify option with some skin smoothing and eye enhancement. Beautify plus is more aggressive with added skin smoothing with whiter teeth, a slight amount of facial slimming, larger eyes and less shine on the face.

    perfectly clear
    portrait with beautify plus preset

    All these presets are adjustable via the Adjust Panel. We’ll go over all the available corrections. You’ll find all flexible corrections in the ‘Portrait’ and ‘Eyes’ sections.

    Portrait Adjustment section

    perfectly clear

    Perfectly Smooth

    The Slider changes how much skin smoothing is applied. Lower values will retain more skin texture, higher settings will produce smoother and flawless skin

    Skin Tone

    Modern cameras capture some of the infrared portions of the colour spectra, making flesh tones appear redder. This is especially the case with flash photography. This slider will reduce the red for a more natural skin tone. It targets specifically the infrared spectrum that was captured by your camera

    Teeth whitening

    Automatically detects when a significant portion of the teeth is visible. Teeth whitening in post production is a tricky business and can often look unnatural. Start with small values and gradually increase the slider until you’ve found a good balance between skin and teeth.

    Face Slimming

    Portrait photographers know that capturing a three-dimensional person in 2D Lenses can sometimes distort faces and make them look wider than people look in person. Perfectly clear seems to work mostly on the jawline. Some slight face slimming can also make your subject look younger.

    Blemish removal

    Will target blemishes such as pimples and other face imperfections. Moving the slider to the right removes more stains and makes the skin appear smoother.

    Shine Removal

    Removes shine you sometimes get with flash photography or subjects without makeup. Brings back more of the natural skin tone in the shine areas. Make sure to leave some highlights to maintain a natural skin appearance.

    Light Diffusion

    Simulates the use of a flash diffuser for a slightly softer and warmer look.

    Eyes Adjustment Section
    Auto Red-Eye

    Will remove Red-Eye automatically. It’s only applied when the software detects this in your subject or subjects.

    Eye Enhance

    Will lighten the eyes and bring out the colour of the eyes. It also applies area specific sharpening. You’ll notice the eyes become brighter and more alive when moving the slider to the right.

    Eye Enlarge

    People have the tendency to squint or slightly close their eyes when smiling. This slider can be used to open slightly or enlarge your subject’s eyes. Use sparingly.

    Dark Circles

    Removes the dark circles under the eyes and removes them according to your preferences. When you have an image with multiple faces, Perfectly Clear will analyse these faces according to gender and age, and will apply the best suitable correction per face.

    Catchlight

    Having a catchlight in the subjects eyes can often make a portrait look alive. It simulates the reflection of a flash in the eyes like what you’d get in a studio environment.

    Conclusion

    Although not a one-stop, fix-it-all plug-in, Perfectly Clear version 2 offers some unique and fast processing capabilities. You can use it as a plug-in straight from Lightroom and Photoshop and will enhance pretty much any image you run through it. The presets offer a good starting point for any imagery, and the adjust panel makes it easy for you to change the desired parameters intuitively.

    It’s also a breeze to make new presets and apply this to a batch of images from Lightroom; this functionality will appeal to many wedding or portrait photographers. Their unique face and facial contours detection work remarkably well, without the need to ‘help’ the software find face parameters. I also like the fact that the face retouching can be set to quite mild corrections. Yes, there are other retouching plug-ins out there like Portrait Professional, but they often render fake looking results, and I usually resort to manual brushing and retouching techniques in Photoshop before. Another advantage is that Perfectly Clear 2 does not apply any face enhancements if none are detected, so it’s safe to leave these on if your processing different types of imagery in one batch.

    Their adaptive exposure, vibrancy and tint correcting algorithms can give spectacular results with only a few clicks.  I know of no other software that can generate good looking results this fast and hassle-free.

    Price and Availability

    The plug-ins for either Lightroom or Photoshop are available for $149 each or bundled for $199. You can download a demo or purchase from their website. You can use the discount code ‘wimarysphotography’ for a 10% discount at checkout.