Category: tips and tricks

Category for advanced manuals with tips, tricks and a full menu run-through for mirrorless cameras from Sony, Fuji, Canon, Nikon, Samsung, Panasonic, Olympus, Ricoh/Pentax, Sigma.

  • Nikon Z50 II setup guide with tips and tricks

    Nikon Z50 II setup guide with tips and tricks

    Nikon Z50 II setup guide with tips and tricks

    Introduction

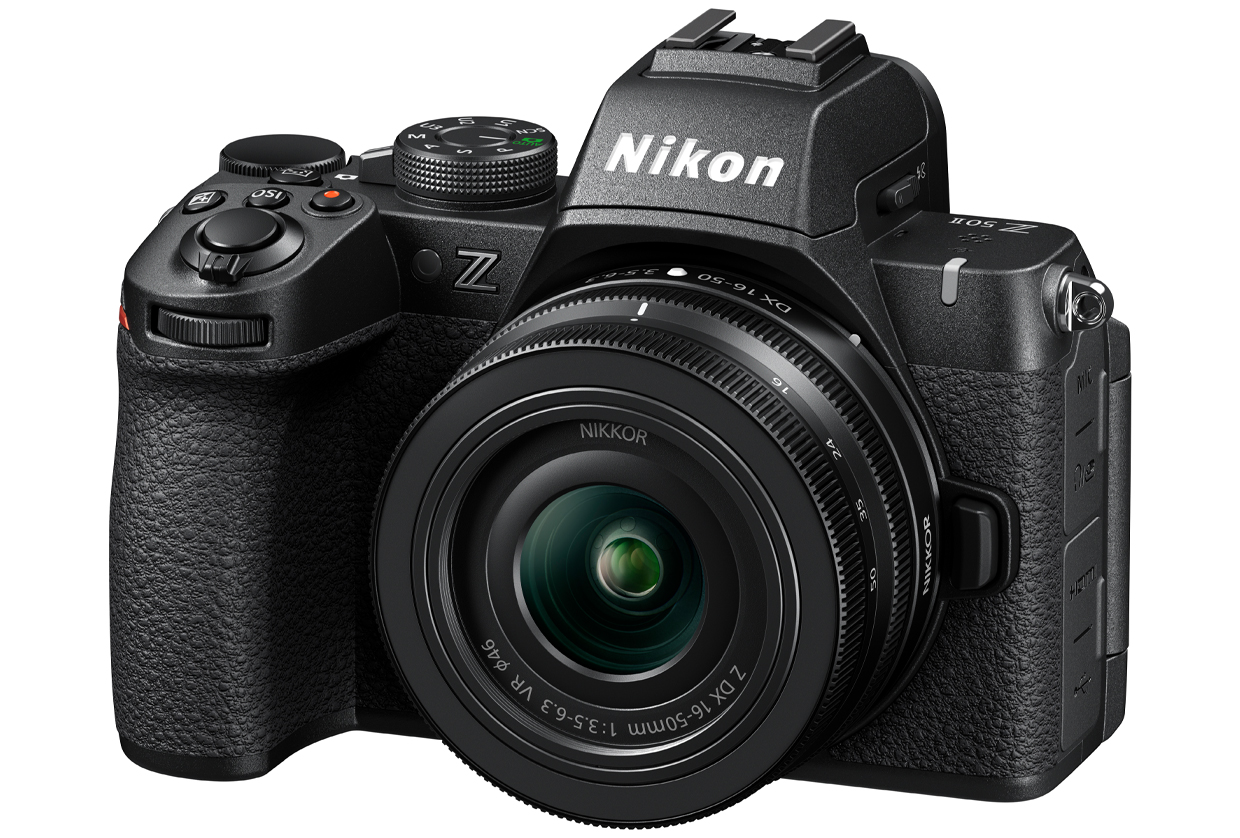
    The Nikon Z50 II camera is the 
Þ
rst Nikon hybrid equipped with an APS-C 
sensor. In a compact form factor, the Z50 II has the right to satisfy demanding 
photographers: 20.9MP APS-C DX sensor with enhanced autofocus, subject detection autofocus with 3D tracking and nine subject types, Expeed 6 
processor, 100-51200 Iso sensitivity, and oversampled 4K video at 30fps from 5.6K resolution.
.

    Full Menu Overview and explanation

    MENU 
!
!
Playback Menu
!


    Delete

    Here you can:

    • delete all pictures on the memory card
    • choose pictures to be deleted in a thumbnail preview
    • delete pictures by shooting date.

    Note the hints at the bottom of the monitor that tells you which keys have to be used.
Hack:</
span>
!
The main advantage of this menu is the option to delete by 
shooting date.

    Playback Folder

    If there are several folders on your memory card you can choose here from which 
folders images will be displayed in playback mode:

    • only from the one that is currently used for new pictures (as de
Þ
ned in the 
shooting menu Storage Folder)
    • from all folders, the Z50 II has created (default)
    • from all folders on the memory card Ð possibly including pictures from other 
sources.

    Hack:</
span>
!
Ignore. I would not exchange memory cards between 
cameras without formatting them to reduce the risk of write errors (=loss of 
pictures!).
    That makes the last option unattractive and I do not see practical use in using 
several Storage Folders and consequently the other two choices.

    Playback Display Options

    You can add Focus point info to the playback display here as well as add additional 
photo info like
!
Exposure Info,
!
Highlights, RGB Histogram,
!
Shooting Data…

    Image Review

    If turn this on, each new image will appear automatically on the monitor just after 
shooting.
Hack:</
span>
!
I prefer to switch off this option because the regular 
ß
ickering of the monitor is annoying if you leave the camera close to the eye.

    After Delete
    
This menu deÞnes which image will be displayed after you delete one:

    • Show next
!
(default): The next newer one
    • Show previous:
!
The next older one
    • Continue as before:
!
The next picture will be displayed if 
you have scrolled forward before deleting the picture and the previous picture will be 
displayed if you have scrolled backward before.

    Hack:</
span>
!
I prefer the last option because I delete images both while 
browsing forward or backward and then it is nice if the display adapts to the direction 
you are using.

    After Burst, Show

    After burst,
!
show
!
option in the playback menu controls whether 
the photo displayed at the end of a burst of shots is the 
Þ
rst or last in the burst. It 
takes effect only when
!
the Image review
!
is off.

    Rotate All

    If you switch on this option photos taken in upright format will be rotated during a 
preview.
    If you switch on this option photos taken in upright format will be rotated during a 
preview.

    Slide Show

    View a slide show of the pictures in the current playback folder.
!
Hidden images are 
not displayed.
Options:

    • Start:
!
Start slide show.
    • Image type:
!
Choose the type of image displayed from
!
Still images and 
movies,
!
Still images only, and
!
Movies only.
    • Frame interval: Choose how long each picture will be displayed.
    • Skip back/skip ahead:
!
Press
!
left
!
to return 
to the previous frame, right
!
to skip to next frame.
    • View additional photo info:
!
Press
!
up
!
or 
down
!
to change or hide photo info displayed (still images only).
    • Pause:
!
Press OK
!
to pause the slide show. To restart, highlight
!
Restart
!
and 
press
!
OK.
    • Adjust volume:
!
Press magni
Þ
er
!
during movie playback to increase volume, 
mag+
ß
ash
!
to decrease.
    • Exit to playback menu:
!
Press Menu
!
to end the slide show and return to the 
playback menu.
    • Exit to playback mode:
!
Press
!
Play
!
to end 
the slide show and exit to playback mode.
    • Exit to shooting mode:
!
Press shutter-release button halfway to return to 
shooting mode.
    Rating

    Rate pictures or mark them as candidates for later deletion. Ratings can also be 
viewed in ViewNX-i and Capture NX-D. Rating is not available with protected 
images.
Procedure:

      1. Select an image:
!
Display the image or highlight it in the thumbnail list in 
thumbnail playback.
      2. Display playback options.
!
Press the
!
info</
span>
!
button to display playback options.
      3. Select
!
Rating:
!
Highlight
!
Rating
!
and press right.
    1. Choose a rating. Press
!
left
!
or 
right
!
to choose a rating of from zero to 
Þ
ve stars, or select
!
trash can
!
to mark the picture as a candidate for later deletion. 
Press
!
OK
!
to complete the operation.

    Hack:
!
If
!
Rating
!
is selected for Custom Setting f1 (Custom 
control assignment) >
!
Fn2 button, pictures can be rated by keeping the
!
Fn2
!
button 
pressed and pressing
!
left
!
or right.

    MENU 
!
!
Photo Shooting Menu
!

!
 page 1

    Reset Photo Shooting Menu

    This menu resets all entries in the shooting menu back to the default values de
Þ
ned 
by Nikon, the only exception is the entry Storage Folder.
Hack:
!
This menu may be useful if you are new 
to the Z50 II and have played a lot with the settings in this menu.

    Storage Folder

    This menu de
Þ
nes the folder on the memory card in which new images are stored 
and allows to create new folders:

    • Select folder by number:
!
You choose a three-digit number and the Z50 II will 
create a folder with this number at the beginning of its name if it does not exist yet. 
The following 
Þ
ve characters ãZ50 IIÒ cannot be altered.
When you see a folder symbol next to the selected number a folder exists already.</
li>
    • Select folder from the list:
!
You choose a folder from a list of existing ones Ð 
without the possibility to create new ones.
    File Naming

    You can replace the three letters ãDSCÒ which are the default beginning of 
Þ
le names 
with your own individual combination.

    • an underscore _ before or after these three letters, depending on which 
color space you use.
    • a sequential four-digit number.
    Choose Image Area

    The Nikon Z50 II offers a choice of the following image areas:

    • DX (24 
”
 16):
!
Images are recorded in DX format. To calculate the 
approximate focal length of the lens in 35 mm format, multiply by 1.5.
    • 1:1 (24
”
24):
!
Pictures are recorded with an aspect ratio of 1:1
    • 16:9 (36×20):
!
Pictures are recorded with a 16:9 image ratio.
    Image Quality

    The Nikon Z50 II supports the following image quality options:

    • NEF (RAW):
!
RAW data from the image sensor are saved without additional 
processing. Settings such as white balance and contrast can be adjusted after 
shooting.
    • NEF (RAW)+JPEG 
Þ
ne/NEF (RAW)+JPEG 
Þ
ne:
!
Two images are recorded, 
one NEF (RAW) image and one 
Þ
ne-quality JPEG image.
    • NEF (RAW)+JPEG 
Þ
ne/NEF (RAW)+JPEG 
Þ
ne:
!
Two images are recorded, 
one NEF (RAW) image and one 
Þ
ne-quality JPEG image.
    • NEF (RAW)+JPEG normal/NEF (RAW)+JPEG normal:
!
Two images are 
recorded, one NEF (RAW) image and one normal-quality JPEG image.
    • NEF (RAW)+JPEG basic/NEF (RAW)+JPEG basic:
!
Two images are 
recorded, one NEF (RAW) image and one basic-quality JPEG image.
    • JPEG 
Þ
ne/JPEG 
Þ
ne:
!
Record JPEG images at a compression ratio of 
roughly 1 : 4 (
Þ
ne quality).
    • JPEG normal/JPEG normal:
!
Record JPEG images at a compression ratio of 
roughly 1 : 8 (normal quality).
    • JPEG basic/JPEG basic:
!
Record JPEG images at a compression ratio of 
roughly 1 : 16 (basic quality).
    Image Size

    Image size is measured in pixels. Choose from
!
Large,
!
Medium, or
!
Small
!
(note that 
image size varies depending on the option selected for
!
Image area.

    DX (24
”
16; DX format)
    • Large: 5568 x3712
    • Medium: 4176 x 2784
    • Small: 2784 x 1856
    1 : 1 (24
”
24)
    • Large: 3712 x 3712
    • Medium: 2784 x 2784
    • Small: 1856 x 1856
    16 : 9 (36×20)
    • Large: 4468 x 37128
    • Medium: 4176 x 2344
    • Small: 2784 x 1560
    NEF (RAW) Recording
    
NEF (RAW) image 
Þ
les (extension Ò*.nefÓ) contain the raw image data output from 
the image sensor. Using NikonÕs ViewNX-i or Capture NX-D software, you can adjust 
and re-adjust settings such as exposure compensation and white balance as often 
as you please without degrading image quality, making this format ideal for photos 
that will be processed in multiple different ways. ViewNX-i and Capture NX-D are 
available free-of-charge from the Nikon Download Center.
The process of converting NEF (RAW) images to other formats such as JPEG is 
referred to as ÒNEF (RAW) processingÓ. You can save NEF (RAW) images in other 
formats using the ViewNX-i and Capture NX-D computer applications or the NEF 
(RAW) processing option in the camera retouch menu.
    ISO sensitively settings

    If the Nikon Z50 II decides that it can’t properly expose the image at that
!
ISO
!
given 
your current aperture and shutter speed, it automatically adjusts
!
ISO
!
as necessary. 
Turn on the Auto
!
ISO Sensitivity option.
!
The camera will now override your ISO 
choice when it thinks a proper exposure is not possible with the settings youÕve 
speci
Þ
ed.

    If On is selected, the camera will automatically adjust ISO 
sensitivity when optimal exposure cannot be achieved at the value selected for ISO 
sensitivity. The options listed below are available for 
Þ
ne-tuning auto ISO sensitivity 
control.

    • Maximum sensitivity: Choose an upper limit for ISO sensitivity to prevent it 
from being raised too high.
    • Maximum sensitivity with c: Choose the 
upper ISO sensitivity limit for photos taken using an optional 
ß
ash unit.
    • Minimum shutter speed: Choose the shutter speed below which auto ISO 
sensitivity control will kick in to prevent underexposure in modes P and A. Options 
range from 1/4000 s to 30 s.

    MENU 
!
!
Photo Shooting Menu
!

!
 page 2

    White Balance

    White balance ensures that colors are unaffected by the color of the light source. 
Auto white balance is recommended with most light sources. If the desired results 
cannot be achieved with auto white balance, choose an option from the list below or 
use preset white balance.

    Auto

    White balance is adjusted automatically for optimal results with most light sources. 
For best results, use type G, E , D or Z lens. If optional 
ß
ash 
Þ
res, results are 
adjusted appropriately. Color temperature can be viewed in the playback info display 
after shooting.
Options:

    • Keep white (reduce warm colors; 3500Ð8000 K)
    • Normal
!
(3500Ð8000 K)
    • Keep warm lighting colors(3500Ð8000 K)
    Natural light auto

    White balance is adjusted for natural light, producing colors closer to those seen by 
the naked eye. (4500Ð8000 K)

    Incandescent

    Use under incandescent lighting. (3000K)

    Fluorescent
    • Sodium-vapor lamps
!
(2700 K):
!
Sodium-vapor lighting (found in sports 
venues).
    • Warm-white 
ß
uorescent(3000 K):
!
Warm-white 
ß
uorescent lights.
    • White 
ß
uorescent(3700 K):
!
White 
ß
uorescent lights.
    • Cool-white 
ß
uorescent(4200 K):
!
Cool-white 
ß
uorescent lights
    • Day white 
ß
uorescent(5000 K):
!
Daylight white 
ß
uorescent lights.
    • Daylight 
ß
uorescent(6500 K):
!
Daylight 
ß
uorescent lights.
    • High temp. mercury-vapor
!
(7200 K):
!
High color temperature light sources 
(e.g. mercury-vapor lamps).
    Direct sunlight

    Use with subjects lit by direct sunlight. (5200K)

    Flash

    Use with optional ßash units. (5400K)

    Cloudy

    Use in daylight under overcast skies. (6000 K)

    Shade

    Use in daylight with subjects in the shade. (8000 K)

    Choose color temp.

    Choose color temperature from list of values. (2500Ð10,000 K)

    Preset manual

    Use subject, light source, or existing photograph as reference for white balance.

    Set Picture Control

    Here you can change settings for the internal processing of picture data from the 
image sensor into 
Þ
nal JPG 
Þ
les.
It’s necessary to start with an existing con
Þ
guration or
!
set of settings that Nikon has 
prede
Þ
ned for a certain look of the 
Þ
nal image. You can choose between:

    • Standard:
!
NikonÔs default for a neutral picture as the standard for most 
shooting situations.
    • Neutral:
!
A processing with slightly less sharpening, contrast improvement, 
and saturation; for those who do these steps on their own later on.
    • Vivid:
!
Higher color saturation, sharpening, and contrast.
    • Monochrome:
!
Converts into black and white.
    • Portrait:
!
Very similar to ãneutralÒ, slightly less sharpening, contrast and color 
saturation than ãstandardÒ.
    • Landscape:
!
Higher contrast than ãstandardÒ.

    You can modify any of these preset con
Þ
gurations by placing a yellow selection mark 
in it and use the
!
selector to the right.
The ãQuick adjustÒ increases or decreases all settings in the direction of the intended 
picture style and is available for all con
Þ
gurations except ãneutralÒ.
Alternatively, you can select and change all detail settings individually:

    • Sharpening:
!
Increases contrasts at edges which improve the perceived 
sharpness.
    • Contrast:
!
Increases or decreases the contrast between light and dark 
areas.
    • Brightness:
!
Lightening or Darkening of the whole picture.
    • Saturation:
!
Changes color saturation for more intense or fainter colors.
    • Hue:
!
Changes the overall color tone in a slightly complicated manner.

    And also two which are available only for the conÞguration ãmonochromeÒ:

    • Filter effects:
!
Simulates the effect of color 
Þ
lters as they are used in black 
and white photography to adjust contrast.
    • Toning:
!
Allows you to choose another dominating color tone than black and 
white.

    Additionally, you can create your own con
Þ
gurations by copying, modifying and 
renaming an existing one.
To do so you need the next menu option Manage Picture Control.
When you change a conÞguration in the Picture Control and do a Reset
your last chosen conÞguration will stay selected but any changes in it will be reset.
Tips: An important menu with a visible impact on your photos! Only those who shoot 
in RAW format only and create JPG 
Þ
les on their own in the computer can ignore it.
The ãbestÒ settings are a matter of your personal preferences, in this menu, everyone 
has to 
Þ
nd his or her best settings by experience.
On the other hand, all of these settings can also be changed afterward in image 
processing on the computer, you really have to get them right in the camera if you 
want to have the best possible results straight out of your Nikon Z50 II.
The con
Þ
guration ãneutralÒ is very similar to ãstandardÒ with slightly less contrast and 
saturation, the difference is really small.
The sharpening chosen by Nikon is rather weak, I prefer a higher value of 5 or 6.
When looking at your images in the proper magni
Þ
cation (100% zoom on the 
computer monitor) you will see clearer edges.
ãVividÒ has visibly more intense color and more contrast. That can improve your 
image but also be too much of a good thing if you have already high contrast (e.g. 
direct sunlight) and make your picture look unnatural.
I would not set contrast and brightness here and switch on the Active D-Lighting.
Regarding the setting ãhueÒ: Ignore this setting, it is only a slight shift in color for 
which I do not see any practical relevance.
Result: All the above has brought me to the following settings that I use myself:
One own con
Þ
guration, created with the next menu option Manage Picture Control, 
called ãstandard+sharperÒ which is a copy of the con
Þ
guration ãstandardÒ with 
sharpening increased to 6.
Another con
Þ
guration called ãsharp+vividÒ which is the same as before plus a 
saturation increased by two steps.
I use the Þrst one most of the time and switch to the second one occasionally.
    Last but not least: Do not overestimate the importance of this menu, most important 
is still a good subject, light, exposure and
white balance for cooler or warmer color rendition. After all that the ãPicture 
ControlÒ is for the 
Þ
nal touch.

    Manage Picture Control

    This menu allows you to copy existing
!
Picture Control con
Þ
gurations (see the 
previous menu) and save them with personal adjustments under a new name.
To create your own con
Þ
guration choose the entry ãSave/editÒ, pick an existing 
con
Þ
guration and press OK. Then you can assign one of nine places in the list of 
possible customized entries, edit it and choose your own name.
you do not really need your own con
Þ
guration and can ignore this menu. With the 
user settings also personal adjustments to a Picture Control will be saved.
If you do change the Picture Control settings regularly it is best to put the most 
commonly used settings into your own con
Þ
gurations.
Reset will put all Picture Control con
Þ
gurations back to their default settings and you 
need an own con
Þ
guration if you do not want to tweak Picture Control each time with 
your setting details.

    • Save/edit:
!
Create a new custom Picture Control based on an existing preset 
or custom Picture Control, or edit existing custom Picture Controls.
    • Rename:
!
Rename custom Picture Controls.
    • Delete:
!
Delete custom Picture Controls.
    • Load/save:
!
Use the following options to copy custom Picture Controls to 
and from the memory card. Once copied to the memory card, Picture Controls can 
be used with other cameras or compatible software. (Copy to the camera,
!
Delete 
from the card or Copy to the card.)
    Color Space

    You can either choose sRGB or Adobe RGB.

    • sRGB
!
(default): This is the worldwide standard with 256 levels of brightness 
for each of the basic colors red, green, blue, for displaying images on computer 
monitors.
    • Adobe RGB:
!
A color space developed by Adobe for a broader color range 
of printed images.

    As for sRGB, all colors will be stored with shares of red, green and blue with 256 
levels of gradation, the difference is that the maximum saturations are higher.
The color space is relevant only for the creation of JPG-Þles, not for the RAW format.

    Active D-Lighting

    ãActive D-LightingÒ (ADL) is NikonÔs name for an additional step in the internal image 
processing that mainly lightens dark areas of the picture.
It is relevant only for JPG Þles, not for the RAW format.
    You can set this to Auto, Extra High, High, Normal, Low or Off.
ADL can also darken too bright areas but lightening dark ones are more frequent and 
the improvements are more visible there.
You can choose an automatic adjustment that the Nikon Z50 II will set stronger or 
weaker depending on your subjectÔs contrast or four steps from low to extra high.
Hack: Turn this ON, set it to 
Normal, it really helps improve your images!

    Long Exposure NR

    If this menu option is switched on the Nikon Z50 II will use an extra step in internal 
image processing for noise reduction if the exposure time is longer than 1 second.
Hack: switch it Off, it’s 
better to use advanced image noise reduction on your Mac

    High ISO NR

    You can choose if an additional noise reduction shall be applied in the internal image 
processing for shots with high ISO sensitivity.

    Vignette Control

    Vignetting is a drop in brightness at the edges of a photograph.
!
Vignette 
control
!
reduces vignetting for type G, E, D and F lenses (PC lenses excluded). Its 
effects vary from lens to lens and are most noticeable at maximum aperture. Choose 
from
!
High,
!
Normal,
!
Low, and
!
Off.
Hack:
!
Depending on the 
scene, shooting conditions, and type of lens, TIFF and JPEG images may exhibit 
noise (fog) or variations in peripheral brightness, while custom Picture Controls and 
preset Picture Controls that have been modi
Þ
ed from default settings may not 
produce the desired effect. Take test shots and view the results in the monitor. 
Vignette control does not apply to movies or multiple exposures.

    MENU 
!
!
Photo Shooting Menu
!

!
 page 3

    Diffraction Compensation

    With digital cameras, if you select a small aperture to increase depth of 
Þ
eld when 
shooting cityscapes or landscapes, it may cause a loss of sharpness across the 
image due to diffraction.
!
.
Thanks to the new and faster EXPEED 6 processor inside the Nikon Z50 II, there is a 
new
!
diffraction compensation function. This helps capture landscapes and 
cityscapes crisply even when small apertures are used(from f/11 onwards).

    Auto Distortion Control

    Select
!
On
!
to reduce barrel distortion when shooting with wide-angle lenses and to 
reduce pin-cushion distortion when shooting with long lenses (note that the edges of 
the area visible in the view
Þ
nder may be cropped out of the 
Þ
nal photograph and that 
the time needed to process photographs before recording begins may increase).

    Flicker Reduction Shooting

    Reduce banding or (in photos taken in continuous release modes) uneven exposure 
or coloration caused by the 
ß
icker of such light sources as 
ß
uorescent or mercury-
vapor lamps during view
Þ
nder photography.
    Reduce banding or (in photos taken in continuous release modes) uneven exposure 
or coloration caused by the 
ß
icker of such light sources as 
ß
uorescent or mercury-
vapor lamps during view
Þ
nder photography.
Hack:
!
Take a test shot and 
view the results before taking additional photographs. Flicker reduction can detect 
ß
icker at 100 and 120 Hz (associated respectively with AC power supplies of 50 and 
60 Hz). Flicker may not be detected or the desired results may not be achieved with 
dark backgrounds, bright light sources, or decorative lighting displays and another 
non-standard lighting. Depending on the light source, there may be a slight delay 
before the shutter is released. During burst shooting, the frame rate may slow or 
become erratic; in addition, the desired results may not be achieved if the frequency 
of the power supply changes during shooting.
Flicker detection will not take effect at shutter speeds slower than 1/100 s (including 
Bulb and Time) or when
!
Mup
!
is selected for release mode or exposure delay mode is 
on.

    Metering

    Metering determines how the camera sets exposure. The following options are 
available:

    1. Matrix: Produces natural results in most situations. 
Camera meters wide area of the frame and sets exposure according to tone 
distribution, color, composition, and, with type G, E, D or F lenses , distance 
information (3D color matrix metering III; with other CPU lenses, camera uses color 
matrix metering III, which does not include 3D distance information).
    2. Center-weighted: Camera meters entire frame but 
assigns greatest weight to center area (if CPU lens is attached, size of area can be 
selected using Custom Setting b6,
!
Center-weighted area,
!
if non-CPU or AF-S 
Fisheye NIKKOR 8Ð15mm f/3.5Ð4.5E ED lens is attached, area is equivalent to 
circle 12 mm in diameter). Classic meter for portraits; recommended when using 
Þ
lters with an exposure factor (
Þ
lter factor) over 1
”
.
    3. Spot: Camera meters circle 4 mm (0.16 in.) in diameter 
(approximately 1.5% of frame). The circle is centered on the current focus point, 
making it possible to meter off-center subjects (if non-CPU or AF-S Fisheye NIKKOR 
8Ð15mm f/3.5Ð4.5E ED lens is used or if auto-area AF is in effect, the camera will 
meter center focus point). Ensures that the subject will be correctly exposed, even 
when the background is much brighter or darker.
    4. Highlight-weighted: Camera assigns the greatest weight 
to highlights. Use to reduce the loss of detail in highlights, for example when 
photographing spotlit performers on-stage.

    Hack:
!
Specifying the focal 
length and maximum aperture of non-CPU lenses using the
!
Non-CPU lens 
data
!
option in the setup menu
!
allows the camera to use color matrix metering when 
the matrix is selected and improves the accuracy of center-weighted and spot 
metering.

    Flash Control

    Choose the 
ß
ash control mode for optional 
ß
ash units mounted on the camera 
accessory shoe and adjust settings for off-camera 
ß
ash photography.

    Flash Control Mode

    When an SB-5000, SB-500, SB-400, or SB-300 is mounted on the camera, the 
ß
ash 
control mode, 
ß
ash level, and other 
ß
ash settings can be adjusted using the
!
Flash 
control
!
>
!
Flash control mode
!
item in the photo shooting menu (in the case of the 
SB-5000, these settings can also be adjusted using the controls on the 
ß
ash unit). 
The options available vary with the 
ß
ash used, while the options displayed 
under
!
Flash control mode
!
vary with the mode selected. Settings for other 
ß
ash units 
can only be adjusted using 
ß
ash unit controls.

    • TTL: i-TTL mode. In the cases of the SB-500, SB-400, and SB-300, 
ß
ash 
compensation can be adjusted using the
!
W
!
(M) button.
    • Auto external 
ß
ash: In this mode, the output is adjusted automatically 
according to the amount of light re
ß
ected by the subject; 
ß
ash compensation is also 
available. Auto external 
ß
ash supports Òauto apertureÓ (q</
span>A) and Ònon-TTL autoÓ (A) modes; non-TTL auto is selected automatically if a 
non-CPU lens is attached without specifying the focal length and maximum aperture 
using the
!
Non-CPU lens data
!
option in the setup menu. See the 
ß
ash unit manual for 
details.
    • Distance-priority manual: Choose the distance to the subject; 
ß
ash output 
will be adjusted automatically. Flash compensation is also available.
    • Manual: Choose the 
ß
ash level manually.
    • Repeating 
ß
ash: The 
ß
ash 
Þ
res repeatedly while the shutter is open, 
producing a multiple-exposure effect. Choose the 
ß
ash level (Output), the maximum 
number of times the unit 
Þ
res (Times), and the number of times the 
ß
ash 
Þ
res per 
second (Frequency, measured in Hertz). The options available for
!
Times
!
vary 
depending on the options selected for
!
Output
!
and
!
Frequency; see the documentation 
provided with the 
ß
ash unit for details.
    Wireless Flash Options

    Adjust settings for simultaneous wireless control of multiple remote 
ß
ash units. This 
option is available only when an SB-5000 or SB-500 
ß
ash unit or a WR-R10 wireless 
remote controller is mounted on the camera.

    • Optical AWL:
!
The remote 
ß
ash units are controlled using low-intensity 
ß
ashes emitted by the master 
ß
ash. Available only with an SB-5000 or SB-500 
mounted on the camera accessory shoe.
    • Optical/radio AWL:
!
This option is for 
ß
ash photography using both optically- 
and radio-controlled 
ß
ash units. Choose this option when using both a WR-R10 and 
an SB-500 mounted on the camera accessory shoe.
!
Remote 
ß
ash control
!
is 
automatically set to
!
Group 
ß
ash.
    • Radio AWL:
!
The remote 
ß
ash units are controlled by radio signals emitted 
by a WR-R10 attached to the camera. Available only with the WR-R10 and remote 
ß
ash units that support radio AWL.
    • Off:
!
Remote 
ß
ash photography disabled.
    Remote Flash Control

    Choose from the following remote ßash photography options:

    • Group 
ß
ash:
!
hoose a separate 
ß
ash control mode and 
ß
ash level for each 
group of remote 
ß
ash units. If
!
Optical AWL
!
or
!
Optical/radio AWL
!
is selected 
for
!
Wireless 
ß
ash options you can choose the channel used by the master 
ß
ash to 
communicate with the remote 
ß
ash units.
    • Quick wireless control:
!
Choose for control of the overall 
ß
ash output. 
Use
!
Quick wireless control options
!
to adjust the balance between groups A and B 
and set the output for group C manually (the master 
ß
ash does not 
Þ
re). You can 
also adjust 
ß
ash compensation for groups A and B and, if
!
Optical AWL
!
or
!
Optical/
radio AWL
!
is selected for
!
Wireless 
ß
ash options
!!
choose the channel used by the 
master 
ß
ash to communicate with the remote 
ß
ash units
    • Remote repeating:
!
The 
ß
ash units 
Þ
re repeatedly while the shutter is open, 
producing a multiple-exposure effect. Choose the 
ß
ash level (Output), the maximum 
number of times the 
ß
ash units 
Þ
re (Times), the number of times the units 
Þ
re per 
second (Frequency), and, if
!
Optical AWL
!
or
!
Optical/radio AWL
!
is selected 
for
!
Wireless 
ß
ash options, the channel used by the master 
ß
ash to communicate with 
the remote 
ß
ash units. Note that the number of times the 
ß
ash units 
Þ
re in total may 
vary depending on the options selected for
!
Output
!
and
!
Frequency; see the 
documentation provided with the 
ß
ash unit for details.
    Radio Remote Flash Info</
h6>
    
View the ßash units currently controlled using radio AWL.
    Flash Mode

    Some of the 
ß
ash modes are set on the camera, rather than on the 
ß
ash. To set most 
of these modes on a Nikon Z50 II, you keep the 
ß
ash button depressed and rotate the 
main (rear) command wheel to cycle through the modes. The modes appear in the 
ß
ash frame in the top LCD panel on the camera.
To set Auto FP on a Nikon Z50 II, you need to go into this menu.

    Fill Flash

    The 
ß
ash 
Þ
res with every shot. In modes P and A, the shutter speed will 
automatically be set to values between 1/200 s (or 1/8000 s with Auto FP High-
Speed Sync) and 1/60 s.

    Red-eye Reduction Mode

    When this mode is activated (showed by an eye-symbol appearing on both the 
camera’s top LCD and the 
ß
ash’s rear LCD), the 
ß
ash 
Þ
res three 
ß
ashes at reduced 
output just before the picture is taken. This makes the iris of humans and animals 
contract which reduces the area where the red-eye effect can be seen. It also 
introduces a shutter delay to allow the subject’s irises time to react.
The red-effect only occurs when you use the 
ß
ash as key light pointing forwards and 
directly into the subject’s eyes.

    Slow-sync Flash + red-eye

    As for Red-eye reduction except that shutter speed slows automatically to capture 
background lighting at night or under low light. Use when you want to include 
background lighting in portraits. The use of a tripod is recommended to prevent 
blurring caused by camera shake.
    As for Red-eye reduction except that shutter speed slows automatically to capture 
background lighting at night or under low light. Use when you want to include 
background lighting in portraits. The use of a tripod is recommended to prevent 
blurring caused by camera shake.

    Slow-sync Flash

    The default shutter speed when using 
ß
ash is 1/60 second (you can change this 
default on a Nikon Z50 II with custom setting #24). The 
ß
ash will use a faster shutter 
speed if the ambient light requires it, but will not normally go below 1/60 second in 
the modes where the camera controls the shutter speed.
When slow-sync 
ß
ash is activated (on a Z50 II, you set this by pressing the 
ß
ash 
button and turning the main command wheel until the word ÒSLOWÓ appears on the 
camera’s top LCD), shutter speeds as low as 30 seconds may be used to obtain the 
correct exposure for both the main subject in the foreground lit by the 
ß
ash, and the 
background, in low-light situations or at night.
For slow shutter speeds, you may need to use a tripod to avoid camera shake.
In the
!
Night Portrait
!
scene mode, slow-sync 
ß
ash is automatically 
activated.

    Rear-curtain Sync

    Normally the 
ß
ash 
Þ
res at the same time the shutter curtain opens (i.e. front curtain 
sync). When the rear curtain is activated (indicated by the word ÒREARÓ on the 
camera’s top LCD), the 
ß
ash 
Þ
res just before the shutter curtain closes.
Rear-curtain sync may be selected when one is shooting fast-moving subjects at 
slow shutter speeds. With front curtain sync, unnatural-looking pictures can occur 
because the blurred movement appears to be
!
in front
!
of the subject frozen by 
the 
ß
ash. Rear-curtain sync creates a picture in which the blur of a moving subject 
(for example, the taillights of a speeding car) appears
!
behind
!
the frozen 
subject.
Rear-curtain sync automatically enables slow-sync mode, since the only time you 
should want to use rear sync, is when you also set slow shutter speed to capture 
blurred movement.
Using rear curtain sync with shutter speeds
!
faster
!
than 1/30 second is not 
recommended. Rear-curtain sync introduces a delay between the pre-
ß
ash and the 
main 
ß
ash lasting the length of the exposure. This delay gives most people just 
enough time to react to the pre-
ß
ash. Using rear sync for portraits is a sure way to 
make your subjects blink or squint.
Rear-curtain sync can not be combined with AWL, or with the FP or RPT modes.

    Auto FP

    
(Focal Plane) is a sync mode that lets you synchronize 
ß
ash with higher shutter 
speeds than the camera’s normal maximum 
ß
ash synchronization shutter speed 
(often called Òx-sync speedÓ).
To use this mode on a Nikon Z50 II, you need to have a CLS-compatible 
ß
ash unit 
connected to the camera’s hot-shoe, and you must enable
!
Auto FP
!
on 
the camera. Without having
!
Auto FP
!
enabled, the camera will not let you 
set the shutter speed higher than the x-sync speed when you use a CLS-compatible 
ß
ash. With
!
Auto FP
!
enabled, you can use any shutter speed.
    In
!
FP
!
mode the 
ß
ash will not 
Þ
re once, but many times at an extremely 
rapid rate (typically 50 kHz) which begins with the opening of front curtain of your 
camera’s focal plane shutter and ends with the closing of the rear curtain. This 
permits the correct exposure to be obtained as the traveling slit of a dual curtain 
shutter passes over the sensor at high-speed.
Note that using
!
FP
!
reduces the maximum power of the 
ß
ash. The only 
way to have FP is to illuminate the focal plane curtain, which, depending on the 
shutter speed, may cover a very large percentage of the focal plane. This means that 
the higher the shutter speed is above the shutter’s x-sync speed, the smaller the 
area of 
Þ
lm that gets illuminated by each 
ß
ash.
The table below shows approximately how much the maximum power expressed as 
guide number GN is reduced when an SB-900 is used in
!
FP
!
mode on a 
Nikon Z50 II. It has full power (GN 34, ISO 100/meter) at the X-sync speed (1/200 
second), is reduced by -1 EV (half power) at 1/250 second, and then by another -1 
EV for each doubling of shutter speed. At 1/4000 second it is reduced by -5 EV, or 
1/32 of full power.

    Shutter Speed GN Power
    1/200 34 0 EV 1/1
    1/250 22 -1 EV 1/2
    1/500 16 -2 EV 1/4
    1/1000 11 -3 EV 1/8
    1/2000 8 -4 EV 1/16
    1/4000 6 -5 EV 1/32

    Using
!
FP
!
will reduce the effective GN of the 
ß
ash when 
you
!
exceed
!
the x-sync speed. However, it has no effect at speeds lower 
than the x-sync. It does no harm to have
!
Auto FP
!
permanently enabled.
On a Nikon Speedlight, the
!
FP
!
mode can be activated in the following 
ß
ash modes:
!
TTL, TTL BL, AA, M, and
!
GN. On the Nissin 
Di866, the
!
FP
!
mode only works in
!
TTL
!
mode.
Note: The
!
FP
!
mode is mainly useful when you want to use large 
apertures when doing
!

Þ
ll-
ß
ash
!
in bright daylight. The FP mode 
does
!
not
!
help you freeze motion. Normal 
ß
ash photography is very good 
at freezing motion since a burst of electronic 
ß
ash is so incredibly brief. When the 
dominant light on a scene is a very short 
ß
ash of light it is almost as if you used a 
very high shutter speed in the thousandths of a second. However, when you use FP 
mode 
ß
ash, the 
ß
ash unit pulses the light output over a
!
longer
!
period of 
time in order to simulate a light being lit for the entire time the shutter travels across 
the focal plane. Since the 
ß
ash burst is no longer very short, it becomes more dif
Þ
cult 
to freeze motion, even with high shutter speeds. And because the FP mode makes 
you lose so much of the power of the 
ß
ash, it is not very useful when you want the 
ß
ash to be the dominant light. For high-speed 
ß
ash photography, you instead 
use
!
manual
!
mode and adjust the power ratio to make sure that the 
ß
ash 
burst is short enough to ÒfreezeÓ movement.

    High-Speed Sync Without Auto FP mode

    The Nikon Z50 II will sync with most 
ß
ash units at any shutter speed (i.e. up to 1/4000 
second). This is because these models use a CCD sensor that works as an 
electronic shutter at high shutter speed. A conventional mechanical shutter is only 
used at shutter speeds below 1/125 second.
For some reason, Nikon has put in a program limitation that will not let you set faster 
shutter speed than 1/500 second in these models if you mount a
!!
ß
ash unit in the 
camera’s hot-shoe. You can get around this limitation by taping over the two metal 
contacts on the back of the Speedlight.

    Flash Compensation

    Flash compensation can be used to adjust the level of the master and remote 
ß
ash 
units by from 
#
3 to +1 EV in steps of 1/3 EV. To choose a value for 
ß
ash 
compensation, press the magnifying
!
button and rotate the sub-command dial until 
the desired value is displayed in the control panel.
When the master 
ß
ash or a remote 
ß
ash is set to TTL or Auto
!
and 
ß
ash 
compensation to a value other than ±0.0, an
!
icon will be displayed in the control 
panel and view
Þ
nder and the current value for 
ß
ash compensation can be viewed by 
pressing mag. Normal 
ß
ash output can be restored by setting 
ß
ash compensation to 
±0.0. Flash compensation is not reset when the camera is turned off.

    Release Mode

    Choose the operation performed when the shutter-release button is pressed all the 
way down.

    • Single frame: The Nikon Z50 II takes one photograph each time the shutter-
release button is pressed.
    • Continuous L: While the shutter-release button is held down, the camera 
records 1Ð4 frames per second. The frame rate can be chosen by rotating the sub-
command dial when Continuous L is highlighted in the release-mode menu.
    • Continuous H: While the shutter-release button is held down, the camera 
records up to about 5 frames per second.
    • Continuous H (extended): While the shutter-release button is held down, 
the camera records up to about 11 frames per second. The built-in 
ß
ash and optional 
ß
ash units cannot be used. Flicker reduction has no effect.
    • Self-timer: Take pictures with the self-timer.
    The Shooting Display

    In continuous low-speed and continuous high-speed modes, the display is updated 
in real time even while shooting is in progress.

    Frame Advance Rate
    Frame advance rate varies with camera settings. The approximate maximum rates at 
different settings are given in the table below.
    Continuous H (Extended)
    
Depending on camera settings, exposure may vary erratically during each burst. This 
can be prevented by locking exposure.

    The Memory Buffer
    
The camera is equipped with a memory buffer for temporary storage, allowing 
shooting to continue while photographs are being saved to the memory card. The 
approximate number of images that can be stored in the buffer at current settings is 
shown in the exposure-count displays while the shutter-release button is pressed 
halfway.

    While photographs are being recorded to the memory card, the memory card access 
lamp will light. Depending on shooting conditions and memory card performance, 
recording may take from a few seconds to a few minutes. Do not remove the 
memory card or remove the battery until the access lamp has gone out. If the 
camera is switched off while data remain in the buffer, the power will not turn off until 
all images in the buffer have been recorded. If the battery is exhausted while images 
remain in the buffer, the shutter release will be disabled and the images transferred 
to the memory card.

    MENU 
!
!
Photo Shooting Menu
!

!
 page 4

    Focus Mode
    AF-S (single AF):

    Designed for shooting stationary subjects, this mode locks focus when you depress 
the shutter button halfway. (Think
!
S
!
for
!
still, stationary.)
!
In 
AF-S mode, the camera insists on achieving focus before it releases the shutter.
If this behavior annoys you, open the Custom Setting menu, choose Autofocus, and 
then choose AF-S Priority Selection. If you change the setting to Release, the picture 
is then recorded when you fully depress the shutter button even if focus isnÕt yet 
achieved.

    AF-C (continuous AF):

    Geared to capturing moving targets, AF-C mode adjusts focus as needed as long as 
the shutter button is pressed halfway. (Think
!
C
!
for
!
continuous 
motion.) Remember that a focus-adjustment occurs only if the subject moves 
closer to or farther from the camera.
If the subject is moving but only shifts a short distance in a horizontal direction, no 
adjustment is needed because the focusing distance remains the same.
    If the subject is moving but only shifts a short distance in a horizontal direction, no 
adjustment is needed because the focusing distance remains the same.

    AF-F

    The camera adjusts focus continuously in response to subject movement or changes 
in composition. Focus locks when the shutter-release button is pressed halfway. This 
option is only available in movie mode.

    MF (Manual Focus)

    To focus manually, adjust the lens focus ring until the image displayed on the clear 
matte 
Þ
eld in the view
Þ
nder is in focus. Photographs can be taken at any time, even 
when the image is not in focus.
Hack:
!
To decide which 
shutter-release option is right for you, consider whether youÕd rather have any shot, 
even if itÕs out of focus, or capture only those that are in focus. I prefer the latter, so I 
set both AF-S and AF-C modes to Focus. Why waste battery power, memory card 
space, and inevitable time deleting out-of-focus pictures? Yes, if youÕre shooting 
rapid action, you may miss a few shots waiting for the focus to occur Ñ but if theyÕre 
going to be lousy shots, who cares? Sports shooters who 
Þ
re off hundreds of shots 
while covering an event, though, may want to unlock shutter release for both AF-C 
and AF-S modes. Again, you may wind up with lots of wasted shots, but you increase 
the odds that youÕll capture that split-second Òhighlight reelÓ moment.

    AF Area Mode

    Choose how the focus point for autofocus is selected.

    • Pinpoint AF:
!
Use for pinpoint focus on a selected spot in the frame. This 
option is only available when photo mode is selected and Single AF is chosen for 
Focus mode. Focusing may be slower than with single-point AF.
    • Single-point AF: Select the focus point; the camera will focus on the subject 
in the selected focus point only. Use with stationary subjects.
!
the ability to limit point 
selection to every other point
!
allows you to quickly use the joystick, or 
touchscreen, to position the AF point.
    • Dynamic-area AF:
!
The camera focuses on a point selected by the 
user. If the subject brie
ß
y leaves the selected point, the camera will focus based on 
information from surrounding focus points, letting you concentrate on composition in 
shots of moving subjects. This option is only available when photo mode is selected 
and Continuous AF is chosen for Focus mode.

    • Wide-area AF (S) and (L):
!
As for Single-point AF except that wider focus 
points are used. The focus points for Wide-area AF (L) are wider than those for 
Wide-area AF (S).
    • Auto-area AF:
!
The camera automatically detects the subject and selects the 
focus area. At default settings, the camera gives priority to portrait subjects; if a 
portrait subject is detected, the selected subject will be indicated by a yellow border 
(if multiple faces are detected, you can choose your subject using the multi-selector). 
Subject tracking can be activated by pressing the OK 
button.

    A word on Subject tracking:
    When Auto-area AF is selected for AF-area mode, pressing OK enables focus tracking. The focus point will change to a targeting 
reticule; position the reticule over the target and either press OK again or press the AF-ON
!
button to start tracking. The focus point 
will track the selected subject as it moves through the frame (in the case of portrait 
subjects, the focus will track the subjectÕs face). To end tracking, press OK a third time. To exit the subject-tracking mode, press the 
magni
Þ
er/question
!
button.
A word on Quick Focus-Point Selection:
or quicker focus-point selection, choose Every other point for Custom Setting a5 
(Focus points used) to use only a quarter of the available focus points (the number of 
points available for Wide-area AF (L) does not change). If you prefer to use the sub-
selector for focus-point selection, you can choose the Select center focus point for 
Custom Setting f2 (Custom control assignment)
!
> Sub-selector center to allow the 
center of the sub-selector to be used to quickly select the center focus point.

    The Touch Shutter:
!
</
strong>Touch controls can be used to focus and release the shutter. Touch the 
display to focus and lift your 
Þ
nger to release the shutter.

    Tap the icon shown in the illustration to choose the operation performed by tapping 
the display in shooting mode. Choose from the following options:

    • Touch: Touch the display to position the 
focus point and focus (autofocus only; the touch shutter cannot be used to focus in 
manual focus mode). Focus locks while your 
Þ
nger remains on the display; lift your 
Þ
nger to release the shutter. Available only in photo mode.
    • Touch AF: As above, except that lifting your 
Þ
nger from the display does not release the shutter. If auto-area AF is selected for 
AF-area mode, the camera will track the selected subject as it moves through the 
frame; to switch to a different subject, tap it in the display.
    • Off: Touch shutter disabled.
    Optical VR

    Enable or disable de optical vibration reduction function of your lens, if the lens has 
this functionality.

    Auto Bracketing

    Vary exposure, 
ß
ash level, Active D-Lighting (ADL), or white balance slightly with 
each shot, ÒbracketingÓ the current value. Bracketing can be used in situations in 
which getting the right settings is dif
Þ
cult and there is not time to check results and 
adjust settings with each shot, or to experiment with different settings for the same 
subject. The following options are available:

    • Auto bracketing set: Choose the setting or settings bracketed when auto 
bracketing is in effect. Choose AE & 
ß
ash bracketing to perform both exposure 
and 
ß
ash-level bracketing, AE bracketing
!
to bracket only exposure, Flash bracketing 
to perform only 
ß
ash-level bracketing, WB bracketing
!
to perform white-balance 
bracketing, or ADL bracketing to perform bracketing using Active D-Lighting.
    • Number of shots: Choose the number of shots in the bracketing 
sequence.
    • Increment: Choose the amount the selected settings vary with each shot 
(ADL bracketing excluded).
    • Amount: Choose how Active D-Lighting varies with each shot (ADL 
bracketing only).
    Multiple Exposure

    Record two to ten NEF (RAW) exposures as a single photograph.
Multiple exposure mode

    • On (series): Take a series of multiple exposures. Select
!
Off
!
to resume 
normal shooting.
    • On (single photo): Take one multiple exposure.
    • Off: Exit without creating additional multiple exposures.

    Number of shotsChoose the number of exposures that will be combined to form a 
single photograph.Overlay mode

    • Add: The exposures are overlaid without modi
Þ
cation; gain is not 
adjusted.
    • Average: Before the exposures are overlaid, the gain for each is divided by 
the total number of exposures taken (gain for each exposure is set to 1/2 for 2 
exposures, 1/3 for 3 exposures, etc).
    • Lighten: The camera compares the pixels in each exposure and uses only 
the brightest.
    HDR (High Dynamic Range)

    Used with high contrast subjects, High Dynamic Range (HDR) preserves details in 
highlights and shadows by combining two shots taken at different exposures.

    Interval Timer Shooting

    Take photographs at the selected interval until the speci
Þ
ed number of shots has 
been recorded. Select a release mode other than self-timer (E) when using the interval timer.

    • Start:
!
Start interval timer shooting, either after 3 s (Now
!
selected for
!
Choose 
start day/time) or at a selected date and time (Choose day/time). Shooting will 
continue at the selected interval until all shots have been taken.
    • Choose start day/time:
!
Choose a start option. To start shooting immediately, 
select
!
Now. To start shooting at a chosen date and time, select
!
Choose day/time.</
li>
    • Interval:
!
Choose the interval (hours, minutes, and seconds) between 
shots.
    • Intervals
”
shots/interval:
!
Choose the number of intervals and the number of 
shots per interval.
    • Exposure smoothing:
!
Selecting
!
On
!
allows the camera to adjust exposure to 
match previous shot in exposure modes other than
!
M
!
(note that exposure smoothing 
only takes effect in mode
!
M
!
if auto ISO sensitivity control is on). Large changes in 
subject brightness during shooting may result in apparent variations in exposure, in 
which case it may be necessary to shorten the interval between shots.
    • Silent photography:
!
Select
!
On
!
to silence the shutter during shooting.
    • Interval priority:
!
Choose whether the camera gives priority to exposure time 
or interval timing in exposure modes
!
P
!
and
!
A. Select
!
On
!
to ensure photos are taken 
at the chosen interval,
!
Off
!
to ensure that photos are correctly exposed. If
!
On
!
is 
selected, be sure the
!
Minimum shutter speed
!
chosen for
!
ISO sensitivity 
settings
!!
>
!
Auto ISO sensitivity control
!
in the photo shooting menu is faster than 
the interval. You should also focus using manual focus or, if you are using autofocus, 
choose
!
Release
!
for Custom Setting a1 (AF-C priority selection) or Custom Setting a2 
(AF-S priority selection)
!
according to whether
!
AF-C
!
or
!
AF-S
!
is selected.
    • Starting storage folder:
!
Highlight either of the following options and 
press
!
2
!
to select or deselect:
!
New folder: A new 
folder is created for each new sequence or
!
Reset 
Þ
le numbering: File numbering is 
reset to 0001 whenever a new folder is created.
    Time-Lapse Movie

    The camera automatically takes photos at selected intervals to create a silent time-
lapse movie.

    • Start:
!
Start time-lapse recording. Shooting starts after about 3 s and 
continues at the selected interval for the selected shooting time.
    • Interval:
!
Choose the interval between shots in minutes and seconds.
    • Shooting time:
!
Choose the shooting time (hours and minutes).
    • Exposure smoothing:
!
Selecting
!
On
!
smooths abrupt changes in exposure in 
exposure modes other than
!
M
!
(note that exposure smoothing only takes effect in 
mode
!
M
!
if auto ISO sensitivity control is on). Large changes in subject brightness 
during shooting may result in apparent variations in exposure, in which case it may 
be necessary to shorten the interval between shots.
    • Silent photography:
!
Select
!
On
!
to silence the shutter during shooting.
    • Image area:
!
Choose an image area for time-lapse recording. The options 
are those for the
!
Image area
!
item in the movie shooting menu.
    • Image area:
!
Choose an image area for time-lapse recording. The options 
are those for the
!
Image area
!
item in the movie shooting menu.
    • Frame size/frame rate:
!
Choose the frame size and rate for the 
Þ
nal movie. 
The options are those for the
!
Frame size/frame rate
!
item in the movie shooting 
menu.
    • Interval priority:
!
Choose whether the camera gives priority to exposure time 
or interval timing in exposure modes
!
P
!
and
!
A. Select
!
On
!
to ensure frames are taken 
at the chosen interval,
!
Off
!
to ensure that frames are correctly exposed. If
!
On
!
is 
selected, be sure the
!
Minimum shutter speed
!
chosen for
!
ISO sensitivity 
settings
!
>
!
Auto ISO sensitivity control
!
in the photo shooting menu is faster than 
the interval. You should also focus using manual focus or, if you are using autofocus, 
choose
!
Release
!
for Custom Setting a1 (AF-C priority selection,) or Custom Setting 
a2 (AF-S priority selection) according to whether
!
AF-C
!
or
!
AF-S
!
is selected.

    MENU 
!
!
Photo Shooting Menu
!

!
 page 5

    Silent Photography

    Select On to reduce vibrations caused by the shutter when shooting landscapes and 
other static subjects. Use of a tripod is recommended. The 
ß
ash and long exposure 
noise reduction are disabled, as are the electronic front-curtain shutter and beep 
speaker, regardless of the options selected for Custom Setting d5 (Shutter type) and 
for Beep options in the setup menu. In continuous release modes, the frame 
advance rate will change.
Enabling silent photography changes the frame advance rates for continuous release 
modes
!
and disables some features, including the 
ß
ash, beep speaker, long exposure 
noise reduction, and the electronic front-curtain shutter.
Although the noise of the mechanical shutter is muted, other sounds may still be 
audible, for example during autofocus or if the Menu 
or Play button is pressed when an option other than 
Off is selected for Vibration reduction. During silent photography, 
ß
icker, banding, or 
distortion may be visible in the display and in the 
Þ
nal picture under 
ß
uorescent, 
mercury vapor, or sodium lamps or with subjects that are in motion, particularly if the 
camera is panned horizontally or an object moves horizontally at high speed through 
the frame. Jagged edges, color fringing, moir”, and bright spots may 
also appear. Bright regions or bands may appear in some areas of the frame with 
ß
ashing signs and other intermittent light sources or if the subject is brie
ß
y 
illuminated by a strobe or other bright, momentary light source.

    MENU 
!
!
Movie Shooting Menu
!

!
 page 1

    Reset Movie Shooting Menu

    In case of trouble or unexpected behaviour,
!
highlight
!
Yes
!
and press
!
OK
!
to restore movie shooting menu options to their default 
values.

    File Naming

    Choose the three-letter pre
Þ
x used in naming the image 
Þ
les in which movies are 
stored. The default pre
Þ
x is ÒDSCÓ.
    Choose the three-letter pre
Þ
x used in naming the image 
Þ
les in which movies are 
stored. The default pre
Þ
x is ÒDSCÓ.

    Frame Size/Frame Rate

    Choose the movie frame size (in pixels) and frame rate.

    4K UHD (max 29 minutes 59 seconds recording time)
    • 2160 30p: 3840 
”
 2160 (4K UHD); 30p 
!
144 Mbps
    • 2160 25p: 3840 
”
 2160 (4K UHD); 25p
!
144 Mbps
    • 2160 24p: 3840 
”
 2160 (4K UHD); 24p 144 Mbps
    HD (max 29 minutes 59 seconds recording time)
    • 1080 120p: 1920 x 1080 120p; 144 Mbps
    • 1080 100p:
!
1920 x 1080 100p;
!
144 Mbps
    • 1080 60p:
!
1920 x 1080 60p; 56 Mbps
    • 1080 50p:
!
1920 x 1080 50p;
!
56 Mbps
    • 
!
1080 25p:
!
1920 x 1080 25p;
!
28 Mbps
    • 
!
1080 24p:
!
1920 x 1080 24p;
!
28 Mbps
    Slow-Mo (max 3 minute recording time)
    • 1080 30p x 4: 1920 x 1080; 30p x 4 (slow-mo) 36 Mbps
    • 1080 25p x 4: 1920 x 1080; 25p x 4 (slow-mo) 36 Mbps
    • 1080 24p x 4: 1920 x 1080; 24p x 5 (slow-mo) 29 Mbps
    Movie Quality

    You can choose from High quality and Normal.

    Movie File Type

    Choose the Þle format for movies from MOV and MP4.
Hack: MP4 is superior!

    ISO Sensitivity Settings

    You can adjust the following ISO sensitivity settings:

    • Maximum sensitivity: Choose the upper limit for auto ISO sensitivity control 
from values between ISO 200 and Hi 2. Auto ISO sensitivity control is used in 
exposure modes
!
P,
!
S, and
!
Aand when
!
On
!
is selected for
!
Auto ISO control (mode 
M)
!
in exposure mode
!
M.
    • Auto ISO control (mode M): Select
!
On
!
for auto ISO sensitivity control in 
exposure mode
!
M,
!
Off
!
to use the value selected for
!
ISO sensitivity (mode M).
    • ISO sensitivity (mode M): Choose the ISO sensitivity for exposure 
mode
!
M
!
from values between ISO 64 and Hi 2. Auto ISO sensitivity control is used in 
other exposure modes.

    Hack: At high ISO sensitivities, the camera 
may have dif
Þ
culty focusing and noise (randomly-spaced bright pixels, fog, or lines) 
may increase. This can be prevented by choosing a lower value for the ISO 
Maximum sensitivity.

    White Balance

    Choose the white balance for movies (same choices as for the Photo Settings)

    Set Picture Control

    Choose a Picture Control for movies. You’ll also 
Þ
nd the Creative Picture Control 
settings here. You can 
Þ
nd presets like Dream, Morning, Pop, Sunday, Sober, 
Dramatic, Silence, Bleached, Melancholic, Pure, Denim, Toy, Sepia, Blue, Red, Pink, 
Charcoal, Graphite, Binary and Carbon. These can off course be edited too

    MENU 
!
!
Movie Shooting Menu
!

!
 page 2

    Manage Picture Control

    You can create custom Picture Controls here. (again same procedure as for photos)

    Active D-Lighting

    Preserve details in highlights and shadows, creating movies with natural contrast. 
Select
!
Same as photo settings
!
to use the option currently selected for photos.
Options are Auto, Extra High, High, Normal, Low or Off.

    High ISO NR

    Reduce ÒnoiseÓ (what Nikon calls randomly-spaced bright pixels) in movies recorded 
at high ISO sensitivities

    Vignette Control

    reduce shading or lens vignetting automatically using this function.

    Diffraction Compensation

    Same as for stills, the Nikon Z50 II can automatically reduce the loss of sharpness due 
to diffraction when lenses are used with an aperture above f/11.

    Auto Distortion Control

    Automatically corrects for peripheral distortion (requires a lens with a CPU chip with 
distortion control support.)

    Flicker Reduction

    Reduce 
ß
icker and banding when shooting movies under 
ß
uorescent or mercury-
vapor lighting. Choose Auto to allow the camera to automatically choose the correct 
frequency, or manually match the frequency to that of the local AC power supply.
If Auto fails to produce the desired results and you are unsure as to the frequency of 
the local power supply, test both the 50 and 60
!
Hz options and choose the one that 
produces the best results. Flicker reduction may not produce the desired results if 
the subject is very bright, in which case you should try choosing a smaller aperture 
(higher f-number). To prevent 
ß
icker, select mode M and choose a shutter speed 
adapted to the frequency of the local power supply: 1/125 s, 1/60 s, or 1/30 s for 60 
Hz; 1/100 s, 1/50 s, or 1/25 s for 50 Hz.

    Metering

    Metering determines how the camera sets exposure. The same options as in the 
Photo Menu are available.

    • Matrix metering:
!
The camera meters a wide area of the frame and sets 
exposure according to tone distribution, color, composition, and distance for results 
close to those seen by the naked eye.
    • Center-weighted metering:
!
The camera meters the entire frame but assigns 
the greatest weight to an area in the center of the frame, the size of which can be 
chosen using Custom Setting b3 (Center-weighted area). This is the classic meter 
for portraits and is also recommended when using 
Þ
lters with an exposure factor 
(
Þ
lter factor) over 1
”
.
    • Spot metering:
!
The camera meters a 
!
4
!
mm circle (equivalent to 
approximately 1.5% of the frame) centered on the current focus point, making it 
possible to meter off-center subjects (if auto-area AF is in effect, the camera will 
instead meter the center focus point). Spot metering ensures that the subject will be 
correctly exposed, even when the background is much brighter or darker.
    • Highlight-weighted metering:
!
The camera assigns the greatest weight to 
highlights. Use this option to reduce loss of detail in highlights, for example when 
photographing spotlit performers on-stage.

    MENU 
!
!
Movie Shooting Menu
!

!
 page 3

    Release Mode
    
Choose the operation performed when the shutter-release button is pressed all the 
way down.
For action shooting (cat, runner): Continuous.
Other Modes: Single frame.
    Focus Mode
    • AF-S:
!
For stationary subjects. Press the shutter-release button halfway to 
focus. If the camera is able to focus, the focus point will be displayed in green; focus 
will lock while the shutter-release button is pressed halfway. If the camera fails to 
focus, the focus point will 
ß
ash red. At default settings, the shutter can only be 
released if the camera is able to focus (focus priority).
    • AF-C:
!
For moving subjects. The camera focuses continuously while the 
shutter-release button is pressed halfway; if the subject moves, the camera will 
predict the 
Þ
nal distance to the subject and adjust focus as necessary. At default 
settings, the shutter can be released whether or not the subject is in focus (release 
priority).
    • AF-F:
!
The camera adjusts focus continuously in response to subject 
movement or changes in composition. Focus locks when the shutter-release button 
is pressed halfway. This option is only available in movie mode.
    • Manual focus:
!
The shutter can be released whether or not the subject is in 
focus.
    AF-Area Mode

    AF-area mode controls how the camera selects the focus-point for autofocus.

    • Pinpoint AF:
!
Use for pinpoint focus on a selected spot in the frame. This 
option is only available when photo mode is selected and Single AF is chosen for 
Focus mode. Focusing may be slower than with single-point AF.
    • Pinpoint AF:
!
Use for pinpoint focus on a selected spot in the frame. This 
option is only available when photo mode is selected and Single AF is chosen for 
Focus mode. Focusing may be slower than with single-point AF.
    • Single-point AF:
!
The camera focuses on a point selected by the user. Use 
with stationary subjects.
    • Dynamic-area AF:
!
The camera focuses on a point selected by the user. If 
the subject brie
ß
y leaves the selected point, the camera will focus based on 
information from surrounding focus points, letting you concentrate on composition in 
shots of moving subjects. This option is only available when photo mode is selected 
and Continuous AF is chosen for Focus mode.
    • Wide-area AF (S or L):
!
As for Single-point AF except that wider focus points 
are used. The focus points for Wide-area AF (L) are wider than those for Wide-area 
AF (S).
    • Auto-area AF:
!
The camera automatically detects the subject and selects the 
focus area. At default settings, the camera gives priority to portrait subjects; if a 
portrait subject is detected, the selected subject will be indicated by a yellow border 
(if multiple faces are detected, you can choose your subject using the multi 
selector).
!
Subject tracking
!
can be activated by pressing the OK button.

    Hack:
!
For quicker focus-point selection, 
choose Every other point for Custom Setting a5 (Focus points used) to use only a 
quarter of the available focus points (the number of points available for Wide-area AF 
(L) does not change). If you prefer to use the sub-selector for focus-point selection, 
you can choose Select center focus point for Custom Setting f2 (Custom control 
assignment)
!
> Sub-selector center to allow the center of the sub-selector to be 
used to quickly select the center focus point.

    Subject Tracking</
strong>:
!
When Auto-area AF is selected for AF-area mode, pressing OK
!
enables 
focus tracking. The focus point will change to a targeting reticule; position the reticule 
over the target and either press OK again or press 
the AF-ON
!
button to start tracking. The focus point will track the selected subject as 
it moves through the frame (in the case of portrait subjects, focus will track the 
subjectÕs face). To end tracking, press J a third time. 
To exit subject-tracking mode, press the mag/question
!
button.

    Optical VR

    Identical to the Photo Menu again. Only needed when your lens does not have a VR 
switch. If your lens does have a VR switch, turning it of will turn off both lens and 
sensor stabilisation.

    Electronic VR

    Choose whether to enable electronic vibration reduction in movie mode.

    Microphone Sensitivity

    Turn the built-in or external microphones on or off or adjust microphone sensitivity. 
Choose
!
Auto sensitivity
!
to adjust sensitivity automatically,
!
Microphone off
!
to turn 
sound recording off; to select microphone sensitivity manually, select
!
Manual 
sensitivity
!
and choose a sensitivity.

    Attenuator

    Select
!
Enable
!
to reduce microphone gain and prevent audio distortion when 
recording movies in loud environments.

    Frequency Response

    If
!
S
!
Wide range
!
is selected, the built-in and external 
microphones will respond to a wide range of frequencies, from music to the bustling 
hum of a city street. Choose
!
T
!
Vocal range
!
to bring 
out human voices.

    MENU 
!
!
Movie Shooting Menu
!

!
 page 4

    Wind Noise Reduction

    Select
!
On
!
to enable the low-cut 
Þ
lter for the built-in microphone (optional stereo 
microphones are unaffected), reducing noise produced by wind blowing over the 
microphone (note that other sounds may also be affected). Wind-noise reduction for 
optional stereo microphones that support this feature can be enabled or disabled 
using microphone controls.

    MENU 
!
!
Custom Setting Menu
!

!
 page 1

    Reset Custom Settings

    Resets all Custom settings to the factory settings.

    Autofocus Settings
    a1 AF-C Priority Selection

    When
!
AF-C
!
is selected for photography, this option controls whether photographs 
can be taken whenever the shutter-release button is pressed (release priority</
em>) or only when the camera is in focus (focus priority).


    • Release:
!
Photos can be taken whenever the shutter-release button is 
pressed.
    • Focus: Photos can be taken only when the camera is in focus.

    Regardless of the option selected, focus will not lock when
!
AF-C
!
is selected for 
autofocus mode. The camera will continue to adjust focus until the shutter is 
released.

    a2 Auto-area AF face/Eye detection

    When photographing portrait subjectswith Auto-area AF, use Custom Setting a2 
(Auto-area AF face/eye detection) to choose whether the camera detects both faces 
and eyes (face/eye-detection AF) or only faces (face-detection AF). If Face and eye 
detection on is selected and a portrait subject is detected, an amber border 
indicating the focus point will appear around the subjectÕs face or, if the camera 
detects the subjectÕs eyes, one or the other of their eyes (face/eye-detection AF).
Faces detected when Face detection on is selected are similarly indicated by an 
amber border. If AF-S is selected for focus mode, or if the camera is shooting using 
AF-S when AF-A is selected for focus mode, the focus point will turn green when the 
camera focuses.
If more than one portrait subject or more than one eye is detected, left arrow and 
right arrow icons will appear on the focus point, and you will be able to position the 
focus point over a different face or eye by pressing LEFT or RIGHT cursor. If the 
subject looks away after their face is detected, the focus point will move to track their 
motion. During playback, you can zoom in on the face or eye used for focus by 
pressing OK.
    If more than one portrait subject or more than one eye is detected, left arrow and 
right arrow icons will appear on the focus point, and you will be able to position the 
focus point over a different face or eye by pressing LEFT or RIGHT cursor. If the 
subject looks away after their face is detected, the focus point will move to track their 
motion. During playback, you can zoom in on the face or eye used for focus by 
pressing OK.

    
Eye detection is not available in movie mode!
    a3 Focus points used
    
For quicker focus-point selection, choose Every other point for Custom Setting a3 
(Focus points used) to use only a quarter of the available focus points (the number of 
points available for Wide-area AF (L) does not change).
    a4 AF activation

    Choose whether the shutter-release button can be used to focus (Shutter/AF-ON) or 
if focus can only be adjusted using the AF-ON button or other controls to which AF-
ON has been assigned (AF-ON only).

    a5 Focus Points wrap-around

    Choose whether focus-point selection Òwraps aroundÓ from one edge of the 
view
Þ
nder to another

    • Wrap: Focus-point selection Òwraps aroundÓ from top to bottom, bottom to 
top, right to left, and left to right, so that, for example, pressing
!
2
!
when a focus point at the right edge of the view
Þ
nder 
display is highlighted (1)
!
selects the corresponding focus point at the left edge of the 
display (2):Z50 II Fd Af Area Select
    • No wrap:
!
The focus-point display is bounded by the outermost focus points 
so that, for example, pressing
!
2
!
when a focus point 
at the right edge of the display is selected has no effect.
    a6 Focus Point options
    
Choose from the following focus point display options.

    a7 Low Light AF

    Autofocus is achievable with the Nikon Z50 II down to -4EV provided low-light 
autofocus is activated. only works in Single AF!!!
Choose On for more accurate focus under low-light conditions when AF-S is selected 
for focus mode, but note that camera may require more time to focus. This option 
takes effect only in photo mode when a setting other than Auto is chosen with the mode dial. While low-light AF is in effect, 
ÒLow-lightÓ will appear in the display and the display refresh rate may drop.
Hack: This slows down autofocus for general 
photography, so it should be disabled except for focussing in really low light.

    a8 Built-In AF-Assist Illuminator
    Metering/Exposure Settings
    b1 EV steps for exposure cntrl

    Select the increments used when making adjustments to shutter speed, aperture, 
and bracketing.

    b2 Easy exposure compensation

    This option controls whether the
!
plus/minus
!
button is 
needed to set exposure compensation. If
!
On (Auto reset)
!
or
!
On
!
is selected, the 0 at 
the center of the exposure display will 
ß
ash even when exposure compensation is 
set to ±0.
    This option controls whether the
!
plus/minus
!
button is 
needed to set exposure compensation. If
!
On (Auto reset)
!
or
!
On
!
is selected, the 0 at 
the center of the exposure display will 
ß
ash even when exposure compensation is 
set to ±0.

    • On (Auto reset):
!
Exposure compensation is set by rotating one of the 
command dials (see note below). The setting selected using the command dial is 
reset when the camera turns off or the standby timer expires (exposure 
compensation settings selected using the
!
E
!
button 
are not reset).
    • On:
!
As above, except that the exposure compensation value selected using 
the command dial is not reset when the camera turns off or the standby timer 
expires.
    • Off:
!
Exposure compensation is set by pressing the
!
E
!
button and rotating the main command dial.
    b3 Center-weighted area

    Choose the size of the area given the most weight in center-weighted metering. If a 
non-CPU lens is attached, the size of the area is 
Þ
xed at 12 mm.
Remember that the exposure compensation
!
icon is not displayed when exposure 
Þ
ne-tuning is in effect. The only way to determine how much exposure has been 
altered is to view the amount in the 
Þ
ne-tuning menu.

    b4 Fine-Tune optimal exposure

    Use this option to 
Þ
ne-tune the exposure value selected by the camera. Exposure 
can be 
Þ
ne-tuned separately for each metering method by from +1 to Ð1 EV in steps 
of 1/6 EV.

    Timers/AE Lock Settings
    c1 Shutter-release button AE-L

    Choose whether exposure locks when the shutter-release button is pressed.

    • On (half press):
!
Pressing the shutter-release button halfway locks 
exposure.
    • On (burst mode):
!
Exposure only locks while the shutter-release button is 
pressed all the way down.
    • Off:
!
Pressing the shutter-release button does not lock exposure.
    c2 Self-timer

    Choose the length of the shutter release delay, the number of shots 
taken, and the interval between shots in self-timer mode.

    • Self-timer delay: Choose the length of the shutter-release delay.
    • Number of shots: Press
!
1
!
and
!
3
!
to choose the number of shots taken each time the 
shutter-release button is pressed.
    • Interval between shots: Choose the interval between shots when 
the
!
Number of shots
!
is more than 1.
    c3 Power off delay

    Choose how long the monitor remains on when no operations are performed during 
playback (Playback; defaults to 10 seconds) and image review (Image review; 
defaults to 4 seconds), when menus (Menus; defaults to 1 minute) or information 
(Information display; defaults to 10 s) are displayed, or during live view and movie 
recording (Live view; defaults to 10 minutes). Choose a shorter monitor-off delay for 
longer battery life.

    Shooting/display Settings
    d1 CL mode shooting speed

    Choose the frame advance rate for low-speed continuous release mode.

    d2 Max. continuous release

    he maximum number of shots that can be taken in a single burst 
in continuous release modes can be set to any value between 1 and 200. Note that 
regardless of the option selected, there is no limit to the number of photos that can 
be taken in a single burst when a shutter speed of 4
!
s or slower is selected in mode 
S or M.

    Regardless of the option selected for Custom Setting d2, shooting will slow when the 
memory buffer 
Þ
lls.

    d3 Exposure delay mode

    In situations where the slightest camera movement can blur pictures, shutter release 
can be delayed by from about 0.2 to 3 seconds after the shutter is engaged.

    d4 Limit selectable image area

    Choose the options available when image-area selection is assigned to the i menu or to the command dials and a camera control. 
Highlight the desired options and press the
!
right arrow
!
</
span>to select or deselect. Press OK to save 
changes when settings are complete.


    d5 Limit selectable image area

    DX: (24×16)
1:1: (16×16)
16:9 (24×14

    d6 File number sequence

    When a picture is taken, the camera names the 
Þ
le by adding one to the last 
Þ
le 
number used. This option controls whether 
Þ
le numbering continues from the last 
number used when a new folder is created, the memory card is formatted, or a new 
memory card is inserted in the camera.

    • On:
!
When a new folder is created, the memory card formatted, or a new 
memory card inserted in the camera, 
Þ
le numbering continues from the last number 
used or from the largest 
Þ
le number in the current folder, whichever is higher. If a 
photograph is taken when the current folder contains a photograph numbered 9999, 
a new folder will be created automatically and 
Þ
le numbering will begin again from 
0001.
    • Off:
!
File numbering is reset to 0001 when a new folder is created, the 
memory card is formatted, or a new memory card is inserted in the camera. Note 
that a new folder is created automatically if a picture is taken when the current folder 
contains 5000 pictures.
    • Reset: Same as for
!
On, except that the next picture taken is assigned a 
Þ
le 
number by adding one to the largest 
Þ
le number in the current folder. If the folder is 
empty, 
Þ
le numbering is reset to 0001.
    d7 Apply settings to live view

    Choose On to preview how changes to such settings as white balance, Picture 
Controls, and exposure compensation affect color and brightness in photo mode, or 
select Off to adjust brightness and hue for ease of viewing (regardless of the option 
selected, the effects of the aforementioned settings are always visible in movie 
mode).

    d8 Framing grid display

    Choose
!
On
!
to display on-demand grid lines in the view
Þ
nder for reference when 
composing photos.

    d9 Peaking highlights

    When focus peaking is enabled in manual focus mode, objects that are in focus are 
indicated by colored outlines in the display. Choose the peaking level and outline 
color.

    • Peaking level: Choose from 3 (high sensitivity), 2 (standard), 1 (low 
sensitivity), and Off; the higher the value, the greater the depth that will be shown as 
being in focus.
    • Peaking highlight color: Choose the highlight color.
    d10 View all in continuous mode

    Choose whether image review is available during burst shooting. If
!
Off
!
is selected, 
not only the monitor but also the monitor backlight will turn off during exposures.

    Bracketing/Flash Settings
    e1 Flash Sync Speed

    This option controls ßash sync speed.

    • 1/250 s (Auto FP):
!
Auto FP high-speed sync is used when a compatible 
ß
ash unit is attached. If other 
ß
ash units are used, shutter speed is set to 1/250 s. 
When the camera shows a shutter speed of 1/250 s in exposure mode
!
P
!
or
!
A, auto 
FP high-speed sync will be activated if the actual shutter speed is faster than 1/250 
s. If the 
ß
ash unit supports auto FP high-speed sync, shutter speeds as fast as 
1/8000 s can be selected by the camera (modes
!
P
!
and
!
A) or by the user 
(modes
!
S
!
and
!
M).
    • 1/250 sÐ1/60 s:
!
Flash sync speed set to selected value.

    Hack:
!
Fixing Shutter Speed at the Flash Sync 
Speed Limit: To 
Þ
x shutter speed at the sync speed limit in shutter-priority auto or 
manual exposure modes, select the next shutter speed after the slowest possible 
shutter speed (30 sec ort longer). An X (
ß
ash sync indicator) will be displayed in the 
view
Þ
nder and control panel together with the 
ß
ash sync speed.

    Hack: Auto FP High-Speed Sync:
!
Auto FP high-speed sync allows 
the 
ß
ash to be used at the highest shutter speed supported by the camera, making it 
possible to choose the maximum aperture for reduced depth of 
Þ
eld even when the 
subject is backlit in bright sunlight. The information display 
ß
ash mode indicator 
shows ÒFPÓ when auto FP high-speed sync is active.

    e2 Flash Shutter Speed

    Choose the slowest shutter speed available when front- or rear-curtain sync or red-
eye reduction is used in mode P or A (regardless of the setting chosen, shutter 
speeds can be as slow as 30 s in modes S and M or at 
ß
ash settings of slow sync, 
slow rear-curtain sync, or red-eye reduction with slow sync).

    e3 Exposure comp. for ßash

    Choose how the camera adjusts ßash level when exposure compensation is used.

    • Entire frame:
!
Both 
ß
ash level and exposure compensation are adjusted to 
modify exposure over the entire frame.
    • Background only:
!
Exposure compensation applies to background only.
    e4 Auto ISO sensitivity control (with ßash)

    Choose the reference used to set exposure when a 
ß
ash is used with auto ISO 
sensitivity control.

    • Subject and background:
!
The camera takes both the main subject and 
background lighting into account when adjusting ISO sensitivity.
    • Subject only:
!
ISO sensitivity is adjusted only to ensure that the main subject 
is correctly exposed.
    e5 Bracketing order

    At the default setting of
!
MTR > under > over, exposure, 
ß
ash, and white 
balance bracketing are performed in the following order: the unmodi
Þ
ed shot is taken 
Þ
rst, followed by the shot with the lowest value, followed by the shot with the highest 
value. If
!
Under > MTR > over
!
(plus to minus) is 
selected, shooting will proceed in order from the lowest to the highest value. This 
setting has no effect on ADL bracketing.

    Controls Settings
    f1 Customize i menu

    Customise the appearance of the i Menu. What’s included and what not.
Split-Screen Display Zoom:
!
When assigned to the i 
menu, Split-screen display zoom can be used to split the display into two boxes 
showing separate areas of the frame side-by-side at a high zoom ratio. The positions 
of the magni
Þ
ed areas are shown in the navigation window, making it easier to check 
focus at two different locations when photographing a building or other wide object 
situated at right angles to the camera.

    f2 Custom control assignment

    Choose the functions assigned to camera controls, whether used individually or in 
combination with the command dials.

    f3 Custom controls (playback)

    AE-L/AF-L button and OK button.

    f4 Customize command dials

    This option controls the operation of the main and sub-command dials.

    • Reverse rotation: Reverse the direction of rotation of the command dials for 
selected operations. Highlight options and press right</
span> to select or deselect, and then press OK to 
save changes and exit.
    • Change main/sub: Choose the roles played by the command dials 
for exposure and focus operations.

      Change main/sub: Choose the roles played by the command dials 
for exposure and focus operations.

      • Exposure setting: If On is selected, the main command dial will control 
aperture and the sub-command dial shutter speed. If On (Mode A) is selected, the 
main command dial will be used to set aperture in mode A only.
      • Autofocus setting: This option applies to the control assigned Focus mode/
AF-area mode using Custom Setting f2 (Custom control assignment). If On is 
selected, the focus mode can be chosen by keeping the control pressed and rotating 
the sub-command dial, AF-area mode by keeping the AF-mode button pressed and 
rotating the main command dial.
    • Menus and playback: Select Off to use the multi selector for menus and 
playback. If On or On (image review excluded) is selected, the main command dial 
can be used to choose the picture displayed during full-frame playback and to 
highlight thumbnails and menu items. The sub-command dial is used in full-frame 
playback to skip forward or back according to the option selected for Sub-dial frame 
advance and in thumbnail playback to page up or down. While menus are displayed, 
rotating the sub-command dial right displays the sub-menu for the highlighted option, 
while rotating it left displays the previous menu. To make a selection, press 2 or J. Select On (image 
review excluded) to prevent the command dials from being used for playback during 
image review.
    • Sub-dial frame advance: When On or On (image review excluded) is 
selected for Menus and playback, the sub-command dial can be rotated during full-
frame playback to select a folder, to skip forward or back 10 or 50 frames at a time, 
or to skip to the next or previous protected picture, the next or previous photo, the 
next or previous movie, or the next or previous picture with a selected rating (to 
choose the rating, highlight Rating and press right).
    f5 Release Button to use dial

    Selecting Yes allows adjustments that are normally made by holding a button and 
rotating a command dial to be made by rotating the command dial after the button is 
released. This setting applies to the plus/minus, ISO, and timer
!
buttons and also to 
controls to which the following roles have been assigned using Custom Settings f2 or 
g2 (Custom control assignment): Choose image area, Image quality/size, White 
balance, Set Picture Control, Active D-Lighting, Metering, Flash mode/compensation, 
Focus mode/AF-area mode, Auto bracketing, Multiple exposure, HDR (high dynamic 
range), Exposure delay mode, Shutter spd & aperture lock, Peaking highlights, 
Choose non-CPU lens number, and Microphone sensitivity.

    f6 Reverse indicators

    If minus plus bar is selected, the exposure indicators in the control panel, view
Þ
nder, 
and information display are displayed with negative values on the left and positive 
values on the right. Selectplus minus bar to display positive values on the left and 
negative values on the right.

    Movie Settings
    g1 Customize i Menu

    Choose the functions assigned to camera controls, whether used individually or in 
combination with the command dials, when you press i.

    g2 Custom controls

    Assign the custom controls for operation when in movie mode.
!
Power aperture is 
available only in modes A and M. The display may 
ß
icker while aperture is adjusted.

    g3 AF Speed

    Change the speed of the autofocus for movie mode.
!
o choose when the selected 
option applies, highlight When to apply and press right. Choose from Always (the 
selected option applies whenever the camera is in movie mode) and Only while 
recording (the selected option applies only while recording is in progress; at other 
times, the focus speed is Ò+5Ó, or in other words as fast possible).

    g4 AF tracking sensitivity

    Choose how quickly focus responds when your subject leaves the focus point or 
something passes between the subject and the camera in movie mode. Choose from 
values between 7 (Low) and 1 (High). The higher the value, the slower the response 
and the less likely you are to lose focus on your original subject when something 
passes between the subject and the camera. The lower the value, the quicker the 
camera is to respond to the subject leaving the focus area by shifting focus to a new 
subject in the same area.

    g5 Highlight display

    Choose whether shading is used to indicate highlights (bright areas of the frame) 
and select the level of brightness needed to trigger the highlight display.

    • Display pattern: To enable the highlight display, select Pattern 1 or Pattern 
2.
    • Highlight display threshold: Choose the brightness needed to trigger the 
movie highlight display. The lower the value, the greater the range of brightnesses 
that will be shown as highlights. If 255 is selected, the highlight display will show only 
areas that are potentially overexposed.

    MENU 
!
!
Setup Menu
!

!
 page 1

    Format Memory Card

    To begin formatting, choose a memory card slot and select
!
Yes.
!
Note that 
formatting permanently deletes all pictures and other data on the card in the selected 
slot.
!
Before formatting, be sure to make backup copies as required.

    Save User Settings

    Frequently-used combinations of settings can be assigned to the U1, U2, and U3 
positions on the mode dial.
Follow the steps below to save settings:

      1. Select a mode.

        
Rotate the mode dial to the desired mode.

      1. Adjust settings.

        
Choose a focus point and make the desired adjustments to 
ß
exible program (mode 
P), shutter speed (modes S and M), exposure and 
ß
ash compensation, aperture 
(modes A and M), and settings in the photo shooting, movie shooting, and Custom 
Settings menus.

      1. Select Save user settings.

        
Highlight Save user settings in the setup menu and press 2.

      1. Select a position.

        
Highlight Save to U1, Save to U2, or Save to U3 and press 2.

    1. Save user settings.

      
Highlight Save settings and press J to assign the 
settings selected in Steps 1 and 2 to the mode dial position selected in Step 4.

    Reset User Settings

    Reset settings for U1, U2, and U3 to default values.

    Language

    Choose a language for camera menus and messages.

    Time Zone And Date

    Change time zones, set the camera clock, synchronize the clock with the clock on a 
smart device, choose the date display order, and turn daylight saving time on or off.

    • Time zone:
!
Choose a time zone. The camera clock is automatically set to 
the time in the new time zone.
    • Date and time:
!
Set the camera clock.
    • Date format:
!
Choose the order in which the day, month, and year are 
displayed.
    • Daylight saving time:
!
Turn daylight saving time on or off. The camera clock 
will automatically be advanced or set back one hour. The default setting is
!
Off.
    Monitor Brightness

    Press the up or down arrow
!
to adjust monitor brightness. Choose 
higher values for increased brightness, lower values for reduced brightness.

    Note that monitor brightness can only be adjusted when the monitor is the active 
display; it cannot be adjusted in the Òview
Þ
nder onlyÓ monitor mode or when your eye 
is to the view
Þ
nder.

    ViewÞnder Brightness

    Adjust view
Þ
nder brightness. If Auto is selected, view
Þ
nder brightness will be 
adjusted automatically in response to lighting conditions; to adjust brightness 
manually, select Manual and press up or down
!
(choose higher values for increased 
brightness, lower values for reduced brightness). Note that view
Þ
nder brightness can 
only be adjusted when the view
Þ
nder is the active display; it cannot be adjusted 
when the view
Þ
nder is off or in the Òmonitor onlyÓ monitor mode.

    ViewÞnder Color Balance

    Use the multi selector to adjust view
Þ
nder color balance as described in Monitor 
Color Balance.

    MENU 
!
!
Setup Menu
!

!
 page 2

    Information Display

    If
!
Auto
!
(AUTO) is selected, the color of the lettering in the information display will 
automatically change from black to white or white to black to maintain contrast with 
the background. To always use the same color lettering, select
!
Manual
!
and 
choose
!
Dark on light
!
(B; black lettering) or
!
Light on dark
!
(W; white lettering). Monitor 
brightness will automatically be adjusted for maximum contrast with the selected text 
color.

    AF Þne-tune

    Fine-tune focus for up to 20 lens types. Use only as required; AF tuning is not 
recommended in most situations and may interfere with normal focus. Auto 
Þ
ne-
tuning is available in live view.
!
We recommend that you perform 
Þ
ne-tuning at a 
focus distance you use frequently; if you perform focus-tuning at a short focus 
distance, for example, you may 
Þ
nd it less effective at longer distances.

    AF 
Þ
ne-tune (On/Off): Choose On to turn AF tuning on, Off to 
turn it off.

    Saved value: Tune AF for the current lens. Press 1 to move focal point away from camera or 3 to move focal point toward camera; choose from values 
between +20 and Ð20. The camera can store values for up to 30 lens types. Only 
one value can be stored for each type of lens.

    Default: Choose the AF tuning value used when no previously 
saved value exists for the current lens.

    List saved values: List previously saved AF tuning values. To 
delete a lens from the list, highlight the desired lens and press O. To change a lens identi
Þ
er (for example, to choose an identi
Þ
er that 
is the same as the last two digits of the lens serial number to distinguish it from other 
lenses of the same type in light of the fact that Saved value can be used with only 
one lens of each type), highlight the desired lens and press the trash icon. A menu will be displayed; press up or down to choose 
an identi
Þ
er and press OK to save changes and 
exit.

    Image Dust Off ref Photo

    This setting requires reference data for the Image Dust Off option in Capture NX-D 
(for more information, refer to Capture NX-D online help). Image Dust Off cannot be 
used with small or medium-sized NEF (RAW) images.
A lens with a focal length of at least 50 mm is recommended when recording Image 
Dust Off reference data. When using a zoom lens, zoom all the way in.

    Choose a start option.

    
Highlight one of the following options and press J. To 
exit without acquiring image dust off data, press G.

    • Start: A message will be displayed.
    • Clean sensor and then start: Select this option to clean the image sensor 
before starting. A message will be displayed when cleaning is complete.

    Acquire dust off reference data.

    
Press the shutter-release button the rest of the way down to acquire Image Dust Off 
reference data. The monitor turns off when the shutter-release button is pressed.

    
If the reference object is too bright or too dark, the camera may be unable to acquire 
Image Dust Off reference data and a message will be displayed. Choose another 
reference object and repeat the process from Step 1.
    Image Comment

    Add a comment to new photographs as they are taken. Comments 
can be viewed as metadata in ViewNX-i or Capture NX-D. The comment is also 
visible on the shooting data page in the photo information display. The following 
options are available:

    • Input comment: Input a comment as described in ÒText 
EntryÓ.
!
Comments can be up to 36 characters long.
    • Attach comment: Select this option to attach the comment to all subsequent 
photographs.
!
Attach comment
!
can be turned on and off by highlighting it and 
pressing
!
2. After choosing the desired setting, 
press
!
OK
!
to exit.
    Copyright Information

    Add copyright information to new photographs as they are taken. 
Copyright information is included in the shooting data shown in the photo information 
display and can be viewed as metadata in ViewNX-i or in Capture NX-D. The 
following options are available:

      • Artist: Enter a photographer name as described in ÒText 
EntryÓ.
!
Photographer names can be up to 36 characters long.
      • Copyright: Enter the name of the copyright holder as described in ÒText 
EntryÓ. Copyright holder names can be up to 54 characters long.
      • Attach copyright information: Select this option to attach copyright 
information to all subsequent photographs.
!
Attach copyright information
!
can be 
turned on and off by highlighting it and pressing
!
2. 
After choosing the desired setting, press
!
J
!
to exit.</
li>
    Beep Options

    Choose the pitch and volume of the beep that sounds when:

    • The self-timer is in operation
    • Time-lapse recording ends
    • The camera focuses in photo mode (AF-S selected for focus mode; Focus 
selected for Custom Setting a2, AF-S priority selection; and Off selected for Silent 
photography)
    • The touch screen is used for keyboard entry

    The Beep options menu contains the following items:

    • Beep on/off: Turn the beep speaker on or off, or select Off (touch controls 
only) to disable the beep during keyboard entry while enabling it for other 
purposes.
    • Volume: Adjust beep volume.
    • Pitch: Choose the pitch of the beep from High and Low.
    Touch Controls

    Adjust monitor touch control settings.

    • Enable/Disable Touch Controls:
!
Select
!
Disable
!
to prevent accidental use of 
touch-screen controls, or
!
Playback only
!
to enable touch-screen controls in playback 
mode only.
    • Full-Frame Playback Flicks:
!
Choose the gesture used to display the next 
image in full-frame playback: a 
ß
ick from right to left or a 
ß
ick from left to right.
    Self-portrait Mode
    
Self-portrait mode is selected automatically when the monitor is in the self-portrait 
position.

    • In self-portrait mode, exposure compensation and self-timer settings can be 
adjusted using touch controls.
    • Tap the self-timer icon to choose the shutter-release delay and the number 
of pictures taken.
    • Tap the exposure compensation icon to adjust exposure.
    • Press the shutter-release button halfway to focus. Press it the rest of the 
way down to take photographs.
    • You can also focus and take photographs using touch controls.
    • In movie mode, movies can be recorded using the movie-record button.
    • To exit self-portrait mode, rotate the monitor out of the self-portrait 
position.

    MENU 
!
!
Setup Menu
!

!
 page 3

    HDMI

    Adjust settings for connection to HDMI devices.
!
The camera can record video 
directly to connected HDMI recorders. Some recorders will even start and stop 
recording in response to camera controls. Use the HDMI
!
option in the setup menu to 
adjust settings for HDMI output.

    • Output Resolution: Choose the format for images output to the HDMI 
device. If Auto is selected, the camera will automatically select the appropriate 
format.
    • Advanced: Adjust the settings below.

      • Output range: Auto is recommended in most situations. If the camera is 
unable to determine the correct RGB video signal output range for the HDMI device, 
you can choose Limited range for devices with an RGB video signal input range of 
16 to 235 or Full range for devices with an RGB video signal input range of 0 to 255. 
Choose Limited range if you notice a loss of detail in shadows, Full range if shadows 
are Òwashed outÓ or too bright.
      • External recording control: Enabling external recording control allows 
camera controls to be used to start and stop recording when the camera is 
connected via HDMI to a third-party recorder that supports the Atomos Open 
Protocol (Atomos SHOGUN, NINJA, or SUMO-series Monitor recorders). An icon will 
be displayed in the camera monitor: A is displayed in 
movie live view, while B is displayed during movie 
recording. During recording, check the recorder and recorder display to ensure that 
footage is being saved to the device (note that the footage output to the device may 
be disrupted while external recording control is in effect). The camera display will 
turn off automatically when the standby timer expires, ending HDMI output; when 
recording movies to an external device, select Standby timer for Custom Setting c3 
(Power off delay) and choose No limit or a time longer than the anticipated recording 
time. See the manual provided with the recorder for more information on device 
features and operation.
      • Output data depth: Choose from 8 bit and 10 bit.
      • N-Log setting: Select On (cannot record to card) to preserve details in 
highlights and shadows and avoid over-saturated colors when recording movies. 
Choose this option (available only when 10 bit is selected for Output data depth) 
when recording footage that will later be color-corrected. The footage will be 
recorded directly to the external device and cannot be saved to the camera memory 
card. The ISO sensitivity settings > Maximum sensitivity and ISO sensitivity (Mode 
M) options in the movie shooting menu can be set to values of from ISO 1600 to 
25600 and ISO 800 to 25600, respectively.
      • View assist: Choose On for a live preview of video footage recorded with 
On (cannot record to card) selected for N-Log setting. The colors in the preview will 
differ from those of the 
Þ
nal movie, but this has no effect on the footage actually 
recorded.

    HDMI Output:
    HDMI output is not available at movie frame sizes of 1920 
”
 1080 120p, 1920 
”
 1080 
100p, or 1920 
”
 1080 slow-mo or when the camera is connected to a device running 
SnapBridge or Camera Control Pro 2.
10-Bit Output Data Depth:

    10 bit can be used only with compatible recorders. Regardless of 
the display mode selected, the camera monitor will turn on and the view
Þ
nder will 
remain blank. No photos can be taken; during movie recording, the following 
additional restrictions apply when 3840 
”
 2160 is selected for frame size:

    • Movies are not recorded to memory cards inserted in the camera.
    • Icons and characters in the monitor will display at low resolution.
    • Selecting the DX image area reduces the angle of view to about 90%.

    Zoom

    Movies 
Þ
lmed at a frame size of 3840 
”
 2160 are displayed at a 
size of 1920 
”
 1080 when zoomed in.

    Location Data display

    Adjust settings for use when the camera is connected to a device that provides 
location data, namely a GPS receiver or a smart device running the SnapBridge app 
(for more information on SnapBridge, see the appÕs online help).

    • Standby timer: If Enable is selected when a GPS receiver is connected, the 
exposure meters will turn off automatically if no operations are performed for the 
period speci
Þ
ed Custom Setting c3 (Power off delay)
!
> Standby timer, reducing 
the drain on the battery.
    • Position: View the location data supplied by the GPS receiver or smart 
device (the items displayed vary with the source).
    • Set clock from satellite: Select Yes to synchronize the camera clock with the 
time reported by the GPS device.
    Airplane Mode

    Select
!
Enable
!
to disable the wireless features of Eye-Fi cards and Bluetooth and Wi-
Fi connections to smart devices. Connections to other devices using a wireless 
transmitter can only be disabled by removing the transmitter from the camera.

    Connect To Smart Device

    Adjust settings for connection to smart devices.

    • Start:
!
Follow on-screen instructions to connect to the smart device.
    • Password protection:
!
Choose a password for smart device connections and 
turn password protection on or off.

    Use SnapBridge to control the camera remotely from a smart device and download 
pictures from the camera.
!
SnapBridge is available free-of-charge from the Apple App 
Store and on Google Play.

    Connect To PC

    If On is selected, new photos will automatically be uploaded to the PC.

    Connecting via USB:

    
If the supplied USB cable is used to connect the camera to a computer running 
ViewNX-i, you can copy pictures to the computer, where they can be viewed, edited, 
and organized.

    Installing ViewNX-i:

    Download the ViewNX-i installer from the following website and 
follow the on-screen instructions to complete installation (existing users should be 
sure to download the latest version, as earlier versions may not support the camera). 
An Internet connection is required. For system requirements and other information, 
see the Nikon website for your region.

    Copying 
Pictures to the Computer

    Connect the USB cable.

    
After turning the camera off and ensuring that a memory card is inserted, connect 
the supplied USB cable.

    
Connect the camera directly to the computer; do not connect the cable via a USB 
hub or keyboard.
To ensure that data transfer is not interrupted, be sure the camera battery is fully 
charged.

    Be sure the camera is off when connecting or disconnecting 
interface cables. Do not use force or attempt to insert the connectors at an angle.</
p>

    Turn the camera on.

    
The Nikon Transfer 2 component of ViewNX-i will start (if a message is displayed 
prompting you to choose a program, select Nikon Transfer 2).

    Wireless Remote (ML-L7) Options

    Adjust settings for optional WR-R10 wireless remote controllers and for optional 
radio-controlled 
ß
ash units that support Advanced Wireless Lighting.

    LED Lamp:

    
Enable or disable the status LEDs on a WR-R10 wireless remote controller mounted 
on the camera. For more information, see the documentation supplied with the 
wireless remote controller.
Link Mode:
Choose a link mode for WR-R10 wireless remote controllers mounted on other 
cameras or radio-controlled 
ß
ash units that support Advanced Wireless Lighting. Be 
sure that the same mode is selected for the other devices.

    Pairing: To pair the camera with a WR-R10, mount the WR-
R10 on the camera and press the pairing button.

    PIN: Connect using a four-digit PIN code. Press 4 or 2to highlight digits 
and press 1 or 3 
to change, then press J to enter and display the 
selected PIN.

    Regardless of the option selected for Link mode, signals from paired wireless remote 
controllers will always be received by the WR-R10. Users of the WR-1 wireless 
remote controller will need to select pairing as the WR-1 link mode.

    Assign remote (WR) Fn Button

    Choose the role played by the Fn button on optional wireless remote controllers.

    Conformity Marking

    View a selection of the standards with which the camera complies.

    Energy saving

    turn on the energy saving function.
MENU 
!
!
Setup Menu
!

!
 page 4

    Slot Empty Release Lock

    Selecting
!
Enable release
!
allows the shutter to be released when no memory card is 
inserted, although no pictures will be recorded (they will however be displayed in the 
monitor in demo mode). If
!
Release locked
!
is selected, the shutter-release button is 
only enabled when a memory card is inserted in the camera.

    Reset All Settings

    Reset all settings except Language and Time zone and date to their default values. 
Copyright information and other user-generated entries are also reset. We 
recommend that you save settings using the Save/load settings option in the setup 
menu before performing a reset.

    Firmware Version

    View the current camera Þrmware version of your Nikon Z50 II and attached lens.
MENU 
!
!
Retouch Menu
!

!
 page 1

    NEF (RAW) Processing

    Create JPEG copies of NEF (RAW) photographs. If you displayed the retouch menu 
by pressing the
!
G
!
button, you can use this option to 
copy multiple images.

      1. Select NEF (RAW) processing.

        
Highlight NEF (RAW) processing in the retouch menu and press 2.

      1. Choose how images are selected.

        Choose from the following options:

        • Select image(s): Select one or more images manually.
        • Select date: Create JPEG copies of all the NEF (RAW) images taken on 
selected dates.
        • Select all images: Create JPEG copies of all the NEF (RAW) images on the 
memory card (proceed to Step 4).
      1. Select photographs.

        
If you chose Select image(s) in Step 2, a picture selection dialog will be displayed 
listing only NEF (RAW) images created with this camera. Highlight images using the 
multi selector and press the W (Q) button to select or deselect; selected images are indicated by a 
Licon. To view the highlighted image full screen, 
press and hold the X button. Press J to proceed to Step 4 when your selection is complete.

        If you chose Select date in Step 2, a list of dates will be displayed. Highlight dates 
using the multi selector and press 2 to select or 
deselect. Press J to select all NEF (RAW) pictures 
taken on the chosen dates and proceed to Step 4.
      1. Choose settings for the JPEG copies.

        
Adjust the settings listed below, or select Original to use the setting in effect when 
the photograph was taken (the original settings are listed below the preview). Note 
that exposure compensation can only be set to values between 
#
2 and +2 EV.

        1 Image quality
        2 Image size
        3 White balance
        4 Exposure compensation
        5 Set Picture Control
        6 High ISO NR
        7 Color space
        8 Vignette control
        9 Active D-Lighting
        10 Diffraction compensation
    1. Copy the photographs.

      
Highlight EXE and press J to create a JPEG copy of 
the selected photograph (if multiple photos are selected, a con
Þ
rmation dialog will be 
displayed; highlight Yes and press J to create JPEG 
copies of the selected photos). To exit without copying the photographs, press the 
Gbutton.

    Trim

    Create a cropped copy of the selected photograph. The selected photograph is 
displayed with the selected crop shown in yellow; create a cropped copy as 
described below.
Create a cropped copy of the selected photograph. The selected photograph is 
displayed with the selected crop shown in yellow; create a cropped copy as 
described below.

    To reduce size of the crop: Press mag/
question button.

    To increase size of the crop: Press magni
Þ
er.

    To change the crop aspect ratio: Rotate the main command 
dial.

    To change the crop aspect ratio: Rotate the main command 
dial.

    To position the crop: Use the multi selector. Keep the multi 
selector pressed to move the crop rapidly to the desired position.

    To create a cropped copy: Press OK
!
to save the current crop 
as a separate 
Þ
le. The size of the copy varies with crop size and aspect ratio and 
appears at upper left in the crop display.

    Resize

    Create small copies of selected photographs.

      1. Select Resize.

        
Highlight Resize in the N tab and press 2.

        2. Choose a size.

        
Highlight Choose size and press 2.

        
Highlight the desired size and press J.
      1. Choose pictures.

        
Highlight Select image(s) and press 2.

        
Highlight pictures and press W (Q) to select or deselect (to view the highlighted picture full screen, 
press and hold the X button). Selected pictures are 
marked by a 8 icon. Press J</
span> when the selection is complete. Note that photographs taken at an image-
area setting of 5 : 4 (30
”
24), 1 : 1 (24
”
24), or 16 : 9 (36
”
20) cannot be resized.

    1. Save the resized copies.

      
A con
Þ
rmation dialog will be displayed. Highlight Yesand press J to save the resized copies.

    D-Lighting

    D-Lighting brightens shadows, making it ideal for dark or backlit photos.
D-Lighting brightens shadows, making it ideal for dark or backlit photographs.

    
Press left
!
or right to choose the amount of 
correction performed. The effect can be previewed in the edit display. Press J to save the retouched copy.
    Quick retouch

    Create copies with enhanced saturation and contrast. D-Lighting is applied as 
required to brighten dark or backlit subjects.

    Red-Eye Correction

    This option is used to correct Òred-eyeÓ caused by the 
ß
ash, and is available only 
with photographs taken using the 
ß
ash. The photograph selected for red-eye 
correction can be previewed in the edit display. Con
Þ
rm the effects of red-eye 
correction and press OK
!
to create a copy. Note that red-eye correction may not 
always produce the expected results and may in very rare circumstances be applied 
to portions of the image that are not affected by red-eye; check the preview 
thoroughly before proceeding.

    Straighten

    Create a straightened copy of the selected image. Press
!
2
!
to rotate the image clockwise by up to 
Þ
ve degrees in 
increments of approximately 0.25 degrees,
!
4
!
to 
rotate it counterclockwise (the effect can be previewed in the edit display; note that 
edges of the image will be trimmed to create a square copy). Press
!
OK
!
to save the retouched copy.

    Distortion Control

    Create copies with reduced peripheral distortion. Select
!
Auto
!
to let the camera 
correct distortion automatically and then make 
Þ
ne adjustments using the multi 
selector, or select
!
Manual
!
to reduce distortion manually. Note that
!
Auto
!
is not 
available with photos taken using auto distortion control; see ÒAuto Distortion 
ControlÓ. Press
!
2
!
to reduce barrel distortion,
!
4
!
to reduce pincushion distortion (the effect can be 
previewed in the edit display; note that greater amounts of distortion control result in 
more of the edges being cropped out). Press
!
J
!
to 
save the retouched copy. Note that distortion control may heavily crop or distort the 
edges of copies created from photographs taken with DX lenses at image areas 
other than
!
DX (24
”
16).

    MENU 
!
!
Retouch Menu
!

!
 page 2

    Perspective Control
    
Create copies that reduce the effects of perspective taken from the base of a tall 
object. Use the multi selector to adjust perspective (note that greater amounts of 
perspective control result in more of the edges being cropped out). The results can 
be previewed in the edit display. Press
!
OK
!
to save 
the retouched copy.
    Image Overlay

    Image overlay combines two existing NEF (RAW) photographs to create a single 
picture that is saved separately from the originals; the results, which make use of 
RAW data from the camera image sensor, are noticeably better than photographs 
combined in an imaging application. The new picture is saved at current image 
quality and size settings; before creating an overlay, set image quality and size.
!
To 
create a NEF (RAW) copy, choose an image quality of
!
NEF (RAW)
!
and an image 
size of
!
Large
!
(the overlay will be saved as a large NEF/RAW image even 
if
!
Small
!
or
!
Medium
!
is selected).

      1. Select Image overlay.

        
Highlight Image overlay in the retouch menu and press 2</
span>. Image overlay options will be displayed, with Image 1highlighted; press 
J to display a picture selection dialog listing only 
large NEF (RAW) images created with this camera (small and medium NEF/RAW 
images cannot be selected).


      1. Select the Þrst image.

        
Use the multi selector to highlight the 
Þ
rst photograph in the overlay. To view the 
highlighted photograph full frame, press and hold the mag</
span> button. Press OK to select the highlighted 
photograph and return to the preview display.


      1. Select the second image.

        
The selected image will appear as Image 1. Highlight Image 2 and press OK, then 
select the second photo as described in Step 2.

      1. Adjust gain.

        
Highlight Image 1 or Image 2 and optimize exposure for the overlay by pressing 
1 or 3 to select 
the gain from values between 0.1 and 2.0. Repeat for the second image. The default 
value is 1.0; select 0.5 to halve gain or 2.0 to double it. The effects of gain are visible 
in the Preview column.
        Highlight Image 1 or Image 2 and optimize exposure for the overlay by pressing 
1 or 3 to select 
the gain from values between 0.1 and 2.0. Repeat for the second image. The default 
value is 1.0; select 0.5 to halve gain or 2.0 to double it. The effects of gain are visible 
in the Preview column.

      1. Preview the overlay.

        
To preview the composition, press 4 or 2 to place the cursor in the Preview column, then press 
up
!
or down to highlight Overlay and press OK (note that colors and brightness in the preview may 
differ from the 
Þ
nal image). To save the overlay without displaying a preview, select 
Save. To return to Step 4 and select new photos or adjust gain, press mag/question button.

    1. Save the overlay.

      
Press OK while the preview is displayed to save the 
overlay. After an overlay is created, the resulting image will be displayed full-frame.

    Trim Movie

    Create a copy from which unwanted footage has been removed.

    Choose Start/End Point</
h6>
Follow the steps below to create trimmed copies of movies.
      1. Display a movie full frame.

      1. Pause the movie on the new opening frame.

        
Play the movie back as described in ÒViewing MoviesÓ, pressing OK to start and resume playback and down to pause, and pressing left
!
or right or rotating the main or sub-command dial to locate 
the desired frame. Your approximate position in the movie can be ascertained from 
the movie progress bar. Pause playback when you reach the new opening frame.

        Movie progress bar

      1. Select Choose start/end point.

        
Press the i button to display the i menu, then highlight Choose start/end point and press OK.

      1. Select Start point.

        
To create a copy that begins from the current frame, highlight Start point and press 
OK. The frames before the current frame will be 
removed when you save the copy in Step 9.
        To create a copy that begins from the current frame, highlight Start point and press 
OK. The frames before the current frame will be 
removed when you save the copy in Step 9.

        Start point

      1. ConÞrm the new start point.

        
If the desired frame is not currently displayed, press 4</
span>or 2 to advance or rewind (to skip to 10 s 
ahead or back, rotate the main command dial; to skip to the 
Þ
rst or last frame, rotate 
the sub-command dial).


      1. Choose the end point.

        
Press the center of the sub-selector to switch from the start point (w) to the end point (x) selection tool 
and then select the closing frame as described in Step 5. The frames after the 
selected frame will be removed when you save the copy in Step 9.

        Sub-selector

        End point

      1. Create the copy.

        
Once the desired frame is displayed, press 1.

      1. Preview the movie.

        
To preview the copy, highlight Preview and press OK 
(to interrupt the preview and return to the save options menu, press 1). To abandon the current copy and select a new start 
point or end point as described above, highlight Cancel and press J; to save the copy, proceed to Step 9.

    1. Save the copy.

      
Highlight Save as new 
Þ
le and press J to save the 
copy to a new 
Þ
le. To replace the original movie 
Þ
le with the edited copy, highlight 
Overwrite existing 
Þ
le and press OK.

    Trim Movie

    Create a copy from which unwanted footage has been removed.

    MENU 
!
 My Menu

    T
he
!
MY MENU
!
option can be used to create and edit a customized 
list of options from the playback, photo shooting, movie shooting, Custom Settings, 
setup, and retouch menus for quick access (up to 20 items). If desired, recent 
settings can be displayed in place of My Menu.

    Add Items

    Add items to My Menu

    Rewove Items

    Remove Items from my menu.

    Rank Items

    change the ranking of your added items.

    Choose Tab

    Choose a tab for your added item.

    The i Menu

    The most used functions in the main Menu can also be easily accessed by pressing 
the “I” on the back plate of the camera. This will bring you too the i Menu. This menu 
is completely customisable for both Photo and Movie mode
!
(</
strong>Controls Settings
!
f1 – Customize i menu). We’ll have a quick look at the 
functionality added to this Menu as factory settings.
Here you can change settings for the internal processing of picture data from the 
image sensor into 
Þ
nal JPG 
Þ
les.
It’s necessary to start with an existing con
Þ
guration or
!
set of settings that Nikon has 
prede
Þ
ned for a certain look of the 
Þ
nal image. You can choose between:


    • Auto: Your Nikon Z50 II automatically detects the type of scene.
    • Standard:
!
NikonÔs default for a neutral picture as the standard for most 
shooting situations.
    • Neutral:
!
A processing with slightly less sharpening, contrast improvement 
and saturation; for those who do these steps on their own later on.
    • Vivid:
!
Higher color saturation, sharpening and contrast.
    • Monochrome:
!
Converts into black and white.
    • Portrait:
!
Very similar to ãneutralÒ, slightly less sharpening, contrast and color 
saturation than ãstandardÒ.
    • Landscape:
!
Higher contrast than ãstandardÒ.

    You can also choose between a range of
!
picture presets like Dream, Morning, Pop, 
Sunday, Sober, Dramatic, Silence, Bleached, Melancholic, Pure, Denim, Toy, Sepia, 
Blue, Red, Pink, Charcoal, Graphite, Binary and Carbon.

    Image Quality
    • NEF (RAW):
!
RAW data from the image sensor are saved without additional 
processing. Settings such as white balance and contrast can be adjusted after 
shooting.
    • NEF (RAW)+JPEG 
Þ
ne/NEF (RAW)+JPEG 
Þ
ne:
!
Two images are recorded, 
one NEF (RAW) image and one 
Þ
ne-quality JPEG image.
    • NEF (RAW)+JPEG normal/NEF (RAW)+JPEG normal:
!
Two images are 
recorded, one NEF (RAW) image and one normal-quality JPEG image.
    • NEF (RAW)+JPEG basic/NEF (RAW)+JPEG basic:
!
Two images are 
recorded, one NEF (RAW) image and one basic-quality JPEG image.
    • JPEG 
Þ
ne/JPEG 
Þ
ne:
!
Record JPEG images at a compression ratio of 
roughly 1 : 4 (
Þ
ne quality).
    • JPEG normal/JPEG normal:
!
Record JPEG images at a compression ratio of 
roughly 1 : 8 (normal quality).
    • JPEG basic/JPEG basic:
!
Record JPEG images at a compression ratio of 
roughly 1 : 16 (basic quality).
    • TIFF (RGB):
!
Record uncompressed TIFF-RGB images at a bit depth of 8 
bits per channel (24-bit color). TIFF is supported by a wide variety of imaging 
applications.
    Flash Control

    Choose the 
ß
ash control mode for optional 
ß
ash units mounted on the camera 
accessory shoe and adjust settings for off-camera 
ß
ash photography. See the 
ß
ash 
control settings in the menu for more info.

    WiFi connection

    Turn On/Off the WiFi connection.

    Release Mode
    • Single frame: The camera takes one photograph each time the shutter-
release button is pressed.
    • Continuous low speed: While shutter-release button is held down, camera 
takes photographs at frame rate selected for Custom Setting d1 (CL mode shooting 
speed)
    • Continuous high speed: While shutter-release button is held down, camera 
takes photographs at frame rate given in ÒPower Source and Frame RateÓ Use for 
active subjects.
    • Continuous high speed plus: only with jpeg.
    • Self-timer: Take pictures with the self-timer.
    AF Area Mode

    Choose how the focus point for autofocus is selected.

    • Pinpoint AF:
!
Use for pinpoint focus on a selected spot in the frame. This 
option is only available when photo mode is selected and Single AF is chosen for 
Focus mode. Focusing may be slower than with single-point AF.
    • Single-point AF: Select the focus point; the camera will focus on the subject 
in the selected focus point only. Use with stationary subjects.
!
the ability to limit point 
selection to every other point
!
allows you to quickly use the joystick, or 
touchscreen, to position the AF point.
    • Dynamic-area AF:
!
The camera focuses on a point selected by the user. If 
the subject brie
ß
y leaves the selected point, the camera will focus based on 
information from surrounding focus points, letting you concentrate on composition in 
shots of moving subjects. This option is only available when photo mode is selected 
and Continuous AF is chosen for Focus mode.
    • Wide-area AF (S) and (L):
!
As for Single-point AF except that wider focus 
points are used. The focus points for Wide-area AF (L) are wider than those for 
Wide-area AF (S).
    • Wide-area AF (S) and (L):
!
As for Single-point AF except that wider focus 
points are used. The focus points for Wide-area AF (L) are wider than those for 
Wide-area AF (S).
    • Auto-area AF:
!
The camera automatically detects the subject and selects the 
focus area. At default settings, the camera gives priority to portrait subjects; if a 
portrait subject is detected, the selected subject will be indicated by a yellow border 
(if multiple faces are detected, you can choose your subject using the multi selector). 
Subject tracking 
!
can be activated by pressing the OK</
span> button.
    Image Size

    Image size is measured in pixels. Choose from
!
Large,
!
Medium, or
!
Small
!
(note that 
image size varies depending on the option selected for
!
Image area.

    White Balance

    White balance ensures that colors are unaffected by the color of the light source. 
Auto white balance is recommended with most light sources. If the desired results 
cannot be achieved with auto white balance, choose an option from the list below or 
use preset white balance.

    Metering

    Metering determines how the camera sets exposure. The following options are 
available:

    • Matrix metering:
!
The camera meters a wide area of the frame and sets 
exposure according to tone distribution, color, composition, and distance for results 
close to those seen by the naked eye.
    • Center-weighted metering:
!
The camera meters the entire frame but assigns 
the greatest weight to an area in the center of the frame, the size of which can be 
chosen using Custom Setting b3 (Center-weighted area). This is the classic meter 
for portraits and is also recommended when using 
Þ
lters with an exposure factor 
(
Þ
lter factor) over 1
”
.
    • Spot metering:
!
The camera meters a 
!
4
!
mm circle (equivalent to 
approximately 1.5% of the frame) centered on the current focus point, making it 
possible to meter off-center subjects (if auto-area AF is in effect, the camera will 
instead meter the center focus point). Spot metering ensures that the subject will be 
correctly exposed, even when the background is much brighter or darker.
    • Highlight-weighted metering:
!
The camera assigns the greatest weight to 
highlights. Use this option to reduce loss of detail in highlights, for example when 
photographing spotlit performers on-stage.
    Face Tracking

    Turn on face tracking, or automatic face detection and autofocus tracking.

    Vibration Reduction

    The Nikon Z50 II is equipped with in-camera vibration reduction (VR), other 
manufacturers call this sensor stabilisation. The VR unit provides compensation for 
movement along 
Þ
ve axes. The effects of vibration reduction are equivalent to a 
shutter speed up to approximately 5.0 stops. This function can also be used 
effectively with NIKKOR F lenses, including those not equipped with a VR function, 
with the Mount Adapter FTZ . ).
There is an ON (normal) and SPT (Sport) preset.

    Focus Mode
    1. AF-S:
!
For stationary subjects. Press the shutter-release button halfway to 
focus. If the camera is able to focus, the focus point will be displayed in green; focus 
will lock while the shutter-release button is pressed halfway. If the camera fails to 
focus, the focus point will 
ß
ash red. At default settings, the shutter can only be 
released if the camera is able to focus (focus priority).
    2. AF-C:
!
For moving subjects. The camera focuses continuously while the 
shutter-release button is pressed halfway; if the subject moves, the camera will 
predict the 
Þ
nal distance to the subject and adjust focus as necessary. At default 
settings, the shutter can be released whether or not the subject is in focus (release 
priority).
    3. AF-F:
!
The camera adjusts focus continuously in response to subject 
movement or changes in composition. Focus locks when the shutter-release button 
is pressed halfway. This option is only available in movie mode.
    4. Manual focus:
!
The shutter can be released whether or not the subject is in 
focus.

    Quick how-to Nikon Z50 II settings

    How to set-up back button focussing

    Back button focussing is a focussing and composition method where you disconnect 
the autofocus engine from the standard shutter button half-press. This enables you 
to engage the autofocus system only with the AF-ON button on the backplate.

Now your autofocus and shutter are disconnected, enabling you to acquire autofocus 
independently from the shutter button action. This method is often used to 
recompose your shot after autofocus is acquired, the so-called focus and recompose 
method.
This is very easy the set up with the Nikon Z50 II:

    Go to a7 in the autofocus menu and set AF activation to AF-ON only. This way, 
only the AF ON button will engage the autofocus engine.

    Conclusion

    There is always a learning curve with every new camera you purchase. Luckily, 
Nikon decided to keep the hierarchy and the logic of their DSLR series cameras in 
the new Nikon Z50 II. This makes art easier to navigate at least for photographers 
experienced with those cameras. The Nikon Z50 II is fairly new so I’ll add more tips 
and tricks to this post as I get more and more familiar with it. If you have any 
comments or questions, or just want to write about your experience with the Z50 II, 
!
feel free to post them in the comment section below.

  • An Amateur’s Journey: Improving Photography Skills One Shot at a Time

    An Amateur’s Journey: Improving Photography Skills One Shot at a Time

    Are you an aspiring photographer looking to improve your skills and take your photos to the next level? Whether you’re a beginner or an amateur looking to enhance your photography game, you’ve come to the right place. In this article, we will embark on a journey to help you improve your photography skills, one shot at a time.

    Photography is not just about pointing and shooting; it’s an art form that requires technical knowledge, creativity, and a keen eye for detail. With the right guidance and practice, you can develop your skills and capture stunning images that tell captivating stories.

    From learning new camera features to exploring composition techniques, understanding the exposure triangle, and mastering lighting, we will cover a range of topics and provide you with practical tips and insights to enhance your photography skills. Additionally, we will discuss the various photography equipment you can use to elevate your photography, including the increasingly popular drones.

    Moreover, we will explore the career and income prospects in the world of photography, as well as highlight online resources and communities that can provide you with support and inspiration. Lastly, we will delve into the importance of engaging with other photographers and staying inspired throughout your photography journey.

    So, grab your camera, put on your creative hat, and let’s begin our journey to becoming a better photographer together. Whether you aim to pursue photography professionally or simply want to capture beautiful moments, this article will serve as your guide to honing your skills and expressing your artistic vision through photography. Are you ready? Let’s get started!

    Learning New Camera Features

    Have you ever looked at your camera and wondered if you were truly utilizing all its features to their fullest potential? It’s easy to get comfortable with a few basic settings and never venture into the world of advanced features. However, learning new camera features can unlock a whole new realm of creativity and improve the quality of your photos. Whether you’re a beginner or an experienced photographer, taking the time to explore and understand your camera’s capabilities can make a significant difference in your photography journey.

    So, how can you go about learning these new camera features? Here are a few techniques and tips to get you started:

    1. Read the Camera Manual

    Yes, it may seem obvious, but many people overlook the importance of reading the camera manual. Manufacturers put a lot of effort into creating comprehensive manuals that explain every function of your camera. Take the time to read through it, focusing on the features that you’re not familiar with. You might discover hidden gems that can enhance your photography skills.

    2. Explore Online Resources

    The internet is a fantastic source of information when it comes to learning new camera features. There are countless photography websites, forums, and blogs where you can find tutorials, tips, and tricks. Some websites even offer step-by-step guides specifically tailored to your camera’s make and model. One such resource is Wimarys.com, which provides valuable insights on unlocking your camera’s potential.

    3. Attend Workshops or Photography Classes

    If you prefer a more hands-on approach, consider attending workshops or photography classes. These sessions are often led by experienced photographers who can teach you how to use advanced features and techniques effectively. Plus, you’ll get the opportunity to practice and receive feedback in real-time, which can significantly speed up your learning process.

    4. Experiment and Practice

    One of the best ways to learn new camera features is to simply experiment and practice with them. Take your camera out for a walk and challenge yourself to try different settings and modes. Play around with exposure compensation, white balance, shutter speed, and aperture settings. The more you practice, the more comfortable you’ll become with your camera’s features.

    5. Join Photography Communities

    Being part of a photography community can be incredibly beneficial when it comes to learning new camera features. Surrounding yourself with like-minded individuals allows you to exchange knowledge, seek advice, and get inspired by others’ work. Whether it’s through online forums, social media groups, or local camera clubs, there are plenty of opportunities to connect with fellow photographers and expand your knowledge.

    Remember, learning new camera features takes time and patience. Don’t get overwhelmed by the sheer number of options available; instead, take it one step at a time. Start with the features that interest you the most and gradually work your way to more advanced settings. With practice and a willingness to explore, you’ll unlock your camera’s true potential and take your photography to new heights.

    Exploring Composition Techniques

    Do you ever wonder why some photographs capture your attention and leave a lasting impression, while others seem flat and uninteresting? The secret lies in mastering composition techniques. Good composition is the foundation of any visually captivating image, whether you’re an amateur photographer or a seasoned professional.

    Composition refers to how elements within a photograph are arranged and organized. It’s about guiding the viewer’s eye to the main subject and creating a pleasing visual balance. By understanding and applying composition techniques, you can take your photography skills to the next level and create impactful images that tell a story.

    The Power of Framing

    One composition technique that can greatly enhance the visual impact of your photographs is framing. By using elements within the scene to create a frame around your subject, you can draw attention to it and add depth to your composition.

    Fingers as a Framing Tool

    One interesting technique for framing your subject is using your fingers. By placing your fingers in the shape of a frame around your subject while looking through the viewfinder, you can visualize how the composition will look before capturing the shot. This technique helps you create a sense of focus and intimacy, as if you’re bringing the viewer’s eye directly to the subject.

    Remember to experiment with different finger positions and sizes of frames to find what works best for each specific photo. Using your fingers as a framing tool is a simple yet effective way to improve your composition and elevate your photography skills.

    The Rule of Thirds

    Another widely used composition technique is the rule of thirds. This guideline suggests splitting your frame into a grid of nine equal parts by placing two equally spaced horizontal and vertical lines. The idea is to position the main subjects or points of interest along these lines or at their intersections.

    The rule of thirds helps create a visually pleasing balance and adds interest by avoiding placing the subject directly in the center of the frame. By placing your subject off-center, you can create a more dynamic composition and draw the viewer’s attention to different parts of the image.

    Leading Lines and Symmetry

    Leading lines and symmetry are two additional composition techniques that can create a strong visual impact in your photographs.

    Leading lines are lines that naturally guide the viewer’s gaze through the image, leading them towards the main subject. These lines can be straight or curved and can be found in various elements such as roads, rivers, fences, or even architectural elements like staircases. Utilizing leading lines adds depth and visual interest to your composition.

    Symmetry, on the other hand, creates a sense of balance and harmony in your photograph. Look for scenes or subjects that naturally exhibit symmetry, such as reflections in water or architectural structures with symmetrical designs. By positioning your subject symmetrically within the frame, you can create a visually satisfying and impactful image.

    Putting it All Together

    As with any art form, composition in photography is subjective, and there are no hard and fast rules. However, mastering composition techniques like framing, the rule of thirds, leading lines, and symmetry can greatly improve the quality and impact of your images.

    Practice and experimentation are key to honing your composition skills. Take the time to analyze and study the work of other photographers to gain inspiration and insight into effective composition. By applying these techniques and continuously refining your composition skills, you’ll create captivating photographs that tell compelling visual stories.

    So, what are you waiting for? Grab your camera, explore different composition techniques, and let your creativity soar!

    Learn more about effective composition techniques in photography by visiting Wimarys.com.

    Utilizing Prime Lenses and Other Photography Equipment

    Drones: Expanding Your Creative Boundaries

    When it comes to photography, the options are endless. From capturing breathtaking landscapes to documenting unique events, photographers are always on the lookout for new ways to capture the perfect shot. One piece of equipment that has revolutionized the photography industry is the drone.

    Drones offer a whole new perspective, quite literally. They allow photographers to capture stunning aerial shots that were once only possible with expensive helicopter rentals. With a drone, you can explore different angles, heights, and viewpoints, taking your photography to new heights (literally!).

    Here are a few ways that utilizing a drone can enhance the creative aspect of your photography:

    1. Expanded Horizons: Drones give you the opportunity to photograph subjects from above, providing a bird’s-eye view that is often unattainable with traditional photography equipment. Imagine photographing a wedding ceremony from above, capturing the entire scene in a single frame. The possibilities are endless.
    2. Unique Perspectives: Drones allow you to explore different angles and viewpoints that would otherwise be impossible or highly challenging. By flying your drone, you can capture shots from above buildings, through trees, and over water, creating unique and eye-catching images that stand out from the crowd.
    3. Dynamic Movement: Drones offer the ability to capture dynamic shots with ease. With their maneuverability and smooth flying capabilities, drones can follow subjects in motion or create cinematic panning shots, adding a sense of dynamism and energy to your photographs.
    4. Unexplored Locations: Drones provide access to locations that may be difficult to reach by foot or inaccessible due to safety concerns. Whether it’s photographing a hidden waterfall nestled deep in a forest or capturing the majesty of a remote mountain range, drones offer photographers the opportunity to explore and document uncharted territories.

    However, it’s important to note that flying drones comes with certain responsibilities and regulations. Always check local laws and guidelines regarding drone usage in your area, and prioritize safety to ensure a positive and responsible drone photography experience.

    In conclusion, utilizing equipment like drones can provide unique perspectives, enhancing the creative aspect of photography. Whether you’re a professional photographer looking to push boundaries or an enthusiastic hobbyist wanting to explore new possibilities, consider adding a drone to your photography toolkit. The sky’s the limit!

    Mastering Lighting

    Mastering lighting is a crucial skill for photographers looking to take their craft to the next level. Understanding how light works and learning how to manipulate it can make a significant impact on the quality of your photos. Whether you’re shooting portraits, landscapes, or still life, lighting can enhance or detract from the overall effect you’re trying to achieve.

    The Importance of Natural Light

    Studying and harnessing natural light is a fundamental aspect of mastering lighting in photography. Natural light provides a soft and flattering illumination that can create stunning and natural-looking images. Here are a few reasons why studying natural light is essential:

    • Variety: Throughout the day, natural light changes in color and intensity, offering a wide range of possibilities. From the warm and golden hues of sunrise and sunset to the soft and diffused light during overcast days, each moment presents unique opportunities for capturing beautiful photographs.
    • Emotion: Natural light has the power to evoke emotion in photographs. The warm, golden light of a sunset can create a romantic and nostalgic atmosphere, while the dynamic and dramatic light of a storm can convey intensity and excitement.
    • Versatility: Natural light is available to photographers in almost any setting, making it the most accessible type of lighting. Understanding how to work with natural light allows you to be more creative and versatile in your photography, whether you’re shooting indoors or outdoors.

    Experimenting with Different Times of Day

    One way to develop your understanding of natural light is by experimenting with different times of the day. Each moment offers its own unique lighting conditions and can evoke different moods in your photos. Here are some of the key times of day to consider when practicing your lighting skills:

    1. Sunrise: The soft and warm light during the early hours of the day creates a serene and peaceful atmosphere. It’s a great time to capture landscapes and portraits with a tranquil vibe.
    2. Midday: The harsh and direct light of midday can be challenging to work with. However, it can also create interesting and dramatic shadows that add depth and texture to your images.
    3. Golden Hour: The hour before sunset, often referred to as the golden hour, provides a beautiful and warm light that adds a magical touch to your photos. The soft and directional light is perfect for capturing portraits and landscapes.
    4. Blue Hour: The period right after sunset or before sunrise, known as the blue hour, offers a unique color palette. The soft, cool blue light can add a dreamy and ethereal quality to your images.

    Remember, the best way to master lighting is through practice and experimentation. Take the time to observe and study the different qualities of light at various times of the day. Pay attention to how it interacts with your subjects and how it affects the overall mood of your photos. With time and experience, you’ll become more adept at using light to create stunning and impactful images.

    “Light can be gentle, dangerous, dreamlike, bare, living, dead, misty, clear, hot, dark, violet, springlike, falling, straight, sensual, limited, poisonous, calm and soft.”

    Sven Nykvist

    Understanding the Exposure Triangle

    When it comes to photography, understanding the exposure triangle is crucial. It involves three key elements: shutter speed, aperture, and ISO. These three factors work together to determine the amount of light that reaches the camera’s image sensor. Mastering the exposure triangle will give you greater control over your images and allow you to capture the perfect shot in any lighting situation.

    Shutter Speed

    One of the components of the exposure triangle is shutter speed. Shutter speed refers to the length of time that the camera’s shutter is open, allowing light to pass through and hit the image sensor. A faster shutter speed means that the shutter opens and closes quickly, while a slower shutter speed means that the shutter remains open for a longer period.

    • A faster shutter speed is ideal for freezing motion and capturing fast-paced action, such as sports photography or wildlife photography.
    • On the other hand, a slower shutter speed can create a sense of motion blur, which can be used creatively in situations like photographing flowing water or capturing light trails in night photography.

    Aperture

    Aperture is another critical component of the exposure triangle. It refers to the size of the camera’s lens opening. The aperture is measured in f-numbers, represented by the letter “f” followed by a number (e.g., f/2.8). The lower the f-number, the wider the lens opening, allowing more light to enter the camera.

    • A wide aperture (small f-number) is useful for creating a shallow depth of field, resulting in a blurred background and a sharp subject in the foreground. This technique is commonly used in portrait photography.
    • Conversely, a narrow aperture (large f-number) increases the depth of field, resulting in more of the scene being in focus. This is ideal for landscape photography or situations where you want everything in the frame to be sharp.

    ISO

    The third component of the exposure triangle is ISO. ISO determines the camera’s sensitivity to light. A low ISO setting (e.g., ISO 100) means that the camera is less sensitive to light, while a high ISO setting (e.g., ISO 1600) makes the camera more sensitive to light.

    • A low ISO setting is suitable for shooting in bright, well-lit conditions, as it produces images with minimal noise or grain.
    • In low-light situations, increasing the ISO allows the camera to capture more light, but it may introduce noise or grain to the image. It’s important to find the right balance between ISO and other exposure settings to achieve the desired image quality.

    Mastering the exposure triangle involves finding the right combination of shutter speed, aperture, and ISO for each unique photography situation. By understanding how these three elements work together, you can have full creative control over your images and capture stunning photographs in any lighting condition. So next time you pick up your camera, remember to consider the exposure triangle and elevate your photography skills to new heights.

    To learn more about mastering aperture, shutter speed, and ISO, check out this comprehensive guide: Master Aperture, Shutter, ISO

    Enhancing skills through Courses

    Are you looking to enhance your skills and knowledge in a particular field? Taking courses can be a fantastic way to improve your abilities, gain new insights, and stay up-to-date with the latest industry trends. Whether you’re a beginner or an experienced professional, there are courses available for everyone.

    One area where courses can have a significant impact is in photography. Photography is a popular hobby and profession, and by taking photography courses, you can refine your skills and take your craft to the next level. One platform that offers a wide range of digital photography courses is Udemy.

    Udemy is an online learning platform that hosts over 2000 digital photography courses, many of which are free. They cover a broad range of topics, from basic photography techniques to advanced post-processing and composition. Whether you want to improve your skills in landscape photography, portrait photography, or even mobile photography, you’re sure to find a course that fits your needs on Udemy.

    Here are some benefits of taking photography courses:

    • Structured Learning: Courses provide a structured learning path, taking you from the basics to more advanced concepts. This ensures that you build a strong foundation and progress at your own pace.
    • Expert Guidance: Courses are often taught by experienced photographers who can share their knowledge and expertise. Learning from professionals can give you valuable insights and tips that you may not find elsewhere.
    • Practical Assignments: Many courses include practical assignments that allow you to apply what you’ve learned. These assignments help reinforce your understanding and develop your skills through hands-on practice.
    • Community Interaction: Online courses often have discussion forums and communities where you can interact with fellow learners. This provides a supportive environment for asking questions, sharing ideas, and getting feedback on your work.
    • Flexibility: Online courses offer the flexibility of learning at your own pace and from anywhere. You can fit the coursework into your schedule and revisit the material whenever you need to.

    By enrolling in photography courses, you can enhance your skills, gain confidence, and produce stunning photographs. Whether you’re a hobbyist or aspiring professional, the knowledge and techniques you acquire through courses can make a significant difference in your photography journey.

    So why wait? Explore the vast selection of photography courses on Udemy and take a step towards enhancing your skills today!

    Daily Practice and Creative Experimentation

    Daily practice and creative experimentation are vital components of developing a personal photography style. Engaging in these activities allows photographers to refine their skills, expand their creative boundaries, and discover unique approaches to capturing images. Whether you’re a beginner or an experienced photographer, incorporating daily practice and creative experimentation into your routine can have a profound impact on your artistic growth.

    Here are a few reasons why daily practice and creative experimentation are essential in the world of photography:

    1. Skill Development: Like any other craft, photography requires consistent practice to improve and master techniques. By engaging in daily practice, photographers can sharpen their technical skills such as composition, exposure, lighting, and post-processing. Regular practice allows them to become more proficient in executing their ideas and enhances their ability to capture stunning images.
    2. Exploring New Techniques: Creative experimentation goes hand in hand with daily practice. Trying out new techniques, pushing the boundaries of conventional photography, and exploring different styles of shooting can lead to breakthroughs in personal style. It allows photographers to step out of their comfort zones, challenge themselves, and uncover innovative ways to tell visual stories.
    3. Finding Inspiration: Daily practice and experimentation expose photographers to a variety of subjects, settings, and scenarios. Engaging with different subjects, be it nature, people, architecture, or abstract concepts, helps photographers find inspiration and expand their creative vision. By actively looking for unique perspectives and moments, photographers can develop a keen eye for compelling visuals and develop their own signature style.
    4. Building Confidence: Consistent daily practice and creative experimentation can boost a photographer’s confidence in their abilities. As photographers achieve small victories and witness their progress over time, their self-assurance grows, enabling them to take on more ambitious projects and tackle the challenges that come with them. The more confident photographers become, the more they’re willing to take risks and experiment with their artistic vision.
    5. Fueling Growth and Adaptability: The photography landscape is constantly evolving, with new technologies, trends, and techniques emerging regularly. Daily practice and creative experimentation help photographers stay adaptable and embrace change. By staying engaged with their craft, photographers can stay ahead of the curve, refine their skills, and evolve their style to keep up with the ever-changing photographic industry.

    In conclusion, incorporating daily practice and creative experimentation into your photography routine is crucial for personal growth as a photographer. It allows you to develop technical skills, explore new techniques, find inspiration, build confidence, and adapt to an evolving industry. By making a commitment to daily practice and embracing creative experimentation, you can cultivate a unique photography style that reflects your artistic vision. So grab your camera, step outside, and start experimenting – you never know what incredible images you’ll capture along the way!

    Career and Income Prospects in Photography

    Photography is a popular and highly creative field that offers a range of career opportunities. Whether you dream of becoming a professional photographer or simply want to pursue your passion, there are ample chances to turn your love for capturing moments into a fulfilling career. In addition to the creative satisfaction it provides, photography also holds promising prospects when it comes to income.

    Projected Demand for Photographers

    According to the U.S. Bureau of Labor Statistics, the demand for photographers is projected to increase by 9% by 2031. This indicates a growing need for skilled photographers in various industries. As visual content becomes increasingly important in today’s digital landscape, photographers are sought after for their ability to tell stories and evoke emotions through captivating imagery.

    The rise of social media platforms, websites, and online businesses has created a constant demand for high-quality visuals. Advertising agencies, e-commerce companies, and media organizations are all in need of skilled photographers to create compelling images that resonate with their target audiences. Moreover, individuals are also increasingly looking to capture and preserve important moments in their personal lives, resulting in a demand for professional photographers for events such as weddings, graduations, and family gatherings.

    Median Hourly Wage

    In addition to the promising demand, photography also offers the potential for income growth. The median hourly wage for photographers was $19.60 in May 2023, according to the U.S. Bureau of Labor Statistics. While this figure may vary based on factors such as experience, specialization, and location, it highlights the potential for earning a decent income in the field of photography.

    As photographers gain more experience and develop their skills, they have the opportunity to command higher rates for their services. By consistently improving their craft and staying up-to-date with the latest techniques and industry trends, photographers can enhance their marketability and attract higher-paying clients. Additionally, photographers who establish a strong reputation and a solid client base can also charge premium rates for their work.

    To make the most of the career and income prospects in photography, it is essential for aspiring photographers to continually enhance their skills and knowledge. By continuously learning and refining their craft, photographers can stay ahead of the competition and position themselves for success in this dynamic field.

    For more information on career opportunities and tips to enhance your photography skills, check out “Career Opportunities in Photography”.

    Online Resources and Communities for Photographers

    Photography is more than just a hobby; for many, it’s a passion and a way of life. Whether you’re just starting out or have years of experience under your belt, there’s always something new to learn and explore in the world of photography. That’s where online resources and communities for photographers come in.

    Online resources and communities like Photo.net and CreativeLive provide valuable tips, tutorials, and inspiration for photographers. These platforms bring together photographers from all around the world, creating a space for learning, sharing, and connecting with like-minded individuals. Let’s take a closer look at what these online resources and communities have to offer.

    Photo.net: A Hub for Photography Enthusiasts

    One of the oldest and most established photography communities on the internet, Photo.net has been a go-to resource for photographers since its inception in 1993. With a vibrant community of photography enthusiasts, Photo.net offers a wealth of resources and features to help you grow as a photographer. Here’s what you can expect from this platform:

    • Forums: Engage in discussions, seek advice, and share your knowledge with other photographers in the forums. From gear recommendations to feedback on your work, the forums offer a wealth of information and community support.
    • Galleries: Showcase your work in the online galleries, where you can receive constructive feedback from fellow photographers. It’s a fantastic opportunity to gain exposure and improve your skills.
    • Articles and Tutorials: Dive into the extensive collection of articles and tutorials covering various aspects of photography. Whether you’re interested in landscape photography, portraiture, or post-processing techniques, Photo.net has you covered.

    CreativeLive: Learning Made Fun

    If you prefer a more structured approach to learning, CreativeLive is the perfect platform for you. Offering live and on-demand classes taught by industry-leading photographers, CreativeLive makes learning photography an enjoyable and immersive experience. Here are some highlights of what you can find on CreativeLive:

    • Expert Instructors: Learn from renowned photographers who are experts in their respective genres. With their guidance, you’ll gain valuable insights and techniques that will take your photography to the next level.
    • Interactive Learning: Participate in live Q&A sessions, chat with fellow students, and get personalized feedback on your work. CreativeLive fosters a sense of community and engagement throughout the learning process.
    • Range of Topics: Whether you want to improve your composition skills, master lighting techniques, or dive into the world of street photography, CreativeLive offers a diverse range of courses to suit your interests.

    These are just a few examples of the incredible online resources and communities available to photographers. Take advantage of the knowledge, inspiration, and connections these platforms provide, and watch your photography skills soar. Happy shooting!

    Engaging with Other Photographers

    Engaging with other photographers and seeking feedback is vital for personal growth and understanding different styles. It not only allows you to network and learn from experienced professionals but also provides an opportunity to receive valuable critiques that can help improve your craft. Here are a few ways to effectively engage with other photographers:

    1. Join Photography Communities: Explore online platforms and communities dedicated to photography, such as photography forums, social media groups, and photography-focused websites. These platforms provide opportunities to connect with like-minded individuals, share your work, and receive feedback.
    2. Attend Workshops and Meetups: Look for photography workshops, conferences, or local meetups in your area. These events often feature expert speakers, hands-on sessions, and group discussions, allowing you to gain knowledge, exchange ideas, and build connections with fellow photographers.
    3. Participate in Photography Challenges: Engaging in photography challenges or competitions not only ignites your creativity but also exposes you to a wider audience. It’s an excellent way to receive constructive criticism and learn from the work of others.
    4. Collaborate on Photography Projects: Seek out opportunities to collaborate with other photographers on joint projects. By working together, you can exchange ideas, combine different styles, and learn new techniques. Collaborations can also help expand your portfolio and reach new audiences.
    5. Seek Feedback and Critique: Share your work with other photographers and ask for honest feedback. Constructive criticism can be invaluable in improving your skills and developing a unique photographic style. Consider joining critique groups or reaching out to specific photographers whose work you admire.

    By actively engaging with other photographers, you can not only enhance your technical skills but also gain insights into different approaches and perspectives. So, don’t hesitate to put yourself out there, share your work, and connect with the vibrant community of photographers eager to learn and grow together.

    “Engaging with other photographers and seeking feedback is vital for personal growth and understanding different styles.”
    Photography Terms Explained: A Comprehensive Guide

    Staying Inspired in Your Photography Journey

    Regularly exposing oneself to inspirational work can foster creativity and motivate photographers in their journey. Whether you are just starting out or have been capturing images for years, seeking inspiration from others in the field can help you stay motivated and push your boundaries as a photographer. Here are some tips to help you stay inspired in your photography journey:

    1. Explore Different Genres and Styles

    Don’t limit yourself to just one type of photography. Challenge yourself by exploring different genres and styles. Experiment with landscape photography, portrait photography, street photography, or even macro photography. Each genre has its own unique characteristics and can provide you with fresh perspectives and ideas.

    2. Follow Photography Blogs and Websites

    Stay up to date with the latest trends and work from other photographers by following photography blogs and websites. These platforms often feature interviews, showcases, and tutorials from established photographers, which can inspire you and provide valuable insights into their creative processes.

    3. Join Photography Communities and Forums

    Connecting with other photographers can be a great source of inspiration. Join online photography communities or forums where you can share your work, receive feedback, and engage in discussions with fellow photographers. Collaborating with others and seeing their work can ignite your creativity and push you to try new techniques.

    4. Attend Photography Workshops and Exhibitions

    Attending photography workshops and exhibitions allows you to immerse yourself in the world of photography and learn from experts in the field. Workshops offer hands-on experiences, while exhibitions showcase the work of talented photographers. These events provide opportunities to network, gain knowledge, and get inspired by the work of others.

    5. Seek Inspiration from Other Art Forms

    Photography is just one form of artistic expression. Draw inspiration from other art forms such as painting, music, cinema, or literature. Explore the works of renowned painters, listen to music that evokes emotions, watch movies that tell captivating stories, or read books that transport you to different worlds. These experiences can trigger new ideas and perspectives that you can incorporate into your photography.

    Remember, staying inspired is an ongoing process. Keep exploring, learning, and challenging yourself to continuously grow as a photographer. Embrace the journey and let the passion for photography guide you towards greater artistic achievements.

    Check out this guide for a list of the best photography blogs where you can find inspiration and stay connected with the photography community.

    Conclusion

    In conclusion, improving your photography skills is an ongoing journey that requires dedication, practice, and a thirst for knowledge. As you continue to learn about your camera’s features, experiment with composition techniques, and master the art of lighting and exposure, you’ll witness remarkable growth and progress in your photographic abilities.

    Remember, it’s essential to engage with other photographers, seek inspiration from the online photography community, and stay committed to daily practice and creative experimentation. By immersing yourself in this immersive process, you’ll discover your unique style and voice as a photographer.

    While monetization is not compulsory, considering professional resources such as courses and workshops can help further enhance your skills and open doors to potential career prospects.

    As you embark on this photography journey, Wim Arys Photography stands ready to support you every step of the way. Whether through tutorials, reviews, private sessions, or photoshoots, Wim offers his expertise and experience to help you become the best photographer you can be.

    So, what are you waiting for? Grab your camera, explore the world through your lens, and let your passion for photography shine. The possibilities are endless, and Wim Arys Photography is here to help you capture them all.

    Learn more about Wim Arys Photography and unleash your photographic potential today!

    Frequently Asked Questions

    1. What are some tips for improving photography skills?Some tips for improving photography skills include practicing regularly, studying composition and lighting principles, experimenting with different camera settings, seeking feedback from other photographers, and learning post-processing techniques.
    2. Are photography classes or workshops beneficial for beginners?Yes, photography classes or workshops can be highly beneficial for beginners as they provide structured learning, guidance from experienced instructors, hands-on practice, and opportunities to network with other photographers.
    3. Which type of camera is best for beginners?For beginners, a basic DSLR or mirrorless camera with interchangeable lenses is recommended. These cameras offer manual controls, better image quality, and the flexibility to upgrade lenses as skills improve.
    4. What are some essential camera accessories for amateur photographers?Some essential camera accessories for amateur photographers include a sturdy tripod, extra batteries and memory cards, a camera bag for easy transportation, lens cleaning kit, and a remote shutter release for long exposures.
    5. How can I develop my own photography style?Developing a photography style takes time and experimentation. Start by exploring different genres, studying the work of other photographers for inspiration, and being consistent in your chosen subject matter or editing techniques. Over time, your unique style will evolve.
  • HDR settings for landscape photography

    HDR settings for landscape photography

    Optimized HDR Settings for Stunning Landscape Photography

    HDR (High Dynamic Range) photography is essential for capturing the full range of light in a landscape scene, from bright skies to dark shadows. In high-contrast settings, HDR allows you to retain detail across different tones, creating balanced and dynamic images. This guide covers the best HDR settings for landscapes, along with shooting tips and editing techniques for beautiful results.

    What is HDR and Why Use it in Landscapes?

    HDR combines multiple exposures to produce a single image that captures a broader range of tones than a single exposure can handle. This technique is especially useful in landscape photography, where the contrast between bright skies and shadowed ground can be extreme. With HDR, you can create images that reveal details in both shadows and highlights.

     mountain landscape at dawn high dynamic range

    Best HDR Settings for Landscape Photography

    1. Use Aperture Priority Mode for Consistent Depth of Field

    In landscape HDR, keeping a consistent depth of field is essential. Set your camera to Aperture Priority (A/Av) mode to control the aperture while the camera adjusts shutter speed. Choose an aperture between f/8 and f/11 for sharpness throughout the scene.

    Tip: Using Aperture Priority allows you to focus on exposure without changing your depth of field, which is ideal for landscapes.

    2. Set ISO Low for Minimal Noise

    HDR merges multiple images, and any noise will accumulate across these exposures. Set your ISO to a low value (ISO 100 or ISO 200) to keep noise to a minimum, especially in shadows.

    Tip: Low ISO is essential for HDR landscapes, as it ensures the cleanest possible image with reduced noise during merging.

    3. Use Exposure Bracketing for Optimal HDR Results

    Exposure bracketing is the key to HDR, as it captures multiple exposures of the same scene. Set your camera to take three or five shots at different exposure levels:

    • 3-Bracket HDR: Take three shots, typically at -2, 0, and +2 EV. This setup works well for most HDR landscapes.
    • 5-Bracket HDR: Use five exposures (-2, -1, 0, +1, +2 EV) in scenes with extreme contrast, like sunsets or forest landscapes.

    Tip: Using a tripod is essential when bracketing exposures to keep each shot aligned for smoother HDR merging.

    a winter landscape with snow capped mountains hdr

    In-Camera HDR vs. Post-Processing HDR

    In-Camera HDR Mode

    Some cameras offer an in-camera HDR mode that combines exposures automatically. This is a convenient option, especially for quick HDR shots, but it may not give you the same level of control as manual HDR processing in software.

    Tip: Use in-camera HDR for casual HDR photography or if you need a quick shot, but use software HDR for the highest quality results.

    Manual HDR Processing in Software

    For professional-quality HDR, shoot in RAW format and merge the images in software like Lightroom, Photoshop, or dedicated HDR software like Aurora HDR. Post-processing allows you more control over tone mapping, contrast, and color adjustments, resulting in a more natural-looking HDR effect.

    desert landscape at golden hour hdr colors

    Tips for Shooting HDR Landscapes

    1. Use a Tripod for Stability

    HDR requires precise alignment of multiple exposures, so a tripod is essential to keep your shots stable and consistent. This is especially important in low light, where longer exposures are necessary.

    2. Avoid Over-Processing for Natural Results

    Overly processed HDR images can look unrealistic and lose their natural appeal. Keep adjustments subtle during post-processing, focusing on balancing contrast and preserving natural colors.

    Tip: Aim for a balanced look by gently adjusting highlights and shadows without over-saturating colors.

    3. Use Filters for Even Exposure

    For scenes with a very bright sky, consider using a graduated neutral density (ND) filter to balance light without needing as much HDR processing. These filters darken the sky while keeping the foreground correctly exposed, reducing the need for multiple exposures.

    a vast mountain landscape at dawn with fast moving clouds

    Editing HDR Landscapes

    1. Tone Mapping for Realistic Contrast

    During editing, tone mapping helps adjust contrast to bring out details without making the image look artificial. Start with small adjustments to highlights and shadows, gradually enhancing detail while maintaining natural tones.

    2. Adjust Clarity and Dehaze for Texture

    Increase Clarity to add midtone contrast, enhancing textures in rocks, trees, and other landscape elements. Use the Dehaze slider to reduce atmospheric haze, especially in distant mountains or skies.

    3. Maintain Subtle Saturation

    It’s easy to overdo color in HDR, but subtlety is key. Use the Saturation and Vibrance sliders sparingly to avoid oversaturation, which can make landscapes look unnatural.

     rolling hills and a vibrant sunset sky hdr

    Common HDR Landscape Mistakes and How to Avoid Them

    • Over-Processing Colors: Avoid intense saturation or extreme contrast. Aim for a natural look that enhances, rather than exaggerates, the scene.
    • Ignoring Shadows: Don’t eliminate all shadows in HDR; shadows add depth and contrast, making landscapes feel more three-dimensional.
    • Not Using a Tripod: Blurred images from camera shake during bracketing can make merging challenging. Always use a tripod for stable, sharp results.

    FAQs

    What is the best exposure bracketing for HDR landscapes?

    A typical HDR bracketing setup for landscapes is -2, 0, and +2 EV. This range captures the shadows, midtones, and highlights, providing a good foundation for HDR processing.

    Can I use HDR for handheld landscape shots?

    While a tripod is recommended, some cameras offer handheld HDR modes that automatically align shots. However, for best results, especially in low light, a tripod is preferable.

    How do I avoid over-processed HDR images?

    To achieve a natural look, make subtle adjustments to highlights and shadows. Avoid excessive saturation and contrast; instead, focus on balancing the tones to enhance details without exaggeration.

    Should I shoot in RAW for HDR landscapes?

    Yes, shooting in RAW preserves more detail in highlights and shadows, making it easier to recover information during HDR editing. RAW files provide greater flexibility for adjustments.

    Additional Resources

    External Resources

  • Shutter Speed Control Guide

    Shutter Speed Control Guide

    Shutter Speed Control Guide: Mastering Motion and Exposure

    Shutter speed is one of the most powerful tools in photography, allowing you to control motion and exposure in your images. Whether you’re capturing fast-moving action or creating smooth, artistic motion blur, understanding shutter speed is essential for creative control. This guide covers everything you need to know about shutter speed, including techniques and recommended settings for different scenarios.

    What is Shutter Speed?

    Shutter speed refers to the amount of time the camera’s sensor is exposed to light. It’s measured in seconds or fractions of a second, such as 1/500s, 1/30s, or even longer exposures like 5 seconds. The choice of shutter speed affects both the brightness of your image and how motion is captured.

    How Shutter Speed Affects Exposure and Motion

    Exposure

    Shutter speed controls the exposure by determining how long light reaches the sensor. A longer shutter speed (e.g., 1 second) allows more light, brightening the image, while a faster shutter speed (e.g., 1/1000s) limits light, resulting in a darker image.

    Motion

    Shutter speed also determines how motion is recorded. A fast shutter speed freezes motion, capturing sharp, still images, while a slow shutter speed can blur motion, creating dynamic effects. Adjusting shutter speed allows you to emphasize or reduce the sense of movement in your photos.

    Choosing the Right Shutter Speed for Your Scene

    1. Freezing Motion with Fast Shutter Speeds

    If you’re photographing action scenes like sports or wildlife, a fast shutter speed (e.g., 1/500s or faster) is necessary to freeze motion and capture details. Fast speeds are ideal for:

    • Sports Photography: Capture athletes in motion with speeds around 1/1000s or higher.
    • Wildlife Photography: Use 1/500s or faster to freeze animals in action.

    Tip: For extremely fast subjects, like birds in flight, try speeds of 1/2000s or faster.

    a crisp autumn scene in a forest with colorful leaves

    2. Creating Motion Blur with Slow Shutter Speeds

    Slower shutter speeds allow you to capture movement with blur, which adds a sense of motion to your photos. This technique is effective in the following situations:

    • Waterfalls and Rivers: Use speeds between 1/15s and 1 second to create soft, flowing water effects.
    • Light Trails in Night Photography: Long exposures (1-30 seconds) capture light trails from cars or other moving light sources.

    Tip: Use a tripod for slow shutter speeds to avoid unintended camera shake and keep the background sharp.

     a high speed photograph of an athletic runner

    3. Panning with Moving Subjects

    Panning is a technique where you move the camera along with the subject’s motion, using a moderate shutter speed (e.g., 1/30s to 1/60s). This creates a sharp subject against a blurred background, emphasizing motion. It works well for:

    • Racing Cars or Bikes: Use 1/30s to 1/60s and follow the subject as it moves.
    • Running Animals or People: Panning can create dynamic portraits, capturing speed and movement.

    Using Shutter Priority Mode for Quick Adjustments

    Most cameras have a Shutter Priority mode (S or Tv) that lets you set the shutter speed while the camera automatically adjusts the aperture for proper exposure. Shutter Priority is ideal when you want to control motion effects without worrying about exposure balance. This mode is especially useful for sports, wildlife, and street photography.

    Tips for Handheld vs. Tripod Shots

    Handheld Shots

    When shooting handheld, use the reciprocal rule: set the shutter speed to at least the reciprocal of your focal length to reduce shake. For example, if using a 50mm lens, aim for 1/50s or faster. For telephoto lenses (e.g., 200mm), use 1/200s or faster.

    a slow shutter speed photo of a busy city street scene

    Using a Tripod for Stability

    A tripod is essential for slow shutter speeds, as it keeps the camera stable and eliminates shake. Tripods are especially useful for long exposures in low light or when creating motion blur effects in landscapes or night photography.

    Recommended Shutter Speed Settings for Common Scenarios

    • Portraits: 1/125s to 1/250s to ensure the subject is sharp while keeping the camera handheld.
    • Landscapes: Use slower speeds (1/30s or longer) with a tripod to capture detailed, still scenes.
    • Action Photography: 1/500s to 1/2000s for sports, wildlife, and other fast-moving subjects.
    • Low-Light/Night Photography: Use 1 second or longer exposures with a tripod to capture detail without motion blur.

    Common Shutter Speed Mistakes and How to Avoid Them

    • Blurry Photos with Slow Shutter Speeds: Use a tripod for slower speeds or increase the ISO to allow for a faster shutter speed.
    • Underexposure in Fast Shutter Speeds: In low light, use a wider aperture or higher ISO to balance exposure with a fast shutter speed.
    • Accidental Motion Blur: Use faster speeds when handheld or apply image stabilization if your lens or camera supports it.

    FAQs

    What is the best shutter speed for portraits?

    For portraits, a shutter speed between 1/125s and 1/250s works well to ensure sharpness without introducing motion blur. Adjust based on lighting and whether the subject is moving.

    How do I avoid blurry images with slow shutter speeds?

    To avoid blur with slow shutter speeds, use a tripod to stabilize your camera. Alternatively, increase ISO or widen the aperture to enable a faster shutter speed when handheld.

    What shutter speed should I use for night photography?

    Night photography often requires long exposures, from 1 second to 30 seconds, depending on light sources and desired effects. Use a tripod to keep the image sharp.

    When should I use Shutter Priority mode?

    Shutter Priority mode is useful when you want to control motion effects without worrying about exposure adjustments. It’s ideal for sports, wildlife, and action scenes where you need to freeze or blur motion.

    Additional Resources

    External Resources

  • Best Autofocus Settings for Portraits

    Best Autofocus Settings for Portraits

    Best Autofocus Settings for Portraits: Capture Perfectly Sharp Shots

    Getting sharp focus is essential in portrait photography, and the right autofocus settings can make a significant difference. From selecting the best AF mode to understanding focus area options, this guide covers the best autofocus settings for portraits to help you capture stunning, in-focus images every time.

    Why Autofocus Matters in Portrait Photography

    In portraits, the focus is critical because it draws attention to the subject’s eyes and expressions, which are key to creating a connection with the viewer. Using the right autofocus settings can ensure that your subject’s eyes are sharp and in focus, even in challenging lighting or when the subject is moving.

    back button autofocus portrait

    Best Autofocus Settings for Portraits

    1. Use Single AF (AF-S or One-Shot AF) Mode for Still Portraits

    Single AF mode, often called AF-S on Nikon and One-Shot AF on Canon, locks focus when you half-press the shutter button. This setting is ideal for stationary subjects, such as traditional portraits, as it allows you to compose and focus without concern for subject movement.

    Tip: Use Single AF mode when photographing individuals or couples in a controlled setting, where you can take your time to lock focus precisely on the eyes.

    2. Use Continuous AF (AF-C or AI-Servo) for Moving Subjects

    If your subject is moving, switch to Continuous AF (AF-C on Nikon, AI-Servo on Canon). This mode continuously adjusts focus as the subject moves, ensuring your portrait remains sharp even with subtle movements.

    Tip: Continuous AF is especially useful for candid portraits, where the subject may move naturally during the shot.

    3. Eye-Detection Autofocus for Precise Focus on Eyes

    Many modern cameras offer Eye-Detection Autofocus, which automatically detects and focuses on the subject’s eyes. This feature is invaluable in portrait photography, as it ensures that the eyes—the most important part of the face—are in sharp focus.

    Tip: Enable Eye-Detection AF if your camera supports it, as it can significantly improve accuracy and save time in composing portraits.

    4. Use Single-Point AF for Precise Focusing

    Single-Point AF allows you to manually select a single focus point in the frame, providing control over where the camera focuses. This setting is ideal for portrait photography because it lets you place the focus point exactly on your subject’s eyes, ensuring sharpness where it matters most.

    Tip: Use Single-Point AF in combination with Eye-Detection if available, giving you control over focus placement for even better results.

    5. Use Back-Button Focus for More Control

    Back-button focus separates the focus function from the shutter button, allowing you to lock focus with a dedicated button (often AF-ON or AE-L/AF-L). This technique gives you more control, letting you focus once and recompose without refocusing, which is ideal for portrait setups where you need consistency.

    Tip: Assign focus to the back button if your camera allows it, as this is useful for posed portraits or situations where the subject remains in the same position.

     a close up portrait with single point autofocus

    Focus Area Modes for Portraits

    1. Single-Point AF Area

    Single-Point AF area focuses on a small, specific part of the frame, making it ideal for placing focus directly on the eyes in portraits. This setting is perfect for ensuring that the focus is exactly where you want it.

    2. Zone or Group AF Area

    Zone AF or Group AF uses multiple points within a designated zone, giving you flexibility when the subject moves slightly. This is useful for portraits with slight motion or when photographing groups of people.

    3. Dynamic Area AF

    Dynamic Area AF allows you to select a focus point and activates surrounding points if the subject moves. This is helpful for portraits where the subject may move slightly, ensuring that focus remains on the subject without frequent adjustments.

    closeup portrait of a woman

    Additional Tips for Sharp Portraits with Autofocus

    1. Focus on the Eyes

    In portrait photography, focusing on the eyes is crucial, as it draws attention and creates a connection with the viewer. Whether using Eye-Detection or Single-Point AF, ensure the eyes are the sharpest part of your image.

    2. Use a Wide Aperture for Soft Backgrounds

    A wide aperture (like f/1.8 or f/2.8) creates a shallow depth of field, which makes the subject stand out against a blurred background. This adds a professional touch to your portraits by isolating the subject.

    3. Choose the Right Focal Length

    For portraits, a focal length between 50mm and 85mm is ideal, as it provides natural perspective without distortion. Longer focal lengths (e.g., 85mm) can add flattering compression, making it a popular choice for portrait photographers.

     a sharp close up portrait with eye detection

    Common Autofocus Mistakes in Portraits and How to Avoid Them

    • Using Too Wide an AF Area: Wider AF areas may accidentally focus on unintended parts of the scene. For portraits, use Single-Point or Eye-Detection AF to ensure focus on the eyes.
    • Forgetting to Lock Focus: Without back-button focus or locking focus, your camera may refocus when recomposing. Use back-button focus to prevent unwanted refocusing.
    • Neglecting Eye-Detection AF: Eye-Detection can dramatically improve focus accuracy in portraits, so use it if your camera supports it.

    FAQs

    What autofocus mode is best for portraits?

    For portraits, use Single AF (AF-S or One-Shot) for stationary subjects and Continuous AF (AF-C or AI-Servo) for moving subjects. Eye-Detection AF is also recommended for more accurate focusing on the eyes.

    Why is eye-detection autofocus useful in portraits?

    Eye-detection autofocus helps ensure that the subject’s eyes are in sharp focus, which is crucial in portrait photography. It automatically detects and focuses on the eyes, reducing the need for manual focus adjustments.

    Should I use back-button focus for portraits?

    Yes, back-button focus can be very helpful in portraits, as it allows you to lock focus on the subject’s eyes and recompose without refocusing. This technique is particularly useful for consistent framing and focus control.

    What focal length is best for portrait autofocus?

    A focal length between 50mm and 85mm is typically best for portraits, as it provides a natural perspective without distortion. Longer focal lengths, like 85mm, create flattering compression that enhances the subject’s features.

    Additional Resources

  • Lighting for Indoor Portraits

    Lighting for Indoor Portraits

    Lighting for Indoor Portraits: Techniques for Stunning Photos

    Lighting is essential in indoor portrait photography, as it can transform the mood and quality of your images. Achieving beautiful, natural-looking indoor lighting can be challenging, but with the right techniques and equipment, you can capture stunning portraits in any indoor setting. This guide covers effective lighting techniques, setups, and tips for mastering indoor portrait lighting.

    Why Lighting Matters in Indoor Portraits

    Lighting shapes your subject’s features, sets the mood, and enhances depth and dimension in your photos. In controlled indoor settings, you can adjust lighting to create soft, flattering portraits or dramatic, high-contrast images. Understanding the principles of lighting allows you to produce consistent, professional results.

    one light setup indoor portrait key light

    Natural Light vs. Artificial Light

    Natural Light

    Natural light, like sunlight streaming through a window, provides a soft and flattering effect on skin tones. Position your subject near a window with indirect light to avoid harsh shadows. If the light is too strong, use a diffuser or sheer curtain to soften it.

    Tip: Place your subject at a 45-degree angle to the window for soft shadows that add depth to their face.

    Artificial Light

    Artificial lights offer more control, allowing you to create the ideal lighting setup regardless of natural light availability. Use softboxes, LED panels, or ring lights to achieve even, flattering lighting. Position artificial lights carefully to mimic the natural fall of light across the subject’s face.

    Basic Lighting Setups for Indoor Portraits

    1. One-Light Setup

    The one-light setup is simple and effective, ideal for soft, moody portraits. Position a softbox or LED panel at a 45-degree angle to your subject’s face for directional light that highlights features and adds dimension.

    2. Two-Light Setup (Key and Fill Light)

    A two-light setup adds a fill light to soften shadows created by the key light, producing a more balanced look. Position the key light at a 45-degree angle to your subject and place a fill light on the opposite side, slightly dimmer than the key, to reduce shadow intensity.

    Tip: If you don’t have a second light, use a reflector on the fill side to bounce light onto the shadowed areas.

    3. Three-Point Lighting (Key, Fill, and Backlight)

    This classic setup includes a backlight positioned behind the subject, adding separation from the background and creating a subtle halo effect. It’s great for more formal portraits where you want the subject to stand out.

    Tip: Use a soft key light and moderate fill light for a natural look, then add a subtle backlight to emphasize your subject.

    a balanced two light setup portrait with even lighting

    Recommended Equipment for Indoor Portrait Lighting

    1. Softboxes

    Softboxes provide diffused light, softening shadows and reducing harshness. They’re ideal for achieving flattering, even lighting in portraits. Position the softbox close to your subject for softer shadows.

    2. Reflectors

    Reflectors are inexpensive tools for bouncing light onto shadowed areas, especially helpful when you don’t have multiple light sources. Use a white reflector for soft light or a silver reflector for stronger, more focused light.

    3. LED Panels

    LED panels offer continuous lighting with adjustable brightness and color temperature, allowing you to fine-tune lighting for your subject’s skin tone. They’re versatile and easy to position for even lighting.

    4. Ring Lights

    Ring lights provide uniform lighting, creating a soft glow on the subject’s face. They’re particularly popular for close-up portraits, adding a distinct circular catchlight in the subject’s eyes.

    Additional Tips for Indoor Portrait Lighting

    1. Position the Light Above Eye Level

    For natural-looking shadows, position the light slightly above eye level and angled down towards your subject. This simulates natural sunlight and enhances facial features.

    2. Control Background Lighting

    Indoor backgrounds can be distracting if too brightly lit. To create depth, adjust your lights to focus on the subject, leaving the background slightly darker for contrast.

    3. Experiment with Light Modifiers

    Modifiers like diffusers, grids, and barn doors help control light direction and softness. Experimenting with modifiers lets you create unique lighting effects tailored to each portrait session.

     close up portrait with ring light bright

    Common Indoor Lighting Mistakes and How to Avoid Them

    • Harsh Shadows: Avoid placing the light directly in front of or above the subject without a diffuser, which creates harsh, unflattering shadows. Use a softbox or reflector to soften shadows.
    • Flat Lighting: Without contrast, portraits can appear flat and lifeless. Adjust the angle and intensity of your fill light for a natural shadow effect.
    • Uncontrolled Reflections: Glossy surfaces and glasses can reflect light back at the camera. Position your lights to minimize unwanted reflections.

    FAQs

    What is the best lighting setup for indoor portraits?

    A two-light setup with a key light and fill light is a versatile choice for indoor portraits, providing balanced lighting with soft shadows. You can also add a backlight for separation.

    Can I use natural light for indoor portraits?

    Yes, natural light is excellent for indoor portraits. Position your subject near a window with indirect light, and use a reflector to bounce light onto shadowed areas.

    What is the best light position for flattering portraits?

    Position the light slightly above eye level and at a 45-degree angle to the subject for soft, natural shadows that enhance facial features.

    Should I use a ring light for portraits?

    Ring lights are great for close-up portraits, providing uniform lighting and a circular catchlight in the eyes. However, they may not be ideal for full-body or environmental portraits.

    Additional Resources

    • Camera Settings Tips – Learn more about camera settings, including ISO, aperture, and shutter speed for portraits.
    • Portrait Photography Tips – Get additional insights on posing, framing, and other techniques for beautiful portraits.

    External Resources

  • Exposure Bracketing Tips

    Exposure Bracketing Tips

    Exposure Bracketing Tips for Perfectly Balanced Photos

    Exposure bracketing is a technique that captures multiple versions of the same photo at different exposures, ensuring you get a balanced image with well-defined shadows and highlights. This approach is especially useful in high-contrast scenes, like landscapes or interiors with bright windows. In this guide, we’ll cover how exposure bracketing works, when to use it, and essential tips for making the most of this technique.

    What is Exposure Bracketing?

    Exposure bracketing involves taking a series of shots at different exposure levels. Typically, you’ll take one photo at the camera’s recommended exposure, one underexposed, and one overexposed. These multiple exposures can be combined later to create a balanced image, or you can choose the best single exposure from the series.

    an indoor scene with large windows exposure bracketing

    Why Use Exposure Bracketing?

    Bracketing helps ensure that no detail is lost in shadows or highlights, making it ideal for high-contrast scenes. Landscapes with bright skies, architectural interiors, or sunset shots often benefit from bracketing. It’s also the foundation of HDR (High Dynamic Range) photography, where multiple exposures are merged to capture a wider range of light.

    How to Set Up Exposure Bracketing

    Most modern cameras have an automatic bracketing function (AEB or Auto Exposure Bracketing). Here’s how to set it up:

    1. Enable AEB Mode

    Go to your camera’s settings and enable Auto Exposure Bracketing. Set the bracketing sequence to take three shots—one underexposed, one correctly exposed, and one overexposed.

    2. Choose Bracketing Steps

    Select the exposure increment, often measured in Exposure Values (EV). Common options include ±1 EV, ±2 EV, or ±3 EV. Use a larger step (e.g., ±2 or ±3) for very high-contrast scenes and a smaller step for more balanced lighting.

    Tip: For HDR post-processing, use a larger step like ±2 EV to capture more dynamic range.

    3. Use Continuous Shooting Mode

    In continuous shooting mode, holding down the shutter button allows the camera to take all bracketed shots in quick succession. This minimizes movement between frames and keeps your images aligned, especially helpful if you’re hand-holding the camera.

     a dynamic landscape with varied exposures combined

    When to Use Exposure Bracketing

    1. High-Contrast Landscapes

    In landscapes, bracketing captures both bright skies and darker foregrounds. Take multiple exposures to ensure detail is retained in both areas, particularly in sunrise or sunset scenes.

    2. Architectural and Interior Photography

    Interior shots with bright windows can be challenging to expose correctly. Use bracketing to capture the detail inside the room as well as the view outside, then merge the exposures for a balanced result.

    3. Sunset and Sunrise Photography

    Sunrises and sunsets create dramatic contrasts between the bright sky and shadowed ground. Bracketing helps you retain detail in the shadows and the vibrant colors in the sky.

    4. Low-Light and Night Photography

    When shooting in low light, bracketing can help manage exposure, allowing you to capture brighter shots with less noise by merging multiple exposures in post-processing.

    Tips for Effective Exposure Bracketing

    1. Use a Tripod for Consistency

    A tripod is essential for keeping all bracketed shots aligned, especially in low-light conditions or with longer exposures. This reduces the need for alignment adjustments during editing.

    2. Choose the Right Bracketing Step

    For scenes with extreme contrast, use a larger bracketing step (e.g., ±2 or ±3 EV) to capture more dynamic range. In balanced lighting, a smaller step like ±1 EV may be sufficient.

    3. Turn Off Auto ISO

    Auto ISO can interfere with bracketing by changing the ISO between frames. Set a fixed ISO to keep exposure adjustments limited to shutter speed and aperture, maintaining consistent image quality across exposures.

    4. Check Your Histogram

    After capturing your bracketed shots, review the histogram to ensure you’ve captured a full range of tones. Aim to cover both shadows and highlights without clipping.

    5. Use HDR Software for Merging

    If you’re merging bracketed shots for an HDR image, use software like Lightroom, Photoshop, or dedicated HDR programs (e.g., Aurora HDR) to blend the exposures smoothly.

    an indoor scene with large windows exposure bracketing

    Common Exposure Bracketing Mistakes and How to Avoid Them

    • Using Too Many Frames: More frames don’t always mean better results. Stick to three frames (underexposed, correct, overexposed) unless the scene has very high contrast.
    • Misaligned Shots: Handheld bracketing can lead to misalignment. Use a tripod, or use software with alignment features for handheld shots.
    • Overdoing HDR Effects: When merging for HDR, keep adjustments subtle. Over-processed HDR can look unnatural; aim for a balanced, realistic look.

    FAQs

    What is the best exposure bracketing setup for landscapes?

    For landscapes with high contrast, a ±2 EV step with three shots (underexposed, correctly exposed, overexposed) is ideal. This range captures details in both shadows and highlights.

    Can I use exposure bracketing without a tripod?

    Yes, you can bracket without a tripod, but alignment may be an issue. Use continuous shooting mode to reduce movement between shots, and consider using alignment features in post-processing software.

    What is the difference between exposure bracketing and HDR?

    Exposure bracketing captures multiple exposures, while HDR combines these exposures into one image with enhanced dynamic range. Bracketing is the technique; HDR is the result when the images are merged.

    When should I avoid using exposure bracketing?

    Bracketing isn’t necessary in evenly lit scenes or when shooting moving subjects, as multiple exposures may cause motion artifacts.

    Additional Resources

    External Resources

  • Macro Photography Techniques

    Macro Photography Techniques

    Macro Photography Techniques: Capture Stunning Details Up Close

    Macro photography brings the smallest details to life, revealing textures, colors, and patterns that are often invisible to the naked eye. Whether you’re photographing flowers, insects, or everyday objects, macro photography allows you to explore a world of intricacies. In this guide, we’ll cover essential macro photography techniques, recommended gear, and tips to help you capture captivating close-ups.

    What is Macro Photography?

    Macro photography focuses on capturing small subjects at life-size or greater magnification. True macro lenses offer a 1:1 magnification ratio, meaning that the subject appears life-sized on the camera’s sensor. This type of photography requires specific techniques and equipment to achieve sharp, detailed images with a shallow depth of field.

    an extreme close up of a flower showing intricate detail

    Essential Macro Photography Techniques

    1. Use a Dedicated Macro Lens

    A dedicated macro lens provides the best results for close-up photography, offering a 1:1 magnification ratio. Common macro lens focal lengths include 60mm, 90mm, and 100mm, each providing a unique working distance and perspective.

    Tip: A 100mm macro lens is ideal for insects, as it allows you to maintain distance without disturbing your subject.

    2. Use Manual Focus for Precision

    Manual focus gives you more control over focus placement, especially at close distances where autofocus may struggle. When shooting macro, even slight shifts in focus can make a big difference. Use live view and focus peaking (if available) for more precise focus.

    3. Try Focus Stacking for Greater Depth of Field

    Depth of field is extremely shallow in macro photography, making it difficult to keep the entire subject in focus. Focus stacking involves taking multiple shots at different focus points and merging them in post-processing to create an image with a greater depth of field.

    Tip: Use a tripod to maintain alignment between shots when focus stacking.

    4. Control Aperture for Depth of Field

    Choose a smaller aperture (e.g., f/8 or f/11) to achieve more depth of field and capture more details across your subject. However, be mindful of diffraction, which can soften the image at very small apertures like f/16 or f/22.

    5. Use a Tripod for Stability

    Macro photography often requires slow shutter speeds, especially in natural light, which can introduce motion blur. A tripod stabilizes your camera, allowing for sharper images and more flexibility with composition and focus.

    a water droplet on a petal reflecting colors

    Best Macro Lenses by Brand

    Canon

    • Canon EF 100mm f/2.8L Macro IS USM: This lens provides a 1:1 magnification ratio and features Hybrid Image Stabilization, reducing camera shake during handheld shooting. Its weather-sealed construction ensures durability in various conditions.
    • Canon RF 100mm f/2.8L Macro IS USM: Designed for Canon’s mirrorless RF mount, this lens offers up to 1.4x magnification and includes a spherical aberration control ring to adjust bokeh characteristics.

    Nikon

    • Nikon AF-S VR Micro-NIKKOR 105mm f/2.8G IF-ED: A classic macro lens with Vibration Reduction (VR) technology, providing sharp images even at close distances. Its Silent Wave Motor ensures quiet and accurate autofocus.
    • Nikon Z MC 105mm f/2.8 VR S: For Nikon’s Z-series mirrorless cameras, this lens offers superior sharpness and a 1:1 reproduction ratio, making it ideal for detailed macro work.

    Sony

    • Sony FE 90mm f/2.8 Macro G OSS: This lens provides Optical SteadyShot image stabilization and a 1:1 magnification ratio, delivering sharp and detailed images. Its focus hold button and sliding focus ring enhance manual focus control.

    Fujifilm

    • Fujifilm XF 80mm f/2.8 R LM OIS WR Macro: Offering a 1:1 magnification ratio and Optical Image Stabilization, this lens is weather-sealed, making it suitable for various shooting conditions.

    Olympus

    • Olympus M.Zuiko Digital ED 60mm f/2.8 Macro: Designed for Micro Four Thirds cameras, this lens provides a 1:1 magnification ratio and features weather-sealing, ensuring durability in diverse environments.

    Sigma

    • Sigma 105mm f/2.8 DG DN Macro Art: Available for Sony E and L-mount cameras, this lens offers exceptional sharpness and a 1:1 magnification ratio, making it a versatile choice for macro photography.

    Tamron

    • Tamron SP 90mm f/2.8 Di VC USD Macro: Compatible with Canon and Nikon mounts, this lens features Vibration Compensation and a 1:1 magnification ratio, providing sharp and detailed images.

    Tips for Different Macro Photography Subjects

    1. Flowers and Plants

    For flowers and plants, focus on interesting parts like petals or stamen to bring out details. Use a wide aperture to isolate the subject from the background, creating a beautiful blur that highlights the subject.

    2. Insects and Small Wildlife

    Insects require patience and a steady hand. Use a longer focal length (e.g., 100mm or more) to avoid disturbing them. Choose a fast shutter speed (e.g., 1/200s or faster) to freeze movement and capture sharp details.

    3. Water Droplets and Reflections

    Water droplets add an interesting element to macro photography, reflecting and distorting the surrounding scenery. Use a small aperture and high shutter speed to capture the droplet details and prevent movement blur.

    u7723174578 close up of a mechanical watch every gear and com 427a85c3 932f 45c3 bc80 8a644629e429 1

    Lighting Tips for Macro Photography

    1. Use Natural Light When Possible

    Natural light is often softer and more flattering for macro photography. Place your subject in indirect light, such as under a cloudy sky or in shade, to avoid harsh shadows.

    2. Control Shadows with Reflectors

    Reflectors help fill in shadows, creating a more balanced and detailed image. Use a small reflector to bounce light into shadowed areas, especially when working with flowers or insects outdoors.

    3. Try Diffused Flash for Indoor Shots

    If shooting indoors, a diffused flash softens light and reduces shadows. A ring flash or off-camera flash with a diffuser provides even lighting that highlights the subject’s texture and details.

    FAQs

    What is the best macro lens focal length?

    A 100mm macro lens is a versatile choice, providing enough working distance for insects and small wildlife without disturbing them. For flowers and static subjects, a 60mm or 90mm lens also works well.

    How do I avoid camera shake in macro photography?

    Use a tripod to stabilize your camera and prevent shake. Additionally, use a remote shutter release or the camera’s timer function to avoid touching the camera during the shot.

    Can I do macro photography without a macro lens?

    Yes, you can use extension tubes, close-up filters, or reverse rings to achieve macro-like magnification without a dedicated macro lens. These accessories allow closer focusing distances but may reduce light and image quality.


  • Time-Lapse Photography Basics

    Time-Lapse Photography Basics

    Time-Lapse Photography Basics: Capture Motion in Stunning Sequences

    Time-lapse photography compresses hours of motion into a few seconds, creating mesmerizing videos that reveal changes over time. Whether you’re capturing a sunset, bustling cityscape, or blooming flowers, time-lapse photography can bring dynamic scenes to life. This guide covers the basics of time-lapse photography, including essential equipment, camera settings, and tips for creating smooth time-lapse sequences.

     a bustling cityscape with skyscrapers

    What is Time-Lapse Photography?

    Time-lapse photography involves taking a series of images at regular intervals and then combining them to create a video that shows motion at an accelerated pace. By capturing one frame every few seconds, minutes, or hours, you can highlight changes that are too slow for the human eye to notice.

    Essential Time-Lapse Equipment

    1. Tripod

    A tripod is crucial for time-lapse photography, as it keeps the camera stable over long periods, preventing unwanted movement or shake. Stability is essential for maintaining consistency in each frame, especially for long-duration time-lapses.

    2. Intervalometer

    An intervalometer is a device that automatically triggers the camera at set intervals, allowing you to capture frames consistently. Some cameras have built-in intervalometers, but if yours doesn’t, an external intervalometer is essential for time-lapse.

    3. Lens Selection

    Choose a lens based on your subject. Wide-angle lenses work well for landscapes and cityscapes, capturing the entire scene, while telephoto lenses can focus on specific details like clouds or traffic in the distance.

    a bustling cityscape with movement

    Setting Up Your Camera for Time-Lapse Photography

    1. Shutter Speed

    Shutter speed affects the amount of motion blur in each frame. For smooth motion, use a slightly slower shutter speed (e.g., 1/30s or 1/60s) to introduce a subtle blur. For a crisper look, use faster shutter speeds, but be aware that overly fast speeds may create a jittery effect.

    Tip: Experiment with shutter speed based on your subject’s motion. Slow-moving clouds may benefit from longer exposures, while fast traffic requires shorter speeds.

    2. Interval Timing

    The interval is the time between each shot and depends on your subject’s speed. Here’s a general guide:

    • Fast-Moving Subjects (e.g., crowds, traffic): 1-3 seconds.
    • Slow-Moving Subjects (e.g., clouds, sunsets): 5-10 seconds.
    • Very Slow Changes (e.g., plant growth): Minutes to hours.

    3. Shooting Mode

    Set your camera to Manual Mode to keep exposure, shutter speed, and ISO consistent throughout the time-lapse. This prevents flickering, a common issue caused by automatic exposure adjustments.

    4. Focus Settings

    Use manual focus to lock focus on your subject, ensuring each frame remains sharp. Autofocus may shift between shots, causing inconsistencies, so set focus before starting the sequence.

    a vast mountain landscape at dawn with fast moving clouds

    Popular Time-Lapse Subjects

    1. Sunsets and Sunrises

    Time-lapses are perfect for capturing the dynamic colors and changes in light during sunrises and sunsets. Use a 5-10 second interval for these slow, gradual changes, and set a low ISO to reduce noise in darker frames.

    2. Cityscapes and Traffic

    Capture the energy of a bustling city with a 1-3 second interval. Use a slower shutter speed to create light trails from vehicles, adding visual interest and motion to your time-lapse.

    3. Cloud Movement

    Clouds make great time-lapse subjects, especially on windy days. Use intervals of 5-10 seconds for faster clouds or 10-30 seconds for slower formations to capture their graceful motion across the sky.

    4. Star Trails and Night Sky

    Time-lapse can beautifully showcase star trails or the Milky Way. Use a wide-angle lens with longer intervals (15-30 seconds) and a longer exposure to capture as much light as possible in each frame. Keep ISO low to avoid excessive noise.

    Editing and Compiling Your Time-Lapse

    1. Organize and Import Photos

    Once your time-lapse sequence is complete, import the photos into software like Lightroom, Photoshop, or dedicated time-lapse software like LRTimelapse. Organize them by sequence to simplify editing and compiling.

    2. Adjust Exposure and Color Consistency

    Correct exposure and color balance in your photos to ensure a smooth transition between frames. Batch-edit in Lightroom for consistent adjustments across the sequence.

    3. Create the Time-Lapse Video

    Use video editing software like Adobe Premiere Pro or Final Cut Pro to compile the images into a video. Set the frame rate to 24 or 30 frames per second for a smooth, cinematic result.

    Tip: Add background music or sound effects to enhance the impact of your time-lapse video.

    Common Time-Lapse Mistakes and How to Avoid Them

    • Flickering: Use manual mode and consistent exposure settings to prevent flickering caused by changing light conditions or automatic settings.
    • Unstable Shots: Always use a sturdy tripod to keep frames consistent and aligned.
    • Incorrect Interval Timing: Choose intervals based on your subject’s speed to ensure smooth motion without skipping too much detail.

    FAQs

    How many frames per second should I use for time-lapse?

    For time-lapse videos, 24 or 30 frames per second (fps) is standard. This frame rate produces smooth motion while keeping file sizes manageable.

    What is the best interval for cloud time-lapse?

    For cloud time-lapses, use an interval of 5-10 seconds for fast-moving clouds or 10-30 seconds for slower-moving clouds. This interval provides enough frames to show smooth motion.

    How do I prevent flicker in time-lapse photography?

    Use manual mode for exposure and white balance to avoid flickering caused by automatic adjustments. Additionally, consistent lighting conditions reduce flickering.

    What is an intervalometer, and do I need one?

    An intervalometer is a device that automatically triggers the camera at set intervals. It’s essential for time-lapse photography, as it allows you to capture frames consistently over time.

    Additional Resources

    External Resources

  • Dynamic Range and Exposure

    Dynamic Range and Exposure

    Understanding Dynamic Range and Exposure for Better Photos

    Dynamic range and exposure are crucial concepts in photography that impact how well your camera captures details in bright and dark areas. Mastering these techniques allows you to create well-balanced photos that retain detail in shadows and highlights, making your images look more dynamic and visually appealing. Here’s everything you need to know about dynamic range and exposure, along with best practices for achieving balanced photos.

    high contrast cityscape at golden hour

    What is Dynamic Range?

    Dynamic range is the range of tones your camera can capture, from the darkest shadows to the brightest highlights. The wider the dynamic range, the more detail you’ll retain in areas with high contrast. Cameras with high dynamic range are better equipped to handle scenes with significant light differences, like a bright sky and dark shadows in a landscape.

    Dynamic Range in Photography

    Dynamic range is measured in stops, with each stop representing a doubling of light. Most modern cameras have a dynamic range of around 12-15 stops, meaning they can capture details across a wide range of brightness levels. Here’s how it affects your photos:

    • High Dynamic Range: Retains more detail in both shadows and highlights, making it ideal for scenes with mixed lighting.
    • Low Dynamic Range: Limited detail in extreme light conditions, often resulting in blown-out highlights or clipped shadows.

    What is Exposure?

    Exposure is the amount of light that reaches your camera’s sensor. It determines the overall brightness of your image and is controlled by three main settings known as the exposure triangle:

    • Aperture: Controls the amount of light entering the lens and affects depth of field.
    • Shutter Speed: Determines how long the sensor is exposed to light and controls motion blur.
    • ISO: Adjusts the sensor’s sensitivity to light; higher ISO settings can introduce noise but brighten the image.

    Balancing these three settings is essential for achieving correct exposure and ensuring your image captures the desired brightness and detail.

     an interior photograph of a dark room with a single source of light

    How to Achieve a Balanced Exposure

    1. Use Exposure Metering Modes

    Exposure metering modes help your camera determine the optimal exposure based on your scene:

    • Evaluative/Matrix Metering: Measures light across the entire frame and is ideal for balanced scenes.
    • Center-Weighted Metering: Prioritizes the center of the frame, useful for portraits and focused subjects.
    • Spot Metering: Measures light at a specific point, ideal for high-contrast scenes where you want precise control over exposure.

    2. Use Exposure Compensation

    Exposure compensation allows you to manually adjust the camera’s exposure to make an image brighter or darker without changing aperture, shutter speed, or ISO. Use exposure compensation in the following scenarios:

    • + Exposure Compensation: Use for backlit scenes where the subject appears too dark.
    • – Exposure Compensation: Use for bright scenes where highlights may be blown out.

    3. Bracketing for High Dynamic Range (HDR)

    Bracketing involves taking multiple shots of the same scene at different exposure levels (e.g., -2, 0, +2 EV) and combining them in post-processing. This technique is especially useful for high-contrast scenes and is the foundation of HDR photography.

    Tip: Use a tripod to keep your camera stable when bracketing, ensuring each shot aligns perfectly.

    a photograph of a vast mountain landscape at midday with bright skies

    Maximizing Dynamic Range

    1. Shoot in RAW Format

    RAW files capture more data than JPEGs, providing greater flexibility to recover details in shadows and highlights during editing. This is essential for maximizing dynamic range in post-processing.

    2. Avoid Overexposure

    To prevent losing detail in highlights, expose for the brightest part of your scene. Slight underexposure is often easier to correct in post-processing, whereas overexposed areas may lose detail entirely.

    Tip: Enable highlight warnings (zebra patterns) if your camera has them to identify potential overexposure areas.

    3. Use the Histogram for Precise Exposure

    The histogram shows the tonal distribution of your image. A balanced histogram ensures you’re capturing a full range of tones without clipping shadows or highlights. Here’s how to interpret it:

    • Left Side: Represents shadows. Clipping on this side means lost detail in dark areas.
    • Right Side: Represents highlights. Clipping on this side means lost detail in bright areas.

     a coastal landscape captured in the late afternoon in black and white

    Dynamic Range Tips for Different Scenarios

    1. Landscape Photography

    Landscapes often have high contrast, with bright skies and dark foregrounds. Use bracketing or a graduated ND filter to balance the exposure and preserve detail across the scene.

    2. Portrait Photography

    In portraits, dynamic range is important for retaining detail in the subject’s skin tones. Use center-weighted metering to prioritize the subject and avoid harsh highlights or shadows on their face.

    3. Night Photography

    In low-light photography, prioritize retaining highlight detail to prevent bright areas from blowing out. Underexpose slightly to capture detail in light sources, and lift shadows in post-processing if needed.

    Common Dynamic Range and Exposure Mistakes and How to Avoid Them

    • Overexposing Highlights: Always check your histogram or enable highlight warnings to avoid blown-out highlights.
    • Ignoring the Histogram: The histogram provides real-time feedback on exposure and dynamic range, so make it a habit to review it after each shot.
    • Relying on Auto Mode: Auto mode can lead to exposure issues in high-contrast scenes. Use manual or semi-automatic modes for more control.

    FAQs

    What is dynamic range in photography?

    Dynamic range refers to the range of light intensities a camera can capture, from the darkest shadows to the brightest highlights. A high dynamic range means the camera can capture more details in both bright and dark areas, making it essential for scenes with significant contrast.

    How do I achieve a balanced exposure?

    To achieve a balanced exposure, use metering modes to measure light accurately, apply exposure compensation if needed, and check the histogram to avoid overexposing or underexposing critical areas.

    Why should I shoot in RAW for dynamic range?

    Shooting in RAW captures more data and preserves details in shadows and highlights, allowing you to recover information in post-processing. This is essential for maximizing dynamic range, especially in high-contrast scenes.

    How does the histogram help with exposure?

    The histogram visually represents the exposure of your image, showing the distribution of tones from shadows (left) to highlights (right). Reviewing the histogram ensures you’re not losing detail in shadows or highlights.

    Additional Resources

    External Resources