Mastering Light Settings for Perfect Landscape Photography
Landscape photography has always been a cherished and revered art form, capturing the beauty of nature in all its grandeur. It allows photographers to showcase breathtaking landscapes, from majestic mountains to serene seascapes. However, mastering landscape photography is not just about finding the right composition or subject; it’s also about understanding and harnessing the power of light.
Light is one of the most critical elements in photography, and it plays a pivotal role in creating stunning landscape images. It can shape the mood, enhance textures, and bring out vibrant colors in your photographs. But to truly master landscape photography, you need to have a deep understanding of light, how it behaves, and how to make it work in your favor.
In this article, we will delve into the different aspects of light and how you can use them to capture stunning landscape photographs. From the spectrum of natural light to the magic of the golden hour, we will explore various techniques and strategies to take your landscape photography to the next level. So, grab your camera, and let’s dive into the world of light and landscapes!
Light is one of the most crucial elements in landscape photography. It has the power to transform an ordinary scene into an extraordinary masterpiece. Understanding how light works and how to use it to your advantage can greatly enhance your landscape photographs. In this article, we will explore different aspects of light that every landscape photographer should be familiar with. From the spectrum of natural light to the creative use of unconventional lighting conditions, we’ll cover it all. So grab your camera, and let’s delve into the fascinating world of light!
Spectrum of Natural Light
The spectrum of natural light encompasses a wide range of colors and intensities. The time of day directly influences the quality of light you will encounter. Different times of day result in variations in color temperature, contrast, and shadows. One key phenomenon that landscape photographers often seek is the “Golden Hour,” which occurs around sunrise or sunset. During this time, the sun is near the horizon, casting a warm, soft, and golden light over the landscape. This magical light can greatly enhance the mood and create stunning photographs. To learn more about how to master the art of landscape photography, you can check out this helpful guide on Mastering Landscape Photography.
Golden Hour Photography
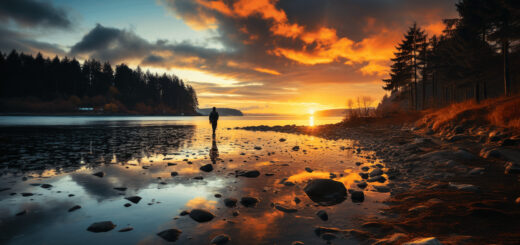
The Golden Hour is the period shortly after sunrise or before sunset when the sun is low in the sky. It is often hailed as the best time for landscape photography due to the soft, warm, and low-contrast light it provides. During this time, the long shadows and subtle hues create a beautiful and ethereal atmosphere. The landscape is bathed in a gentle, golden glow that can make even the simplest scene appear stunning. It is a time when nature seems to come alive, and capturing the details and textures becomes a delight. The Golden Hour is a true gift for landscape photographers, offering endless opportunities for creating breathtaking images.
Embracing Backlighting
Backlighting is a technique where the main light source is positioned behind the subject, creating a glowing effect and emphasizing the outlines. While backlighting can be challenging to work with, it has the potential to produce dramatic and captivating photos. When shooting in backlight, it’s important to manage the exposure carefully. The bright light behind the subject can cause the foreground to appear underexposed. To overcome this, you can use techniques like exposure compensation or fill flash to balance the exposure across the frame. When executed correctly, backlighting can add depth, dimension, and a sense of wonder to your landscape photographs.
Exploring Reflected, Diffused, and Open Shade Light
Unconventional lighting conditions such as reflected light, diffused light, and open shade can present unique opportunities for capturing diverse and captivating landscape scenes.
- Reflected light occurs when sunlight bounces off surfaces such as water, snow, or buildings, creating interesting and dynamic lighting patterns. By incorporating these reflections into your photographs, you can add visual interest and create a sense of depth in your compositions.
- Diffused light is soft, even light that results from the scattering of sunlight. It is often found on cloudy days or in shaded areas. Diffused light eliminates harsh shadows and can be ideal for capturing delicate details, textures, and subtle colors. Embracing diffused light can give your landscape photographs a serene and tranquil atmosphere.
- Open shade refers to areas that are shaded but still receive indirect light from the sky. This type of lighting can produce even and flattering illumination, making it perfect for photographing subjects like flowers or close-up details. By placing your subject in open shade, you can avoid harsh highlights and shadows, resulting in a well-balanced and pleasing image.
By exploring and experimenting with these unconventional lighting conditions, you can capture unique and striking landscape photographs that stand out from the rest.
In conclusion, understanding the different aspects of light and how to harness its power is essential for landscape photographers. Whether it’s the ethereal glow of the Golden Hour, the dramatic effects of backlighting, or the creative use of unconventional lighting, light can elevate your landscape photographs to new heights. So, head out into nature, observe the light, and let it guide you in creating truly mesmerizing images.
When it comes to landscape photography, capturing the beauty of nature in all its glory requires the right camera settings. Choosing the appropriate ISO, shooting mode, and balancing the exposure triangle are key factors in achieving breathtaking landscape shots. In this article, we will explore the essential camera settings that every landscape photographer should know.
ISO Settings
ISO is a measure of the camera’s sensitivity to light. In landscape photography, it is important to use a low ISO setting to capture clear, noise-free images. The ideal ISO for landscape photography ranges from 100 to 400. Here are a few tips for setting your ISO:
- Start with the lowest ISO setting (e.g., ISO 100) and adjust accordingly based on the available light.
- Increase the ISO only if necessary, such as when shooting in low-light conditions or wanting to use a faster shutter speed.
- Avoid high ISO settings, as they can introduce digital noise and decrease image quality.
Aperture Priority Mode
Aperture Priority mode (A/Av) allows you to control the aperture while the camera automatically sets the shutter speed for proper exposure. This mode is particularly useful in landscape photography, where aperture selection and camera configuration play a crucial role in capturing sharp and detailed images.
Here’s why Aperture Priority mode is beneficial for landscape photography:
- It gives you control over depth of field, allowing you to achieve a wide depth of field by using a smaller aperture (larger f-number) like f/16 or f/22.
- It provides flexibility by automatically adjusting the shutter speed based on the selected aperture, ensuring proper exposure in varying lighting conditions.
Shutter Speed and its Role
Shutter speed determines the length of time the camera’s sensor is exposed to light. In landscape photography, it has a significant role in capturing motion and creating certain effects, such as smooth water or the motion of clouds. Here are some points to consider when setting your shutter speed:
- Use a slower shutter speed (e.g., 1/4th of a second or longer) to create a silky effect on waterfalls or rivers.
- Experiment with longer exposures (several seconds or more) to capture star trails or light painting.
- Use faster shutter speeds (1/500th of a second or higher) to freeze action, such as capturing a bird in flight.
Balancing the Exposure Triangle
The art of balancing exposure involves mastering the three components of the exposure triangle: ISO, shutter speed, and aperture. Properly balancing these settings is crucial for achieving well-exposed landscape photos. Here’s how you can achieve a balanced exposure:
- Use a low ISO setting for optimal image quality.
- Adjust the aperture to control the depth of field and determine how much of the scene is in focus.
- Set the shutter speed based on the desired effect or to freeze or emphasize motion.
Remember, achieving stunning landscape shots requires practice and experimentation. By understanding and utilizing these essential camera settings, you can capture breathtaking landscapes that will leave viewers in awe.
To learn more about mastering landscape photography techniques and tips for breathtaking shots, check out Techniques for Breathtaking Shots.
Landscape photography is a popular genre that allows photographers to capture the beauty of the natural world and create stunning visual representations of their surroundings. However, achieving exceptional landscape photographs requires more than just point-and-shoot techniques. To truly capture the essence of a landscape, photographers must employ specific practices and tools that enhance their creative vision. Let’s explore some best practices in landscape photography that can help you take your skills to the next level.
Shooting in RAW Format
One of the essential practices in landscape photography is shooting in RAW format. RAW files contain all the data captured by the camera’s sensor, providing photographers with more flexibility and control during post-processing. Here are some benefits of shooting in RAW format:
- Greater dynamic range: RAW files have a wider dynamic range, allowing you to capture more details in both shadows and highlights.
- Flexible exposure adjustments: RAW files give you the freedom to adjust exposure settings without compromising image quality. You can easily recover overexposed or underexposed areas during post-processing.
- Enhanced color accuracy: RAW files preserve more color information, enabling you to achieve accurate and vibrant colors during editing.
- Non-destructive editing: Since RAW files contain uncompressed data, you can make extensive edits without degrading image quality.
By shooting in RAW format, you have more creative control over the final look of your landscape photographs. It allows you to unleash your artistic vision and bring out the true beauty of the scenery you captured.
Utilization of a Tripod
When it comes to landscape photography, a tripod is an indispensable tool. It provides stability and allows you to capture sharp, high-quality images. Here’s why utilizing a tripod is crucial in landscape photography:
- Eliminates camera shake: Even a slight movement during long exposures can result in blurry images. A tripod keeps your camera steady, ensuring sharpness and clarity in your photographs.
- Enables slow shutter speeds: With a tripod, you can use slower shutter speeds to capture movement in waterfalls, rivers, or clouds, creating a sense of tranquility or drama in your images.
- Facilitates accurate composition: By using a tripod, you can precisely frame your shots, making it easier to align your scene and maintain a consistent perspective.
- Allows for multiple exposures: A tripod is essential for capturing multiple exposures for techniques like HDR (High Dynamic Range) photography or image stacking.
Investing in a sturdy tripod and using it consistently will significantly improve the quality of your landscape photographs. It ensures sharpness, stability, and precise composition, enabling you to create images that truly showcase the beauty of the natural world.
The Use of Polarizing Filters
Polarizing filters are a fantastic accessory for landscape photographers. These filters enhance color saturation, reduce reflections and glare, and improve overall image quality. Here’s how they can elevate your landscape photographs:
- Enhanced color and contrast: A polarizing filter helps intensify colors by reducing reflections on non-metallic surfaces such as water, foliage, or rocks. This results in richer, more vibrant images with increased color saturation and contrast.
- Reduced glare: Glare caused by sunlight bouncing off of shiny surfaces can be distracting in landscape photography. A polarizing filter cuts through this glare, allowing you to capture a clearer, more detailed scene.
- Improved sky definition: By using a polarizing filter, you can darken the sky and make clouds more prominent, resulting in a more dramatic and captivating image.
Whether you’re photographing landscapes with water bodies, lush vegetation, or a cloudy sky, a polarizing filter can be a game-changer. It adds a touch of magic to your images, making them visually stunning and engaging.
To master landscape photography, it’s crucial to incorporate these best practices into your workflow. Shooting in RAW format, utilizing a tripod, and using polarizing filters will elevate the overall quality of your images and help you capture the true beauty of nature. Remember to always keep experimenting and refining your technique to create unique and captivating landscape photographs.
When it comes to landscape photography, capturing stunning images in-camera is only the first step. The real magic happens during post-processing, where photographers have the opportunity to bring out the full potential of their images. Post-processing adjustments can enhance image brightness and contrast, elevating the final landscape shots to breathtaking levels of beauty.
In the world of landscape photography editing, there are various techniques and tips that photographers can use to enhance their images. Whether you’re a professional photographer or a hobbyist looking to up your post-processing game, there are a few key adjustments and techniques that can make a significant difference in your final results.
Here are some landscape photography editing tips to help you take your images to the next level:
- Adjusting Exposure: One of the most basic yet crucial adjustments you can make is to adjust the exposure of your image. This involves tweaking the brightness and contrast to achieve the desired look. Whether you want to emphasize the highlights or bring out the details in the shadows, exposure adjustments can help you achieve the perfect balance.
- Enhancing Colors: Colors play a vital role in landscape photography, and post-processing allows you to bring out the vibrant hues of nature. You can use tools like saturation, vibrance, and hue adjustments to boost the colors in your image, giving them that extra pop.
- Sharpening Details: To bring out the intricate details in your landscape images, sharpening is key. With the right technique and tools, you can enhance the clarity and sharpness of your image without sacrificing overall quality. Just be careful not to overdo it, as excessive sharpening can result in unnatural-looking images.
- Cropping and Straightening: Composition is crucial in landscape photography, and sometimes a little cropping is all it takes to improve the overall balance and aesthetic of an image. Additionally, straightening the horizon line can make a significant difference in the overall impact of your landscape shot.
Remember, post-processing is a personalized art form, and there is no one-size-fits-all approach to editing landscape images. Experimentation is key, so don’t be afraid to explore different techniques and find your unique editing style.
To gain more insights into landscape photography editing tips and techniques, you can check out this comprehensive guide. Happy editing!
Mastering light settings is essential for capturing stunning landscape photography. By understanding the spectrum of natural light and taking advantage of the golden hour, photographers can create images with beautiful colors and a dreamy atmosphere. Embracing backlighting adds depth and drama to your shots, while exploring reflected, diffused, and open shade light can bring out the details and textures in your landscapes.
In addition to understanding light, utilizing the right camera settings is crucial for landscape photography. Adjusting the ISO settings, using aperture priority mode, and balancing the exposure triangle will help you achieve the desired level of exposure and sharpness in your images.
To enhance your landscape photography even further, there are some best practices to keep in mind. Shooting in RAW format gives you greater flexibility in post-processing, while using a tripod ensures stability and allows for long exposure shots. Polarizing filters can help reduce glare and enhance colors, and experimenting with long lenses can provide a unique perspective on your landscapes.
Finally, post-processing plays a significant role in landscape photography. Fine-tuning your images with editing software can bring out the true beauty of the scene and allow you to create your desired aesthetic.
By mastering light settings, understanding camera settings, following best practices, and applying post-processing techniques, you will be well on your way to capturing breathtaking landscape photographs that showcase the beauty of nature. So grab your camera, head out into the great outdoors, and let the light guide you to create stunning images that will leave a lasting impression. Happy shooting!
Frequently Asked Questions
- What are the essential light settings for landscape photography?
The essential light settings for landscape photography include adjusting the ISO, aperture, and shutter speed. These settings will help you capture the ideal amount of light and achieve the desired depth of field and motion blur.
- How can I determine the correct exposure for landscape photography?
To determine the correct exposure for landscape photography, you can use the camera’s built-in light meter or an external light meter. Additionally, you can also learn to read the histogram on your camera to ensure proper exposure.
- Should I use natural light or artificial light for landscape photography?
Both natural and artificial light can be used for landscape photography, and the choice depends on the desired outcome and the specific scene. Natural light, such as golden hour or blue hour lighting, can create stunning effects, while artificial light, like flash or light painting, can add creative elements.
- What is the best time to shoot landscape photography?
The best time to shoot landscape photography is during the golden hour, which is typically the first hour after sunrise and the last hour before sunset. The soft and warm light during this period creates a beautiful and dramatic atmosphere.
- How do I control the dynamic range in landscape photography?
To control the dynamic range in landscape photography, you can use techniques such as exposure bracketing or using graduated neutral density filters. These methods allow you to capture a wider range of light and maintain details in both the highlights and shadows.