Blog

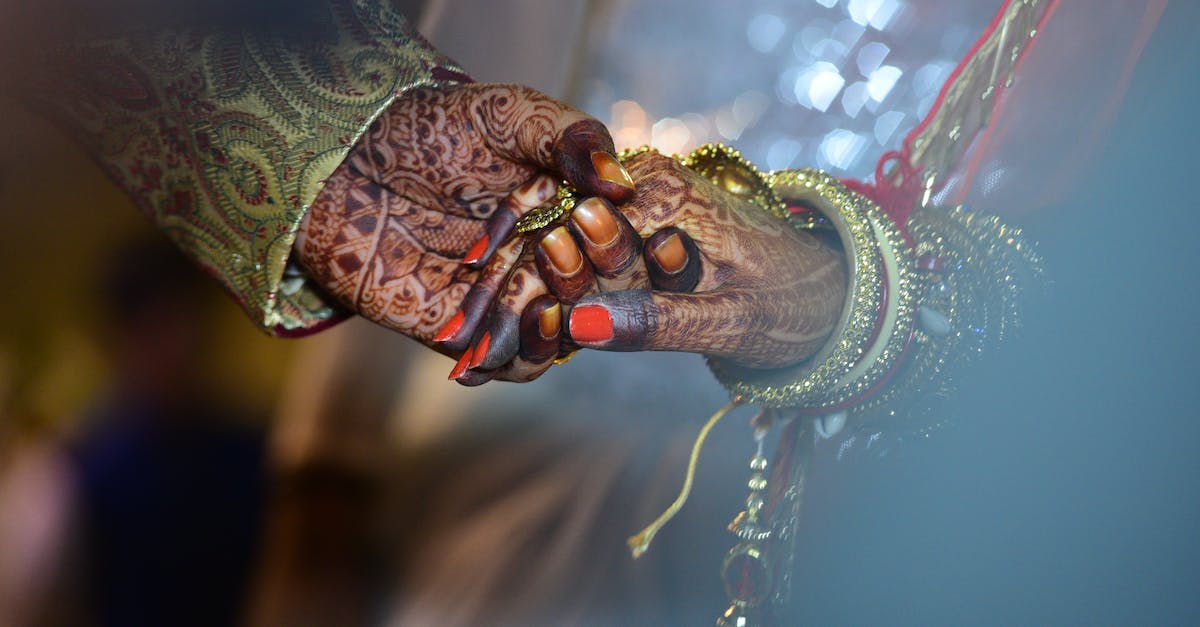
  • How to Become an Effective 2nd Shooter at Wedding Photography Events

    How to Become an Effective 2nd Shooter at Wedding Photography Events

    How to Become an Effective 2nd Shooter at Wedding Photography Events

    If you’re starting out as a photographer, you may want to consider taking on wedding photography as a great way to gain experience and build your portfolio. Working as a second shooter at a wedding event is an invaluable experience, but it also comes with its own unique set of challenges. To be an effective second shooter, it’s important to know what’s expected of you and to be well prepared for the day.

    Understand Your Role

    As a second shooter, your job is to provide supplemental imagery for the primary photographer, as well as taking candid photographs of guests during the wedding ceremony and reception. It is important to understand your role on the day, communicate your needs to the primary photographer, and be aware of their timeline and expectations.

    Be Prepared

    Being well-equipped and prepared is a key part of being a successful wedding photographer. Make sure to have all the necessary equipment beforehand. This includes multiple lenses, plenty of batteries and memory cards, and a backup camera in case of any malfunctions. You should also bring a screenshot of the couple’s photo list to ensure that you get all the shots they want captured.

    Have a Professional Attitude

    As a second shooter at a wedding, you should maintain a professional attitude at all times. You should be punctual, polite and courteous, and dress accordingly. You should also be sensitive to the couple’s wishes and the strict wedding day timeline so that you can stay on top of your schedule of shots.

    Be Adaptable

    Wedding photography is all about being able to adapt and be flexible. You should always be open to change, as things can often pop up on the day. You can never plan for every contingency, so it is essential to remain calm and handle any last minute changes as much as possible.

    Focus on the Candid Shots

    When you’re at the wedding, make sure to always be looking out for any special candid shots you can take. Make sure that you capture the couple’s interactions with each other, as well as those between them and their wedding guests. These shots will give a more personal and intimate feel to the final photos.

    Develop a Working Relationship with the Primary Photographer

    Having a strong working relationship with the primary photographer is essential to being a successful second shooter. Communication and collaboration with the primary photographer is the key to having a successful wedding photography event.

    Be Social Online

    Once you’ve established a working relationship with the primary photographer, be sure to stay connect with them online—through social media and blogging. This is a great way to stay in touch after the wedding, offer them referrals, and work on future projects together.

    Stay up on the Latest Trends in Wedding Photography

    The world of wedding photography is constantly changing, so it’s important to stay up on the latest trends in the industry. Make sure to attend any local workshops or seminars in wedding photography, and to read up on the latest technology and techniques to ensure that you’re always up to date.

    Summary

    Being an effective second shooter at a wedding photography event requires organization, preparation, professionalism, adaptability and a good relationship with the primary photographer. With the right skills and knowledge, you can become a great asset to any wedding photography team.
  • 7 Tips to Make Fine Art Photography Stand Out in the Miami Scene

    7 Tips to Make Fine Art Photography Stand Out in the Miami Scene

    7 Tips to Make Fine Art Photography Stand Out in the Miami Scene

    Miami is a vibrant and bustling city. And the art, especially photography, is no exception.

    Fine art photography is a particular branch of photography that uses alternative techniques, often associated with traditional art, to create something unique. It has become increasingly popular in recent years, especially in cities like Miami.

    But in a city where everybody has a great camera and a passion for photography, how can you make your fine art photography stand out? Here are seven tips on how to do that in the Miami scene.

    1. Look Closer

    Miami is a city of vibrancy, color, and beauty. To make your fine art photography stand out from the rest, you need to take a step back and look closer. Look beyond the obvious and explore the subtle beauty of the city, from its hidden side alleys to its hidden beaches. Find the extraordinary in the ordinary and let your photography do the talking.

    2. Embrace New Perspectives

    Shooting from a different and fresh perspective is also key when creating unique fine art photography. Be brave and try out new angles and techniques to tell your story. You don’t have to stick to conventional perspectives; you can view the world from a different, more creative point of view.

    3. Focus on Night Shots

    Night photography is a great way to stand out in Miami. The city has an amazing night life and bustling nighttime energy. Take advantage of the available light sources, such as street lights, neon signs, and fireworks. These will help you create stunning images that are sure to be remembered.

    4. Use Color as a Creative Tool

    Colors can be powerful creative tools for capturing stunning photographs. Take the time to choose the right colors for your photography project. Pay close attention to the background and foreground, as well as any pale or vibrant shades. Be brave when combining different colors and be sure to pick out the finest details that can bring your creation to life.

    5. Be Playful with Light

    Lighting is a key element to make your fine art photography unique and stand out. Make sure to use a variety of lighting styles and techniques to enhance your art. Create a distinct dynamic between light and darkness, as this will make your work stand out. Experiment with shadows to play with the emotion of your photography.

    6. Employ Creative Effects

    Don’t be scared of getting creative with post-processing effects. By using them in the right way they can really enhance your visuals. Be careful not to overdo it though. Over-processing can easily take away from the beauty of your photograph.

    7. Make Connections

    Finally, the best way to make your fine art photography stand out in Miami is to get creative and make connections. Whether it’s between people, different stories, or different parts of the city, by connecting it, you can create a more meaningful story that can also be communicated more effectively.

    By implementing these seven tips, you’ll be sure to make your fine art photography stand out in the Miami scene. Don’t be afraid to experiment, take risks, and be creative in order to make your work memorable.

  • How to Take the Perfect Wedding Photos for the Stylish Bride

    How to Take the Perfect Wedding Photos for the Stylish Bride

    How to Take the Perfect Wedding Photos for the Stylish Bride

    A wedding is the most special and important day for a bride. It’s a special day that should be captured perfectly to ensure that the bride can look back fondly on one of the most important days of her life. While most couples go to great lengths to ensure that every detail of their wedding day is perfect, taking beautiful wedding photos are often put off to the last minute. The results of this last-minute rush can be a beautiful, but not especially stylish, wedding photo album.

    However, with a bit of planning and preparation you can take stunning wedding photos that will make the stylish bride look and feel beautiful. Although there are many tips and tricks you can use to take the perfect wedding photos, here are the five essential steps to help you capture the perfect wedding photos for the stylish bride.

    1. Choose the Right Photographer

    The first step to taking perfect photos for the stylish bride is to choose the right wedding photographer. Not only should you look for a photographer who has experience taking wedding photos, but also one whose style of photography matches that of the bride. Look for portfolio samples that capture the atmosphere and emotions of the day, as well as photos that display the couple’s style. A good photographer should be able to capture the couple’s personality and style in their photos. Brides should take their time when researching photographers and should be sure to get to know them before signing a contract.

    2. Prepare for the Big Day

    Once a photographer is chosen, it’s time to start planning for the wedding photos. Brides should make a list of the shots they definitely want taken, such as the first kiss, photos with family and friends, and the reception photos. This list should be shared with the photographer so that they are aware of the bride’s expectations. Brides should also take into account their own style when selecting their clothing, makeup, and accessories. Makeup should be natural and subtle to ensure that the stylish bride looks her best. The bride should also be sure to discuss the details of the day with the photographer to ensure that the photographer is aware of the timeline, locations, and any other special requests such as props or backdrops.

    3. Make Use of Natural Lighting

    Natural lighting is one of the most important elements when it comes to taking beautiful wedding photos. Natural light has a softer, warmer quality and helps to create flattering photos. Good photographers will know how to make the most of the natural light and work around any glaring sunlight. They will also be able to suggest the best time of day to take the photos, as well as the best locations in and around the wedding venue to take them.

    4. Get Creative

    Once all the traditional photos have been taken, you can get creative with the wedding photos. Photographers should encourage the couple to be creative, think outside the box, and have fun with their poses, locations, and props. Taking photos in unexpected settings and using props, such as balloons and flowers, can help add an extra element of style and whimsy. Photographers should also never be afraid to experiment with angles and perspectives since these can be very effective when it comes to taking great wedding photos.

    5. Make Sure to Enjoy the Moment

    Finally, the most important tip to remember is to enjoy the moment. Weddings can be a stressful time, so it’s important to take some time to relax and take in the special moments. As long as the photographer and the couple take time to enjoy the moment and capture the real emotion and feelings of the day, the resulting photos will be truly beautiful and stylish.

    By taking these five steps, the stylish bride can make sure that her wedding photos are the perfect expression of her unique style and personality. With a bit of planning and preparation, couples can be sure to capture the perfect wedding photos that will make them look and feel beautiful for years to come.

    Good luck!

  • Using Low Angle Photography To Create Memorable Fashion Images

    Using Low Angle Photography To Create Memorable Fashion Images

    Using Low Angle Photography To Create Memorable Fashion Images

    Fashion is an ever-evolving art form and fashion photographers have to keep up with the latest trends if they want to capture fashion images that are both memorable and striking. One technique that fashion photographers can use is low-angle photography. Low-angle photography has many advantages and can be used to wonderfully express fashion. In this article we will look at what it is and how you can use it to create great fashion images.

    What is Low-Angle Photography?

    In photography, the angle of view refers to the angle at which the camera is positioned in relation to the object or subject. Low-angle photography is the technique of taking photographs from a very low angle. This is usually achieved by either bending down or using a very low camera stand. The result is photographs taken from an angle that is much lower than eye level.

    Advantages of Low-Angle Photography

    Using low-angle photography has many advantages when it comes to fashion photography. The most important of these is that it helps to emphasize certain features of the outfit being photographed. A low-angle photo will highlight the flow of a dress or the details of a pair of shoes in a way that an eye-level angle would not. When taking fashion pictures it is essential to pull focus on the item being photographed and low-angle photography can help to do this. Another advantage is that, when taking low-angle photos, the photographer often can capture interesting backgrounds and textures that may otherwise go unnoticed.

    Creating a Memorable Fashion Image with Low-Angle Photography

    If you are planning on using low-angle photography to create memorable fashion images, there are a few tips that can help you to get the best results. Firstly, you should try to shoot in an area that has interesting and varied background elements, such as textures and colors. This will give your photos depth and enable the fashion item being photographed to stand out. Secondly, be creative with your shooting angle. Experiment with different angles and distances to see what works best for the shot you are trying to capture. Finally, make sure you consider the light and use it to best effect.

    Conclusion

    Low-angle photography is a great tool for fashion photographers, as it helps to emphasize the details and features of fashion items. Taking low-angle photos can also add depth and interest to fashion images that would not have been possible with eye-level photographs. When used correctly, it can be a great way to create memorable and striking fashion images. So if you are looking to take your fashion photography to the next level, why not try shooting from a low-angle?

  • A Guide to the Best Mirrorless Cameras for Beginners

    A Guide to the Best Mirrorless Cameras for Beginners

    A Guide to the Best Mirrorless Cameras for Beginners

    When it comes to photography, there are many different types of cameras to choose from. One of the most popular types of cameras for beginners is the mirrorless camera. Mirrorless cameras offer many benefits, such as being lightweight and more affordable than traditional DSLR cameras. They are also more compact, allowing for easy transport and storage.

    While traditional DSLRs still dominate the market, mirrorless cameras are quickly gaining in popularity due to their convenience and versatility. They are ideal for beginners, as they are easy to use and don’t require specialized knowledge or expensive lenses.

    What is a Mirrorless Camera?

    A mirrorless camera is a digital photography camera that eliminates the mirror and optical viewfinder that are typically found in DSLR cameras. This type of camera uses an electronic viewfinder, allowing for autofocus and live preview. Mirrorless cameras are designed to be smaller and lighter than traditional DSLRs, making them more convenient for travel and everyday shooting.

    Mirrorless cameras provide many advantages to beginners, the most significant being their affordability and versatility. They are lighter than DSLRs, making them easier to handle, and they can use a variety of interchangeable lenses. Thus, they offer the same level of flexibility as DSLRs without the weight or bulk, making them ideal for outdoorsy and travel photography. You can also enjoy the latest technology without breaking the bank.

    How to Choose a Mirrorless Camera

    Before buying a mirrorless camera, it is important to consider what features you are looking for. Here are some of the most important factors to consider when choosing a mirrorless camera:

    Sensor Size

    Sensor size is one of the most important factors to consider when buying a mirrorless camera. Generally, larger sensors (measured in megapixels) will produce higher quality images as they capture more light. However, a larger sensor may require you to buy more expensive lenses to take full advantage. Smaller sensors are more economical and will still provide good image quality. It is important to consider how large a sensor you need for the type of photography you plan on doing.

    Autofocus System

    Autofocus is a necessary feature on most mirrorless cameras. You need to make sure you choose a camera with an accurate and reliable autofocus system. Also, consider how many autofocus points your camera has. The more autofocus points, the faster the camera will be able to lock onto your subject.

    Image Quality

    The most important factor when it comes to image quality is the sensor. Make sure that you choose a camera that has a large enough sensor to capture the type of images you are looking for. Additionally, look for features such as efficient noise reduction, advanced color reproduction, and wide dynamic range.

    Best Mirrorless Cameras for Beginners

    Now that you know a bit more about mirrorless cameras, you are probably wondering what the best mirrorless cameras for beginners are. Here is a list of some of the top rated mirrorless cameras for those new to photography:

    Canon EOS M50

    The Canon EOS M50 is one of the best entry-level mirrorless cameras on the market. It features a 24.1MP APS-C size CMOS sensor with advanced autofocus and dual-pixel technology. The camera is fast, has excellent image quality, and offers 4K video recording. It’s an ideal choice for those wanting an easy-to-use camera that produces excellent photos and videos.

    Fujifilm X-T200

    The Fujifilm X-T200 is an ideal choice for those wanting an affordable mirrorless camera without sacrificing quality. It features a 24.2MP APS-C X-Trans CMOS 4 sensor with a great autofocus system and 8fps burst mode. Additionally, it boasts a wide dynamic range and excellent video quality.

    Olympus OM-D E-M10 Mark IV

    The Olympus OM-D E-M10 Mark IV is a great all-around option for beginners. It features a 20.3MP, Four Thirds BSI Live MOS sensor and boasts an impressive 5-axis image stabilization system. Additionally, the camera is compact and lightweight, making it great for travelers. What’s more, it offers 4K video recording, RAW shooting, and an impressive autofocus system.

    Conclusion

    If you are looking for a good mirrorless camera, there are many great options available for beginners. Each of the cameras mentioned here offer different features, so make sure you do your research and find the one that best suits your needs. With the right camera, you will be able to take amazing photos and videos!

  • Exploring the Benefits of Professional Fine Art Photography Printing Services

    Exploring the Benefits of Professional Fine Art Photography Printing Services

    Exploring the Benefits of Professional Fine Art Photography Printing Services

    Fine art photography is a beautiful way to capture the world around us and is becoming increasingly popular. From stunning landscapes to vibrant city scenes, the skill of the photographer and the artistry of the photograph are what make it truly special. But professional fine art photography printing services are essential for turning these works of art into impressive prints for display.

    The art of fine art photography begins with the photographer’s skills. Expert photographers can communicate a message, create interesting compositions and manipulate light to create one-of-a-kind images. However, having a professional printer complete the job is necessary for a perfect final product. Here are the benefits of professional fine art photography printing services.

    High Quality Materials

    When it comes to fine art photography, the quality of the print is just as important as the image itself. Professional printing services use the highest quality paper with thicker weight, vivid colors, and superior finishes. This ensures extended durability, so the photo looks just as good years later as it did on the day it was printed.

    Fresh Ink

    Using the highest-grade printer ink helps produce long-lasting prints that won’t fade. Professional printing services also use large, high-capacity ink cartridges for consistent color throughout the entire print, providing brighter colors and sharper images. Choosing a professional printing service will assure you of the highest quality product.

    Longevity and Durability

    High-quality paper and inks are essential for maintaining the quality of a fine art photograph. Professional-grade inks, papers and fade-resistant materials create a more enduring piece of artwork and will protect the photograph from external elements. This ensures that the colors and details remain vibrant and true-to-life.

    Accuracy

    Another advantage of using a professional printing service is the assurance of accurate color. Digital color printers use a process called ‘color-calibration’ to accurately transfer color from a digital image to the print. Professional color technicians manually adjust the printer’s settings to guarantee accurate color consistency and accuracy.

    Quality Control

    A professional printing service has quality control measures in place to check each print for accuracy and consistency. The technicians will review a sample of each print to ensure that it meets the highest standards of quality.

    Customization

    When you choose a professional printing service, you can customize your print in a variety of ways. You can choose the paper stock, size, finish and many other attributes. Additionally, you can have a digital watermark added to prevent unauthorized usage of your photograph.

    Time & Cost Savings

    Using a professional printing service will save you time and money. Professional printers can produce multiple prints of your photograph in a fraction of the time it would take you to do it yourself. Additionally, they can be more cost-effective due to their access to wholesale printing materials and discounts on printing costs.

    Expert Advice

    When you choose a professional printing service, you have access to expert technicians who can provide invaluable advice on how to produce the best prints. Not only will this ensure you get the highest quality print, but it can also help you save time and money.

    Conclusion

    Professional fine art photography printing services provide many benefits. From high quality materials to expert advice and time savings, these services can help you create eye-catching prints that will last a lifetime. Whether you are searching for a basic print or a complex custom piece, a professional printing service should be your first choice.

  • Marketing for Real Estate Listing Photographers: How to Capture and Present Stunning Home Interiors

    Marketing for Real Estate Listing Photographers: How to Capture and Present Stunning Home Interiors

    Marketing for Real Estate Listing Photographers: How to Capture and Present Stunning Home Interiors

    For real estate listing photographers, the success of a property’s sale often depends on the quality of the photographs used in marketing materials. Presenting stunning photos of home interiors can be an effective way to draw buyers’ attention to the property and help to make a sale. Here are some tips for real estate listing photographers to capture and present stunning home interiors.

    Create an Appealing Environment

    When taking photographs for real estate listings, the photographer needs to create an environment that will be appealing to potential buyers. This includes making sure that the home is clean, free of clutter, and neutrally decorated. The photographer should also make sure that the lighting in each room is adequate and that the furniture is arranged in a pleasing manner.

    Choose the Right Angles

    When working on interior shots of real estate listings, the photographer needs to be aware of the best angles to capture the beauty of the home. The photographer should position themselves at different angles in each room to find the best shots for the property. It is also essential to make sure that the camera is level and that all photos are taken with a straight horizon.

    Utilize Props

    In some cases, real estate listing photographers may want to use props to add visual interest to interior shots. This can be effective in highlighting certain features of the property, such as architectural features or furniture. The photographer should be mindful of not overusing props and making sure that they are non-distracting.

    Use as Much Natural Light as Possible

    Making use of natural lighting is one of the best ways to create a soothing and inviting atmosphere for interior shots. Natural light ensures that all the rooms in the home are equally lit and uniformly illuminated. Photographers should avoid using artificial lighting and instead should use as much natural light as possible.

    Optimize the Post-Production Process

    The post-production process for real estate listing photographs is almost as important as the shooting itself. The photographer should optimize each shot for sharpness, vibrancy and contrast by adjusting levels and saturation in post-processing. It is also important to make sure that all distractions, such as wires and clutter, are removed from the final photo.

    Utilize Drone Technology

    Drone photography is an increasingly popular option for real estate listing photographs. Utilizing drone photography can allow the photographer to capture shots that are not easily accessible, such as aerial views of pool areas and larger homes. The photographer should make sure that they are familiar with the regulations governing drone usage in their area before attempting to utilize this type of photography.

    Present the Photos in Unique Ways

    One of the most important elements of successful real estate listing photography is presentation. Presenting the photos in unique ways can catch the eye of potential buyers and spur them to take a further interest in the property. Photographers can consider utilizing virtual tours, interactive maps, or other creative means to showcase the shots.

    Conclusion

    Real estate listing photography is a unique discipline and requires special skills to capture stunning home interiors. Creating an appealing environment and using natural light as much as possible are essential components of successful photography. Optimizing the post-production process and presenting the photos in unique ways can also help to ensure satisfactory results. By employing the tips articulated in this article and applying them to their real estate listing photos, photographers can help to make the property they’re selling stand out from the competition.

  • Exploring the Best Budget Camera Options for Star Photography

    Exploring the Best Budget Camera Options for Star Photography

    Exploring the Best Budget Camera Options for Star Photography

    Star photography has become an increasingly popular activity among amateur and professional photographers alike. With the right equipment, you can capture stunning shots of the night sky and its infinite wonders. The challenge is, acquiring said equipment can sometimes be a little daunting, particularly when you’re working with a budget. In this blog post, we’ll take a closer look at some of the best budget camera options for star photography.

    1. Canon EOS Rebel SL3

    Let’s kick things off with the Canon EOS Rebel SL3. This entry-level DSLR camera is an excellent option for budding astrophotographers as it offers excellent image quality and a wide range of features for an affordable price.

    The camera sports a 24.1 megapixel CMOS sensor, an ISO range of 100–25600, and a 9-point autofocus system. It also comes with a 3–inch vari-angle LCD monitor and Wi-Fi connectivity for easy sharing.

    In terms of performance, the SL3 is capable of capturing stunning images of stars and other celestial objects. It’s even capable of capturing the northern lights. The only downside is that it doesn’t come with a dedicated “night” mode, but with a bit of practice, it’s quite capable of getting great photos.

    2. Nikon D3500

    Another excellent option for star photography is the Nikon D3500. This entry-level DSLR camera is an excellent choice for amateur photographers who want to take their night photography to the next level.

    The D3500 boasts a 24.2 megapixel DX-format CMOS image sensor and an EXPEED 4 image processor. It offers an ISO range of 100–25600 and a 5-point autofocus system for clear shots of stars and other sky objects.

    The Nikon D3500 is an excellent camera for astrophotography due to its excellent noise reduction. This means that your night shots will be far less noisy and more vibrant. Plus, it has a dedicated “Night Vision” mode for maximum potential in low light settings.

    3. Sony a7R III

    If you’re looking for a more advanced option and don’t mind investing a bit more in your gear, the Sony a7R III is an excellent option. This full-frame mirrorless camera combines excellent image quality, speed and performance into one package.

    The a7R III sports a 42.4 megapixel full-frame Exmor R CMOS sensor and an ISO range of 100–32000. It also offers a much faster shooting speed, a 5-axis in-body image stabilization system and improved autofocus capabilities.

    In terms of performance, the a7R III is capable of capturing stunning photos of the night sky. Its 5-axis in-body image stabilization system also helps reduce blur and camera shake for increased image clarity. However, it does have a few downsides, namely its hefty price tag and its limited battery life.

    4. Canon Powershot G7 X Mark II

    For those looking for a more compact option, the Canon Powershot G7 X Mark II is an excellent choice. This compact digital camera offers excellent image quality and a number of impressive features in a highly portable package.

    The G7 X Mark II sports a 20.1 megapixel 1-inch CMOS sensor and an ISO range of 125–12800. It also offers an impressive 4.2x optical zoom and a 3-inch vari-angle LCD screen for easier viewing. Plus, it has Wi-Fi and Bluetooth connectivity for quick sharing.

    The G7 X Mark II is capable of capturing stunning photos of the night sky. It offers excellent low-light performance and is capable of capturing the Milky Way very clearly. The only downsides are its relatively limited lens range and a relatively short battery life.

    Conclusion

    There you have it: four of the best budget camera options for star photography. Each camera offers its own unique set of features and capabilities, so it’s best to do your research to figure out which one will best suit your needs. Whichever one you choose, you’re sure to get beautiful shots of the night sky.

  • Exploring the Benefits of Using a Zoom Lens for Landscape Photography

    Exploring the Benefits of Using a Zoom Lens for Landscape Photography

    Exploring the Benefits of Using a Zoom Lens for Landscape Photography

    Photographers have a broad selection of lenses to pick from for landscape photography and one of the most popular is the zoom lens. There are many reasons why this type of lens is ideal for landscape shots, and here we will explore those reasons in more detail.

    Versatile Focusing Options

    When you are outdoors shooting, you must account for the vast range of distances between you and the subject you are shooting. The zoom lens provides the versatility to quickly fine-tune the focus settings to a more close-up shot or a more distant one. In addition, you can even create a sense of depth with a closer shot and a wider angle instead of having to switch lenses.

    Use in Poor Lighting Conditions

    Landscape photography often requires shooting in low light conditions, and this is particularly true if you are shooting during sunrise or sunset. The zoom lens is beneficial for such shooting because it provides a longer minimum focal length which allows you to use slower shutter speeds without compromising on sharpness. This helps to produce sharper images that have greater clarity in low light conditions.

    Compact and Lightweight Design

    Many zoom lenses on the market nowadays are much more compact and lightweight than other types of lenses. This makes them ideal for photographers who need to take their camera gear out into the field with them, but don’t want the burden of carrying heavier, bulkier equipment. A lightweight zoom lens will also be much easier to transport over long distances.

    Distance Compensation

    When shooting with the zoom lens you are able to quickly adjust the focal length without changing lens. This allows you to quickly compensate for distances when switching between shots, which is particularly useful in dynamic conditions such as outdoors or in extreme weather conditions. Additionally, the ability to change the focal length quickly helps to keep your shots from appearing too close-up or too far away.

    Creative Depth of Field Control

    Shooting with the zoom lens enables you to control the depth of field of your shots. By adjusting the zoom, you are able to isolate specifics areas in the foreground or background to add volume to a shot. This can also help to create an artsy and dramatic feel to the landscape photos.

    Multiple Focal Lengths

    When shooting landscapes it is beneficial to be able to swap between various lenses quickly and efficiently. Instead of switching between lenses, with the zoom lens you can simply adjust the zoom to the desired focal length. It is also helpful if you are working with a static subject—by altering the focal length you can transform the same shot into different angles without having to move around.

    Reducing Camera Shake

    Using the zoom lens for landscape photography also helps to reduce the amount of camera shake that can occur from hand-holding your camera. Its longer focal lengths allow you to utilize slower shutter speeds without introducing camera shake or blurring in your images.

    Conclusion

    As you can see, there are many reasons why the zoom lens is advantageous for landscape photographers. It provides a versatile focal length range, helps reduce camera shake and provides more creative depth of field control. The zoom lens is a great choice for any photographer looking to capture the beauty of landscapes in sharper images.

  • Navigating Street Photography Confrontations and the Laws Surrounding It

    Navigating Street Photography Confrontations and the Laws Surrounding It

    Navigating Street Photography Confrontations and the Laws Surrounding It

    Photographers that engage in street photography all face similar challenges, often involving confrontation and a knowledge of the legal framework in which they work. It’s important to understand the implications of street photography both legally and in personal dealings, so here are some tips on navigating these challenges.

    Understand Local Laws

    Before you can begin navigating street photography confrontations, you must understand the local laws regarding taking photos of people and in public. Generally, you are allowed to take photos of people without their permission provided that the photos don’t violate someone’s reasonable expectation of privacy. In some cases, this means you must be careful about photographing people in hospitals, in homes, and in certain types of businesses. It’s important to research these laws before you start taking photos and to be familiar with the legal landscape.

    Talk to People

    Unlike some other types of photography, street photography involves interacting with real people in public. The best way to navigate a confrontation is to talk to the person. You don’t need to explain your entire intention behind the photo, but it’s important to be respectful and aware of the other person’s feelings. This can be a difficult and uncomfortable situation, but it is possible to respectfully engage people and to explain why you’re taking the photo.

    Be Careful with Photo Editing

    When you’re done taking photos, you need to be careful with photo editing. You may be tempted to edit the photos to make them more interesting, but this can backfire if the subject believes that you’ve published or used their photo in a way they don’t approve of. Make sure that you look over the photos and edit them in a way that respects the privacy and integrity of the people in the photos.

    Look out for Private Property Locations

    When you’re engaging in street photography, you may need to be extra careful about photographing private property. Generally, you can photograph public places, but private property such as a home, an office, or even a store can be have more strict rules regarding photography. If a business has a “no photography” sign, be sure to respect it. And if you’re ever in doubt about photography in a specific location, ask permission before taking any photos.

    Find Out What the Community Thinks

    Finally, it’s important to find out what other street photographers and members of your community think of your photography decisions. Talk to other photographers or even local businesses to get an idea of what’s accepted. This can help you avoid any confrontations since you’ll know what’s okay to photograph and what isn’t.

    Navigating street photography confrontations and understanding the legal landscape surrounding it can be difficult, but it doesn’t need to be. By understanding your local laws and the community’s sensibilities, you can take great street photography without the need for any confrontations.