Sony A6000: how to take advantage of the fast AF
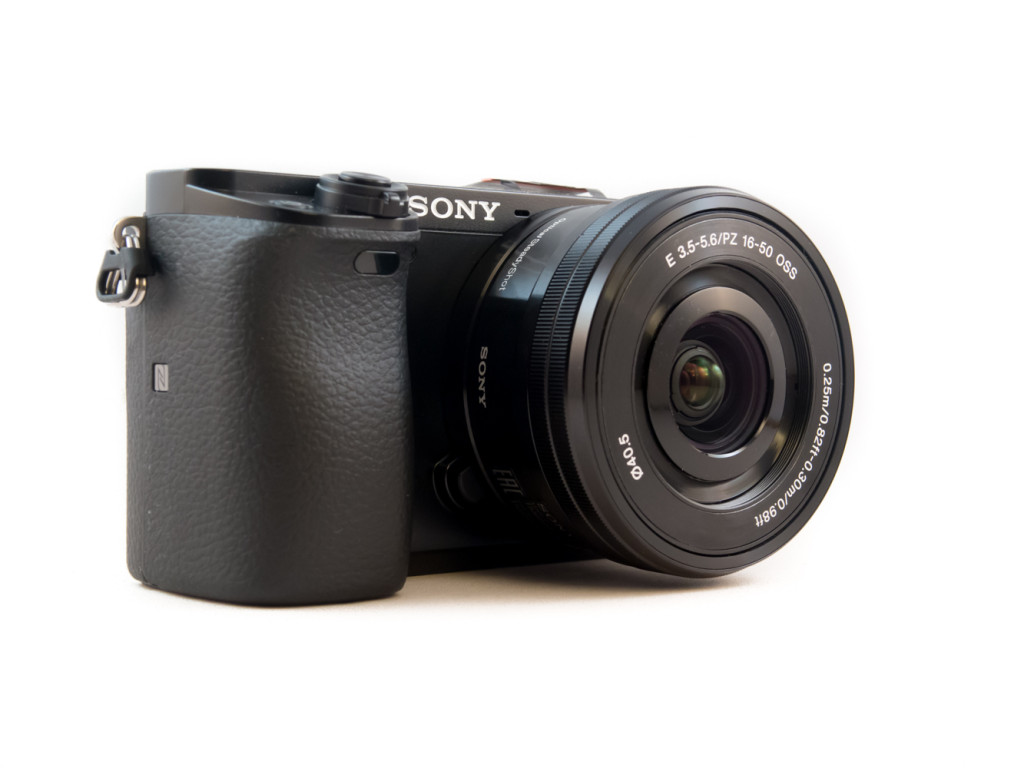
I’ve been playing with the Sony A6000 for the last week, updating my impressions daily. The on-sensor hybrid AF system is indeed very fast. It uses 179 phase detect AF points as well as 25 contrast detect points and covers over 90% of the sensor.
In order to get the most out of the Sony A6000’s AF system, it is necessary to make yourself familiar with the advanced autofocus functions. This will mean straying from iAuto mode for certain functions to work.
Focus area set in P, A, S, M (access through the Fn button)
- Wide: uses all 179 phase-detection points and 25 contrast-detection points. Use this are set to take full advantage of all detection points.
- Zone: AF works with the detection points in the selected specified region.
- Center: focuses automatically on a subject in the center of the image. When used together with the AF lock function, you can compose the picture you want.
- Flexible Spot you can choose among the 25 contrast detection AF points available for use (Small, Medium, Large).
AF Modes
- AF-A (Automatic AF): when the shutter button is pressed halfway down, the camera automatically recognises whether the subject is moving or not, and switches the AF mode between AF-S and AF-C accordingly. Use this mode to shoot various subjects at the same time, or to avoid changing the AF mode manually.
- AF-S (Single-shot AF): autofocus operates when the shutter button is pressed halfway down. Once the subject is in focus, the focus is locked. It is suitable for shooting motionless subjects, such as landscapes or snapshots.
- AF-C ( Continuous AF): autofocus continues to operate and keeps adjusting the focus while the shutter button is pressed and held halfway down. It is suitable for shooting moving subjects, such as sports or action photography. If you want to take full advantage of AF tracking.
Tip: AF-C is more reliable than AF-A on the A6000
Smile/Face Detect (MENU →  → page 5 → Smile/Face Detect)
You can set Face Detection to OFF, ON (Registered faces, see next subject), ON (detects all faces, even without registering them first).
Activate Smile Shutter and your camera will automatically take the photo when your subjects smile. You can choose a varying degree of smile from slight to big. No need to press the shutter; the camera does it for you. And it works! Excellent function if you need it.
Face Registration (MENU →  → page 5 →Face Registration]
Great for portraits and family shots. The procedure is simple: in the Face Recognition menu, go to ‘New registration‘, take a picture of your subjects’ face in good lighting and the camera will register it. You can take register up to 8 faces, and the camera will give priority focus-by-number to this face when Smile/ Face detect is set to ON.
I noticed Face Recognition improves AF accuracy even more, so it is a very useful feature. Funny thing is that he recognition software detects Cameron Diaz as my girlfriend, which made her euphoric 🙂
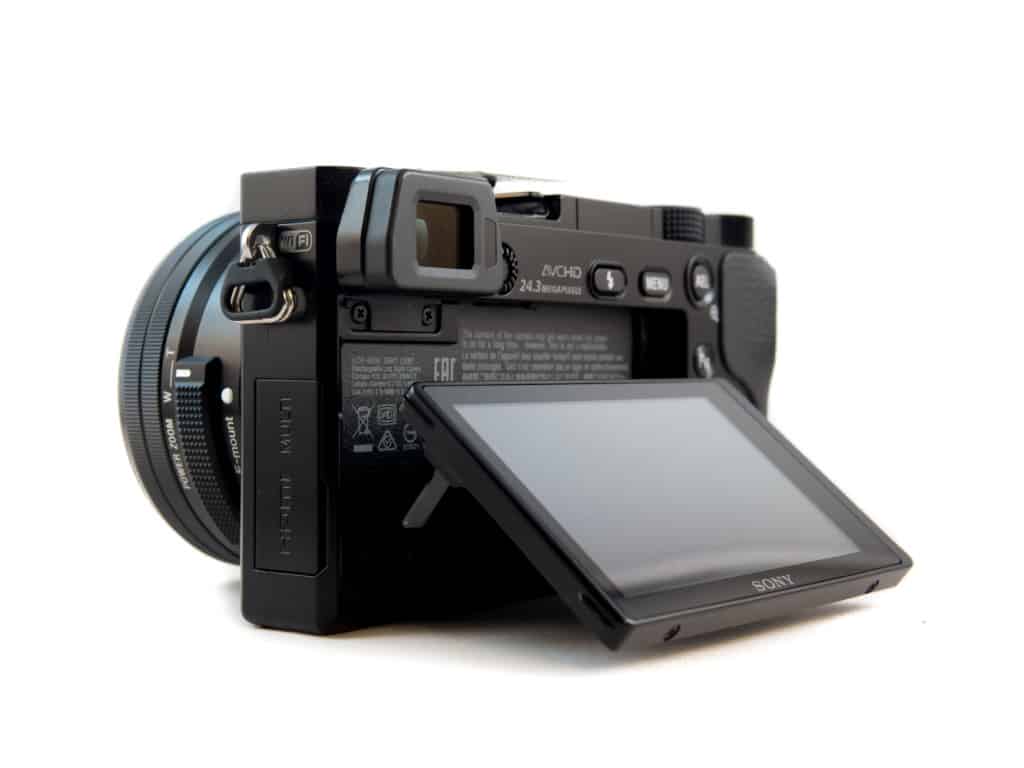
Lock-on AF ((MENU →  → page 5 → Lock-on AF)
- Lock-on AF allows the camera to lock on a subject and follow focus when your subject moves.
- For best tracking results, set the Focus mode to AF-C, center your subject in your frame and press the central button in the control wheel.
- The Sony A6000 will follow your subject. Leave it ON always, it is a very handy feature, and you’ll get used to the process in no time! You can check out the rest of my multi-page review here.
Conclusion
Although not as customizable as the Sony A77II, the Sony A6000’s AF system is in some ways superior. Especially for the novice photographer, or if you’re new to Sony’s AF system. It’s easier to set-up and more straightforward to customise.
After a few weeks of use, you’ll quickly get the hang of the different Focussing Modes, Focus Areas and Focus Settings.
It’s always useful to go back to the manual if you’re unsure about certain features, and to use online guides like this one to help you along. If you have any questions, feel free to comment below.


Good article, but you don’t answer the question posed by your title? I.E., which exact functions to select.
Hi Harry, thanks for your comment. I thought I was clear enough in my article, so thanks for letting me know I wasn’t. I just added some more info.
There is no magical setting that will work for every situation, if you want to get the most out of the Sony’s A6000 speedy AF you’ll need to familiarise yourself with these functions and apply this knowledge to the specific scene you are shooting.
So for an action scene Lock-on AF should be ON, set the Focus mode to AF-C (works beter than AF-A), center your subject in your frame and press the central button in the control wheel. The Sony A6000 wil follow your subject using the phase detection points that cover 91% of the sensor.It’s useful to have your subject(s) in the registered faces if at all possible as it will help the cameras tracking.
For a group portrait: wide, face detect and smile detect on, the camera might even squeeze the trigger before you do
Sometimes its easier for the camera to know what you want to focus on if you put the focus area to center or zone.
So you’ll need to familiarise yourself with these specific functions to get the most out of the AF.
Excellent!! Thanks a lot!!
Did you try functionality: EYE START AF too?
When I tried it, camera wrote: Invalid with this lens (SELP 1650). This function was part of advertisement A6000 but I dont know, where and how to use 🙁
Thanks
Milan
Hi Milan, yes Eye start AF should work with the SELP1650. Did you buy it it with the A6000? The lens might be defective, my kit lens was.
… your replies are fast … as AF A6000 🙂 Thanks
I tried another lenses: 24F18 and 50F18 … the same problem: “Invalid with this lens” 🙁
BUT: I put fuction “EYE AF” to “Center Button” and before shooting I touch this center button and camera can find EYE of my object. So … for me is “done”. Thank you
Great to read your problem is solved Milan, so I’m thinking it is a incompatibly with Eye-AF and a menu setting?
I found in manual NEX-6:
Eye-Start AF: Sets whether or not to use autofocus when you look through
an Electronic Viewfinder (sold separately for the NEX-5R)
with the LA-EA2 Mount Adaptor attached (sold separately).
Aha, I see the problem: indeed Eye-AF and Eye start AF or not the same.
Used the a6000 for baseball with the sony 70-200 2.8 with adaptor…. quick focus, fps good but during a play i shot several frames in succession then moved the camera to another part of the field for the second part of a double play…. with my eye still to the ev, the last frame shot from the initial series still was in view for a second or two so I cud not capture the second part of the play until that frame cleared the viewfinder…. Not sure why, but my DSLR (canon 1dx) seems to handle situations like this much faster. Any comments would be welcomed.
Hi Robert, thanks for your comment. You are not using the Fast Hybrid AF with an adaptor. You’ll need to get an e-mount lens if you want to use the Fast Hybrid AF. These are all currently compatible lenses:
E 16mm F2.8
E 20mm F2.8
E 35mm F1.8 OSS
E 50mm F1.8 OSS
E 30mm F3.5 Macro
E 24mm F1.8 ZEISS
E 10-18mm F4 OSS
E PZ 16-50mm F3.5 – F5.6 OSS
E 18-55mm F3.5 – F5.6 OSS
E 18-200mm F3.5 – F6.3 OSS
E 18-200mm F3.5 – F6.3 OSS LE
E PZ 18-200mm F3.5 – F5.6 OSS
E 55-210mm F4.5 – F6.3 OSS
E PZ 18-105mm F4 G OSS
E 16-70mm F4 ZEISS OSS
FE 28-70mm F3.5 – 5.6 OSS
FE 35mm F2.8 ZEISS
FE 55mm F1.8 ZEISS
FE 24-70mm F4 ZEISS OSS
FE 70-200mm F4 G OSS
There is also a small delay between the live action and what you see in your viewfinder when using the LA-EA2.
Thanks so much, Wim….
Very welcome Robert.
Robert if I understand you correctly you could not get the second shot because the previous shot was still showing in your EVF. There is a setting that may alleviate this for fast shooting under the Cog Wheel menu section 1 item 5 it’s called “Auto Review” turn this off and your EVF will not show any reviews of your shots so you can continue shooting. I hope this helps..
Thanks for this very useful article!
I have a question. Do you know which AF modes use hybrid AF? Or all of them? Or only the AF-C mode? Thank you!
Sorry, my previous question was asked for both still and movie shooting.
Thanks!
Good to know you found the right info Kai, if you have any more questions, let me know. And enjoy your A6000!
Sorry for my bad English that mislead you.
No, I haven’t found my answers yet.
Let me repeat my questions. 🙂
My question is:
Which AF mode uses phase detection for both still and video shooting?
I suspect only the AF-C is using it.
Thank you and have a nice day. 🙂
The best way would be to have the A6000 Focus area in Wide and AF-C for video if you’d want it to follow focus for both still and video. With video, AF-A would switch to AF-C automatically, since AF-S relies on the pressing of the shutter button to focus on a subject, and is only used for stills.
If you’d have it on Flexible Spot , my guess is that it would use contrast detection for the spot you selected, but never tried this. Zone would then again use the Hybrid AF points in the selected area and so on.
Phase detection is faster, but contrast detection is more precise. So on-sensor hybrid AF uses both to achieve the fast AF. First it will use phase detection to calculate the distance to the subject, and a split second later the bionz processor will use contrast to do the final focus. In general, all AF modes use hybrid AF.
If all AF use hybrid, that would be great! The Sony’s online manual confused me, and it does not clearly mentioned it. It’s great to know all AF use hybrid. Thanks for your prompt reply.
http://www.sony-asia.com/microsite/dslr_userguide/ILCE-6000/en/contents/TP0000390693.html
Hi Kai, yes Sony are not that clear in their manuals huh…. I’ve noticed that you can find different snippets of information on region sites, sony.co.uk is good too.
So hybrid AF works up to F/13, after that it switches to only contrast detection. You’d only use smaller apertures for landscapes or architecture, with a tripod and longer exposures, where speedy AF would not be that much of an issue.
Love your site, Wim! The photos and observations you’re sharing are brilliant, and the layout is topnotch.
Thanks for venturing to demystify and give some tips on using the A6000 focus system. Not a simple task by any means. I found the advanced user manual, or Help Guide, to be useful in further clarifying when and how to use the various modes. For those who are interested, it’s available for download here, http://www.camerauserguide.net/sony-alpha-a6000-%CE%B16000-ilce-6000-dslr-users-manual-guide-owners-instruction/23628.
Hi…I’am new here!! many compliments for your work! I buyed the a6000 3 months ago selling my nex 6. After some months I am not totally happy. I tested some lenses and finally decided for the 18-105. My bigger problem is autofocus. I switced in many combinations but never found the best compromise. Seems that many pictures are out of focus…but very little out of focus! I shot in the mountains, animals flowers and landscapes. Nex 6 gave me best sharp and contrast, this one is very strange…more more noise and this difficult focus set up. What I am doing wrong? Pics made without OIS and on a tripod are perfect. Normally I shot before f4 and f 8 using high shutter if necessary. PRE AF is off, AF w/shutter is on, AEL W/shutter is off, e-front Curtain is on, AF Micro adj is on. Thank you for your answer! bye from Italy.
Hi Giorgio,
No camera AF will have all your pictures in focus all the time, but it should perform at least as well as the NEX6 I would hope 🙂
I would first suggest performing a factory reset of your A6000. Then do some focus test, best with focus set to center only, center your subject and see if you still have the same problems. If you still do, get in contact with sony support, as you might have a problem either with your lens or your camera.
Thank you very much for your suggestion. I tried it. I only removed sound and used the camera with default settings. Must say..something better, but still many faulty pics. I don’t understand..I was happy with my old Nex 6…also with standard 16-50mm. Now I am using the 18-105 G lens bit seems to have poor definition. The raw files are very noisely and must work a lot. Do you think that the 24-70 will boos more power to the A6000? Or better to switch direct to A7 ?
Switching to the A7 won’t give you better AF results, trust me. I’ve just been to Morocco with the A6000 and Zeiss Touit lenses and they performed great (but no zooms available n the Touit range unfortunately). Kinda annoying that you ‘upgraded’ your camera, spent a lot of cash and are now getting inferior results.
Maybe the 18-105G is just not fast enough for your use, and the A6000 probably has to switch to higher ISO to get a descent shutter time, hence the noise in your pictures. So yes the SEL2470z will give better results, but it’s expensive.
But you could also sell your A6000 go back to your NEX6 and 16-50… Companies would want you to upgrade every year, but if that combination works for you, why not?
I found a bug in AF-A and AF-C mode, always back focus. Have to use AF-S only for now until Sony fix this bug.
Hi,why did my a6000 af-a didnt work with sel16f28 ?
Hi Gill, I don’t think the SEL16F28 is fully supported.
Oh thanks 🙂 btw do u know which nex lenses are also not fully supported?
Hi Gill,
These lenses are all compatible with Sony’s Fast Hybrid AF:
E PZ 16-50mm F3.5-5.6 OSS (SELP1650)
Vario-Tessar T* E 16-70mm F4 ZA OSS (SEL1670Z)
E 18-55mm F3.5-5.6 OSS (SEL1855)
E 55-210mm F4.5-6.3 OSS (SEL55210)
E 18-200mm F3.5-6.3 OSS (SEL18200)
Sonnar T* E 24mm F1.8 ZA (SEL24F18Z)
E 30mm F3.5 Macro (SEL30M35)
E 50mm F1.8 OSS (SEL50F18)
E 18-200mm F3.5-6.3 OSS LE (SEL18200LE)
E 10-18mm F4 OSS (SEL1018)
E 35mm F1.8 OSS (SEL35F18)
E PZ 18-200mm F3.5-6.3 OSS (SELP18200)
E 20mm F2.8 (SEL20F28)
E PZ 18-105mm F4 G OSS (SELP18105G)
Sonnar T* FE 35mm F2.8 ZA (SEL35F28Z)
Vario-Tessar T* FE 24-70mm F4 ZA OSS (SEL2470Z)
Sonnar T* FE 55mm F1.8 ZA (SEL55F18Z)
FE 70-200mm F4 G OSS (SEL70200G)
FE 28-70mm F3.5-5.6 OSS (SEL2870)
Vario-Tessar T* FE 16-35mm F4 ZA OSS (SEL1635Z)
FE PZ 28-135mm F4 G OSS (SELP28135G)
FE 90mm F2.8 Macro G OSS (SEL90M28G)
Distagon T* FE 35mm F1.4ZA (SEL35F14Z)
FE 24-240mm F3.5-6.3 OSS (SEL24240)
FE 28mm F2 (SEL28F20)
Greetings!
Good topic, and very good explaination of the AF functions/features of the A6000.
The sony lenses you published in your last post are all great choices that cover the ranges. In contrast to these sony lenses that all work well with the hybrid autofocus of the A6000, could we use a manual lens from an earlier era to utilize this hybrid autofocus function?? That is the question.
Hi Salik, if you want to use the hybrid AF, you’ll need a lens that supports this functionality.
If not I will still use a manual focus lens by takung advantage of the focus peaking offered in the A6000,perhaphs not for action photography where one would need focus lick on a subject and also take advantage of the 11 fps, rather for landscape and portrait photographs.
Kind regards
Hi Wim
I found your blog whilst searching for help to access the setup menu on my A6000 in order to update the firmware. I just cannot find it having spent far too long trying! Can you help please? If you could just tell me the steps to get to the current firmware version that would great and extremely helpful. Thanks in advance.
Hi Tony,
Firstly:
1) Power on the camera.
2) Press the Menu button.
3) At the “Menu” screen, use the Control Wheel to select “Setup”, and then press the center button of the Control Wheel.
4) At the “Setup” screen, use the Control Wheel to scroll to “USB Connection” and verify that “Mass Storage” is selected.
Then:
1) Download and Update the Firmware
2) Go to the directory where the file was downloaded and double-click the Update_ILCE6000V200.dmg file.
Do not connect the camera to the computer yet.
3)On the desktop, double-click the Update_ILCE6000V200 icon.
4)Double-click the “Firmware Updater” icon.
5) At the Password prompt screen, enter the Name and Password for the administrative account, and then click “OK”.
6) Now Connect the camera to your computer using the supplied USB cable. (The LCD screen on the camera will turn off when it is connected to the computer. If the LCD screen of camera does not turn off, disconnect and reconnect the USB cable to the camera. If the computer has additional USB ports, try connecting the USB cable to different USB port.)
7) At the “Firmware Updater” screen, click “Next”.
Connect the Camera via the camera Screen. Do not power off the camera or disconnect the USB cable until the update process is complete.
8) When the updater recognises the camera connection, the following screen is displayed, and the camera screen displays the message, “Follow computer instructions.”
On the Camera Connected Screen
9) At the “Firmware Updater” screen, click “Next”.
10) Do not disconnect the USB cable from the camera or the computer.
11) On the camera, press the center button of the Control Wheel to reset the camera.
12) At the “Firmware Updater” screen, click “Next”.
13) click “Run”. (The update process takes about fifteen minutes to complete.)
Do not power off the camera or disconnect the USB cable until the update process is complete.
14) When the following screen is displayed, click “Finish”.
After clicking Finish, make sure to wait for the camera screen to turn back on before you continue, this may take a few minutes.
15) Disconnect the USB cable, power off the camera, then remove the battery pack or AC adapter.
16) Reconnect the battery pack or AC adapter and power on the camera.
Thank you for this useful article. I did not see (maybe I missed it) any advice on the pros and cons of using the Pre-AF setting and also the AF w/shutter setting. What’s your opinion about those? Maybe I should add that my normal settings are center focus area, AF-C, and Lock-on AF On (Start w/shutter). I do a lot of street photography, so I don’t have time to make a lot of adjustments.
Hi Tony, Pre-AF could be useful for street photography, as the camera will constantly try to acquire focus, meaning it should be a little bit quicker when actually pressing the shutter. But this function drains batteries faster. AF w/shutter engages autofocus when half-pressing the shutter button, most users leave this ON.
Consider this: for example the Sel50f18 apsc lens itself has firmware (software).
The hibryd AF system on your A6000 only will work if you has an updated firmware version installed on your Sel50f18 lens, in this lens is only the .02 version that makes fully functional with this camera model.
Check that version going to settings on your camera and looking for lens software version.
How do you fill in the black area of a vertical picture? I saw a tip for this, but can’t find it now.
On the screen you mean? Or in photoshop?