Sony RX100 II guide settings, tips, and tricks
Introduction
Welcome to my Sony RX100 II advanced manual with tips and tricks.Although the differences between the Sony RX100 II and the original RX100 might look minor on paper, when it comes to features and performance, there are significant improvements. The best new feature is Wi-Fi support that enables you to transfer images to your smartphone as well as remotely control the camera. Sony also changed the sensor in the Mark 2 to a BSI model that promises to give less noise at higher ISO, increasing usability by about one stop. Other changes include a tilting screen (instead of a fixed one), improved battery life and an external Flash shoe (the only RX100 model to have this feature in fact) following Sony’s MIS standard.
First things first:
Are you looking for tips and settings for:
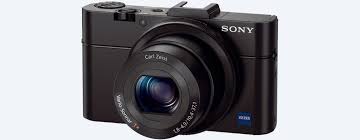
Since the Sony RX100 II has the same menu layout as recently released Sony Alpha cameras, you’ll quickly find your way around if you already own one of those. I’ll be going over the entire Menu system, if you only want to check the best features, scroll down to right before the conclusion.
Diving into the MENU system
When you switch on your camera, you’ll be asked to enter a date, time and timezone. This setting is necessary, as all images captured will have a timestamp on the Sony RX100 II, making it easy to find your favorite pictures in the future.
After this is setup, press the MENU button. You’ll see a range of icons and pages.
We’ll start at page 1 of the camera Icon (camera settings)
MENU → Camera Settings → page 1
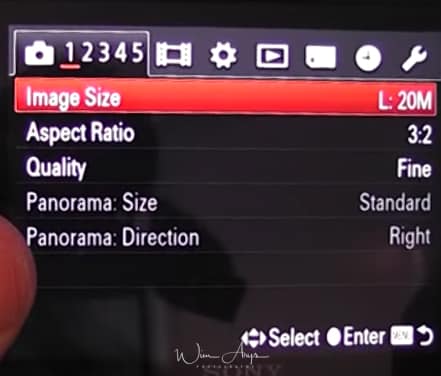
Image size:
The larger the image size, the more detail will be reproduced when the image is printed on large-format paper. The smaller the image size, the more images can be recorded.
Image size when the aspect ratio is 3:2:
- L: 20 megapixels: 5472 × 3648 pixels for prints up to A3 size
- M: 10M 3888 × 2592 pixels for prints up to A3 size
- S: 5.0M 2736 × 1824 pixels for prints from 10×15 cm up to A4 size
Image size when Aspect Ratio is 16:9
- L: 17 megapixels or 5472 × 3080 pixels
- M: 7,5 megapixels or 3648 × 2056 pixels
- S: 4.2 megapixels or 2720 × 1528 pixels
Image size when Aspect Ratio is 4:3
- L: 18 megapixels or 4864 × 3648 pixels
- M: 10 megapixels or 3648 × 2736 pixels
- S: 5 megapixels or 2592 × 1944 pixels
Image size when Aspect Ratio is 1:1
- L: 13 megapixels or 3648 × 3648 pixels
- M: 6,5 megapixels or 2544 × 2544 pixels
- S: 3.7 megapixels or 1920 × 1920 pixels
Please note that when Quality is set to RAW or RAW & JPEG, the image size for RAW images is automatically set to L for optimal quality.
If SD card space is an issue, you can set it to Small.
Aspect ratio:
You can choose 3:2 (which uses the full sensor surface), 16:9 (crop but a more broad view), 4:3 and 1:1. Leave as is at 3:2, you can always crop your pictures later.
Quality:
Do you edit your pictures on your desktop? If so, set to RAW or RAW jpeg. A RAW file saves all information the camera pixels register during shooting and will make for better quality images if you want to edit in something like Adobe Lightroom.
A RAW file saves all information the Sony RX100 II pixels register during shooting and will make for better quality images if you want to edit in something like Adobe Lightroom.
A jpeg is a compressed image (available in FINE (larger) and STANDARD (smaller, less quality) which takes up less space on your SD card but is less suited for editing afterward. Jpeg images will also have in-camera noise reduction applied, something you might or might not want to take care of yourself later, depending on your use.
Jpeg images will also have in-camera noise reduction applied, something you might or might not want to take care of yourself later, depending on your use.
Panorama size
(Only available when in panorama shooting mode)
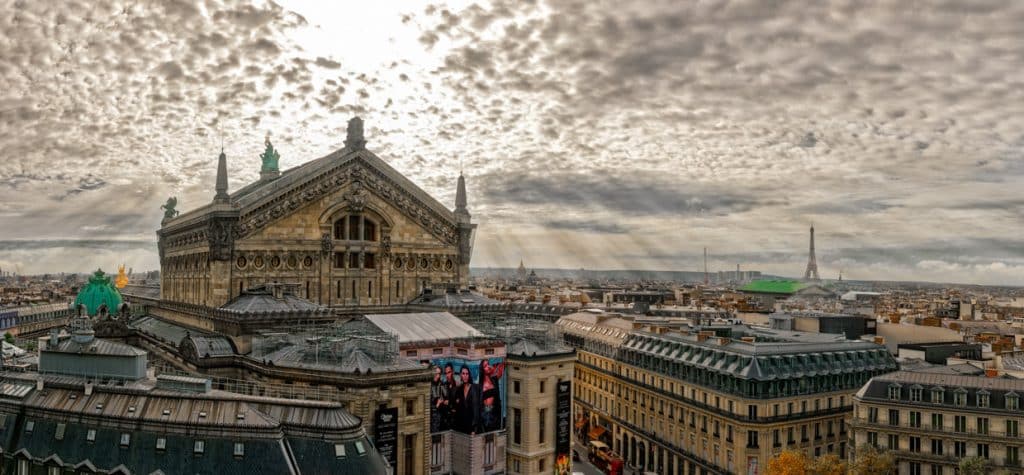
Size is selectable between standard and wide. Wide means your picture will cover a larger area. Set it to standard, having to scan an even broader area when making panoramas will take some experience with the camera to do efficiently.
Size is selectable between standard and wide. Wide means your picture will cover a larger area. Set it to standard, having to scan an even broader area when making panoramas will take some experience with the camera to do efficiently.
Set it to standard, having to scan an even broader area when making panoramas will take some experience with the camera to do efficiently.
Panorama direction
A panorama picture (only available in jpeg) is a composite of several images stitched together. When in this mode, you’ll see an arrow that guides you in what direction and speed you should pan the camera to take the sequential images that will be stitched together. You can choose the path in this menu (either, up, down, left or right).
You can make panoramas while scanning your camera up-down or left-right.So what is this all about? This might sound confusing at first, but this comes down to how you hold the A5000 when shooting panoramas: either in portrait or landscape orientation.
MENU → Camera Settings → page 2
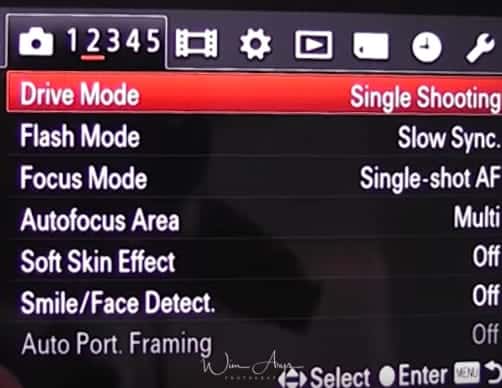
Drive Mode
You can set the drive mode, such as continuous or self-timer shooting.
- Single Shooting (default setting): Shoots one still image. Normal shooting mode.
- Cont. Shooting: Shoots images continuously while you press and hold down the shutter button.
- Speed priority Cont. Shooting: Shoots images continuously at high speed while you press and hold down the shutter button. Focus and brightness settings of the first shot are used for the following shots.
- Self-timer: Shoots an image after 10 or 2 seconds. (selectable in sub menu) You can change the angle of the LCD screen and shoot images while monitoring the image on the screen.
- Self-portrait; selfie mode. Sets the self-timer to Self-portrait timer. When the Sony RX100 II detects the specified number of faces, a beep sounds, and the shutter operates 2 seconds later.
- Self-timer(Cont): Shoots a specified number of images continuously after 10 seconds or 2 seconds (selectable in the sub menu).
- Cont. Bracket: Shoots images while holding the shutter button down, each with different degrees of brightness. (from 3 to 5 images with between .3 and 3 EV difference, selectable in the sub menu.) For processing as HDR on your PC.
- WB bracket: Shoots a total of three images, each with a different color tone according to the selected settings for white balance, color temperature, and the color filter. (3 images with either LO small changes or Hi large changes).
Flash Mode

Flash off;
obvious
Autoflash:
The flash works in dark environments or when shooting towards a bright light.
Fill-flash:
The flash works every time you trigger the shutter with the Sony RX100 II.
Slow sync:
Tells the camera to use a longer shutter speed along with a flash, and thus is better for night shots. In manual and shutter priority modes, there is no difference in flash power. But when using aperture priority, program, or auto, choosing slow sync tells the camera to use a longer shutter speed than it would ordinarily pick.What the slow sync flash mode actual does is first fire the flash for the subject exposure, then allow for a longer shutter speed that will allow for more ambient light to be captured by the sensor.
Rear Sync:
Capturing an image involves two shutter actions: one when the capture starts and on when it stops. Rear Sync tells the flash to fire right before the shutter closes. Moving objects will show a streak where they came from and a sharp image where they were at the end of the exposure. This conveys a sense of speed with moving objects. Rear Sync is a creative technique, if you’d like to know more about this type of photography, I’d suggest doing a Google search on ‘Rear Sync Flash Photography.’
Focus Mode
Here, you can select how the autofocus engine will behave when you half-press the shutter button. Novice users should set into AF-A. This functionality is partly dependent on what focus area you select (see next)
AF-S:
With a half-press of the shutter button, the Sony RX100 II will focus only once. Suitable for capturing stills.
AF-C:
The camera will continuously focus on any movement when you half-press the shutter button.
DMF:
The Sony RX100 II focuses on your subject and allows you to fine tune your focus area further using the manual focus ring on the lens.
MF:
No autofocus is used, and you focus manually using the focus ring on the lens.
Autofocus area
You might think it is best to leave it on the factory ‘Multi’ setting (as this uses all AF points), but for certain scenes, it is often better to use the center or flexible spot to get it to focus on what you want.
Multi
Focuses on a subject in all ranges of the finder frame automatically. When you press the shutter button halfway down in still image shooting mode, a green frame is displayed around the area that is in focus. When the Face Detection function is active, AF operates with priority on faces!
Center:
Focusses on whatever is centered in your images. A fail-proof way of getting the camera to focus on what you want. If you have any problems using the autofocus and are in a situation where you don’t want to miss any shots, revert to Center and just make sure you have your subject centered.
Flexible spot:
Flexible spot area selects a spot anywhere on the screen where the camera should focus. (similar to Center spot, except not.. in the center) . This is really the failsafe way of getting every shot in focus, although it is not the fastest way. Practice does make perfect.
Soft Skin Effect
If you’re using the Sony RX100 IImainly for pics of friends and family, this is an excellent feature, as it will soften and smooth skin tones make you and your beloved ones look their best. I never use this.

Smile/Face Detect.
When the Face Detection function is used, the camera detects the faces of your subjects and adjusts the Autofocus Area, Flash Mode, Exposure Comp., White Balance and Red-Eye Reduction settings automatically. I always have this on when shooting portraits, it helps with faster and more accurate autofocus.
When using Smile Shutter, the camera detects smiles and releases the shutter automatically.
When the Sony RX100 II detects more than one subject, the camera will judge which is the main subject and set focus by priority. The frame for which the focus is set will turn green by pressing the shutter button halfway down.
Auto Obj. Framing
When enabled, the Sony RX100 II will automatically crop your captured image to what it deems best. Meaning it will cut the picture for a nicer composition. A nice feature if you don’t want to bother too much with the technical side of photography.
MENU → Camera Settings → page 3
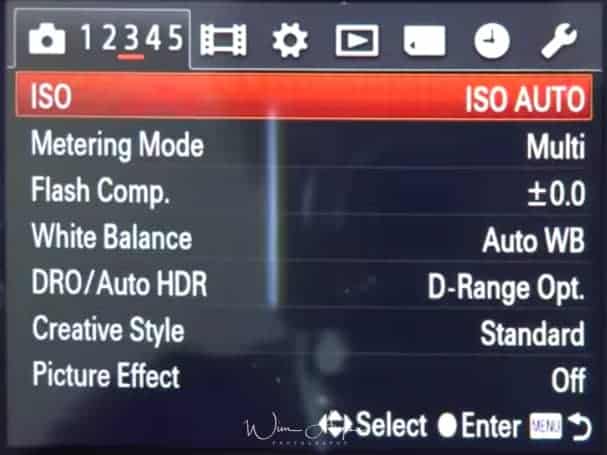
ISO
You can select at which ISO value you’d like to capture your image or change the AutoISO range
I have this range set between 100-800 as this range is virtually noise free, and I don’t like the ISO performance above 800. If you’re a jpeg shooter (and use built-in Noise Reduction), you might think of using a higher top value (factory setting goes up to 6400).
Metering Mode
Metering mode refers to the way the camera reads the light and sets the exposure.
In multi, it considers the whole frame and sets exposure according to internal algorithms programmed in camera.
In spot or center, the camera only considers what is in that spot or the center (per example, if your subject is completely black, the camera will try to compensate by overexposing the image).
Flash compensation:
Adjusts the amount of flash light. Separately to the exposure compensation, flash compensation changes the amount of flash light to change the exposure for the main subject within the range of the flash.
White Balance
You can either:
- Auto (default setting): The product automatically detects the light source and adjusts the color tones.
- Daylight: The color tones are adjusted for the daylight. Shade: The color tones are adjusted for shadiness.
- Shade: Adjusts for a shady location.
- Cloudy: The color temperature is adjusted for a cloudy sky.
- Incandescent: The color temperature is adjusted for places under an incandescent lamp, or under bright lightings, such as in a photo studio.
- Fluor.: Warm White: The color temperature is adjusted for warm white fluorescent lighting.
- Fluor.: Cool White: The color temperature is adjusted for white fluorescent lighting.
- Fluor.: Day White: The color temperature is adjusted for neutral white fluorescent lighting.
- Fluor.: Daylight: The color temperature is adjusted for daylight fluorescent lighting.
- Flash: The color temperature is adjusted for a flash.
- Underwater Auto: The color temperature is adjusted for underwater shooting.
- C.Temp./Filter: Adjusts the color tones depending on the light source. Achieves the effect of CC (Color Compensation) filters for photography.
- Custom: Uses the white balance setting saved in [Custom Setup].
- Custom Setup: Memorizes the basic white color under the light conditions for the shooting environment.
DRO/Auto HDR
DRO:
This stands for Dynamic range optimize and analyses the contrast of your scene in real-time. It produces an image with optimal brightness and recovered shadow detail. You can use this function even while the subject is moving or during the continuous shooting.
- D-Range Optimizer: Auto (default setting): Corrects the brightness automatically.
- D-Range Optimizer Lv1 to D-Range Optimizer: Lv5: Optimizes the gradation of a recorded image for each divided area. Select the optimization level from Lv1 (weak) to Lv5 (strong)
Auto HDR:
(not available for RAW captures) this feature Shoots three images with different exposures and then overlays the bright area of the underexposed image and the dark area of the over exposed image to create a picture with an extended range from highlight to shadow.
The highlight detail in auto HDR is better than that in DRO and with reduced noise. The shutter is released three times, so using this function for moving subjects is not recommended.
- Auto HDR: Exposure Diff. Auto (default setting): Corrects the exposure difference automatically. Auto HDR: Exposure Diff. 1.0EV ―
- Auto HDR: Exposure Diff. 6.0EV: Sets the exposure difference, based on the contrast of the subject. Select the optimal level between 1.0 EV (weak) and 6.0 EV (strong). For example, if you set the exposure value to 2.0 EV, three images will be composed of the following exposure levels; −1.0 EV, optimal exposure, and 1.0 EV
Creative Style
This menu setting allows you to select the desired image processing. You can adjust exposure (shutter speed and aperture) as you like with [Creative Style], unlike with [Scene Selection] where the product adjusts the exposure.
- Standard (default setting): For shooting various scenes with rich gradation and beautiful colors.
- Vivid: The saturation and contrast are heightened for shooting striking images of colorful scenes and subjects such as flowers, spring greenery, blue sky, or ocean views.
- Portrait: For shooting the skin color in a soft tone, ideally suited for shooting portraits.
- Landscape: The saturation, contrast, and sharpness are heightened for shooting vivid and crisp scenery. Distant landscapes also stand out more.
- Sunset: For shooting the beautiful red of the setting sun.
- Black & White: For shooting images in black and white monotone.
Contrast, Saturation, and Sharpness can be adjusted for each Creative Style item. Select an item to be set by pressing the right/left side of the control wheel, then set the value using the top/bottom side of the control wheel.
- Contrast: The higher the value selected, the more the difference of light and shadow is accentuated, and the bigger the effect on the image.
- Saturation: The higher the value selected, the more vivid the color. When a lower value is selected, the color of the image is restrained and subdued.
- Sharpness: Adjusts the sharpness. The higher the value selected, the more the contours are accentuated, and the lower the value selected, the more the contours are softened.
Picture Effect
Think of this menu as an Instagram app right in your Sony RX100 II, with all kinds of retro filters and effects.
- Off (default setting): Disables the Picture Effect function.
- Toy Camera: Creates a soft image with shaded corners and reduced sharpness.
- Pop Color: Creates a vivid look by emphasizing color tones.
- Posterization: Creates a high contrast, abstract look by heavily emphasizing primary colors, or in black and white.
- Retro Photo: Creates the look of an aged photo with sepia color tones and faded contrast.
- Soft High-key: Creates an image with the indicated atmosphere: bright, transparent, ethereal, tender, soft.
- Partial Color: Creates an image which retains a specific color, but converts others to black and white.
- High Contrast Mono.: Creates a high-contrast image in black and white.
- Soft Focus: Creates an image filled with a soft lighting effect.
- HDR Painting: Creates the look of a painting, enhancing the colors and details.
- Rich-tone Mono.: Creates an image in black and white with rich gradation and reproduction of details.
- Miniature: Creates an image which enhances the subject vividly, with the background defocused considerably. This effect may often be found in pictures of miniature models.
- Watercolor: Creates an image with ink bleed and blurring effects as if painted using watercolors.
- Illustration: Creates an illustration-like image by emphasizing the outlines.
MENU → Camera Settings → page 4
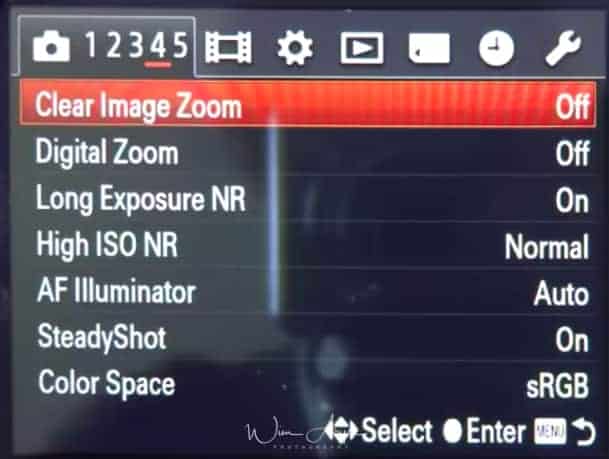
Clear image zoom
Clear Image Zoom allows you to enlarge the image with close to the original image quality when shooting still images. The Sony RX100 II zooms images with the original image quality first depending on the selected image size. When Clear Image Zoom is set to O, the camera automatically switches over to Clear Image Zoom when the zoom range without deterioration of the original image quality is exceeded.
Digital zoom
The camera can zoom over the scale that can be achieved using the optical zoom or Clear Image Zoom, although the quality of the resulting image will deteriorate. I prefer to crop images on my laptop afterward, that way I still have the choice.
Long Exposure NR
When you set the shutter speed to 1/3 second or longer (Long exposure shooting), noise reduction is turned on for the same duration that the shutter is open. This is to reduce the grainy noise typical in a long exposure.
High ISO NR
Here you can select the amount of noise reduction applied to images with high ISO settings (when quality is set to jpeg). As Sony has rather aggressive noise reduction, I would chance it to Low. (if not, you run the risk of getting paint-like, smeared images at higher ISO values)
AF Illuminator:
The AF illuminator is a little red light allowing the Sony RX100 II to focus more easily when the shutter button is pressed halfway. It automatically is switched off when you fully press the shutter. Leave it on.
Steady Shot
You can turn image stabilization ON or OFF here. Should be OFF for taking time-lapses with the app for example.
Color Space
You can choose between Standard and Adobe (extended color range)RGB. If you don’t know what this means, leave it to standard.
MENU → Camera Settings → page 5
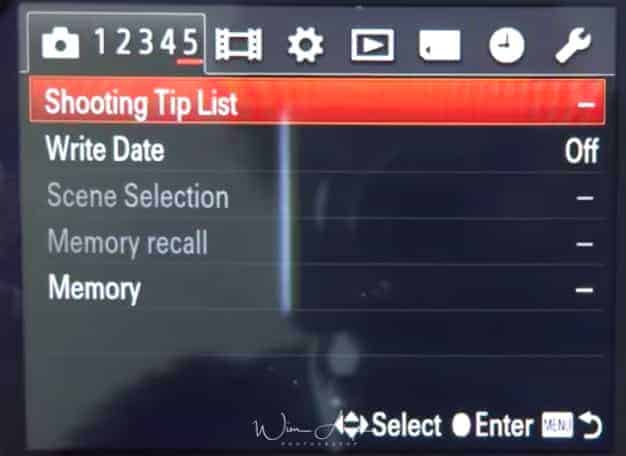
Shooting Tip list
View all shooting advice on the screen when you use the Sony RX100 II.
Write Date
Sets whether to record a shooting date on the still image.
Scene Selection
Scene Selection lets you select the scene type that is most like the environment you are shooting.
Useful for: getting the benefits of auto mode in a known scene setting.
Scene types include:
- Portrait: Allows you to blur away backgrounds and sharpens the subject. Expresses skin tones softly.
- Anti-motion blur: Allows you to shoot indoor shots without using the flash to reduce subject blur.
- Sports Action: Allows you to shoot a moving subject at a fast shutter speed so that the subject looks as if it is standing still. The camera shoots images continuously while the shutter button is pressed.
- Pet Allows you to shoot images of your pet with the best settings.
- Gourmet: Allows you to shoot food arrangements in delicious and bright colors.
- Macro: Allows you to shoot a flower and a small item from close up
- Landscape: Allows you to shoot the entire range of scenery in sharp focus with vivid colors
- Sunset: Allows you to shoot the red of the sunset or sunrise beautifully.
- Night Scene: Allows you to shoot night scenes without losing the dark atmosphere
- Hand-held Twilight: Allows you to shoot night scenes with less noise without using a tripod. A burst of shots are taken, and image processing is applied to reduce subject blur, camera shake, and noise.
- Night Portrait: Allows you to shoot sharp images of people with a night view in the background.
- Fireworks: Allows you to record fireworks in all their splendor.
- High ISO sensitivity: Allows you to shoot images without a flash under low light conditions, reducing blur.
Memory recall
You can recall your saved settings in Memory (next item) by setting the mode dial (on top) to MR and pressing the arrows to select your Memory Recall number.
Memory
Allows you to register up to three often-used modes or camera settings in the Sony RX100 II. You can recall the settings using Memory recall. You can save settings like Aperture, Shutter Speed, EV, still and movie shooting menu items. You can recall these settings by setting the mode dial (on top) to MR and pressing the arrows to select your Memory Recall Number
MENU → Film strip icon → page 1
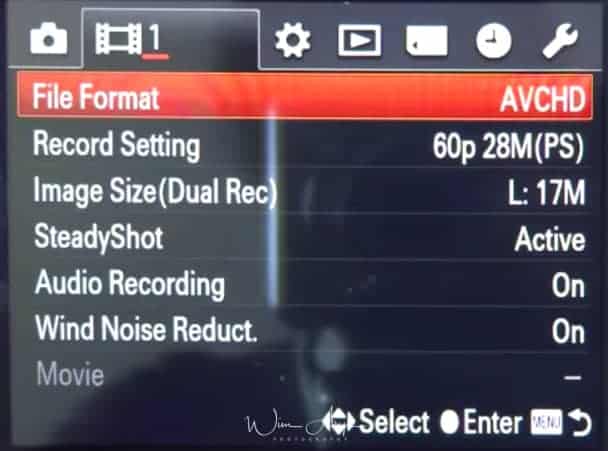
File Format
This is where you select what file format you want to use for video.
These are your options:
- AVCHD (default setting): Records HD movies in AVCHD format. This file format is suitable for high-definition TV. You can create a Blu-ray Disc, an AVCHD recording disc, or a DVD-Video disc using the software PlayMemories Home. Audio is recorded in Dolby Digital
- MP4: Records mp4 (AVC) movies. This format is suitable for WEB uploads, e-mail attachments, etc. Audio: AAC
AVCHD is a far superior codec than plain MPEG-4. AVCHD is based on MP4 but is a much cleaner, much more advanced.
Record setting
Also for video functionality only on the Sony RX100 II. You can choose the quality of recorded video here.The larger the size of the movie image, the higher the image quality. And also the higher the amount of data used per second (average bit-rate), the higher the image quality.
File Format: AVCHD
- FX/FH: Movies shot are recorded in AVCHD format, at approximately 60 fields/sec (for 1080 60i-compatible devices) or 50 fields/sec (for 1080 50i-compatible devices), in interlaced mode, with Dolby Digital audio, AVCHD format.
- PS: Movies shot are recorded in AVCHD format, at approximately 60 frames/sec (for 1080 60i-compliant devices) or 50 frames/sec (for 1080 50i-compliant devices), in progressive mode, with Dolby Digital audio, AVCHD format.
File Format: MP4
Movies shot are recorded in MPEG-4 format, at approximately 30 frames/sec (for 1080 60i-compatible devices) or approximately 25 frames/sec (for 1080 50i-compatible devices), in progressive mode, with AAC audio, mp4 format.
Image size (dual Rec)
Sets the still image size shot while recording a movie.
Steady Shot
You can set the strength of the image stabilization here. Should be OFF for taking time-lapses and long exposures for example.
- Active: Reduces camera shake when shooting images while walking or zoom shooting.
- Standard: Reduces camera shake under stable movie shooting conditions.
- Off
Audio Recording
You can switch off audio recording in movie mode.
Wind Noise Reduction
This helps reduce noise from the wind during video recording.
Movie
You can select a shooting mode when the mode dial is set to Movie.
- Program: The Sony RX100 II sets the exposure (shutter speed and aperture value) automatically, but you can set other settings and the settings will be retained.
- Aperture priority: Allows you to set the aperture value manually.
- Shutter priority: Allows you to set the shutter speed manually.
- Manual Exposure: Allows you to set the exposure (shutter speed and aperture value) manually.
MENU → Custom settings (wheel) → page 1
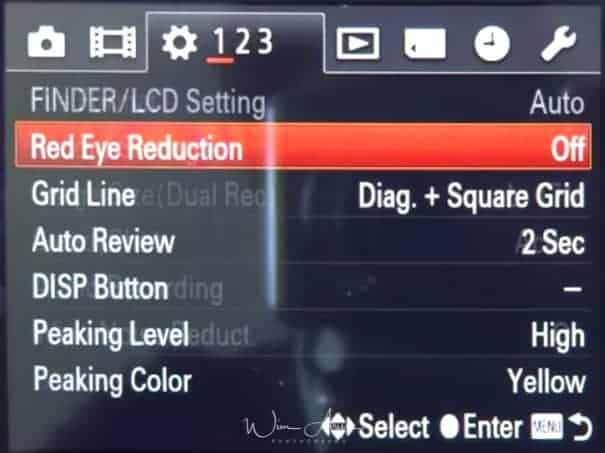
Finder/LCD setting:
When using an electronic viewfinder on the hot shoe, you can set the method for switching between the electronic viewfinder and screen.
- Auto: Recognizes the position of eyes and switches the electronic viewfinder/screen automatically.
- Manual: Switches the electronic viewfinder/screen by the button on the viewfinder.
Red Eye Reduction:
This anti-Red Eye setting quickly fires the flash 2 times before your image capture starts, reducing the red-eye effect often seen when using the built in flash.
Grid Line
Having a grid line on your screen is a helpful aide for the composition of your image.
The human brain is hard-wired to recognize the structure, and most people find a well-composed image more eye-pleasing.
During photography history, rules have been developed on how to compose the different elements best within a scene. Many landscapes you’ll see have the horizon run through the middle of the image for instance, but this is just composition in its simplest form. Many photographers with a thorough understanding of these techniques go far beyond that.
A good starting point is using the in-camera grid to make your brain aware of the possibilities in composition.
The Rules of 3rds, Square and Diag square are available in the Sony RX100 II.
Auto Review
Select the amount of time the camera displays your image directly after capturing the image. 10, 5 and 2 sec is available, or you can turn this feature OFF if it annoys you.
Disp button
Selects the functionality (what is shown) on the screen of the Sony RX100 IIwhen you press the DISP button (on the control wheel). You can choose Graphic Display, all info, no dips info and histogram.
Peaking Level
- Peaking Level is a manual focusing aid that works when you have your Sony RX100 II set to MF or DMF.
- You’ll see a type of noise outlining the parts of your image where the focus lies; you can adjust the sensitivity to high, mid or low.
- Which setting is best depends on what lens you use, as with a sharper lens it can be configured to low, while more soft lenses benefit from a medium or high setting to clearly visualize what you’re focusing on.
Peaking Color
You can choose the color of this Peaking between Red, white and yellow. I have it set to red, as this contrasts nicely with most scenes you capture.
MENU → Custom settings (wheel) → page 2
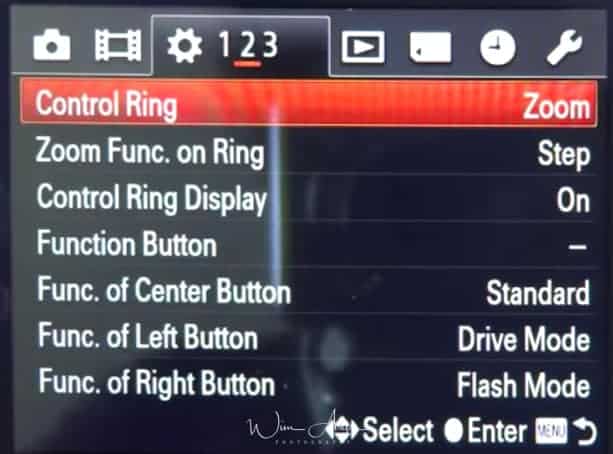
Control Ring
Set the often-used functions to the Control Ring of the lens. Why not set it to aperture? This way the lens works like a Leica of Fujinon!
Zoom Func. on Ring
Sets the zooming method when the zoom function is assigned to the Control Ring. In the default setting, the zoom function is assigned to the Control Ring when shooting mode is set to Intelligent Auto or Superior Auto.
- Standard: Zooms in/out smoothly using the Control Ring.
- Step: Zooms in/out at fixed focal length steps, using the Control Ring. Fixed steps are 28 mm, 35 mm, 50 mm, 70 mm and 100 mm.
Control Ring display
Sets whether to display animation when operating the Control Ring.
Function Button
You can customize the seven functions assigned to the Fn button.
Func. of center button
Allows you to select frequently used functions and assign them to the center button on the control wheel. It’s a good idea to have this set to Focus magnifier, and have either the left or right button set to AF/MF toggle.
Func. of left button
Allows you to select frequently used functions and assign them to the left button.
Func. of right button
Allows you to select frequently used functions and assign them to the right button.
MENU → Custom settings (wheel) → page 3
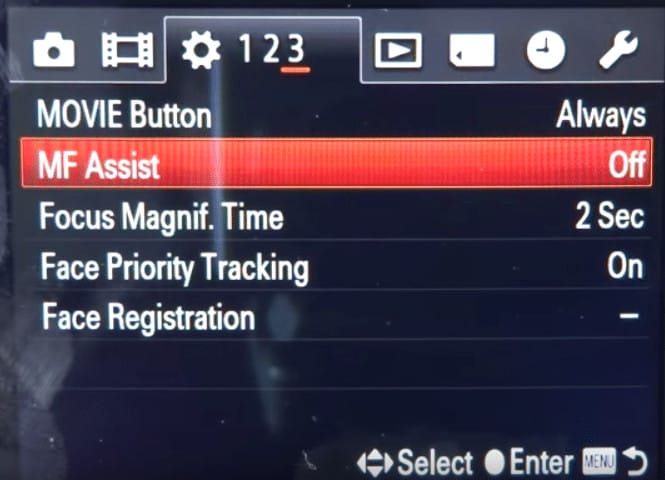
Movie Button
Allows you to set the mode to enable the MOVIE button.
- Always: Movie recording starts, regardless of camera status.
- Movie Mode Only: Movie recording starts only when the shooting mode is set to Movie.
MF assist
This works in conjunction with the Focus Magnifier. You might remember that you can select the area to magnify there when using manual focus (MF). MF assist will need to be turned on if you want to use this feature.
Focus Magnif Time
You can set how long to hold the magnified area during MF assist. 2 sec, 5 seconds or no limit. 2 seconds is how I have it set up.
Face Priority tracking
When the Sony RX100 II detects faces while using the tracking focus function, sets whether to give priority to a face.
Face Registration
This is where you can register faces on the Sony RX100 II; it works only when face recognition is set to ON (registered faces). This is an interesting functionality, as you can register faces of your subject (like at a wedding the bride and groom) and the camera will automatically detect these registered faces and give autofocus priority to them. You can register faces (by taking a picture of them within this menu) and set a priority order.
Works well, and helps to get the right people in-focus in busy shots.
MENU – playback options – page 1
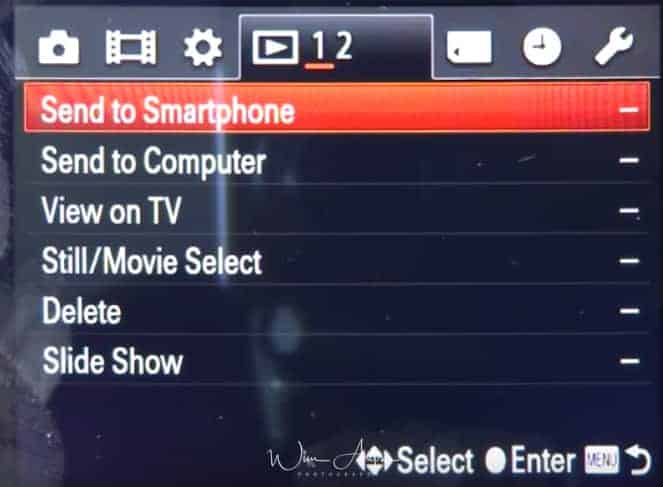
Send to smartphone
Allows you to transfer images to display on a smartphone. Install the smartphone support application “PlayMemories Mobile” to your smartphone from the application store. If “PlayMemories Mobile” has already been installed on your smartphone, update it to the latest version.
Connect to the Sony RX100 II from your smartphone, using the information that appears on the screen when the camera is ready to be connected. Connection methods differ, depending on the type of smartphone.
Options for image size are the size in which the image was shot, 2M or VGA. You can select this in the Sony Playmemories app menu on your phone.
You can select either:
- Select on This Device: Select images on the Sony RX100 II to be transferred to the smartphone.
- Select on Smartphone: Transfer all still images in a memory card to display on a smartphone.
How to transfer images to an Android smartphone with one touch (NFC)
- You can connect the camera to an NFC smartphone with just one touch, without the need for complicated settings, and transfer images.
- Display a single image on the camera. You can use the NFC function only when (N Mark) is displayed on the screen.
- Touch the camera to the smartphone.
- The smartphone is connected to the camera, and “PlayMemories Mobile” is activated.
- The image being displayed on the camera is transferred to the smartphone!
Send to computer
You can easily backup images from the Sony RX100 II to a computer connected to your wireless access point or wireless broadband router.
Install “PlayMemories Home” before registering the wireless access point.
View on TV
If the camera and TV are not connected using an HDMI cable, you can view images on a network enabled TV by transferring the image from the camera. You may need to set the TV beforehand, depending on the model.
For details, see the instruction manual of the TV.
Still/Movie Select
Switches the display mode between still images and movies (View Mode).
Delete
Allows you to select unwanted images for deletion. You can also delete images using the Delete button
Slide Show
Plays back images automatically as a slideshow.
MENU – playback options – page 2
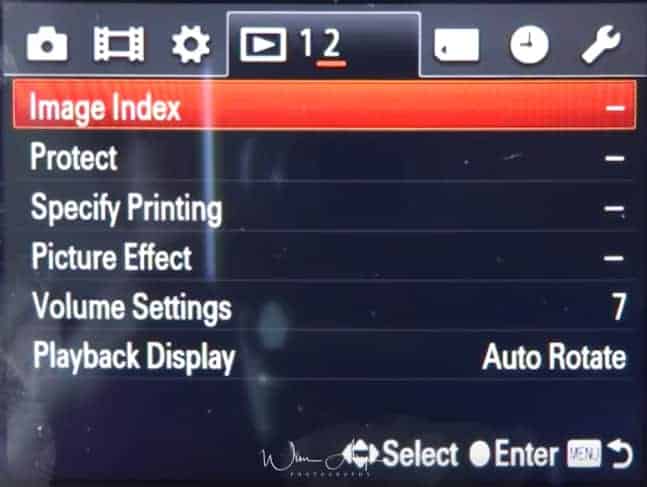
Image Index
Selects the number of images to be displayed on the index (grid when viewing images on your camera).
Protect
Protects recorded images against accidental erasure. You can select multiple images at one time.
Specify Printing
DPOF (Digital Print Order Format) is a function that allows you to specify the images of the memory card that you want to print out later
Picture Effect
Think of this menu as an Instagram app right in your Sony RX100 II, with all kinds of retro filters and effects. You can also save it as a new file to your SD card when you have finished editing.
Volume settings
Change the playback volume in eight steps for recorded video or demos.
Playback display
Selects the orientation when playing back still images recorded in portrait orientation.
MENU – SD card options – page 1
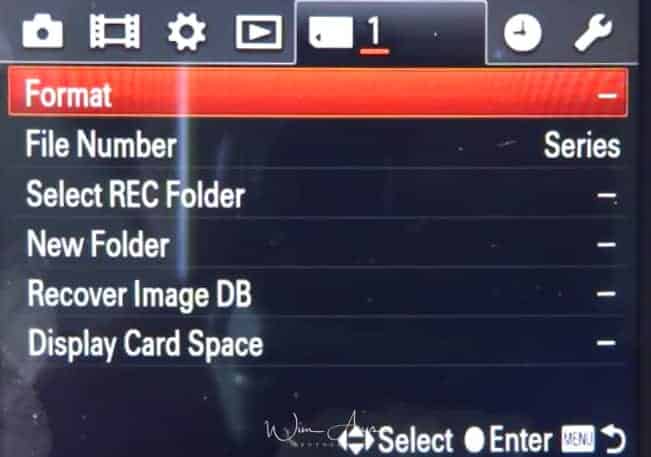
Format
Format your SD card before use; this will erase any images still on the memory card.
File Number
Number your files according to the number of shots or reset it to start from 1.
Select REC folder
Selects where the camera will store newly captured images.
New Folder
Make a new folder for easily organizing events and locations.
Recover Image DB
If you have a storage card error, you can try to rebuild the database to possibly retrieve lost images.
Display card space
Simply check the amount of free space on your SD card.
MENU – clock options – page 1
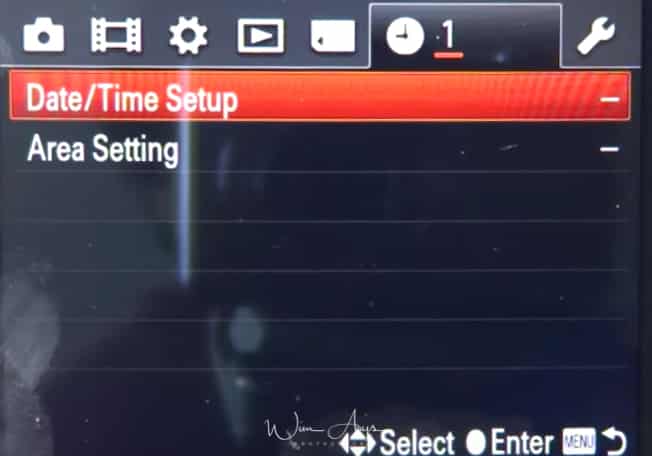
Date Time Setup
Change date, time, date format and Daylight savings time
Area setting
Select your region, or change region when abroad, the camera will automatically change time and date for you.
MENU – Setup – page 1
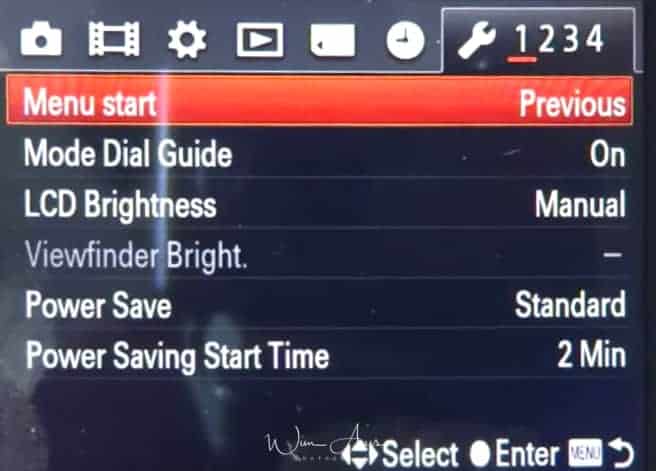
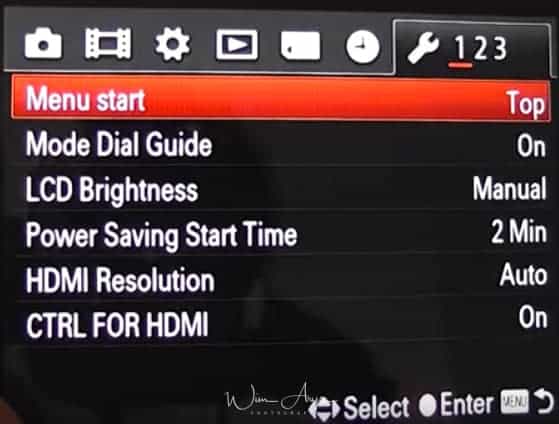
Menu start
Allows you to select whether to always display the first screen of the menu or to display the screen of the item previously set
Mode dial guide
Sets whether to display the mode dial guide (description for each shooting mode)
LCD brightness
The brightness of the screen is automatically adjusted to the ambient lighting conditions using the light sensor. You can set the brightness of the screen manually.
- Auto: Adjusts the brightness automatically.
- Manual: Allows you to adjust the brightness within the range of -2 to 2.
- Sunny Weather: Automatically adjusts the brightness appropriately for shooting outdoors.
Viewfinder bright
When using an electronic viewfinder, this sets the brightness of the electronic viewfinder.
- Auto: Adjusts the brightness automatically.
- Manual: Allows you to adjust the brightness within the range of -1 to 1.
Power save
Saves battery charge by having the camera automatically turn off sooner after a period of no operation.
Max: Power Saving Start Time is set to 1 Minute. If the camera is not operated for a certain period of time, the screen goes dark.
Standard: The setting of Power Saving Start Time is used.
Power save start time
Sets the length of time until the camera turns off automatically. If you do not operate the Sony RX100 II for a certain period of time while the power is on using the battery pack, the camera turns off automatically to prevent wearing down the battery pack (Auto power-off function).
MENU – Setup – page 2
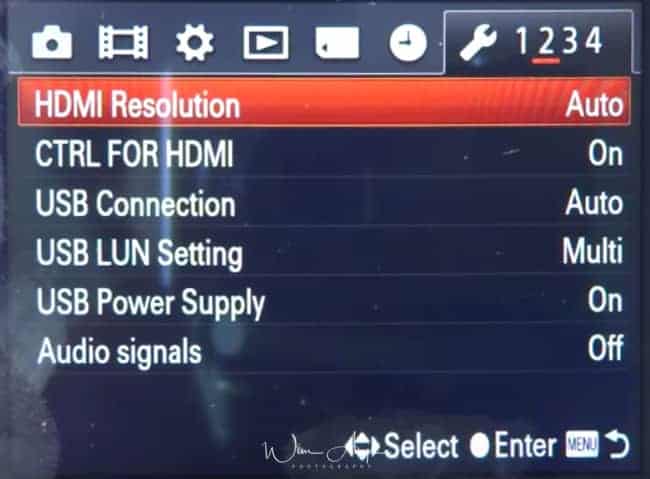
HDMI resolution
Set the Resolution of images and video sent to your TV with an HDMI cable (1080p or 1080i).
CTRL for HDMI
With the “Control for HDMI” function, Sony BRAVIA Sync helps communicate with BRAVIA Sync-compatible equipment using HDMI CEC.
USB connection
Selects what will happen when you connect your camera to your PC or MAC.
- Auto: Depending on the computer or other USB devices you connect to the camera, the connection mode is automatically selected from [MTP] or [Mass Storage]. When you use Windows 7, [MTP] is selected and Windows 7-specific functions become available.
- Mass Storage: Establishes a Mass Storage connection between the camera and a computer or other USB device.
- MTP: Establishes an MTP connection between the camera and a computer or other USB device. When you use Windows 7, [MTP] is selected and Windows 7-specific functions become available. When you use other operating systems (Vista/XP, Mac OS X), the AutoPlay Wizard appears, and the still images in the recording folder on the camera are imported to the computer.
USB LUN Setting
- Sets the USB Connection mode when connecting the RX100 II to a computer, etc.
Multi allows you to use the built-in Playmemories software for image transfer to your Computer. - Single should be used with any other device than a computer, for instance for charging.
USB power supply
Sets whether to use USB as the power supply when the Sony RX100 II is connected to a computer or USB device using the micro USB cable.
Audio Signals
You can turn off audio signals like the beep when te camera achieves focus. Useful if you want a more stealthy operation (although you’ll still hear the second curtain shutter).
MENU – Setup – page 3
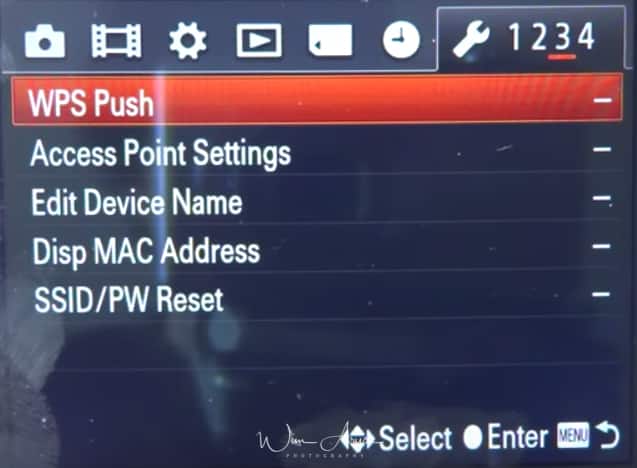
WPS Push
If your access point has the WPS button, you can register the access point to the camera easily by pushing the WPS button. To use WPS Push, the security of your access point has to be set to WPA2 or WPA, and support the WPS push button system. In other cases, such as where security is set to WEP or the WPS push button system is not supported, register the access point manually.
Access Point Settings
You can also register your access point manually on the Sony RX100 II. Before starting the procedure, check the SSID name of the access point, security system, and password. The password may be preset in some devices.
For details, see the instruction manual of the wireless access point.
- Go to Access Point Settings
- Select the access point you want to register.
- When the desired access point is displayed on the screen: Select the desired access point.
- When the desired access point is not displayed on the screen: Select Manual Setting and set the access point.
- If you select Manual Setting, input the SSID name of the access point and select the security system.
- Input the password OK Access points that do not display do not require a password to be entered.
- Select OK, then press c scroll wheel center button.
Edit Device Name
You can change the device name under Wi-Fi signals, Like Wim’s RX100M2 for instance.
Disp Mac Address
Displays the MAC address of the Sony RX100 II.
SSID/PW Reset
The camera shares the connection information for Send to Smartphon] and Ctrl with Smartphone with a device that has permission to connect.
If you want to change the device that is permitted to connect to the camera, reset the connection information here.
MENU – Setup – page 4
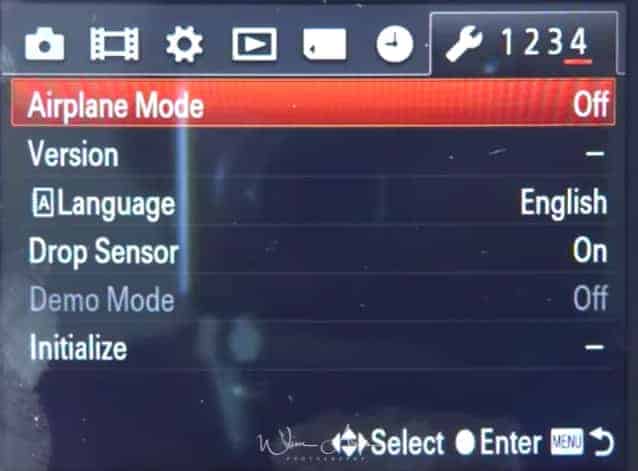 Airplane Mode
Like what you’d find on a Smartphone. Airplane mode turns OFF all Wifi signals and communication. It’s also a good way of saving battery power.
Version
Check the firmware version of the Sony RX100 II here.
Language
Selects the language to be used in the menu items, warnings, and messages.
Drop sensor
Sets whether to use the protective function when you drop the Sony RX100 II. You’ll see a message on the screen saying “Drop detected” and the lens will retract. Internally, your sensor will be magnetically secured.
Demo Mode
You can set whether to use a demonstration of movie playback. When there is no need to view a demonstration, turn it Off.
Initialize
Initializes the settings to the default setting. Even if you execute this function, the images are not deleted.
The most interesting Sony RX100 II settings
I’ll quickly go over the ones that I find most useful:
Face Detection & Smile Shutter

Face detection
- This is a valuable tool to increase AF accuracy and speed.
- There is a general face recognition setting, which uses the RX100 II processor to detect any faces and a face registration feature, where it will give focus priority to faces you’ve previously registered.
- There is also an option to record eight faces that will have priority when auto-focussing

Face registration with registered faces works in 2 steps:
- first, you’ll have to take a clear picture of the face through the face recognition menu,
- after your the new face has been registered, you can set an order of priority for the maximum of 8 registered faces
Smile Shutter
- Smile shutter will automatically take a picture once a smile is detected.
- Great for family or group shots.
- Big, Slight and Normal smile presets are available, and there is even a bar graph on the screen that shows the detection level.
Manual Focus Assist

MF assist
This works in conjunction with the Focus Magnifier. You might remember that you can select the area to magnify there when using manual focus (MF). MF assist will need to be turned on if you want to use this feature.
Focus Magnif Time
- When set to ON, Magnification will automatically magnify a selectable (through the menu) part of you image when in Manual Focus Mode (MF).
- Press on the center of the control wheel to enlarge the image and select the position you want in other modes.
- The duration of the magnification can also be set to either 2 sec, 5 sec or no limit in the menu Focus Magnification Time.
Center AF

Autofocus area
You might think it is best to leave it on the factory ‘Multi’ setting (as this uses all AF points), but for certain scenes, it is often better to use the center or flexible spot to get it to focus on what you want.
Center:
Focusses on whatever is centered in your images. A fail-proof way of getting the camera to focus on what you want. If you have any problems using the autofocus and are in a situation where you don’t want to miss any shots, revert to Center and just make sure you have your subject centered.
Conclusion
Besides outstanding image quality for a pocket camera, many of the advanced functionality of the Axxx and even A7 range have been incorporated in this little beast. You’ll soon get the hang of all the interesting functions with my Sony RX100 II advanced manual. I prefer it over the bigger RX10, as I find the one-inch sensor works better with this medium zoom lens. Some of the most interesting advanced features are Face recognition with Face detection, smile shutter, DMF with MF assist and the Center AF failsafe autofocus method. Take some time to go over all these and other functions of the Sony RX100 II and you’ll be on your way to taking great shots!


Trying to find instruction for Canon Rx100ll camera reset.
there is no Canon RX100II
Thanks so much for putting all this together, it’s a huge help! Had to replace my well loved RX100 (Mark I) after it died following many years of reliable service. Purchased the second generation (Mark II) described here last Fall and thoroughly enjoy the impressive capabilities this family of cameras is known for. I do however have a question for you regarding the “HDR” mode on the Mark II. I used this mode on my old camera and never had any issues with it. On the Mark II however, when shooting in “HDR auto” (auto EV), I occasionally get what I would call a digital artifact on the merged HDR image. These appear as light or dark square-shaped splotches or otherwise areas where the texture detail is either blurred, absent or the color is off. All shots are of landscapes or mountains (no motion) and the artifacts usually appear in the color gradient of a treed slope in the mid-to-background, and occasionally may also follow the contour of a ridge, forming an unnatural pixelated outline. In these same shots, the foreground and sky do not exhibit this defect. This tends to occur more often when shooting in less than ideal lighting conditions (overcast, cloudy, smoky, shooting into sun etc.), although I have shots taken on perfectly sunny days that also have the artifacts. Curious if you have any suggestions as to what may be causing this and I can try to prevent it from happening. Thanks in advance!
Hi Sergio, I would bet it’s the internal processing. Even top range cameras still have problems doing this.
This is a comprehensive and very useful guide.
I notice, with the Imaging Edge program, that there is a space in the RAW data for the photographer’s name,
I would believe that information should be entered to the camera as a part of the setup process.
Any ideas on how to do this?
George Herrmann
Lewes, Delaware
i have a really strange issue. I plug a trigger on the usb slot and when I press the shutter, it shoots video!!
its crazy and I cant turn it to take pictures!
do you know about this?? pleas help me its driving me crazy
thanks!
Is it the type of Sony trigger where you can slide the record button? Sliding is video, pushing is photo?